background image

36

Precauzioni per l’uso


o

Non collocare alcun oggetto sul coperchio giradischi. 
Gli oggetti sul coperchio potrebbero causare disturbi 
a causa di vibrazioni o cadere, soprattutto durante la 
riproduzione.


o

Evitare di collocare l’unità alla luce solare diretta, 
vicino a una fonte di calore o in altre condizioni simili. 
Non collocare l’unità sopra un amplificatore o altri 
dispositivi che possono generare calore superiore 
alla temperatura di funzionamento di questa unità. 
Ciò potrebbe causare scolorimento, deformazione o 
malfunzionamento.


o

Poiché l’unità potrebbe divenire calda durante il fun-
zionamento, lasciare sempre uno spazio sufficiente 
intorno per la ventilazione. Quando si installa questa 
unità, lasciare un po‘ di spazio (almeno 20 cm) dagli 
altri dispositivi e le pareti per consentire una buona 
dissipazione del calore.
Quando si colloca in un rack, per esempio, lasciare 
almeno 35 cm sopra e 10 cm dietro. Il mancato rispetto 
di queste precauzioni potrebbe causare un surriscalda-
mento interno e provocare incendi.


o

NON SPOSTARE L’UNITÀ DURANTE LA RIPRODUZIONE. 
Durante la riproduzione, il disco ruota. Non sollevare o 
spostare l’unità durante la riproduzione. Ciò potrebbe 
danneggiare il disco, lo stilo, la cartuccia o l’unità.


o

Rimuovere sempre il disco prima di trasferirsi o spo-
stare l’unità. Spostamento dell’unità con un disco sul 
giradischi potrebbe danneggiare il disco, lo stilo e la 
cartuccia o potrebbe causare malfunzionamenti.


o

Il voltaggio fornito all’unità deve corrispondere alla 
tensione indicata sul pannello posteriore. Se si è in 
dubbio riguardo a ciò, consultare un elettricista.

Manutenzione

Se la superficie dell’unità si sporca, pulirla con un panno 
morbido o utilizzare sapone liquido neutro diluito. 
Lasciare asciugare completamente la superficie dell’u-
nità prima di utilizzarla.


o

Non utilizzare panni chimici, solventi o sostanze 
simili perché potrebbero danneggiare la superficie 
dell’unità.


V

CAUTELA

Per motivi di sicurezza, scollegare il cavo di alimenta-
zione dalla presa di corrente prima di pulirla.

Uso del sito TEAC Global

È possibile scaricare gli aggiornamenti per questa unità 
dal TEAC Global Site:

http://teac-global.com/

1)  Aprire il sito TEAC Global Site.
2)  Nella sezione TEAC Downloads, selezionare la lingua 

desiderata per aprire la pagina di download per la 
propria lingua.

NOTA

Se la lingua desiderata non viene visualizzata, clic-
care su “Other Languages”.

3)  Cliccare nella sezione “Search by Model Name” per 

aprire la pagina Downloads per quel prodotto (gli 
utenti in Europa dovrebbero cliccare sul nome del 
prodotto nella sezione “Products”).

4)  Selezionare e scaricare gli aggiornamenti necessari.

Prima dell’uso (continua)

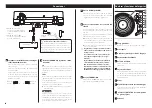
Preparazione del giradischi

Tenere l’unità in standby durante la configurazione (

E

 a 

pagina 38).

Metterla su una superficie piana.

Dal momento che le altezze dei piedini di questa 
unità non possono essere regolate, assicurarsi di 
posizionarla su una superficie piana.

Installare il piatto giradischi.

Allineare il piatto giradischi con l’albero centrale e 
installarla.

Albero centrale

Piatto

Avvolgere la cinghia attorno alla puleg-

gia del motore.

Usare un dito per tirare la cinghia di gomma che è 
avvolta intorno al piatto inferiore attraverso l’aper-
tura rotonda e avvolgerla intorno alla puleggia del 
motore.


o

Fare attenzione a non torcere la gomma.


o

Ruotare il piatto diverse volte per assicurarsi che 
sia sicuro.

Puleggia del motore
Cinghia in gomma

Apertura rotonda

Posizionare il tappetino di gomma.

Posizionare il tappetino protettivo di gomma che è 
incluso con il giradischi prima dell’uso.

Sopra


o

Il tappetino di gomma ha una parte superiore e 
una inferiore. Come mostrato in figura, il lato con 
i cerchi concentrici increspati deve essere collo-
cato verso il basso.

Installare il contrappeso.

Posizionare il contrappeso all’estremità del brac-
cetto e ruotarlo in senso orario per stringerlo.

Contrappeso 

Installare la conchiglia.

Inserire la conchiglia alla fine del braccetto e ruotare 
il dado per fissarla.

Conchiglia 

Dado

Содержание TN-300

Страница 1: ...DEUTSCH ITALIANO NEDERLANDS SVENSKA ANALOG TURNTABLE OWNER S MANUAL MODE D EMPLOI MANUAL DEL USUARIO BEDIENUNGSANLEITUNG MANUALE DI ISTRUZIONI GEBRUIKSAANWIJZING BRUKSANVISNING TN 300 Z A N T I S K A...

Страница 2: ...ur outlet consult an electrician for replace ment of the obsolete outlet 10 Protect the power cord from being walked on or pinched particularly at plugs convenience recep tacles and the point where th...

Страница 3: ...disposal of waste batteries and or accumulators can have serious effects on the environment and human health because of the presence of hazardous substances in them d The WEEE symbol which shows a whe...

Страница 4: ...CAUTION For safety disconnect the power cord from the socket before cleaning Product registration Customers in the USA please visit the following TEAC website to register your TEAC product online http...

Страница 5: ...t to 2 on the counterweight scale when using the included cartridge A N T I S K A T I N G 3 0 9 Adjust the anti skating dial Start with it set at 2 and adjust it during record play back page 8 to the...

Страница 6: ...er plug of the AC adapter is plugged into a power outlet o o Unplug the power cord from the outlet when you are not planning to use the unit for an extended period of time o o Do not use any AC adapte...

Страница 7: ...dge with one hand or by holding it by its edge with both hands Label Grooves Outer edge Cleaning o o Fingerprints and dust on a record can cause noise and the sound to skip as well as damage the recor...

Страница 8: ...een 5 Balance the tone arm and adjust the stylus pressure Follow the procedures in Balancing the tone arm and adjusting the stylus pressure on page 5 Basic operation Playing records 1 Press the STANDB...

Страница 9: ...vericks 10 9 as of September 2014 Use with operating systems other than these is not guaranteed o o This unit will run with the standard OS driver so there is no need to install a special driver Conne...

Страница 10: ...adapter power Input AC 100 V AC 240 V 50 60 Hz Output 12 V 500 mA Power consumption Standby 0 5 W or less On START 1 5 W or less Weight 4 9 kg 10 7 8 lb Operating temperature range 5 C to 35 C Dimensi...

Страница 11: ...l vous avez acquis l quipement Mise au rebut des piles et ou accumulateurs a Les piles et ou accumulateurs hors d usage doivent tre trait s s par ment de la collecte municipale d ordures m nag res dan...

Страница 12: ...surface de l unit V V ATTENTION Par s curit d branchez le cordon d alimentation de la prise secteur avant tout nettoyage Utilisation du site mondial TEAC Vous pouvez t l charger des mises jour pour ce...

Страница 13: ...le contrepoids jusqu la gradua tion 2 si vous utilisez la cellule fournie A N T I S K A T I N G 3 0 9 R glez la molette d antipatinage Commencez en la r glant 2 et ajustez la durant la lecture d un di...

Страница 14: ...udio de cette unit en num rique et l envoyer l ordinateur page 17 D Connecteur d entr e CC Apr s avoir fait tous les autres branchements bran chez cette prise l adaptateur secteur fourni V rifiez que...

Страница 15: ...tiquette et son bord ou en le tenant avec les deux mains par son bord tiquette Sillon Bord ext rieur Nettoyage o o Les traces de doigts et la poussi re sur un disque peuvent provoquer du bruit et des...

Страница 16: ...r glez la pression de la pointe Suivez les proc dures d crites dans quilibrage du bras de lecture et r glage de la pression de la pointe en page 13 Fonctionnement de base Lecture des disques 1 Appuyez...

Страница 17: ...tembre 2014 Le fonctionnement avec des syst mes d exploitation autres que ceux ci n est pas garanti o o Cette unit fonctionnera avec le pilote standard du syst me d exploitation OS donc il n y a pas b...

Страница 18: ...tie 12 V 500 mA Consommation lectrique En veille 0 5 W ou moins En service START 1 5 W ou moins Poids 4 9 kg Temp rature de fonctionnement 5 C 35 C Dimensions L H P hors tout 420 117 356 mm o o Les do...

Страница 19: ...eshacerse de pilas y o acumuladores a Las pilas y o acumuladores gastados deben ser eliminados separados del resto de basura com n y nicamente en los puntos de recogida o bajo los procedimientos espec...

Страница 20: ...oma de electricidad antes de proceder a la limpieza Registro del producto Los clientes de EE UU por favor visiten el siguiente sitio web de TEAC para registrar su producto en l nea http audio teac com...

Страница 21: ...a del contrapeso hasta el n mero 2 A N T I S K A T I N G 3 0 9 Ajuste la rueda antideslizamiento Comience con ella puesta en 2 y aj stela durante la reproducci n de un disco p gina 24 a la posi ci n d...

Страница 22: ...B tipo USB B Conecte este puerto al puerto USB de un ordena dor para convertir la se al de audio de esta unidad a digital y enviarla al ordenador p gina 25 D Conector de entrada de corriente DC IN 12V...

Страница 23: ...o o sujet ndolo por los bordes con ambas manos Etiqueta Surcos Borde exterior Limpieza o o Las huellas de dedos y el polvo en un disco de vinilo pueden causar ruido y hacer que el sonido salte as como...

Страница 24: ...la aguja Siga el procedimiento del apartado C mo equili brar el brazo y ajustar la presi n de la aguja de la p gina 21 Funcionamiento b sico Reproducci n de discos de vinilo 1 Pulse el bot n STANDBY O...

Страница 25: ...2014 No est garantizado el funcionamiento con otros siste mas operativos distintos a los mencionados o o Esta unidad funcionar con el controlador driver est ndar del sistema operativo por lo que no h...

Страница 26: ...12 V 500 mA Consumo de corriente En reposo standby 0 5 W o menos Encendido en funcionamiento 1 5 W o menos Peso 4 9 kg Margen de temperatura de funcionamiento de 5 C a 35 C Dimensiones an al pro incl...

Страница 27: ...rennglied zur Span nungsversorgung Achten Sie darauf dass er stets in einwandfreiem Zustand ist o o Achten Sie bei der Verwendung von Kopfh rern auf Ihr Geh r Zu hoher Schalldruck von Ohr oder Kopfh r...

Страница 28: ...n k n nen V V ACHTUNG Aus Sicherheitsgr nden sollte vor dem Rei nigen der Netzstecker gezogen werden Verwenden der globalen TEAC Website Updates f r den TN 300 k nnen von TEAC s globaler Website herun...

Страница 29: ...ehmersystems am Gegenwicht bis der Skalenwert 2 angezeigt wird A N T I S K A T I N G 3 0 9 Stellen Sie den Anti Skating Wert ein Beginnen Sie mit einem Anti Skating Wert von 2 und stellen Sie w hrend...

Страница 30: ...digitalisierte Ausgangssignal des TN 300 zum Computer zu senden siehe Seite 33 D Gleichspannungseingang Schlie en Sie den im Lieferumfang befindlichen Netz adapter hier an nachdem Sie alle anderen An...

Страница 31: ...und an der Au enkante oder mit beiden H n den an der Au enkante fest Label Rille Kante Reinigungshinweise o o Fingerabdr cke und Staub k nnen st rende Neben ger usche verursachen und die Nadel aus de...

Страница 32: ...ein Folgen Sie den Anweisungen im Abschnitt Aus ba lan cieren des Tonarms und Einstellen der Auf la ge kraft auf Seite 29 Grundlegende Bedienung Schallplattenwiedergabe 1 Bet tigen Sie zum Einschalte...

Страница 33: ...0 9 Stand September 2014 F r andere Betriebssysteme kann die einwandfreie Funk tion nicht zugesagt werden o o Der TN 300 nutzt den Standardtreiber dieser Betriebs systeme Die Installation eines spezie...

Страница 34: ...in siehe Seite 29 Falls die Auflagekraft geringer ist als f r die instal lierte Tonabnehmer Nadelkombination angege ben erh ht sich die Gefahr dass die Nadel aus der Rille springt Technische Daten All...

Страница 35: ...ate circa lo smaltimento delle vec chie apparecchiature elettriche ed elettroniche contattare il negozio dove stato acquistato l apparecchio o l autorit locale Smaltimento delle pile e o accumulatori...

Страница 36: ...superficie dell unit V V CAUTELA Per motivi di sicurezza scollegare il cavo di alimenta zione dalla presa di corrente prima di pulirla Uso del sito TEAC Global possibile scaricare gli aggiornamenti p...

Страница 37: ...contrappeso quando si utilizza la cartuccia in dotazione A N T I S K A T I N G 3 0 9 Regolare il selettore di anti skating Iniziare con un impostazione a 2 e regolare l an ti skating durante la ripro...

Страница 38: ...USB di un computer per convertire il segnale audio in digitale e mandarlo al computer pagina 41 D Connettore di ingresso DC Dopo aver completato tutti gli altri collegamenti collegare l alimentatore A...

Страница 39: ...olo per l etichetta e il bordo con una mano o tenendolo per i bordi con entrambe le mani Etichetta Solchi Bordo esterno Pulizia o o Le impronte digitali e la polvere su un disco possono causare rumore...

Страница 40: ...s sione dello stilo Seguire le procedure descritte in Bilanciare il brac cetto e regolare la pressione dello stilo a Bilanciare il braccetto e regolare la pressione dello stilo a pagina 37 Operazioni...

Страница 41: ...da settembre 2014 L uso di sistemi operativi diversi da questi non garantito o o Questa unit funzioner con il driver standard del sistema operativo quindi non necessario installare un driver speciale...

Страница 42: ...cifiche Generali Adattatore di alimentazione AC Ingresso AC 100 V AC 240 V 50 60 Hz Uscita 12 V 500 mA Consumo Standby 0 5 W o meno Acceso START 1 5 W o meno Peso 4 9 kg Temperatura di esercizio da 5...

Страница 43: ...zijn goedgekeurd laten de gebruikersgarantie vervallen Voor Europese gebruikers Verwerking van elektrische en elektronische apparatuur a Alle elektrische en elektronische apparatuur dient te worden g...

Страница 44: ...hemische reinigingsdoekjes oplos middel of soortgelijke substanties omdat deze het oppervlak van het apparaat kunnen beschadigen V V LET OP Trek voor uw veiligheid v r het schoonmaken de stek ker uit...

Страница 45: ...trage wicht bij gebruik van het meegeleverde element A N T I S K A T I N G 3 0 9 Pas de anti skatingdraaiknop aan Start met deze knop op 2 en pas dit tijdens het afspelen van een grammofoonplaat pagin...

Страница 46: ...pe Aansluiten op de USB poort van een computer om het audiosignaal van dit apparaat om te zetten naar digitaal signaal en te verzenden naar de computer pagina 49 D DC ingang Voltooi eerst alle andere...

Страница 47: ...n de zijkant of met beide handen aan de zijkanten Etiket Groeven Buitenkant Reinigen o o Vingerafdrukken en vuil op een grammofoonplaat kunnen ruis en het haperen van het geluid veroorza ken maar ook...

Страница 48: ...itafelarm en pas de naalddruk aan Volg de aanwijzingen in volgende aanwijzingen in De draaitafelarm balanceren en de naalddruk aan passen op pagina 45 Basisbediening Grammofoonplaten afspelen 1 Druk o...

Страница 49: ...4 Als u niet een van de bovenstaande besturingssystemen gebruikt is de werking niet gegarandeerd o o Dit apparaat werkt met het standaard OS stuurpro gramma dus er hoeft geen speciaal stuurprogramma t...

Страница 50: ...r gaan haperen Specificaties Algemeen Vermogen netadapter Ingang AC 100 240 V 50 60 Hz Uitgang 12 V 500 mA Opgenomen vermogen Standby 0 5 W of minder On START 1 5 W of minder Gewicht 4 9 kg Temperatuu...

Страница 51: ...RATION f r samtycke kommer att g ra anv ndarens garanti ogiltig For kunder i Europa Kassering av elektrisk och elektronisk utrustning a Alla elektriska och elektroniska produkter b r kasseras separat...

Страница 52: ...te kemiska reng ringstrasor f rtunnare eller liknande mnen eftersom de kan skada enhe tens yta V V F RSIKTIGHET F r s kerhets skull dra ut n tsladden ur v gguttaget f re reng ring Anv nda TEAC Global...

Страница 53: ...n medf ljande patronen A N T I S K A T I N G 3 0 9 Justera anti skak ratten Starta med den inst lld till 2 och justera medan du spelar upp skivan sida 56 till positionen d r den v nstra och h gra voly...

Страница 54: ...detta jack Bekr fta att str mkontakten av n tadaptern r ansluten till str muttaget o o Koppla fr n n tsladden fr n uttaget om du inte skall anv nda enheten ver en l ngre tidsperiod o o Anv nd inte en...

Страница 55: ...ler genom att h lla den vid dess kant med b da h nder Etikett R fflor Yttre kant Reng ring o o Fingeravtryck eller damm p en skiva kan orsaka buller och ljudet kan hoppa samt kan skivan skadas och ven...

Страница 56: ...tylus trycket F lj anvisningarna i Balansera ut tonarmen och jus tera stylustrycket p sidan 53 Grundl ggande anv ndning Spela upp skivor 1 Tryck p STANDBY ON knappen p bak sidan av enheten f r att s t...

Страница 57: ...7 OS X Mountain Lion 10 8 OS X Mavericks 10 9 sedan september 2014 Anv ndning med andra operativsystem n de ovan garanteras inte o o Denna enhet kommer att k ras med standard OS drivrutin s det finns...

Страница 58: ...0 240 V 50 60 Hz Utg ng 12 V 500 mA Str mf rbrukning Vilol ge 0 5 W eller mindre P START 1 5 W eller mindre Vikt 4 9 kg Intervall f r drifttemperatur 5 35 C M tt B H D inklusive utskjutande delar 420...

Страница 59: ...59...

Страница 60: ...ersi al proprio commerciante presso il quale stato acquistato l ap parecchio nel caso in cui si voglia richiedere una prestazione in garanzia Dit product valt onder de wettelijke garantievoor schrifte...

Отзывы: