


TASCAM SS-R1/SS-R05
37
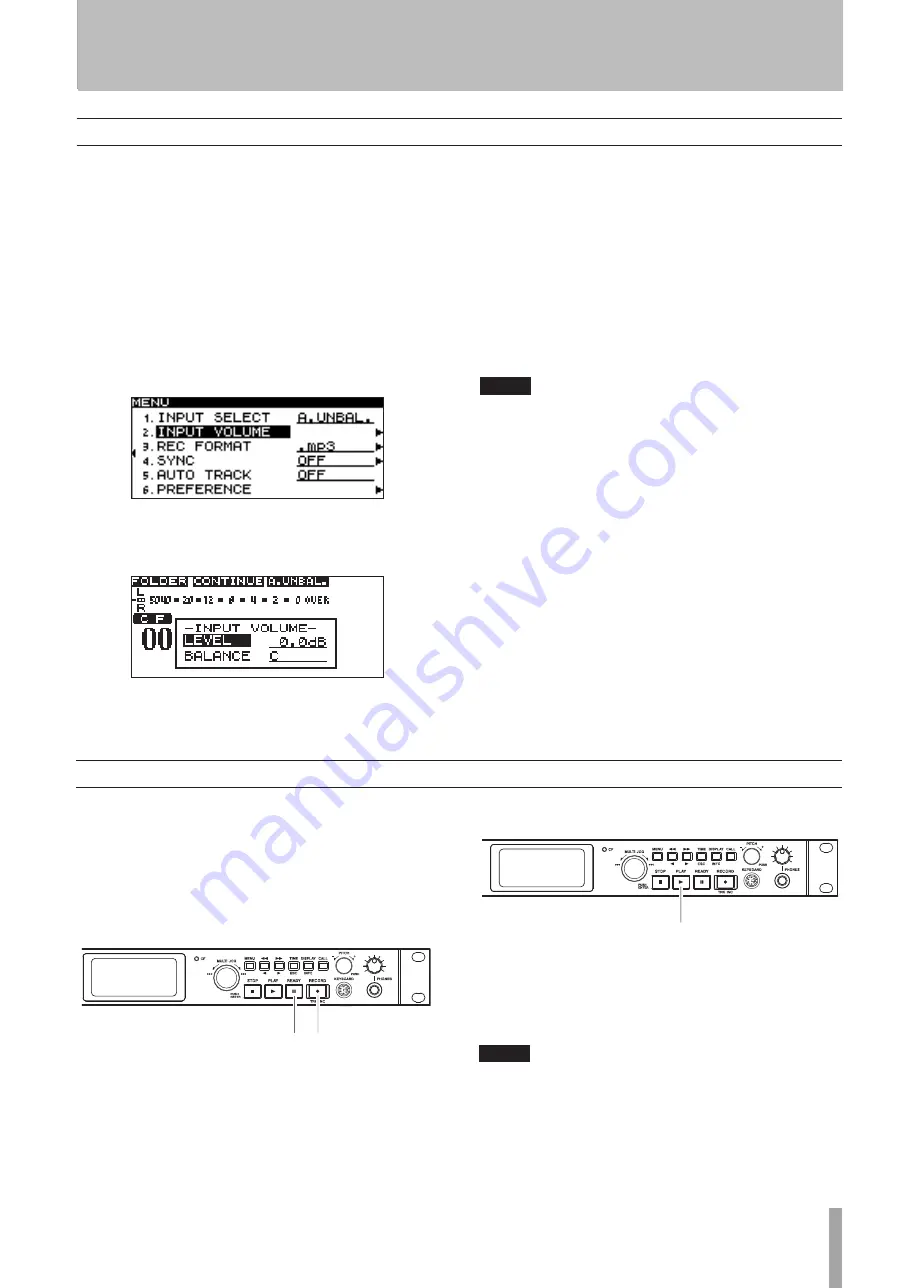
Adjusting the input signal level and balance
Use the menu to adjust the level and balance of the input
signal.
As described above in “Monitoring the input signal”, put
the SS-R1/SS-R05 in a condition where you can monitor
the input signal, and then proceed with the following steps
(for details on menu operations, refer to “Operations in the
menu screens” on page 16).
1 Press the
MENU
key to access the main menu list
screen.
2 Open the REC menu.
3 Highlight the INPUT VOLUME item.
4 Press the front panel
˚
key (or the remote’s
cursor
¥
key) to access the INPUT VOLUME SETTING
popup window.
5 Turn the
MULTI JOG
dial (or use the remote’s
cursor
§
,
¶
keys) to highlight the INPUT LEVEL
item, and then press the front panel
˚
key (or the
remote’s
cursor
¥
key) to highlight the level value.
6 Turn the
MULTI JOG
dial (or use the remote’s
cursor
§
,
¶
keys) to adjust the volume.
You can adjust the volume in a range of -∞ to +18 dB.
The upper part of the display shows the level meter of
the home screen, allowing you to watch the level while
you make adjustments.
Set the level as high as possible without allowing the
OVER
indicator at the right edge of the meter to light.
NOTE
OVER
will light at -0.2 dB or higher.
7 Press the front panel
∆
key (or the remote’s
cursor
˙
key) to highlight LEVEL.
8 Turn the
MULTI JOG
dial (or use the remote’s
cursor
§
,
¶
keys) to highlight BALANCE, and then press
the front panel
˚
key (or the remote’s
cursor
¥
key) to highlight the balance value.
9 Turn the
MULTI JOG
dial (or use the remote’s
cursor
§
,
¶
keys) to adjust the balance.
You can adjust this in a range of L50–C (center)–R50.
10 When you’ve finished making settings, press the
front panel
TIME (ESC)
key (or the remote’s
CLR/ESC
key) to return to the home screen.
Basic recording operation
When you’ve finished making the above settings (input
source selection, recording file format setting, sampling
rate converter on/off, input level adjustment), you can
begin recording.
To enter the unit in record-ready condition when stopped:
Press the
RECORD
key to enter the record-ready condition
(the front panel
RECORD
key and
READY
key will light).
READY key RECORD key
To start recording from the record-ready (pause)
condition:
Press the
PLAY
key.
PLAY key
To pause recording:
Press the
READY
key.
To stop recording:
Press the
STOP
key. When you
stop recording, the recorded data will be written, and
an audio file will be created.
NOTE
You can use the PREFERENCE menu item WORD CLIP
•
to specify the audio file name that is automatically
added to the created file (see “Specifying a name of
the recorded file” on page 44).
The maximum size of each track is 2 GB.
•
The recorded track will be created in the current
•
folder (see “Making a folder the current folder” on
page 48).
6 − Recording


