background image

15

SWITCH SETTINGS:

The EC-3130,  EC-3132 & EC-3142 ChekPoint controller off ers settable water fl ow 
control adjustment selections.  These selections are set by confi guring a bank of DIP 
switches located behind the sensor to the settings shown on the tables below.

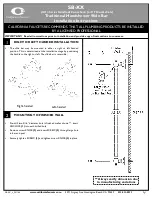
 To access the DIP switches:

1. Shut-off  the water supply at the supply stops.

2. Using the L-Key provided, remove the handle and 

body screws.  If the pre-set temperature plug is 
installed it does not need to be removed.

3. Remove the temperature lever from the faucet 

body. 

4. Remove the faucet body from the base by pulling 

the body straight up.

5. Locate the bank of DIP switches on the back of 

the sensor.  Be careful not to damage the exposed 
small PCB.

6. Set the DIP switches to the desired settings 

described below.

7. Carefully reinstall the body straight down onto the 

base.

8. Reinstall the lever handle and body screw.

AJUSTES DEL INTERRUPTOR:

El controlador de los modelos EC-3130, EC-3132 y EC-3142 de ChekPoint ofrece 
opciones de ajuste confi gurables para el control del fl ujo de agua. Estas opciones 
se establecen confi gurando un banco de interruptores DIP en la parte posterior del 
sensor, de acuerdo con las siguientes tablas.

Para acceder a los interruptores DIP:

1. Interrumpa el suministro de agua en los paros de suministro.

2. Con la llave Allen proporcionada, quite el maneral y los tornillos del cuerpo. Si el 

tapón de temperatura predeterminada está instalado, no es necesario quitarlo.

3. Quite la palanca de control de temperatura del cuerpo del grifo.

4. Quite el cuerpo del grifo de la base jalando hacia arriba.

5. Localice el banco de interruptores DIP en la parte posterior del sensor. Tenga 

cuidado de no dañar la pequeña tarjeta de circuitos impresos (PCB) que queda 
expuesta.

6. Ajuste los interruptores DIP de acuerdo con sus preferencias, según se describe a 

continuación.

7. Con cuidado, vuelva a instalar el cuerpo del grifo en la base.

8. Vuelva a colocar el maneral de la palanca y el tornillo del cuerpo.

ES

EN

Access to DIP Switch Settings

Acceso a los ajustes del interruptor DIP
Accès aux réglages des microcommutateurs
Zugang zu den DIP-Schalter-Einstellungen

访问 DIP 开关设置

DIP Switches

Interruptores DIP
Micro-interrupteurs
DIP-Schalter

拨码开关

6

Содержание EC-3130

Страница 1: ...express warranty not provided herein and any remedy for Breach of Contract which might arise is hereby excluded and disclaimed Any implied warranties of merchantability or fitness for a particular pu...

Страница 2: ...2 6 1 2 3 4 5 8 7 9 10 11 12 Figure 1 EC 3130 Exploded View Shown with Optional Pre Set Temperature Plug Figure 1A EC 3130 ST VF05 Single Temperature Faucet...

Страница 3: ...3 1 2 3 4 7 8 9 5 6 10 Exploded View Shown with Optional Pre Set Temperature Plug Figure 2A EC 3132 ST VF05 Single Temperature Faucet Figure 2 EC 3132...

Страница 4: ...4 1 2 3 4 7 8 9 5 6 10 Exploded View Shown with Optional Pre Set Temperature Plug Figure 3A EC 3142 ST VF05 Single Temperature Faucet Figure 3 EC 3142...

Страница 5: ...ray Device B 0199 08 N05 2 VR Aerator Key 015425 45 3 6V Lithium Battery CR P2 019087 45 4 Auxiliary Power Connector Cable 020417 45 5 Lever Asm Body Screw Kit w L Key 020270 45 6 Torx T 20 VR L Key 0...

Страница 6: ...L GRIFO A LOS PAROS DEL SUMINISTRO Important TOUT LE C BLAGE LECTRIQUE DOIT TRE INSTALL CONFORM MENT AUX CODES ET R GLEMENTATIONS NATIONAUX LOCAUX TOUTE LA PLOMBERIE DOIT TRE INSTALL E CONFORM MENT AU...

Страница 7: ...rior to Installation Prior to installing the T S ChekPoint Series Faucet install the items listed below Scrub or wash up sink Drain line Hot and cold water supply lines stops Supply stops must be furn...

Страница 8: ...indiqu s ci dessous vier de chirurgien ou de lavage Conduite d vacuation Conduites et vannes d alimentation en eau chaude et froide Les vannes d alimentation doivent tre fournies par l installateur ou...

Страница 9: ...r range will need adjusting refer to INSTRUCTIONS FOR SETTING THE SENSOR RANGE INSTALACI N Consulte las figuras 1 2 3 y 4 Los grifos EC 3130 EC 3132 y EC 3142 de ChekPoint cuentan con un sensor electr...

Страница 10: ...ne commande de temp rature lectroniques L alimentation est fournie une pile au lithium de 6 V dans le corps du robinet Il est galement possible d utiliser un transformateur en CA branch sous le plan d...

Страница 11: ...die Armatur eingebaut wird Die maximale Dicke der Arbeitsplatte betr gt 1 2 Den von der Unterseite der Armatur kommenden Batterieschutzstreifen abziehen Die LED Leuchte in der Sensorlinse leuchtet und...

Страница 12: ...NG DES SENSORBEREICHS 1 2 3 4 EC 3130 EC 3132 EC 3142 6V 1 1 1 2 LED 3 4 5 6 7 8 9 10 11 2 3 LED 12 2 SW 5 SW 6 CN EN POINT OF USE TEMPERATURE ADJUSTMENT 1 Push the lever on the right side towards the...

Страница 13: ...suministro de agua en los paros de suministro 5 Quite el cuerpo del grifo de la base jalando hacia arriba 6 Instale el obturador de cuerpo cromado en el orificio interno del cuerpo como se muestra en...

Страница 14: ...fernen 3 Mit einem Schlitzschraubenzieher die Messingspindel drehen die durch das Loch zug nglich ist an dem der Hebel entfernt wurde um die Wassertemperatur auf die gew nschte Einstellung einzustelle...

Страница 15: ...urables para el control del flujo de agua Estas opciones se establecen configurando un banco de interruptores DIP en la parte posterior del sensor de acuerdo con las siguientes tablas Para acceder a l...

Страница 16: ...e la poign e et du corps SCHALTERSTELLUNGEN Die ChekPoint Regler EC 3130 EC 3132 EC 3142 bieten einstellbare Auswahl zur Anpassung der Wasserflusskontrolle Diese Wahlm glichkeiten werden durch Konfigu...

Страница 17: ...OD 15 seconds 30 seconds 45 seconds 60 seconds 3 minutes 20 minutes SW 1 OFF OFF OFF OFF ON ON SW 2 OFF OFF ON ON OFF OFF SW 3 OFF ON OFF ON OFF ON Auto Time Out Selection PERIOD 1 seconds 10 seconds...

Страница 18: ...RETRASO DE CORTE DEL AGUA INTERRUPTORES 5 Y 6 El controlador ChekPoint ofrece cuatro periodos que pueden seleccionarse para cortar el agua cuando el objeto se quita de enfrente del sensor electr nico...

Страница 19: ...conde 10 secondes 15 secondes et 30 secondes Le r glage par d faut est de 1 seconde MODE DE MESURE COMMUTATEUR 7 En mode de mesure lorsqu il est activ le robinet reste allum pendant 15 secondes qu un...

Страница 20: ...ler bietet vier Phasen aus denen gew hlt werden kann um Wasser abzuschalten wenn das Objekt vor der elektronischen Optik entfernt wird Die folgenden Zeitr ume k nnen gew hlt werden 1 Sekunde 10 Sekund...

Страница 21: ...pective kit when ordered separately SENSOR DETECTION RATE AND SLEEP MODE When powered only by batteries 6 VDC Lithium and or Hydrogenerator the sensor detection rate is every 1 3 second After no activ...

Страница 22: ...ator EC HYDROGEN consultez le manuel d utilisation dans le kit EC HYDROGEN command s par ment Pour le c blage et les options de raccordement d alimentation c bl e EC HARDWIRE et facile EC EASYWIRE con...

Страница 23: ...lang keine Aktivit t erfolgt schaltet der Sensor in den Schlafmodus mit einer Erken nungsrate von alle 1 2 3 Sekunden Bei Versorgung ber den AC Adapter oder EC HARDWIRE mit oder ohne 6 VDC Lithium Bat...

Страница 24: ...nnected and powered the LED flashing on for one second then off for one second indicates a dead battery POWER INDICATOR Two flashes every two seconds indicates a transformer or AC power failure Three...

Страница 25: ...que hay una falla en el transformador o en el adaptador de CA Si el LED parpadea tres veces cada dos segundos significa que hay una falla en el hidrogenerador Cuando se utilice un transformador o un...

Страница 26: ...une panne de transforma teur ou de courant alternatif Trois clignotements toutes les deux secondes indiquent une panne d hydrog n rateur Lorsqu un transformateur ou un hydrog n rateur et une pile son...

Страница 27: ...aus was auf eine leere Batterie hinweist ANZEIGE DES STROMSTATUS Zweimaliges Blinken alle zwei Sekunden weist auf einen Ausfall des Transformators oder der Wechselstromversorgung hin Dreimaliges Blink...

Страница 28: ...ersetzen 6 Den Armaturenk rper vorsichtig wieder gerade nach unten auf den Sockel setzen 7 Den Hebel und ggf die Schraube am Armaturenk rper wieder montieren 8 Die Absperrungen ffnen CN LED LED LED LE...

Страница 29: ...d keep its previous setting 6 When the sensor has successfully set the new range the LED will turn off briefly then turn on for 2 seconds and save the new setting If the sensor cannot set the new rang...

Страница 30: ...trovanne se ferme l eau s arr te de couler et le voyant DEL s teint 3 Retirer l aimant La DEL clignote lentement pendant 5 secondes indiquant que le capteur est en mode de configuration 4 En mode de c...

Страница 31: ...auf die Entfernung der Beckenkante einstellt insbesondere wenn diese stark reflektiert In diesem Fall muss die Reichweite des Sensors erneut eingestellt werden 5 Wenn die LED aufh rt zu blinken begin...

Страница 32: ...3 Debris in aerator or spray head remove clean and reinstall 1 Check surroundings for factors that can contribute to the false triggering for example bright lights highly reflective surfaces sunlight...

Страница 33: ...Revise los paros de suministro bralos si est n cerrados 2 Hay residuos en las rondanas del filtro de la manguera de suministro en el extremo del eslab n giratorio NPSM de 1 2 pulg qu telas l mpie las...

Страница 34: ...d arr t d eau ouvrez les si elles sont ferm es 2 D bris dans les rondelles filtrantes du tuyau d alimentation dans l extr mit pivotante 1 2 po NPSM retirez les nettoyez l l ment et r installez le 3 De...

Страница 35: ...NG 1 Batterien ersetzen 1 Absperrung en berpr fen ffnen wenn geschlossen 2 R ckst nde in den Filterscheiben im Versorgungsschlauch im 1 2 NPSM Schwenkarm Ende entfernen s ubern und wieder einbauen 3 R...

Страница 36: ...36 LED 1 1 2 1 2 NPSM 3 1 2 1 CN...

Страница 37: ...Fax 864 834 3518 2441 CW Nieuwveen E mail tsbrass tsbrass com The Netherlands RELATED T S BRASS PRODUCT LINE EC 3130 4DP ChekPoint Electronic Faucet Single Hole Deck Mount with 4 Deck Plate EC 3132 VF...

Отзывы: