background image

29

29

30

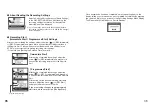
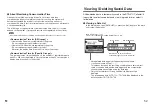
Forbidding Recording Start via Wireless Communication

When making recording condition settings via your computer, under [Start 

Wireless Communication] you can select [Forbid] or [Permit] to either forbid or 

allow the starting of recording or the changing of a recording start via wireless 

communication. 

If [Forbid] has been checked, starting a recording session via wireless 

communication will not be allowed. 

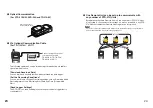
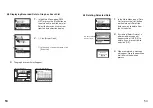
If a selected Remote Unit has been set to only start 

recording via computer and has been to set to be 
protected against changes in the recording start via 
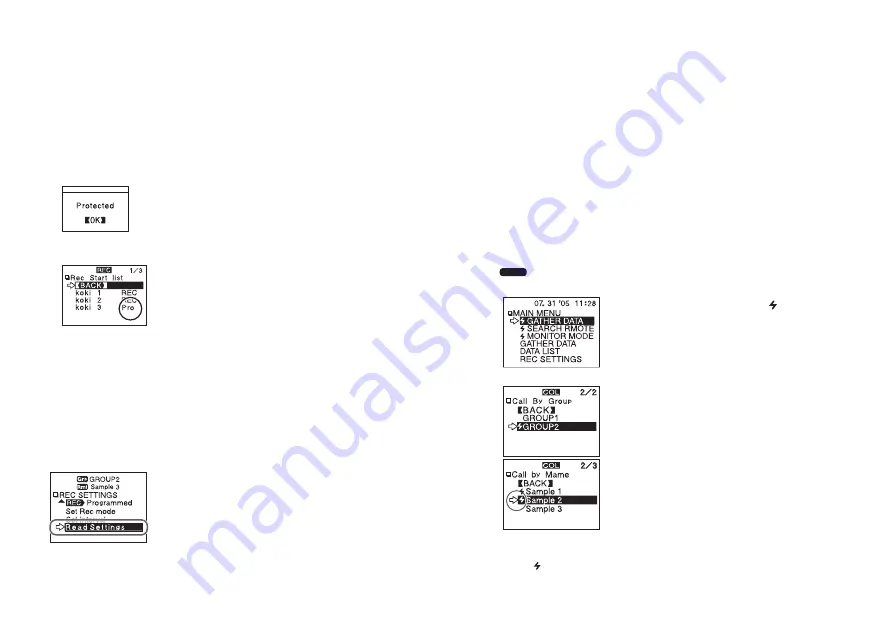
wireless communication, the following message will 
appear.

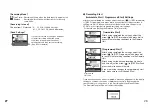
When starting recording by Group, a list will appear 

showing the Remote Units with which communication 
occurred.


[Pro] will appear next to those Remote Units which 

have been set to only start recording via computer and 
have been set to be protected against changes in 
recording conditions via wireless communication.

How to Lift the Protection

For details about how to lift the protection see the Help Menu in the 

provided software

T&D Recorder for Windows


US

or see its User' s 

Manual.

About Reading the Recording Settings

��������������


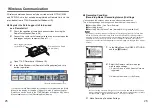
Select a Remote Unit and press on [Read Settings] 

in the REC SETTINGS Menu. After reading, the 

recording settings information for the selected 

Remote Unit will be displayed.

If you selected [By Group] in the [Call by Name] Window,  
the reading of settings cannot be done and  [Read 
Settings] will not displayed.

About the Default Settings

At any time, you can return the RTR-

57

U to its default settings of 

Recording Mode


:  Endless 

 Recording Interval:  

10

 minutes

    Channel Names:  

1

 channel

ch.

1


2

 channel

ch.

2

Downloading Recorded Data

Wireless communication can only be done with  RTR-

51

/

52

/

53

 and RVR-

52

A units that have been registered as Remote Units via the software

T&D 

Recorder for Windows US

.

About 

2000

 data readings can be downloaded per minute.  About 

1000

 event 

data readings can be downloaded per minute.

Note

Please extend the antenna before carrying out wireless communication.

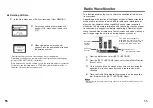
1.

In the Main Menu, open [

GATHER 

DATA].

2.

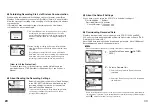
Select a Remote Unit.

Select a Group in which Remote Units are 
registered.

Select the Remote Unit you wish to download 
the data from.

Before selecting a Remote Unit you can run a search to find all Remote Units with which 
communication is possible. Those units with which communication is possible will appear 
with a 

「 」

mark next to them. (See p.

47

 for details)

Содержание RTR-57U

Страница 1: ...User s Manual Thank you for purchasing our product Carefully read this instruction manual before using this unit Copyright 2001 2005 T D Corporation All rights reserved 2005 09 16004455040...

Страница 2: ...for any malfunction or trouble caused by the use of our product or by any problem caused by the use of measurement results of our unit Please be fully aware of this before using our product Some of ou...

Страница 3: ...ns to the unit immediately turn the power OFF and remove the batteries Continued use may cause re or electrocution CAUTIONS This unit is not water resistant If the unit gets dirty wipe it with a clean...

Страница 4: ...ling and cause injury or damage In places exposed to re or heat It may cause damage or a change in shape In places exposed to excessive smoke dirt and dust It may cause damage Wireless Regulations Rad...

Страница 5: ...ta 30 Non Wireless Communication How to Connect for Optical or Optional Communication Cable 33 Recording Conditions Settings 34 Downloading Recorded Data 37 Graph Display 39 Event List Display 41 Othe...

Страница 6: ...at 1 minute the battery life will be about 4 months Easy Data Collection from a Variety of Unit Types Data downloading can be carried out with any RTR 5 Series Unit via wireless communication or by s...

Страница 7: ...ent transmission frequency and ambient temperature This estimate of battery life was based on normal use under normal conditions using a new batteries This is in no way or manner a guarantee of batter...

Страница 8: ...in Move the dial up Move the dial down Moving the dial up and down By moving the dial up or down the arrow will move to allow you to choose the desired item The selected part will be displayed in an e...

Страница 9: ...edure If there is no OK in the setting display but a BACK is displayed adjust the arrow to BACK and press it to complete the setting and take you back to the menu display When carrying out a Remote Un...

Страница 10: ...to save battery power If you wish to continue to use switch the power on again Note If using the monitoring function the Auto Power Off function will not go into effect During communication even by p...

Страница 11: ...tware T D Recorder for Windows US the USB Device Driver will also be copied to your hard disc So even if you do not have the CD ROM but have already installed T D Recorder for Windows you can easily i...

Страница 12: ...to use the device with a USB cable and Windows The USB device driver must be installed for communication via USB between your computer and a RTR 57U Data Collector After installing the USB device driv...

Страница 13: ...ion Window opens close it 4 By connecting a data Collector to the USB cable already connected to your computer the Found New Hardware Wizard will automatically open 5 By clicking the Next button a win...

Страница 14: ...urn on your computer and open Windows 2 After Windows has been completely started up connect the supplied USB cable to a USB port on your computer 3 Insert the attached CD ROM in the CD ROM drive If t...

Страница 15: ...or a better dirver Recommended and click the Next button to begin installation NEXT button 6 Check Search for the best driver your device Recommended and click the Next button Check NEXT button 7 Chec...

Страница 16: ...r units that have been registered as Remote Units via the accompanying software T D Recorder for Windows US The following operations can be done using Wireless communication Download Recorded Data You...

Страница 17: ...nd change all recording settings such as Recording Mode Recording Interval and Recording Start Date and Time Programmed Start Read Logger Settings The RTR 57U can read and display all settings for the...

Страница 18: ...ing Mode Recording Interval Settings Please extend the antenna when using wireless communication The following settings and changes can be made from the main unit Recording Mode One Time Endless Recor...

Страница 19: ...the RTR 57U are correct before making recording start settings For details see Setting the Date and Time from p 10 programmed start time Immediate Start After having completed the settings adjust the...

Страница 20: ...anual About Reading the Recording Settings Select a Remote Unit and press on Read Settings in the REC SETTINGS Menu After reading the recording settings information for the selected Remote Unit will b...

Страница 21: ...ed when the downloading is completed CAUTION The downloaded data for TR 71U TR 72U will be displayed in the data list under TR 71S TR 72S If the amount of main unit memory is low the downloading of re...

Страница 22: ...l Endless Recording will continue with oldest data continuously overwritten Recording Interval Choose from 15 intervals S 1 2 5 10 15 20 30 seconds M 1 2 5 10 15 20 30 and 60 minutes Some recording in...

Страница 23: ...tings For details see Setting the Date and Time from p10 Immediate Start After having completed the settings adjust the arrow to REC Immediate and press dial to transmit the recording conditions to th...

Страница 24: ...peration dial the display will change to that of a graph If you have set the judgment ON in Set Limits before downloading the result will be displayed when the downloading is completed CAUTION The dow...

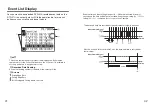
Страница 25: ...presently displayed in graph The display can be scrolled with the operation dial or the buttons on the main unit Cursor Bar Fixed Display Cursor position is displayed and measurement information is di...

Страница 26: ...orded Data Reading Shows the reading number of the data at the cursor position Arrows Rising Edge Data Falling Edge Data Both Rising and Falling within 1 second Events within an input voltage range of...

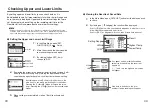
Страница 27: ...computer when setting up the recording start time for the Remote Unit will take precedence over other limit settings Note Settings can also be made via the computer For details see the Help Menu in th...

Страница 28: ...nit you can run a search to find all Remote Units with which communication is possible Those units with which communication is possible will appear with a mark next to them See p 47 for details 3 Clic...

Страница 29: ...nds to complete The search time depends on the number of Remote Units registered in the group By selecting a Remote Unit with which communication is possible and clicking on it you can either download...

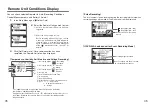
Страница 30: ...allow for the necessary amount of communication time If the upper and lower limit settings are activated Result Upper and Lower Limits Ex of a Search Results List For those units with which communica...

Страница 31: ...y Groups The communication time will depend on the number of registered remote units For 250 units registered to 1 group the time will be 54 seconds plus a display time for each unit of 2 seconds View...

Страница 32: ...ete If yes move arrow to and click OK 3 When completed a message will appear Press the operation dial to nish the deletion process Displaying Recorded Data in Graph or Event List 1 In the Main Menu op...

Страница 33: ...due to radio wave interference or other causes communication capability does not meet expected standards To help avoid interference and reduce the chances of poor transmission we suggest that before r...

Страница 34: ...ighter Muting the Operations Buzzer Current Settings Selection 1 In the Main Menu open SET FUNCTIONS and Beep 2 By moving the arrow to OFF and pressing the dial the setting will be completed 3 Move th...

Страница 35: ...Data BACK BACK Display Graph See p 39 Judge See p 44 Select Delete See p 54 Displays the graph for that data View results of judgment After con rmation select OK to nish MONITOR MODE View Current Mea...

Страница 36: ...displayed Record Standby Call by Group Call by Name By Group 2 BACK Upper and Lower Limit Settings See p 43 Backlight See p 57 Set Clock See p 10 Check Memory See p 58 Clear Memory See p 55 Beep See p...

Страница 37: ...after downloading Display Saved Data Graphs Display Highest and Lowest Temperature Set Recording Start for Remote Data Loggers Delete Stored Data one reading all readings Monitor Current Temperature S...

Страница 38: ...to 50 32 to 122 F Humidity Less than 90 RH Without dew condensation Accessories Included Computer Communication Cable USB Cable US 15C Length 60 in 1 5m x 1 AAA Alkaline Batteries LR03 x 2 User s Manu...

Страница 39: ...our company news products upcoming events software and user s guides downloads as well as other support Please stop by and see what we have to offer http www tandd com This is printed on 100 recycled...

Отзывы: