Tally Dascom DL-200
User Guide V1.3
4
Media Type
How it looks
Description
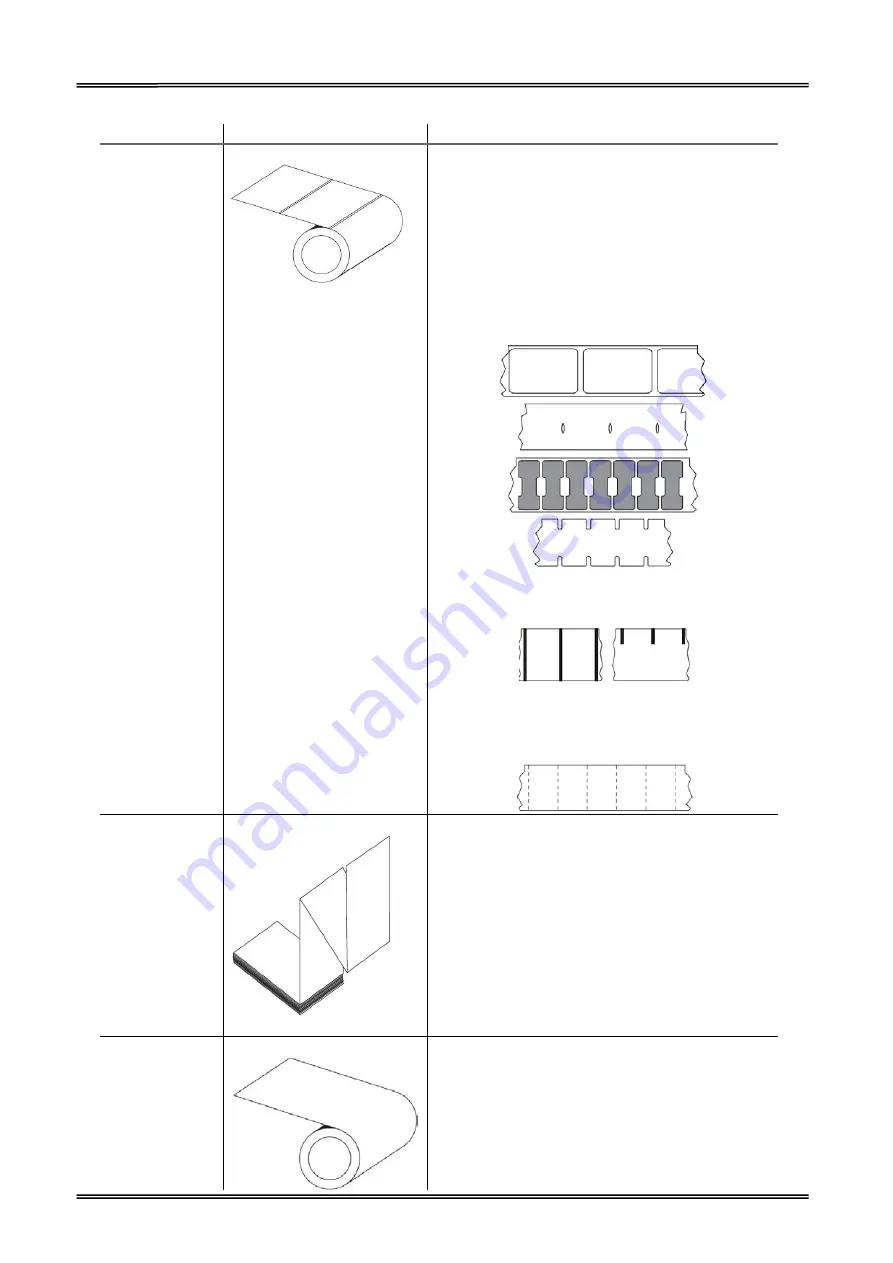
Non-Continuous
Roll Media
Roll media is wound on a core that can be 1 to 1.5
in. (25.4 to 38.1 mm) in diameter. Labels have
adhesive backing that sticks them to a liner, and
they are separated by gaps, holes, notches, or black
marks. Tags are separated by perforations.
Individual labels
are separated by one or more of the following
methods:
• Web media separates labels by gaps, holes, or
notches.
• Black mark media uses pre-printed black marks on
the back side of the media to indicate label
separations.
• Perforated media has perforations that allow the
labels or tags to be separated from each other
easily. The media may also have black marks or
other separations between labels or tags.
Non-Continuous
Fanfold Media
Fan-Fold media is folded in a zigzag pattern. Fanfold
media can have the same label separations as
non-continuous roll media.
The separations would fall on or near the folds.
Continuous Roll
Media
Roll media is wound on a core that can be 1 to 1.5
in. (25.4 to 38.1 mm) in diameter. Continuous roll
media does not have gaps, holes, notches, or black
marks to indicate label separations. This allows the
image to be printed anywhere on the label. A cutter
can be used to cut apart individual labels. With
continuous media, use the transmissive (gap)
sensor so the printer can detect when the media
Содержание DL-200
Страница 1: ...User Manual DL 200 Label Barcode Printer ...
Страница 18: ...Tally Dascom DL 200 User Guide V1 3 5 runs out 1 4 External Dimensions Standard Model Big Roll Model ...
Страница 38: ...Tally Dascom DL 200 User Guide V1 3 25 3 Select the installation path to the Driver 3 Click Finish ...
Страница 39: ...Tally Dascom DL 200 User Guide V1 3 26 4 Click Yes 5 Click Next ...
Страница 41: ...Tally Dascom DL 200 User Guide V1 3 28 8 Enter printer name Click Next 9 Click Finish ...
Страница 42: ...Tally Dascom DL 200 User Guide V1 3 29 10 Restart the computer to complete the process ...
Страница 44: ...Tally Dascom DL 200 User Guide V1 3 31 3 Select the installation path to the tool 4 Click Finish ...
Страница 45: ...Tally Dascom DL 200 User Guide V1 3 32 5 Click Install 6 Click Install ...
Страница 46: ...Tally Dascom DL 200 User Guide V1 3 33 7 Installation complet Click Finish ...
Страница 54: ...Tally Dascom DL 200 User Guide V1 3 41 4 Click the model name and enter Next to continue ...
Страница 56: ...Tally Dascom DL 200 User Guide V1 3 43 7 Check the port type in this case it is COM4 ...
Страница 58: ...Tally Dascom DL 200 User Guide V1 3 45 9 Then COM4 for the printer is checked ...
Страница 96: ...Tally Dascom DL 200 User Guide V1 3 83 5 Activate the Peeler in the printer settings ...


