T A L K S W I T C H C O N F I G U R A T I O N
8 1
Setting up TalkSwitch behind an existing PBX
1. Connect the PBX extension to one of TalkSwitch’s Line ports. You may do
this with all your TalkSwitch lines (1 PBX extension per line) depending
upon how many Auto Attendant ports you would like on the PBX.
2. Configure incoming calls on your PBX to ring the extensions you have
allocated to the TalkSwitch Lines.
3. Configure TalkSwitch’s Auto Attendants to answer after x rings (answer
immediately is used most commonly).
4. Record your Auto Attendants. The Auto Attendants should list the
extensions with the digit 7 in front of them.
Example: If you have chosen the PBX extension length to be 3 digits (and
John Doe’s extension is 111 on the PBX), the Auto Attendant should say: “To
speak with John Doe, press 7111…”. When 7111 is dialed, TalkSwitch puts
the caller on hold and transfers the caller to extension 111.
Intercom Calls
This setting is enabled by default. Any internal calls follows the Cascade
settings of the extension dialed. If it is disabled, no fall-through actions
takes place.
Fax Over IP
A VoIP enabled TalkSwitch supports fax detection and switching to G.711 for
transparent fax over IP.
Internal clock setting
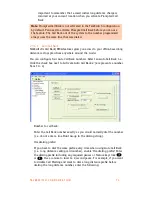
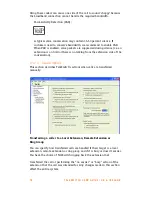
TalkSwitch can obtain time information from Caller ID for its internal clock.
If you have indicated that you do have Caller ID on any of the lines, this
option defaults to the active position. If it is de-activated, TalkSwitch
obtains its time information from the time and date set in the ‘Mode’ tab
under Automatic Mode Switching. TalkSwitch’s clock information is used for
Automatic Mode Scheduling and for internal Caller ID information when
intercom calls are placed in the office.


