


.
5
sWaP Nova
user guide
www.s-w-a-p.co.uk
Contents
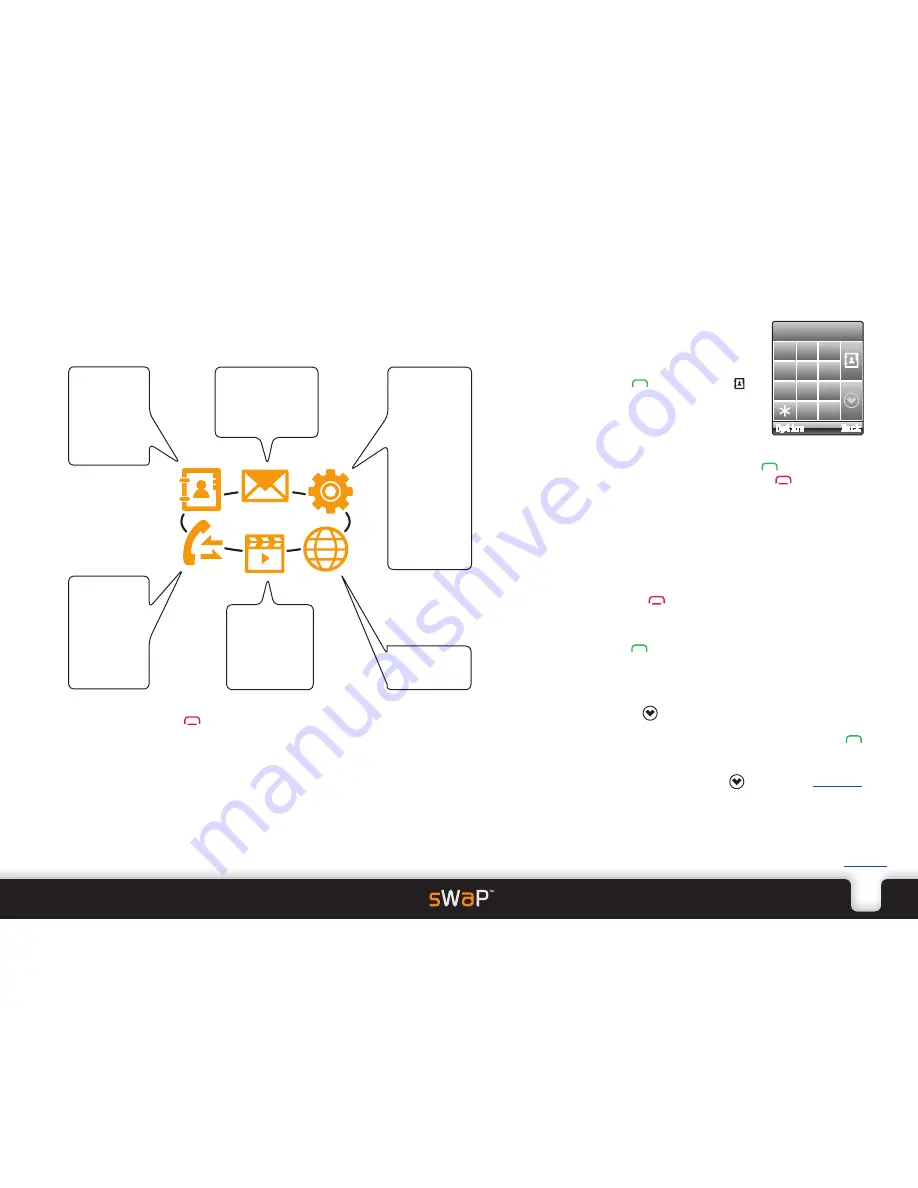
Menu map
From the clock face, tap the
Menu
option (or press the lower button) and then choose one
of six icons:
SETTINGS
Pen Calibration
Organizer
Calendar
To Do List
Alarm
World Clock
Calculator
Bluetooth
File Manager
User Profiles
Phone Setup
Call Setup
Network Setup
Security Setup
MEDIA
Photo Album
Video Player
Audio Player
Sound Recorder
FM Radio
WAP
WAP
Data Account
CALL LOG
Missed Calls
Dialed Calls
Received Calls
Delete Call Log
Call Time
SMS Counter
GPRS Counter
MESSAGES
SMS
MMS
Voice Mail Server
Broadcast Message
CONTACTS
Search Entry
Add Entry
Copy All
Delete
Caller Group
Settings
Tap the
Back
option or press
to exit from the menu and return to the clock face.
Dialling a call
1 From clock face, tap and hold the
screen for 2 seconds to show the
dial page:
2 Tap the phone number and then
press
Alternatively, tap to
access your Phone book.
1 2 3
4 5 6
7 8 9
0 #
Answering a call
• When the call alert sounds, press
to answer.
Alternatively, to reject the call, press
or tap
Reject
in the lower right corner.
Voice activation
• From the clock face, press and hold the down button
(located on the side of your sWaP Nova), and then say
either “CALL xyz” or “FIND xyz”, where xyz is a Phone
book contact name.
Ending a call
• Press the
button or tap
Option
in the lower left
corner and then tap
End
.
Viewing previously dialled calls
• Press
when no numbers are entered.
Using speed dial
• Tap and hold a number between
1
and
8
to dial one of
your most commonly used contacts*.
• Tap the
button to view your list of speed dial
contacts. Here you can edit an entry, delete an entry, or
call an entry (highlight the required entry and press
to place the call).
* To use speed dial, you need to first store your special
contact numbers - use the
button or see
Speed Dial
within the Phone Setup section.
Содержание Nova
Страница 1: ...Nova user guide www s w a p co uk ...


