REFERENCE
EN
REFERENCE
51
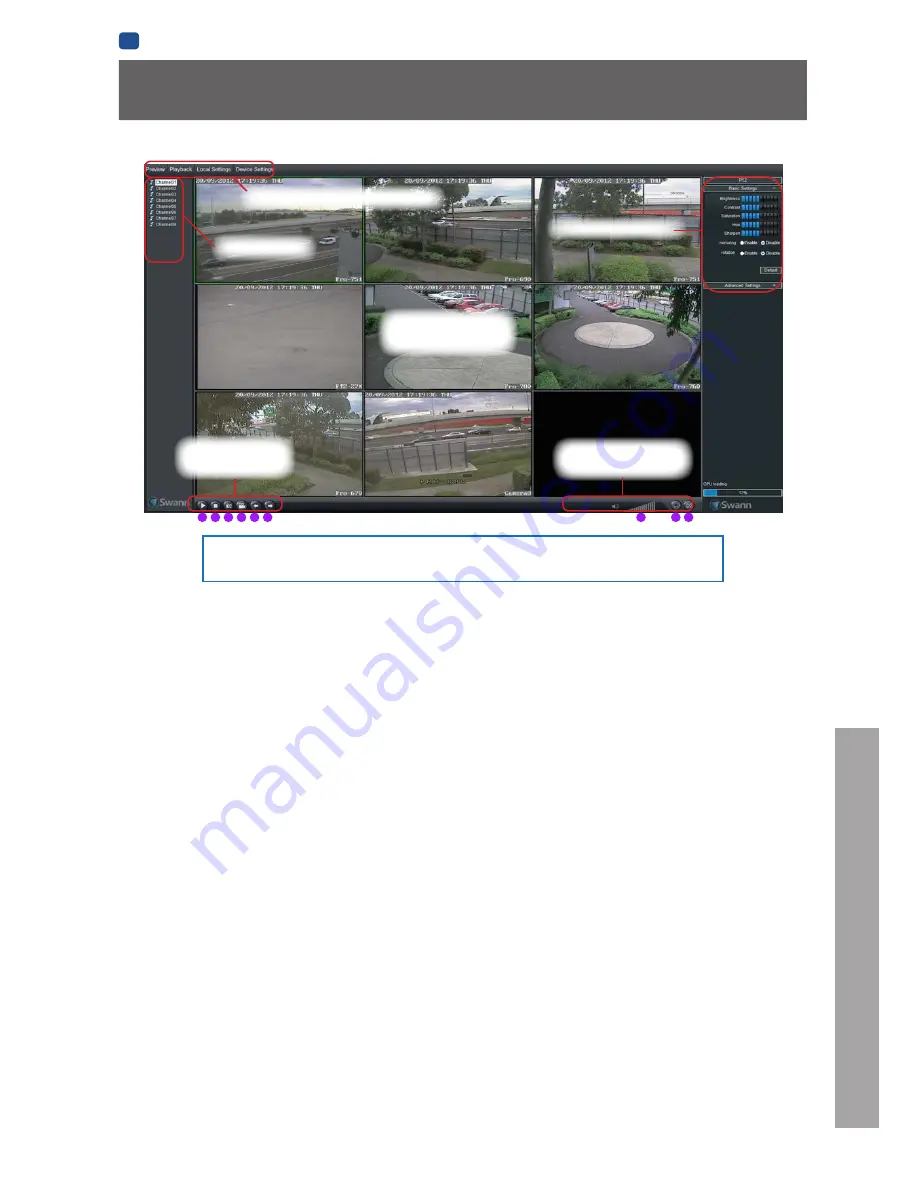
SwannView Link Windows Interface
1.
Start Live View
2.
Stop Live View
3.
Snapshot
4.
Video Capture
5.
Previous Page
6.
Next Page
7.
Volume
8.
Split-Screen
9.
Full Screen
Preview:
The default live-view screen of SwannView Link.
The screen layout emulates the multi-channel live view screen of the DVR, showing you images coming directly from your
cameras in near real-time (some delay is caused by the network/Internet connection you’re using to access the DVR).
You can select a single camera, or multi-channel viewing by selecting either the
Split-Screen (2 x 2)
or
Full Screen
viewing
mode buttons in the lower right corner. When in Split-Screen view, you can double-click the mouse on one of the cameras to
switch to a full screen view. Double-click again to return back to split-screen view.
Playback:
Opens the Playback interface, which operates in much the same way as the playback interface on the DVR itself.
Local Settings:
Defines how SwannView Link will manage and save footage and still images to your local PC.
Device Settings:
Allows access to the DVR’s settings. The configurable options are very similar to those you’ll find in the DVR
menus.
PTZ Controls:
These buttons are used to control PTZ devices (if connected to the DVR). They operate in the same way as those
you’ll find on the DVR itself.
Basic Settings:
You can alter the brightness, contrast, saturation and hue of your images here. They operate in the same way as
those in the DVR’s menu (see
“Display: Camera” on page 24
for more information).
Advanced Settings:
You can alter how each camera adapts to different light conditions for day and night.
CPU Loading:
How hard your computer is working to decode and display images as they arrive from the DVR. If this is
consistently high, you can try:
• disabling multiple monitor setups. The SwannView Link application doesn’t support hardware acceleration across multiple
monitors. Disabling all but your primary monitor will greatly increase performance.
• reduce the number of video feeds being displayed. Select a channel and click
Stop
to disable the monitoring.
• switch to single channel view.
Main Viewing
Area
Playback and
Backup Links
Viewing Modes &
Volume Control
Image Controls
Preview / Playback / Setup
Channel List
1 2 3 4 5 6
7
8 9
Содержание 960H
Страница 1: ...English 1 INSTRUCTION MANUAL EN 960H Digital Video Recorder 8 9 channel models ...
Страница 4: ...4 Chapter 1 Introduction ...
Страница 10: ...10 Chapter 2 Basic Setup ...
Страница 22: ...22 Chapter 3 Menu Functions ...
Страница 50: ...50 Chapter 4 Reference ...


