31
MENU
FUNC
TIONS
EN
MENU FUNCTIONS
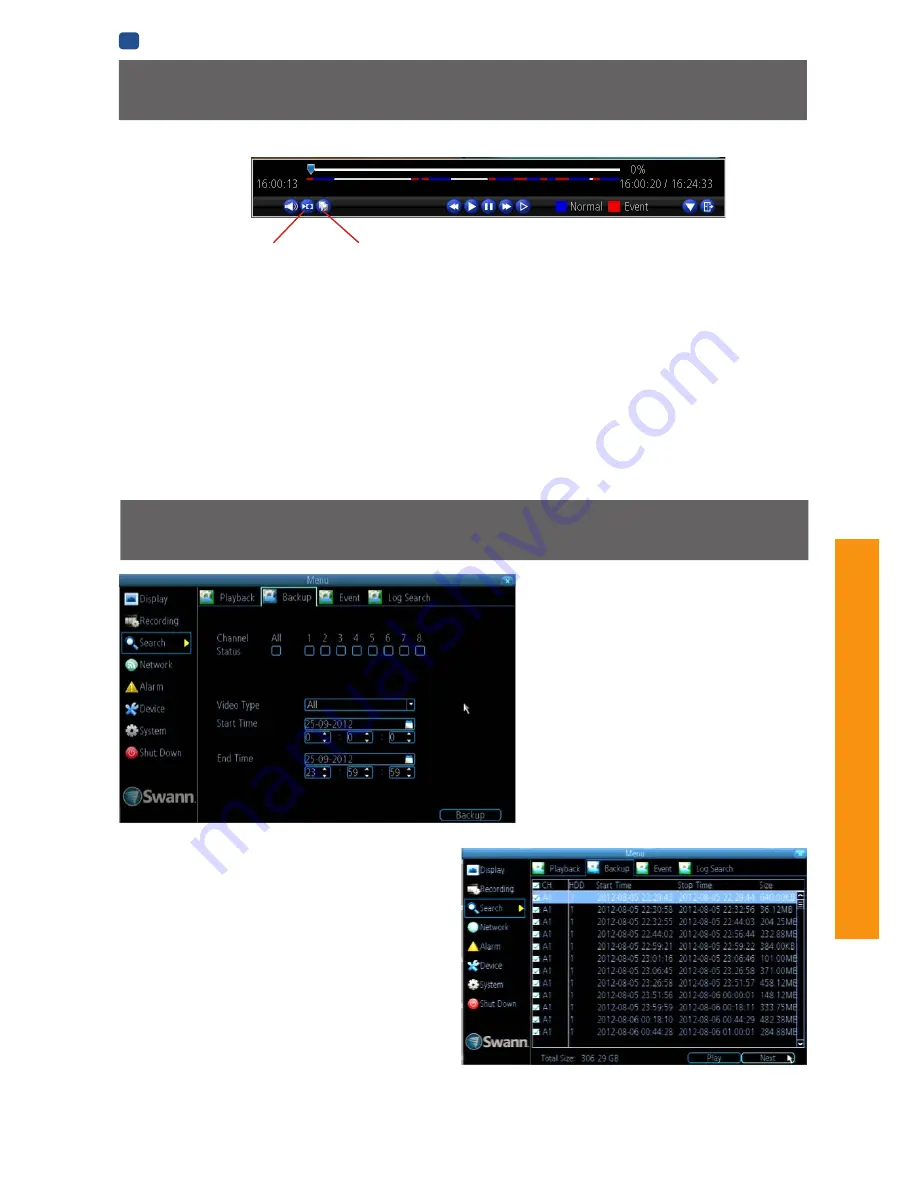
To backup footage:
• Connect a USB flash drive or a USB hard drive
(HDD) to the
USB
Port
on front of the DVR.
• Choose the camera(s) you want to backup
footage from.
• From the
Video Type
menu, select the type(s)
of video you want to backup.
• Set your
Start Time
and
End Time
.
• Select
Backup
.
Note:
The USB Ports are used for backing up
footage, or connecting the USB mouse. If you
want to use an external drive to record live video
footage, use the eSATA port on the rear of the DVR.
Specific Incident Backup
Search: Backup
The Backup File List
Displays a list of all the video events between the start and
end times you’ve selected. All the ticked files will be part of
the backup. Click
Next
to continue.
Refresh:
Looks for devices to which footage can be backed
up to. This will include USB flash drives or hard drives
connected to the front USB port.
AVI Format File:
When checked, the DVR will
transcode
the footage into a file format that can be played back on a
computer.
About transcoding to AVI:
Don’t be put off by the complex word - transcoding is just
a shortening of “translating code”. Transcoding, while a
straight-forward process, is
very processor intensive
.
You may notice significant slow-down (or apparent non-
responsiveness) on your DVR while the transcoding takes
place.
Say you’ve got an hour of video recorded as a single pack, and
the interesting bit is from 33:12 to 33:26. We’re sure you don’t
want to copy and convert the whole hour for those precious 14
seconds. So, there is a better way!
Shown above is the
Playback Control Interface
, explained
in more detail in the previous page (see
“The Playback
Interface” on page 30
). We’re going to discuss the functions
of two buttons only, the
Cut
button and the
Copy
button.
Note:
These don’t work
quite
the same way they do on a
computer! Those familiar with a video editor might recognize
the function of the Cut button as being similar to the
Mark In/
Out
function.
Cut:
Marks the Start Point and End Point for a specific
incident backup.
Press once
to mark an
start point
at the current position
marker. Typically, this will be immediately before the incident
you want to copy.
Let the video play past the incident you want to save, and then
press Cut again
to mark the
end point
.
Pressing
Cut
a third time will erase the previous start/end
points and begin the process again.
Copy:
Initiates a backup of everything between the start and
end points. You’ll see the backup dialog shown above, but with
only a single video listed.
If there is no start point marked, the backup will commence
from the start of the timeline. If no end point is marked, the
backup will continue until the end of the current timeline.
Cut
Copy
Содержание 960H
Страница 1: ...English 1 INSTRUCTION MANUAL EN 960H Digital Video Recorder 8 9 channel models ...
Страница 4: ...4 Chapter 1 Introduction ...
Страница 10: ...10 Chapter 2 Basic Setup ...
Страница 22: ...22 Chapter 3 Menu Functions ...
Страница 50: ...50 Chapter 4 Reference ...


