background image

39

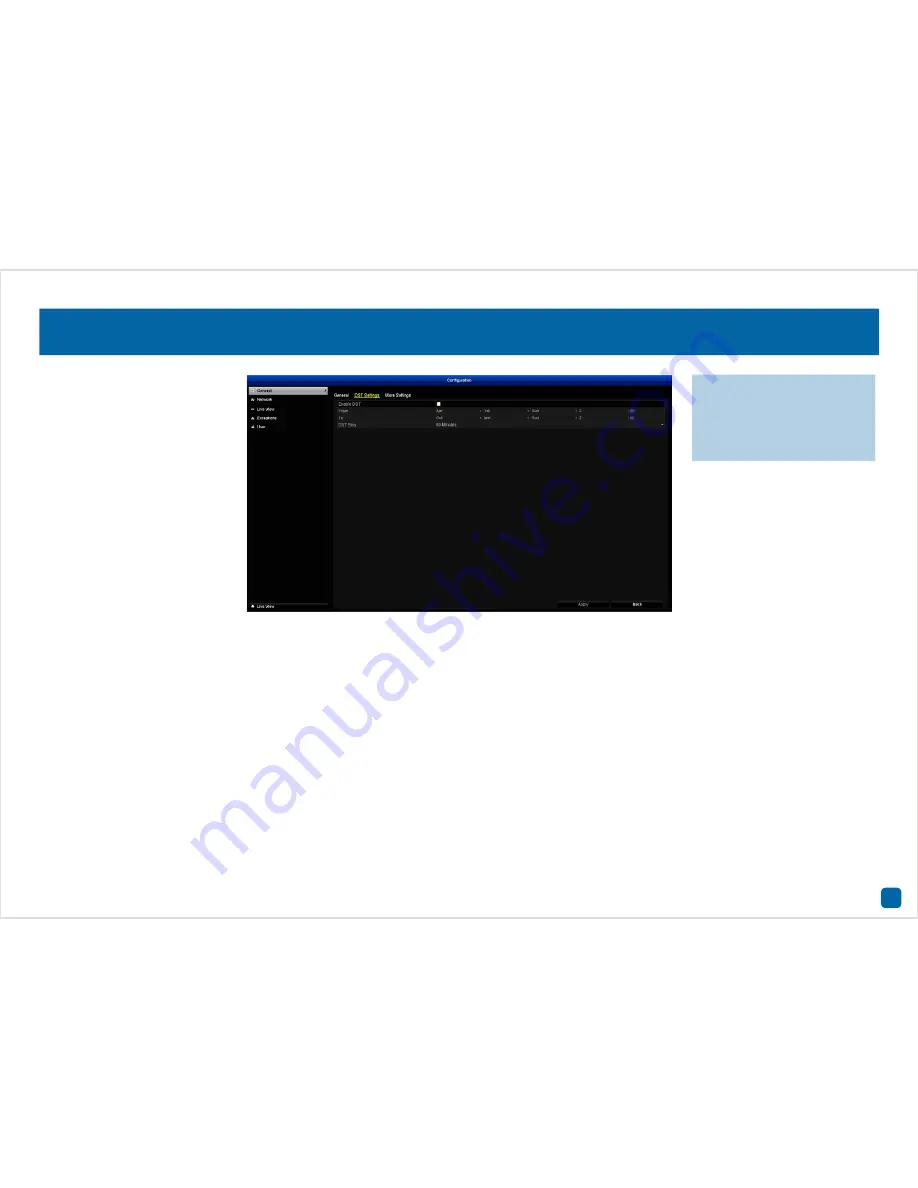
Configuration: General - DST Settings

The DST (Daylight Saving Time) function allows you to select the amount 
of time that Daylight Saving has increased by in your time zone.

Enable DST:

 Click the checkbox to enable.

From/To:

 Set when Daylight Saving starts and ends. For example, 2 a.m. 

on the first Sunday of a particular month.

DST Bias:

 This refers to the difference in minutes, between Coordinated 

Universal Time (UTC) and the local time. Select the amount of time that 
Daylight Saving has increased by in your time zone.


·

Don’t forget to click “Ap-

ply” to save settings.


·

Click the “Back” button to 

go back to the Menu.

Содержание 4-4350

Страница 1: ...Security Made Smarter 720P PRO SERIES HD Professional HD Security System INSTRUCTION MANUAL ...

Страница 2: ...e of all applicable laws and reg ulations that prohibit or limit the use of cameras and to comply with the applicable laws and regulations FCC Regulation for USA Prohibition against eavesdropping Except for the operations of law enforcement officers conducted under lawful authority no person shall use either directly or indirectly a de vice operated pursuant to the provisions of this Part for the ...

Страница 3: ... PTZ 22 Chapter 3 Recording Configuration 23 Record Schedule 24 Record Advanced 25 Record Holiday 26 Manual Record 27 Chapter 4 Playback 28 Playback Normal 29 Playback Event 30 Playback Tag 31 Playback Smart 32 Chapter 5 Export 34 Export Normal 35 Export Event 36 Chapter 6 Configuration 37 Configuration General General 38 Configuration General DST Settings 39 Configuration General More Settings 40...

Страница 4: ...m Maintenance 53 System Maintenance System Info 54 System Maintenance Log Information 55 System Maintenance Import Export 56 System Maintenance Upgrade 57 System Maintenance Default 58 System Maintenance Net Detect 59 System Maintenance HDD Detect 60 HDD General 61 HDD Advanced 62 Manual Video Quality Diagnostics 63 Glossary 64 Warranty Information 68 Helpdesk Technical Support 69 ...

Страница 5: ...yback and to export to a storage device such as a USB flash drive To maintain sys tem integrity a firmware upgrade can be performed when available and ac cess to the Shutdown menu to restart or safely turn off your DVR 5 26 02 2016 Fri 09 30 15 Camera 01 26 02 2016 Fri 09 30 15 Camera 02 26 02 2016 Fri 09 30 15 Camera 03 26 02 2016 Fri 09 30 15 Camera 04 ...

Страница 6: ...ss and contrast and ac cess to Video Quality Diagnostics to alert you to blurred images and ab normal brightness Controls for PTZ Motion Privacy Mask Video Tam pering and VCA Video Content Analysis are also available here Configuration Access and configure many settings of your DVR includ ing network settings adjusting the time date and creating or altering user accounts Maintenance For accessing ...

Страница 7: ... the res olution and bitrate as well as image settings for brightness contrast and saturation Your DVR has several con trols for Motion Video Tampering Video Loss Video Quality Diagnostics and VCA Video Content Analysis as well as the ability to apply one or more masks for privacy 7 26 02 2016 Fri 09 30 15 Camera 01 Camera 01 26 02 2016 Fri 09 30 15 ...

Страница 8: ...ng recorded We recommend changing this to 10 seconds 10s Post record Same as above but your DVR will continue recording after an event has occurred 30 seconds 30s is the recommended length Expired Time day Determines how long the video footage will remain on the hard drive without it being overwritten Record Audio Click the checkbox to record audio when selecting Video Audio for the stream type Vi...

Страница 9: ... be more choppy Video Quality The amount of data your DVR will use to stream live vid eo Lowering the quality reduces the amount of data required Please note When streaming live video the overall quality is de pendent on your internet connection and the encoding settings uti lised This is especially important when streaming multiple cam eras at the same time Lowering the resolution frame rate and ...

Страница 10: ...ow you would like the date to be displayed Time Format Choose between 24 hour and 12 hour time Display Mode Select how you would like the on screen display to ap pear on screen It s worth having a look at the different settings availa ble to see what best fits OSD Font Select the desired font size for the on screen display Use the mouse to click drag the on screen camera name and date to the desir...

Страница 11: ...anges the color mix of the image Sharpness Increase or decrease the overall sharpness of the image Increasing the sharpness will also increase the level of video noise that is visible Denoising Is a technique of reducing or removing image noise from a video signal This is especially useful for night time or low light environ ments Please note Any changes made to the image settings available will a...

Страница 12: ...R s internal buzzer send alerts to the SwannView Plus Windows software software must be running to receive alerts and to send an email Don t forget to click Apply to save settings Click OK to exit Sensitivity This setting is controlled by a slider allowing you to set a value between L low and H high The closer to H the slider is set the more sensitive the detection will be Using the mouse click th...

Страница 13: ...t s common for intruders to enter a home through an unlocked garage or by using a garage door opener in an unlocked car located in the driveway Avoiding False Triggers 1 A flag or foliage that is blown by the wind angle the camera so wind blown objects are out of the camera s view 2 Pets moving in front of the camera lower the sensitivity level and or point the camera into areas that are not parti...

Страница 14: ... Clear All button to clear all masks or click on a particular mask to clear Don t forget to click Ap ply to save settings Use the Copy function to apply all settings to the other cameras Click the Back button to go back to the Menu This function can be used to obscure all or part of your image for privacy up to four masks per camera You can also use this to minimize false triggers when motion is d...

Страница 15: ... send alerts to the SwannView Plus Windows software software must be running to receive alerts and to send an email Don t forget to click Apply to save settings Click OK to exit Sensitivity This setting is controlled by a slider allowing you to set a value between L low and H high The closer to H the slider is set the more sensitive it will be Don t forget to click Ap ply to save settings Use the ...

Страница 16: ...kage Action Options available are full screen monitoring enabling your DVR s internal buzzer send alerts to the SwannView Plus Windows software software must be running to receive alerts and to send an email Don t forget to click Apply to save settings Click OK to exit Don t forget to click Ap ply to save settings Use the Copy function to apply all settings to the other cameras Click the Back butt...

Страница 17: ...oo close to the camera or if someone is intentionally obscuring the image Abnormal Brightness Your DVR will alert you if the camera detects a bright source of light such as a torch or headlights Color Cast Your DVR will alert you if the camera detects an unwanted tint in the image which is caused by a change to the lighting white bal ance and if one or more color channels is strong or weak Use the...

Страница 18: ...tware software must be running to receive alerts and to send an email Don t forget to click Apply to save settings Click OK to exit Line Up to four detection lines can be enabled Direction Select a rule that you want to apply to the detection line A B Motion is detected when an object has crossed the line from both directions A B Motion is detected when an object has crossed the line from di recti...

Страница 19: ...ly You can apply a different rule to a detection line without having to redraw it 2 Clear Click this button to clear the selected detection line Sensitivity After drawing a detection line move the slider to increase or decrease the sensitivity level according to your needs The higher the number the more sensitive the detection line will be Some experimen tation may be needed to get the correct sen...

Страница 20: ...to four intrusion regions can be enabled Sensitivity After drawing an intrusion region increase or decrease the sensitivity level according to your needs The higher the number the more sensitive the intrusion region will be Some experimentation may be needed to get the correct sensitivity level Percentage Increase or decrease the total coverage area Some exper imentation may be needed to get the d...

Страница 21: ...n and click once to create the third point then move left and click once to create the fourth point see above right example 2 Full Screen Click this button to automatically draw a full screen in trusion region 3 Clear Click this button to clear the selected intrusion region When finished click the Apply button to save settings Please note It s very important that you change the recording schedule ...

Страница 22: ...22 Camera PTZ Even though the PTZ menu is accessible the PTZ functions and controls are not compatible with this DVR model Camera 01 26 02 2016 Fri 09 30 15 ...

Страница 23: ...e available in the Record menu thatisaccessiblefromtheMenu From here you can access and change the default recording schedule present ed as a 24 hour 7 days a week grid and is color coded for each camera con nected as well as enabling a schedule when holidays are taken ...

Страница 24: ...Detection for the camera that you ve selected to edit None As the name suggests your DVR will not record anything To edit using the pen tool select the recording type Continuous Motion or VCA then move the pen tool over the schedule Click and hold the mouse then drag the pen tool over the time segments that you want to change You can also edit each time segment individually In the above example Mo...

Страница 25: ... from running out of storage space It s recommended to leave this option enabled and to copy important events to a USB flash drive before they are overwritten Don t forget to click Apply to save settings Click the Back button to go back to the Menu Don t forget to click Ap ply to save settings Click the Back button to go back to the Menu ...

Страница 26: ... 3 Enable Click the checkbox to enable 4 Mode Select by date week or month 5 Start Date Select a start date 6 End Date Select an end date When finished click the Apply button to save settings then click OK to continue There are times when you don t want your DVR to record using its regular schedule Per haps you require it to record more or less or at different times This function allows you to def...

Страница 27: ...at each camera has no recording schedule enabled and the yellow ON button indicates that each camera is recording manually Click the button next to each camera to change the recording status Continuous Your DVR will constantly record for any given period Motion Detection This is the default recording schedule Your DVR will only record when it detects something moving in front of one or more camera...

Страница 28: ...that are stored on your DVR s hard drive You have the choice of selecting either Normal Event Tag or Smart Playback When playing videos you can add Tags to help you identify people or objects and you can then do a search on those Tags 18 04 2016 Mon 11 33 50 Camera 01 18 04 2016 Mon 09 41 05 Camera 01 ...

Страница 29: ...s allows you to edit or delete tags that you have added to the video 7 Zoom In Click this to enter digital zoom mode Click the video then use the PIP picture on picture screen on the bottom right to select a different area to zoom in to Right click to exit 8 Play controls These are your play pause rewind forward previous day and next day controls 9 Zoom In Out Zoom in and out of the timeline for p...

Страница 30: ...o a USB flash drive Select the save location then click Export Click OK to confirm 4 Add default tag Tagging allows you to record information such as location or people within the video Multiple tags can be added 5 Add customized tag As above but you can choose your own tag name 6 Tag management This allows you to edit or delete tags that you have added to the video 7 Zoom In Click this to enter d...

Страница 31: ...different area to zoom in to Right click to exit 6 Play controls These are your play pause rewind forward previous day and next day controls 7 Zoom In Out Zoom in and out of the timeline for precise control 1 2 3 4 5 6 7 18 04 2016 Mon 14 47 52 Camera 01 Select from one or more camera s that you would like to search on Input the name for the Tag be careful as it is case sensitive select a start ti...

Страница 32: ... the timeline for precise control 2 4 1 3 18 04 2016 Mon 11 51 35 Camera 01 Select from one or more camera s that you would like to display for playback Thecoloreddatesindicate video that is recorded on those particular days Click the Play button or double click a date to play Smart mode allows you to define a specific area of the video which then makes it easier to find what you are searching for...

Страница 33: ...ions on Line Crossing Detection and Intrusion Detection see page 18 and page 20 respectively 2 In the above right example Motion Detection has been selected Click and drag to select the area that you want to define Multiple areas can be defined but only one detection type can used at a time Click the green Search button to start searching The video will automatically start playing Sections not mat...

Страница 34: ...the abil ity to save important events to a USB flash drive As the Overwrite option is enabled by default it s important to copy these important events before they are overwritten You can play these video files either on your DVR or your computer ...

Страница 35: ...our search crite ria Your search criteria will be listed 2 Double click a file to play 3 Click the checkbox to select files that you want to export 4 Insert your USB flash drive to the USB port 5 Click the Export button select a save location then click Export again 6 You have the choice of exporting a video file or player program You can use the player program to play the video file on your compu...

Страница 36: ...teria will be listed 2 Click the checkbox next to the time period that you want to export Click the Details button to display videos contained within that time period Double click a file to play 3 Click the checkbox to select files that you want to export 4 Insert your USB flash drive to the USB port 5 Click the Export select a save location then click Export 6 You have the choice of exporting a v...

Страница 37: ... is con figured and how it operates Some of the options such as Resolution Time Zone Email Daylight Saving and password creation are configured during the Setup Wizard For experi enced network users your DVR pro vides options that can be configured to suit your particular requirements ...

Страница 38: ...e calendar icon to select the correct date System Time If the time is not correct click the clock icon to select the correct time The time is displayed in 24 hour time Mouse Pointer Speed Move the slider to increase or decrease the mouse pointer speed Enable Wizard Your DVR will automatically run the Setup Wizard when it is turned on the Setup Wizard itself contains the option to disable it Enable...

Страница 39: ...x to enable From To Set when Daylight Saving starts and ends For example 2 a m on the first Sunday of a particular month DST Bias This refers to the difference in minutes between Coordinated Universal Time UTC and the local time Select the amount of time that Daylight Saving has increased by in your time zone Don t forget to click Ap ply to save settings Click the Back button to go back to the Men...

Страница 40: ...more relevant or leave the default name Device No The device number of your DVR We recommend that you leave the default setting Auto Logout Here you can change the time your DVR will exit the Menu if there is no activity Menu Output Mode The Menu will always appear on the display your DVR is connected to Don t forget to click Ap ply to save settings Click the Back button to go back to the Menu ...

Страница 41: ...ace the older IPv4 system MAC Address The MAC Media Access Control address is hardwired into the hardware and can t be changed MTU Bytes The MTU Maximum Transmission Unit is the size of the largest datagram that can be sent over a network Preferred DNS Server A DNS Domain Name System server is used to translate a website address to its IP address Alternate DNS Server A backup DNS server UID The UI...

Страница 42: ... Name Enter the domain name that is hosted on your account For example username swanndvr net User Name Enter the username host name for your account Password Enter the password for your account Click the Test button to confirm your account details After a short moment you should see Current State OK Don t forget to click Ap ply to save settings Click the Back button to go back to the Menu Prior to...

Страница 43: ...tly con nected to the Internet via a DSL modem This is an option for advanced users only Username Enter the username for your DSL account provider Password Enter the password for your DSL account provider Don t forget to click Ap ply to save settings Click the Back button to go back to the Menu ...

Страница 44: ...ck with a time server This gives it the ability to con stantly have an accurate time setting your DVR will periodically sync time automatically Obviously this is very important for a security sys tem and is enabled by default Don t forget to click Ap ply to save settings Click the Back button to go back to the Menu ...

Страница 45: ...time that must elapse after your DVR sends an email before it will send another Adjust accordingly Don t forget to click Ap ply to save settings Click the Back button to go back to the Menu As an email account was configured for your DVR during the Setup Wizard an ex planation of the vari ous options available will not be covered here However there are two options that were not available to select...

Страница 46: ...ol for managing devices over an IP network It is mainly used in network management systems to monitor network attached devices For the day to day function of your DVR SNMP is not required to be enabled Don t forget to click Ap ply to save settings Click the Back button to go back to the Menu ...

Страница 47: ...u re having issues streaming video to your mobile device or your mobile service provider is blocking access we recommend to change this to 5554 Do not change this if everything is working Server Port This is the internal port that your DVR will use to send information through This particular port number 8000 is not used by many devices however if you have another DVR like device you may need to ch...

Страница 48: ...rm Host Port and Multicast IP functions are not compatible with this DVR Any changes to the Server Port HTTP Port and RTSP Port on the previ ous tab will be reflected here Don t forget to click Ap ply to save settings Click the Back button to go back to the Menu ...

Страница 49: ...ndent on how many video channels your DVR has Dwell Time The time in seconds to dwell on a video channel when en abling Start Auto switch on the Menu Bar This only works when Live View mode is set to Single Screen Enable Audio Output Click the checkbox to enable the audio output connection on your DVR Volume Click to change the volume level Event Output All events will display on your DVR s VGA or...

Страница 50: ...l channels button to start the Live View of all cameras connected Press the Stop live view of all channels but ton to stop the Live View of all cameras connected Pressing the Stop live view of all channels button means you will not see a real time im age in Live View mode 5 When selecting different Live View modes you can click the Next and Previous buttons to change the viewing windows available ...

Страница 51: ... DVR detects a conflicting IP address Illegal Login When your DVR detects an incorrect login Input recording resolution mismatch When the camera connected is not capable of matching the recording resolution selected Record Exception When there is one or more errors during capture such as a hard drive failure or if the hard drive quota has been changed Audible Warning This will enable your DVR s in...

Страница 52: ...d enable Change Password and then input your new password Click OK to save 2 If you have multiple user accounts that you have created click De lete to remove them 3 Click the Add button to create additional user accounts You can create multiple admin accounts or guest accounts Guest accounts are restricted to a limited amount of options only Click the Back button to go back to the Menu ...

Страница 53: ...nd options that have been selected for your DVR to function Each action that your DVR performs as well as events detected are logged which you can search view and export You can also install a firmware upgrade when avail able format the hard drive and per form a factory reset in case of error ...

Страница 54: ...es the information here and in the subsequent tabs will not be needed for general use of your DVR however one of our Swann Helpdesk Technical Support staff may ask you to access this if you call for assistance Click the Back button to go back to the Menu ...

Страница 55: ...ontained in the log 5 Insert your USB flash drive to the USB port 6 Select a log file that you want to copy click the Export button select a save location then click Export again 7 Click OK to finish and right click to exit To export all log files without searching click the Export All button select a save location then click Export again Click the Back button to go back to the Menu Each action th...

Страница 56: ... to exit Importing your configuration settings 1 Insert your USB storage device to the USB port 2 Select the location of the file then click Import Your DVR will now restart to apply your configuration settings This function gives you the option to import or export your current configuration settings This comes in handy as it will save you time configuring your DVR after performing a fac tory rese...

Страница 57: ... upgrade 1 Insert your USB flash drive to the USB port 2 Select the location of the file then click Upgrade Your DVR will re start when finished FTP We don t recommend using this option in case your DVR is discon nected from your network during the upgrade Click the Back button to go back to the Menu ...

Страница 58: ...efaults This option will reset all settings that have been changed Factory Defaults This option will perform a factory reset All settings will go back to their default settings and information such as password and email settings will be removed Your DVR will restart after pressing the OK button Click the Back button to go back to the Menu ...

Страница 59: ...e of your DVR however one of our Swann Helpdesk Technical Support staff may ask you to access this if you call for assistance Click the Back button to go back to the Menu This function allows you to check network traffic and to obtain real time information from your DVR such as sending and receiving network detection and network status ...

Страница 60: ...Helpdesk Technical Support staff may ask you to access this if you call for assistance This function displays technical information of the hard drive in stalled as well as the ability to detect bad sectors a bad sector is simply a cluster of storage space that ap pears to be defective Don t forget to click Ap ply to save settings Click the Back button to go back to the Menu ...

Страница 61: ...ease note From time to time we recommend that you format the hard drive This ensures that your DVR runs efficiently and maintains system integrity Connect a USB flash drive to copy events that you want to save Re member formatting the hard drive erases all your recordings If a new hard drive has been installed inside your DVR you need to for mat the drive before it can be used This function allows...

Страница 62: ...llocation is made Record on HDD Group In Group mode select which camera is allocated to hard drive 1 or 2 if you have multiple hard drives installed Enable HDD Sleeping This function is only applicable if you have mul tiple hard drives installed Having this option enabled will reduce wear and tear and will increase the overall lifespan of the second drive This function allows you to configure a qu...

Страница 63: ...agnostics Diagnose If you have Video Quality Diagnostics enabled on one or more cameras click this button to display the diagnostic result and diagnostic time for each camera selected Click the Back button to go back to the Menu ...

Страница 64: ...into Internet protocol addresses For example www google com will have a DNS server address that is equivalent to 74 125 224 72 For this option the DNS server is automatically provided by your Internet service provider Auto focus Will adjust the lens of your camera to focus on an object being viewed Bit rate The amount of data that your DVR will use to record video The higher the bitrate the more s...

Страница 65: ...twork to the outside network that is providing access to the Internet Hardware A physical device Your DVR is hardware HDD Hard Disk Drive Is a storage device located inside your DVR It is where all data is kept saved and stored HTTP Port HTTP stands for Hypertext Transfer Protocol This port is used to log into the web browser interface of your DVR using a web cli ent such as Internet Explorer Hue ...

Страница 66: ... record Instructs your DVR to record for a set period of time after an event has occurred PPPoE Point to Point Protocol over Ethernet is the most common method that your router uses to login to your ISP to enable your internet connection This setting also exists on your DVR but is only for advanced users as the configuration required is difficult to complete and requires a modem only device or a m...

Страница 67: ...formation to its clients on the net work Time Zone Is a region that observes a uniform standard time for le gal commercial and social purposes It is convenient for areas in close communication to keep the same time UID It stands for Unique IDentifier and is an alphanumeric string that is associated with a single entity within a given system By entering your DVR s UID into the SwannView Link app an...

Страница 68: ...in The warranty does not cover any incidental accidental or consequential damages arising from the use of or the inability to use this product Any costs associated with the fitting or removal of this product by a tradesman or other person or any other costs associated with its use are the respon sibility of the end user This warranty applies to the original purchaser of the product only and is not...

Страница 69: ...tech swann com Technical Support Website support swann com Telephone Helpdesk USA Toll Free 1 800 627 2799 USA Parts Warranty 1 800 627 2799 M F 9am 5pm US PT AUSTRALIA 1800 788 210 NEW ZEALAND Toll Free 0800 479 266 UK 0808 168 9031 M4350140416E Swann 2016 ...

Отзывы: