30
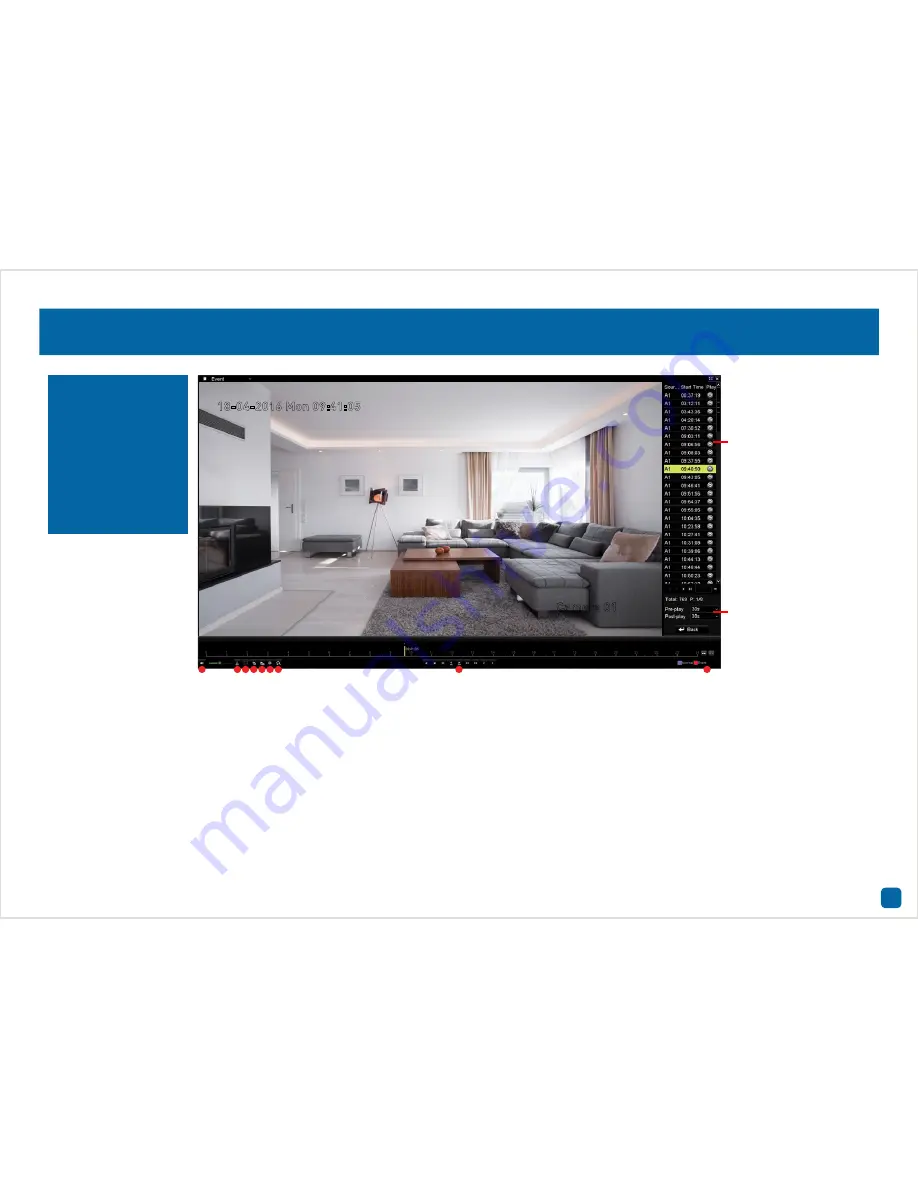
Select from one or more
camera(s) that you would
like to search on. Select
a start time & date and
end time & date then click
the “Search” button. Your
DVR will start searching
and will then display
videos fitting your search
criteria. Double-click a
file to play.
You can change the
Pre-play and Post-play
times according to your
needs. Click “Back” to
commence a new search.
Playback: Event
1. Mute:
Mutes audio playback. Click and hold the slider to change the
volume level.
2. Start clipping:
This button allows you to set mark in and out points
on your video which you can then export to a USB flash drive. When you
have selected a video to play, press this button at the mark in point and
press it again at the mark out point.
3. Save clip(s):
Click this to save your clip(s) to a USB flash drive. Select
the save location then click “Export”. Click “OK” to confirm.
4. Add default tag:
Tagging allows you to record information such as
location or people within the video. Multiple tags can be added.
5. Add customized tag:
As above but you can choose your own tag name.
6. Tag management:
This allows you to edit or delete tags that you have
added to the video.
7. Zoom In:
Click this to enter digital zoom mode. Click the video then
use the PIP (picture-on-picture) screen on the bottom right to select a
different area to zoom in to. Right-click to exit.
8. Play controls:
These are your play, pause, rewind, forward, previous
day and next day controls.
9. Zoom In/Out:
Zoom in and out of the timeline for precise control.
1
2 3 4 5 6 7
8
9
18-04-2016 Mon 09:41:05
Camera 01
Event mode gives you
the ability to search for
video footage that has
one or more events over
a set period of time. For
example, from October
to November with a
start and end time of
your choice.


