29
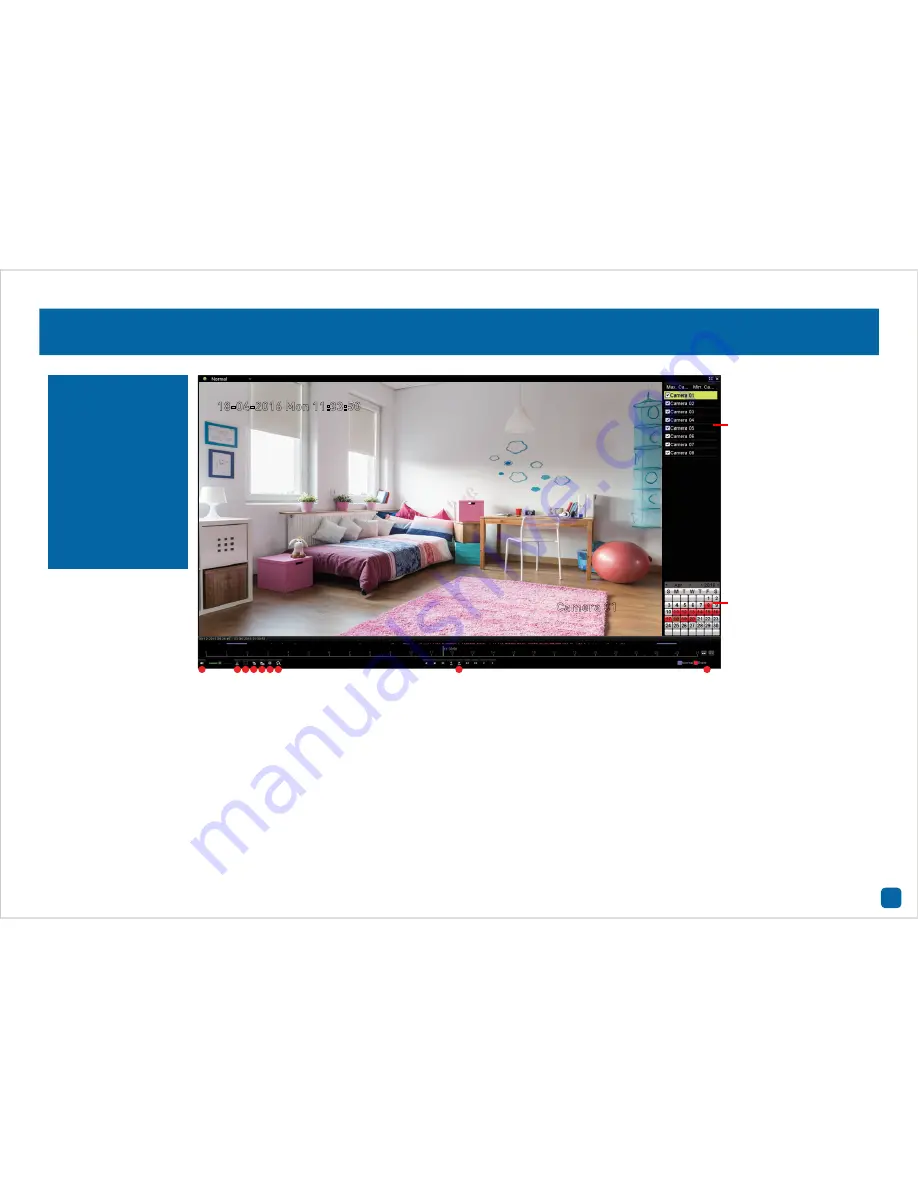
Playback: Normal
1. Mute:
Mutes audio playback. Click and hold the slider to change the
volume level.
2. Start clipping:
This button allows you to set mark in and out points
on your video which you can then export to a USB flash drive. When you
have selected a video to play, press this button at the mark in point and
press it again at the mark out point.
3. Save clip(s):
Click this to save your clip(s) to a USB flash drive. Select
the save location then click “Export”. Click “OK” to confirm.
4. Add default tag:
Tagging allows you to record information such as
location or people within the video. Multiple tags can be added.
5. Add customized tag:
As above but you can choose your own tag name.
6. Tag management:
This allows you to edit or delete tags that you have
added to the video.
7. Zoom In:
Click this to enter digital zoom mode. Click the video then
use the PIP (picture-on-picture) screen on the bottom right to select a
different area to zoom in to. Right-click to exit.
8. Play controls:
These are your play, pause, rewind, forward, previous
day and next day controls.
9. Zoom In/Out:
Zoom in and out of the timeline for precise control.
18-04-2016 Mon 11:33:50
Camera 01
1
2 3 4 5 6 7
8
9
Select from one or more
camera(s) that you
would like to display for
playback.
The colored dates indicate
video that is recorded on
those particular days.
Click the “Play” button
or double-click a date to
play.
Normal mode gives
you the ability to play
video from one or more
camera(s) on a given
day. The blue segments
located on the timeline
(underneath the video)
indicate a Normal
recording and the red
segments indicate an
Event recording.


