6-6
S
UPER
S
ERVER 1027R-WC1R/1027R-WC1RT User's Manual
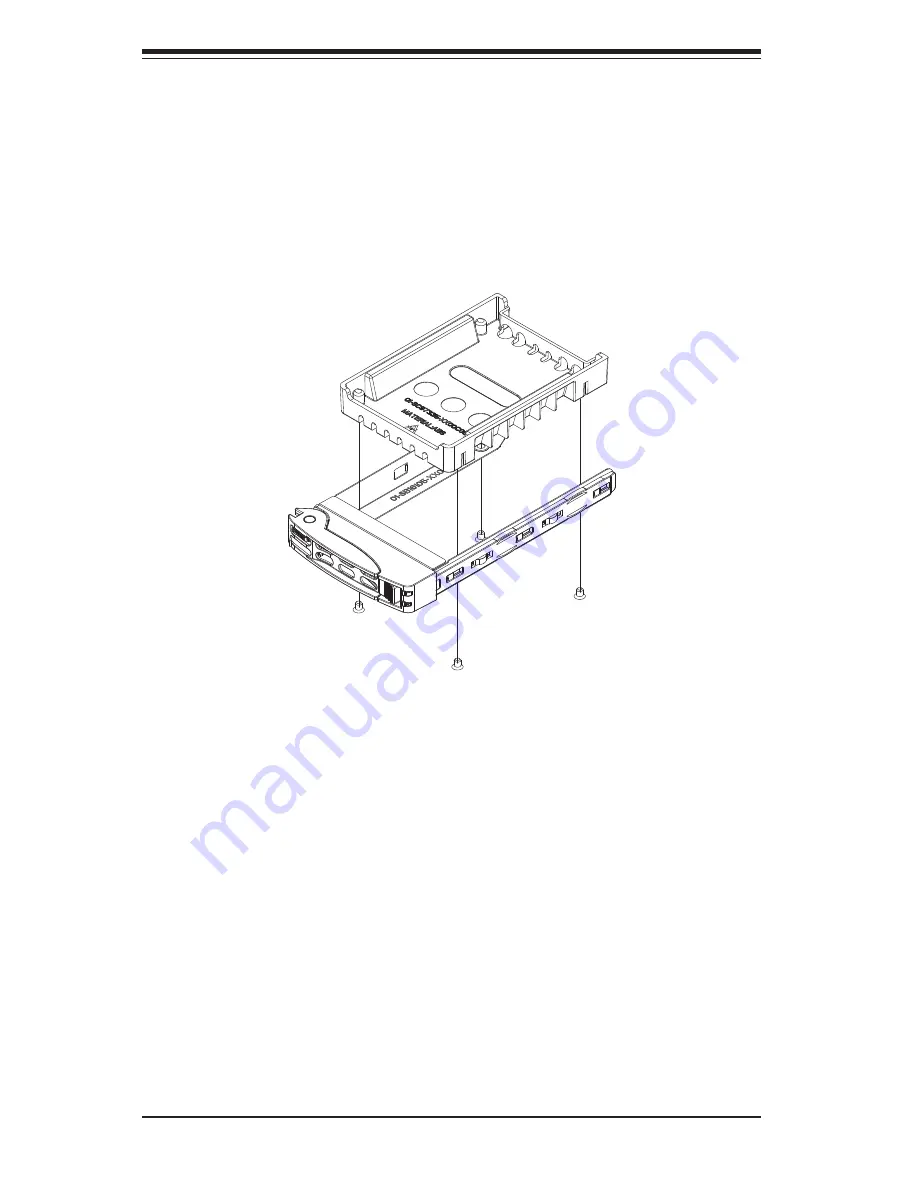
4. Insert the drive carrier into its bay, keeping the carrier oriented so that the
hard drive is on the top of the carrier and the release button is on the right
side. When the carrier reaches the rear of the bay, the release handle will
retract.
5. Push the handle in until it clicks into its locked position
Figure 6-3. Installing a Drive into a Carrier
Removing a Hard Drive (Figure 6-4)
1. To remove a carrier, push the release button located beside the drive LEDs.
2. Swing the handle fully out and use it to pull the unit straight out.
Note:
Your operating system must have RAID support to enable the hot-plug ca-
pability of the hard drives.
Caution:
Regardless of how many hard drives are installed, all drive carriers must
remain in the drive bays to maintain proper airfl ow.
Enterprise level hard disk drives are recommended for use in Supermicro chassis
and servers. For information on recommended HDDs, visit the Superm
icro
Web site
at http://www.supermicro.com/products/nfo/fi les/storage/SAS-CompList.pdf
Содержание SUPERSERVER 1027R-WC1R
Страница 1: ...SUPERSERVER 1027R WC1R 1027R WC1RT SUPER USER S MANUAL 1 0...
Страница 5: ...Notes Preface v...
Страница 14: ...1 6 SUPERSERVER 1027R WC1R 1027R WC1RT User s Manual Notes...
Страница 48: ...4 20 SUPERSERVER 1027R WC1R 1027R WC1RT User s Manual Notes...
Страница 76: ...5 28 SUPERSERVER 1027R WC1R 1027R WC1RT User s Manual Notes...
Страница 80: ...6 4 SUPERSERVER 1027R WC1R 1027R WC1RT User s Manual Figure 6 2 Replacing a System Fan 1 3...
Страница 116: ...A 2 SUPERSERVER 1027R WC1R 1027R WC1RT User s Manual Notes...
Страница 119: ...B 3 Appendix B System Specifications Notes...


