5-8
S
UPER
S
ERVER 6026TT-TF/IBXF/IBQF User's Manual
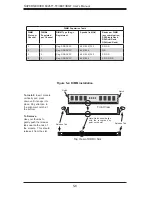
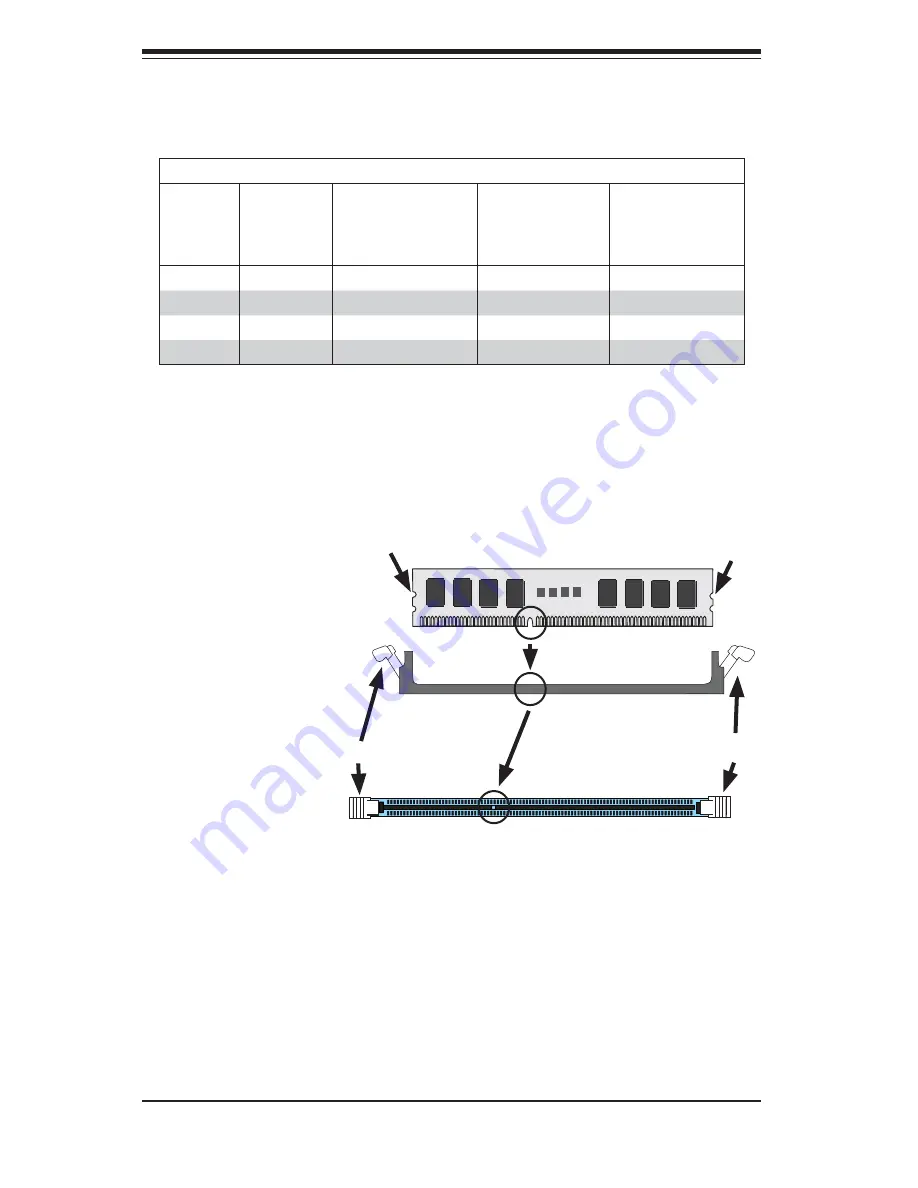
To Install:
Insert module
vertically and press
down until it snaps into
place. Pay attention to
the alignment notch at
the bottom.
To Remove:
Use your thumbs to
gently push the release
tabs near both ends of
the module. This should
release it from the slot.
Figure 5-2. DIMM Installation
Top View of DDR3 Slot
Release Tab
Release Tab
Note: Notch should align
with the receptive key
point on the slot.
Notch
Notch
Front View
DIMM Population Table
DIMM
Slots per
Channel
DIMMs
Populated
per Channel
DIMM Type (Reg.=
Registered)
Speeds (in MHz)
Ranks per DIMM
(any combination;
SR=Single Rank,
DR=Dual Rank,
QR=Quad Rank)
2
1
Reg. DDR3 ECC
800,1066,1333
SR, DR
2
1
Reg. DDR3 ECC
800,1066,
QR
2
2
Reg. DDR3 ECC
800,1066,1333
SR, DR
2
2
Reg. DDR3 ECC
800,1066
SR, DR, QR
Содержание SUPERSERVER 6026TT-IBQF
Страница 5: ...v Preface Notes ...
Страница 16: ...1 8 SUPERSERVER 6026TT TF IBXF IBQF User s Manual Notes ...
Страница 54: ...5 22 SUPERSERVER 6026TT TF IBXF IBQF User s Manual Notes ...
Страница 64: ...6 10 SUPERSERVER 6026TT TF IBXF IBQF User s Manual Release Tab Figure 6 8 Removing the Power Supply ...
Страница 92: ...7 28 SUPERSERVER 6026TT TF BIXF BIQF User s Manual Notes ...
Страница 94: ...A 2 SUPERSERVER 6026TT TF IBXF IBQF User s Manual Notes ...
Страница 99: ...C 3 Appendix C System Specifications Notes ...

