6-4
S
UPER
S
ERVER 1028UX-TR4 User's Manual
Installing a Drive
1. Remove the dummy drive, which comes pre-installed in the drive carrier, by
removing the screws securing the dummy drive to the carrier. These screws
are not used to mount the actual hard drive.
2. Insert a drive into the carrier with the PCB side facing down and the connector
end toward the rear of the carrier. Align the drive in the carrier so that the screw
holes of line up. Note that there are holes in the carrier marked “SATA” to aid
in correct installation.
3. Secure the drive to the carrier with four M3 screws as illustrated below. These
screws are included in the chassis accessory box.
6-5 Installing Drives
The hard disk drives are mounted in drive carriers to simplify their installation and
removal from the chassis. These carriers are accessible from the front of the chassis
without removing the chassis cover or powering down the system. These carriers
also help promote proper airflow for the drive bays. For this reason, even carriers
without drives installed must remain in the chassis during system operation.
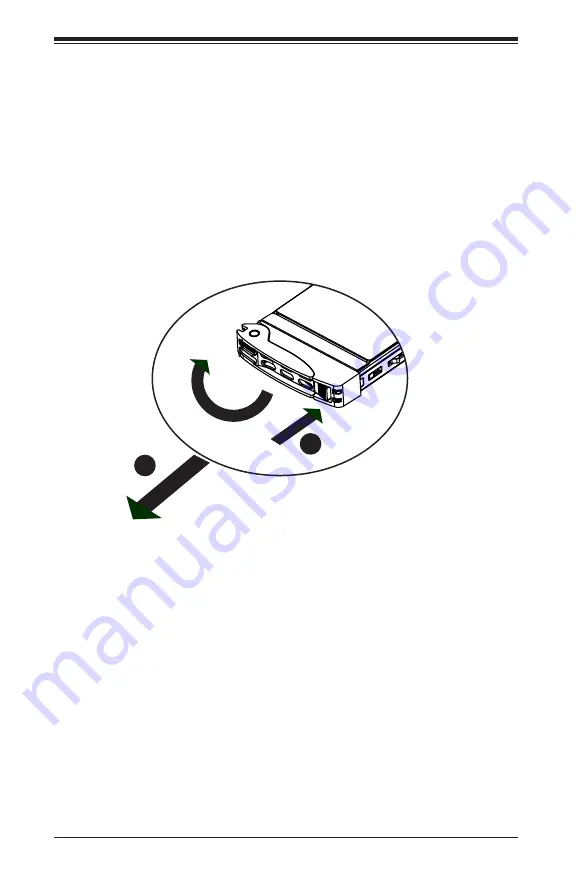
Removing Drive Carriers from the Chassis
1. Press the release button on the drive carrier. This extends the drive carrier handle.
2. Use the handle to pull the drive carrier out of the chassis.
Figure 6-3. Removing a Drive Carrier
1
1
1
2
Содержание SUPERSERVER 1028UX-TR4
Страница 1: ...User s Manual Revision 1 0a SUPERSERVER 1028UX TR4...
Страница 5: ...v SUPERSERVER 1028UX TR4 User s Manual Notes...
Страница 14: ...1 6 SUPERSERVER 1028UX TR4 User s Manual Notes...
Страница 24: ...2 10 SUPERSERVER 1028UX TR4 User s Manual Notes...
Страница 72: ...5 24 SUPERSERVER 1028UX TR4 User s Manual Notes...
Страница 84: ...6 12 SUPERSERVER 1028UX TR4 User s Manual Notes...
Страница 126: ...A 2 SUPERSERVER 1028UX TR4 User s Manual Notes...
Страница 130: ...B 4 SUPERSERVER 1028UX TR4 User s Manual Notes...


