


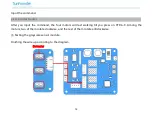


36
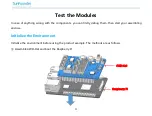
Input the commands:
picar-4wd
test servo
The arm of servo will rotate to the angle of 0, meanwhile the monitor will print the readings of ultrasonic
module once.
Note: You need to boot this function to check the direction of servo’s output axis when you assemble the
car and the servo.
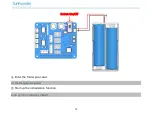
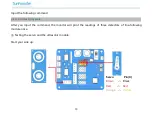
Power Supply Detection
You can use the following command to get the supply voltage.
picar-4wd
power-read
The supply voltage ought to be 6V~8.5V to ensure that the car works well.
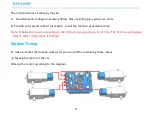
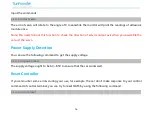
Reset Controller
If you encounter some errors during your use, for example, the car don’t make response to your control
command of control terminal, you can try to reset HATS by using the following command.
picar-4wd
soft-reset
Содержание PiCar-4WD
Страница 6: ...1 Component List Structural Plates ...
Страница 7: ...2 Mechanical Parts ...
Страница 8: ...3 Electronic Parts ...
Страница 9: ...4 Other Parts ...
Страница 10: ...5 ...
Страница 20: ...15 Step 9 Set country region language and time zone and then click next again ...
Страница 21: ...16 Step 10 Input the new password of Raspberry Pi and click Next ...
Страница 22: ...17 Step 11 Connect the Raspberry Pi to WIFI and click Next ...
Страница 23: ...18 Step 12 Retrieve update ...
Страница 47: ...42 Assembling Nylon Standoffs M2 5 6 Screw M2 5 8 6mm Nylon Standoff ...
Страница 48: ...43 Assembling Top Plate and Bottom Plate M3 8 Screw M3 30mm Nylon Standoff M3 8 Screw ...
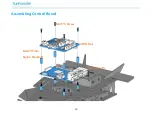
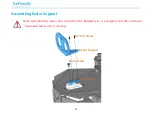
Страница 49: ...44 Assembling Spoiler Spoiler ...
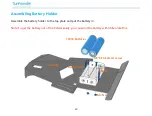
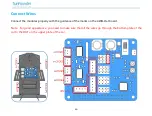
Страница 50: ...45 Assembling Control Board 4WD Hat M2 5 11mm Nylon Standoff M2 5 6 Screw Raspberry Pi ...
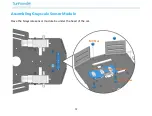
Страница 53: ...48 Assembling Ultrasonic Sensor Module M1 4 8 Screw M1 4 Nut Ultrasonic Module ...
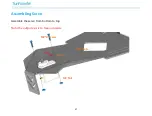
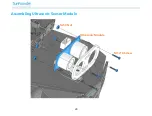
Страница 54: ...49 Assembling Wheels finished ...
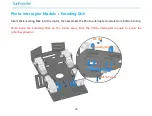
Страница 56: ...51 Interface Introduction ...
Страница 63: ...58 ...
Страница 67: ...62 Python Example Code Analysis Program Structure Framework ...