background image


111


  4. Does Media Bank support multi-partitions


    A

Yes, no problem it does. 

  5. Why can I not play some AVI files


    A

Some AVI files use non standard video codecs. Media Bank has all the standard video codecs loaded in the   

     firmware. You need to update the firmware in order to play those files. 

  6. What is DivX®   ? 

    A

DivX is high quality and most commonly used video compression/decompression(codec) technology used   

      for video distribution format. Media Bank can decode DivX®   3.x, 4.x and 5.x without any problem. 

  7. What are RM or RMVB files


    A

RM/RMVB is the file format developed from Real Network, Media Bank cannot play these files.  

  8. Where can I find some more resources about DVD backup


    A

This is a very good web http://doom9.cdpa.cc/. You can find most video utilities and backup tools. They have   

     some excellent user guides about subtitles too. 

Содержание ME-747AK

Страница 1: ...USER MANUAL Media Bank ME 747AK...

Страница 2: ...d used in accordance with the instructions there is no guarantee that interference will not occur in a particular installation If this equipment does cause harmful interference to equipment off and on...

Страница 3: ...DOS Windows Windows 95 98 NT 2000 me XP are trademarks of Microsoft Corporation Macintosh and Mac are trademarks of Apple Computer All of the third party brands and names are the property of their re...

Страница 4: ...Tools 10 1 3 Take a look to the ME 747AK 11 2 Easy Installation Guide 13 2 1 What is in the Package 13 2 2 Specifications 13 2 3 Supported Hard Disk Formats 14 2 4 Minimum System Requirements 14 2 5 S...

Страница 5: ...irmware Upgrade 21 3 2 2 TV Lock Function 22 3 3 LAN Share Device Setup Overview NDAS Mode 22 3 4 Switching between Media File Playback Mode and NDAS mode 24 4 Remote Control Introduce 24 5 Starting Q...

Страница 6: ...1 2 Install NDAS Device Management in Windows ME and Windows 98SE 47 6 1 3 NDAS Administrator 51 6 1 4 Add Register a New NDAS Device using the Registration Wizard 51 6 1 5 Add Register a New NDAS De...

Страница 7: ...te Mode to Read Only Mode 71 6 3 3 Changing from Read Mode to Read Write Mode 73 6 4 Use With LAN Share Mode in Mac OS X 75 6 4 1 Install NDAS Device Management 75 6 4 2 Add Register NDAS Device 76 6...

Страница 8: ...igrate 98 6 6 3 Replace Device 99 6 6 4 Replace HDD 99 6 6 5 Add Spare Disk 99 6 6 6 Remove Spare Disk 102 6 6 7 Using Mirrored NDAS Devices 103 6 7 Formatting NDAS Device 105 6 7 1 Initialize NDAS De...

Страница 9: ...9 6 8 Uninstall 109 6 9 Use NDAS Device in Linux 109 7 FAQ 110...

Страница 10: ...mage and make void of this product warranty 3 Keep this equipment away from humidity or any type of moisture 4 Do not drop or shack the device 5 Do not press or put any weight on the device 6 Do not c...

Страница 11: ...11 1 3 Take a look to the ME 747AK...

Страница 12: ...12...

Страница 13: ...1 Power Adapter Cable x 1 Audio cable x 1 Video cable x 1 USB cable x 1 Ethernet Cable x 1 Remote control User Manual x 1 Software Install CD x 1 2 2 Specifications Application Any 3 5 inch hard disk...

Страница 14: ...k Mode Only FAT32 NDAS Mode FAT32 NTFS 2 4 Minimum System Requirements Windows 98SE ME 2000 XP Server 2003 32bit 233 MHz Pentium II or higher 128 MB RAM 256 MB recommended USB 1 1 Port USB 2 0 recomme...

Страница 15: ...Port USB 2 0 recommended CD ROM drive for installation 100Base T full duplex switch for NDAS mode for Lan Share Only 2 5 Supported Media Playback Formats Video MPEG1 VCD SVCD DAT MPEG2 AVI VOB MPEG4...

Страница 16: ...16 2 6 Start To Assemble Step1 Step2 Step3 Step4...

Страница 17: ...nnect the USB cable in your computer 3 When your hard disk is detected by your computer LED1 is bright 3 1 1 USB OTB One Touch Backup 1 Install the Welland_Setup exe from ITE Free AP in the Software I...

Страница 18: ...18 Notes If you plug the ME 747AK into computer with USB media file playback and NDAS will not work...

Страница 19: ...connect the Audio and Video cables between Media Bank and TV as shown as below figure 2 Please plug in the power adaptor and power on your TV 3 Please change your TV mode to AV mode 4 Push the POWER...

Страница 20: ...20 Notes If your image and subtitle are separated please put them in the same folder then copy to your ME 747AK and remember the file name of the image and subtitle must be same...

Страница 21: ...and power cable and power on the Media Bank 3 Enter the TV mode and move your cursor on the new firmware Bank30 rom 4 Push the OK key to enable the upgrade procedure Attention Do not turn off the pow...

Страница 22: ...nd play key on the remote control to move or execute input function 4 If you want to change the password please choose the change key in the keyboard Input the old password and then input the new pass...

Страница 23: ...23 a power source...

Страница 24: ...mode is active 4 Remote Control Introduce Key pad Function Description OK Takes you to play or execute the current selection UP Direction button to move cursor on the screen DOWN Direction button to...

Страница 25: ...e PREVIEW Previous file STOP Terminate the selected mode NEXT Next file VOL Increase the volume VOL Decrease the volume MUTE Turn off the sound AUDIO Choose the sound channel REPEAT Repeat setup when...

Страница 26: ...n UP Direction button to move cursor on the screen DOWN Direction button to move cursor on the screen LEFT Direction button to move cursor on the screen RIGHT Direction button to move cursor on the sc...

Страница 27: ...r the SETUP MENU MAIN PAGE 2 Choose Preferences and check TV TYPE is MULTI SYSTEM or not 3 After setup choose Exit Setup return to main menu Notes 1 Default setup of TV type is MULTI SYSTEM 2 MULTI SY...

Страница 28: ...28 5 1 PHOTO PLAY MODE You can press arrow key to select PHOTO mode in MAIN MENU or press PHOTO on the remote control or you can press FILE to enter File Library to search the file you want to play...

Страница 29: ...29 FULL SIZE DISPLAY You can press OK button on the remote control to show the Full size picture The screen will be shown as right...

Страница 30: ...oom in the picture and press Zoom button again to disable You can press arrow keys to move picture The screen will be shown as below Zoom Off Zoom In 1 Zoom In 3 ROTATE SIDPLAY You can press ROTATE bu...

Страница 31: ...HOW SETUP Press Setup button to enter the SETUP MENU MAIN PAGE and select SLIDESHOW SETUP to select your play mode MANUAL You must press or button to change your picture AUTO Pictures will change auto...

Страница 32: ...32 FOLDER REPEAT...

Страница 33: ...to files display automatically OFF Single photo file display automatically INTERVAL TIME This item can setup interval time between every picture Press or button on the remote control to select slidesh...

Страница 34: ...OTTOM Change picture from top to bottom BOTTOM TOP Change picture from bottom to top T B CENTER Change picture from top and bottom to center CENTER T B Change picture from center to top and bottom BLI...

Страница 35: ...R CENTER Change picture from left and right to center CENTER L R Change picture from center to left and right IMPLODE Change picture from around to center BLIND L R Change picture from left to right l...

Страница 36: ...your video files without going to MAIN MENU Press or button on the remote control to select your play mode ON Video file will play automatically when you power on Media Bank OFF You must play video fi...

Страница 37: ...lows you to view your MP3 files You can press arrow key to select MUSIC mode in MAIN MENU or press MUSIC on the remote control or you can press FILE to enter File Library to search the file you want t...

Страница 38: ...38 Press or button on the remote control to select the file you want to play You can press EQ button on the remote control to change the EQ mode Classic Jazz Rock PoP Ballad Dance REPEAT PLAY...

Страница 39: ...ETUP to select your play mode You can press or button on the remote control to select your play mode ONE The same song will play repeatedly OFF Music will stop to play when songs played once from firs...

Страница 40: ...ode allows you to view your video files You can press arrow key to select VIDEO mode in MAIN MENU or press VIDEO on the remote control or you can press FILE into File Library to search the file you wa...

Страница 41: ...AUSE on your remote control Stop playback press the button STOP on your remote control To move to previous video file press the button PREVIOUS or REV on your remote control To move to next video file...

Страница 42: ...File library allows you to view all your media files and browse your play list Use the arrow keys on your remote control to quick search the file you want to play Press OK button on your remote contr...

Страница 43: ...n on the remote control in the file library you can delete rename the file and folder you also can create a new folder DELETE Delete file RENAME Create new file name of file NEW FOLDER Create a new fo...

Страница 44: ...that you want to use PREVIEW Preview window on off OSD MESSAGE Turn on or turn off OSD MESSAGE Notes If you turn on this item you can see the icon at your TV upper left corner when you execute REV or...

Страница 45: ...45 6 Network Hard Disk NDAS Mode...

Страница 46: ...l LAN Share Device Management in Windows XP Windows 2000 and Server 2003 1 1 Find NDAS control AP in the driver CD double click setup exe than choose the language what you need 2 Install Shield Wizard...

Страница 47: ...e Install button to install drivers 5 Click Continue Anyway to continue installation 6 Click the Finish button to complete 7 Click on the Yes button to restart your computer now or No to restart later...

Страница 48: ...start to install 2 Install Shield Wizard will appear click Next 3 Select I accept the terms in the license agreement then click Next 4 Click Install 5 Put in the Windows 98SE CD click OK 6 Select Yes...

Страница 49: ...me installing LAN Share Add New Hardware Wizard will appear Click Next and follow further instructions Otherwise Media Bank will be listed as a local drive on My Computer Driver letter and name may va...

Страница 50: ...elect Specify a location and click Browse button From the Browse for Folder window search for NDASUSB folder and click OK Once the location is set click Next from the Add New Hardware Wizard window 10...

Страница 51: ...ministrator Tool onto the system tray 2 NDAS Administrator Tool system tray icon performs the following functions Refresh NDAS Status Enable Read Only Access Add a NDAS Disable a NDAS Display Software...

Страница 52: ...te Key Write Key is needed to write to NDAS Device Click Next to continue If the Write Key was entered in the previous step the NDAS is registered as Read Write Mode If the Write Key was not entered i...

Страница 53: ...S Device status 7 Select how you want to mount the NDAS Device Read Write Mode Mounts NDAS Device as Read Write Mode Read Only Mode Mounts NDAS Device as Read Only Mode Don t Mount NDAS Device is left...

Страница 54: ...uring step 5 8 Registration is finished Click Finish 6 1 5 Add Register a New NDAS Device without using the Registration Wizard 1 Click on the NDAS Device Management icon located on the system tray 2...

Страница 55: ...Key Write Key is needed to write to NDAS Device Leave the Activate this device after registration box checked to automatically enable the device after registration Note NDAS Device ID and Write Key do...

Страница 56: ...stered the Found New Hardware Wizard may appear If the window appears click Next to install the new NDAS Device It should automatically find the appropriate drivers for your NDAS Device Note For Windo...

Страница 57: ...Yes or Continue Anyway to finish the installation 3 Registration is completed Click NDAS Device Management to see the registered NDAS Device Read Write Mode Read Only Mode Note If you cannot see your...

Страница 58: ...mputer Drive letter and NDAS Device name may vary between Personal Computers You can use NDAS Device like a local drive on your PC 1 Drag and drop files to NDAS Device 2 Copy and paste data to NDAS De...

Страница 59: ...he network using the NDAS device must have the NDAS driver version 3 1 x installed 4 NDAS device must be registered onto each computer Windows ME 98SE Environment 1 All computers and NDAS device must...

Страница 60: ...r 1 x On Mac OSX install NDAS driver 1 x 4 NDAS must be registered onto each computer 5 Write access is assigned to one user at a time and is passed from one user to another 6 In this mode if there ha...

Страница 61: ...nments LAN Share must be formatted in FAT32 If you use the Disk Management utility in Windows XP Windows 2000 or Server 2003 to format your LAN Share then your LAN Share will be re formatted in NTFS N...

Страница 62: ...3 When sharing LAN Share between Windows 2000 Windows XP and Server 2003 perform chkdsk 6 2 Introduction to NDAS Device Management 6 2 1 NDAS Device Status Modes NDAS device provides users with six b...

Страница 63: ...63...

Страница 64: ...64...

Страница 65: ...ystem tray All registered NDAS Device s will be displayed on the NDAS Device Management Menu 1 When you click on the icon Lists all NDAS Devices that are registered 2 Register a New Device Registers a...

Страница 66: ...Device Management can be restored by double clicking the icon on the Desktop 6 3 NDAS Device Functions 6 3 1 NDAS Device Management Click NDAS Device Management and place the cursor on a NDAS Device...

Страница 67: ...Mounted RW The current state of NDAS Device Unmount Enables users to change NDAS Device mode to Connected Mode Properties Displays properties of the NDAS Device B NDAS Device mounted in Read Only Mod...

Страница 68: ...68 Mounted RO The current state of NDAS Device Unmount Enables users to change NDAS Device mode to Connected Mode Properties Displays properties of the NDAS Device C NDAS Device in Disconnected Mode...

Страница 69: ...69 Disconnected The current state of NDAS Device Unregister Enables users to un register NDAS Device Properties Displays properties of the NDAS Device D NDAS Device in Connected Mode...

Страница 70: ...d Only NDAS Device can be mounted into Read Only Mode Mount Read Write NDAS Device can be mounted into Read Write Mode Unregister Enables users to un register NDAS Device Properties Displays propertie...

Страница 71: ...AS Device to be activated into Connected Mode Once activated NDAS Device will be indicated by white colored box Unregister Enables users to un register NDAS Device Properties Displays properties of th...

Страница 72: ...you want to change from Read Write to Read Only 2 Select Unmount 3 A warning message will appear Click Yes The Blue Square will change to a White Square indicating Connected Mode 4 Click NDAS Device...

Страница 73: ...to a Green Square indicating Read Only Mode 6 3 3 Changing from Read Mode to Read Write Mode 1 Click NDAS Device Management and select the NDAS Device you want to change from Read Only to Read Write 2...

Страница 74: ...nge to a White Square indicating Connected Mode 4 Click NDAS Device Management and select the NDAS Device you have just umounted 5 Select Mount Read Write The White Square will change to a Blue Square...

Страница 75: ...nter Admin Name and Password Then click OK 2 Welcome to the Lan Share Installer Click Continue 3 Important Information Click Continue 4 Software License Agreement Click Continue If you want to continu...

Страница 76: ...Restart your computer NOTE Once NDAS Device Management is installed NDAS Device needs to be Added Registered to your computer before you can start using NDAS Device 6 4 2 Add Register NDAS Device 1 Do...

Страница 77: ...lick Add Added NDAS Device will be displayed in NDAS IDs window NOTE To add a new NDAS Device repeat the Add Register a NDAS Device steps 6 4 3 Using NDAS Device Admin To Get NetDiskAdmin 1 Double cli...

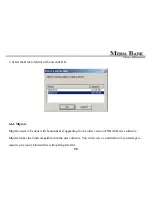
Страница 78: ...e from your computer Disable Disable Reading and Writing to NDAS Device Enable RW Enable NDAS Device into Read Write Mode Enable RO Enable NDAS Device into Read Only Mode Quit End NDAS Device Admin ND...

Страница 79: ...it s time to familiarize yourself on using it NDAS Device can be found on the desktop Here are few uses for NDAS Device You can use NDAS Device like any other hard drive on your system Drag and drop f...

Страница 80: ...Read Write Mode Only one user or application can write to a specific NDAS Device at a time No other users or applications can write to NDAS Device until Read Write Access is transferred Changing Read...

Страница 81: ...to Read Only Mode 1 Select a NDAS Device from NDAS IDs window 2 Click Enable RO button 3 Both Configuration and Status will change to Read Only 4 Now NDAS Device is in Read Only Mode Changing to Read...

Страница 82: ...cations are using Read Write Access both Configuration and Status will change to Read Write Otherwise the Configuration will change to Read Write and Status will stay as Read Only Until both the Confi...

Страница 83: ...hen click OK 3 Click Uninstall 4 NDAS has been successfully uninstalled Click Quit 6 5 NDAS Bind Management Using NDAS Bind Management users can create and manage a NDAS RAID There are 3 different but...

Страница 84: ...o bind Aggregation RAID0 and RAID1 Aggregation Allows any number of NDAS Device units between 2 8 to be recognized as a single large disk drive Extremely useful when a larger storage device is needed...

Страница 85: ...riting to NDAS Devices RAID1 Mirroring Allows 2 4 6 or 8 NDAS Device units to be mirrored at the same time Fault tolerant If one unit fails data is retrieved from other units Can also Mirror NDAS Devi...

Страница 86: ...onnected Mode 1 Go to NDAS Device Management choose a NDAS Device you want to Bind If the NDAS Device is in Mounted Mode select Unmount If the NDAS Device is in Connected Mode leave it as it is If the...

Страница 87: ...S Devices as Connected Mode Instructions for Bind 1 Two or more NDAS Devices need to be in Connected Mode All of the NDAS Devices must have the Write Key 2 Go to Start Programs NDAS Software NDAS Bind...

Страница 88: ...n bind 2 4 6 or 8 units Note Currently RAID4 is not supported 5 Move a NDAS Device from the left window to the right window by first selecting a NDAS Device from the left window and then clicking the...

Страница 89: ...to Bind and click Finish 7 Two warning messages will appear Once NDAS Devices are bound all of the data will be lost Click Yes to continue The new bound NDAS Devices must be mounted and formatted befo...

Страница 90: ...90 8 Go to the NDAS Device Management and Mount the Bound NDAS Devices To do so select any one of the Bound NDAS Device and select Mount Read Only or Mount Read Write...

Страница 91: ...2 Unbind You can unbind one or all of the NDAS Devices from a bound group Unbind All 1 Go to NDAS Device Management and select a Bound NDAS Device you want to Unbind 2 Unmount the NDAS Device by clic...

Страница 92: ...es go to NDAS Bind Management 4 From the NDAS Bind Management select the Bound NDAS Device you have just unmounted Click the Unbind button 5 Unbind window will appear Make sure these NDAS Devices are...

Страница 93: ...l be last Click Yes to continue The new bound NDAS Devices must be mounted and formatted before it can be used Click OK 7 Now you can go back into the NDAS Device Management and Mount each of unbound...

Страница 94: ...Device by clicking on Unmount Note If the bound NDAS Device is in use a warning message will appear Make sure that no programs are using the NDAS Device and try again 3 After you have unmounted the N...

Страница 95: ...you want to convert it to a Single disk Click Yes if you want to continue Note Once the Binding has been broken you cannot re add any NDAS Devices to the broken Bound device You will have to recreate...

Страница 96: ...you are finished formatting your NDAS Device should show up in My Computer as a local drive 6 6 Other NDAS Bind Management Functions The NDAS 3 11 Bind Management software also comes with new added fe...

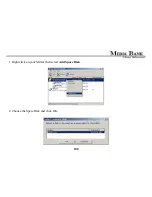
Страница 97: ...r Adds a mirrored disk to a basic disk by adding a empty disk to a original disk which is in use you can build a RAID 1 which contains data of original disk 1 Right click on the Disk you wish to Mirro...

Страница 98: ...e Migrate needs to be done with bound disks if upgrading from a older version of NDAS Device software Migrate makes the bind compatible with the new software You will receive a notification if you att...

Страница 99: ...chronized automatically 6 6 4 Replace HDD Replaces the HDD in the selected device with another one When one disk in a NDAS device is missing or out of order in RAID 1 you can replace it with a new dis...

Страница 100: ...100 1 Right click on your Mirror then select Add Spare Disk 2 Choose the Spare Disk and click OK...

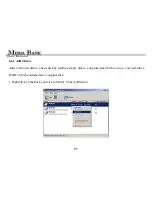
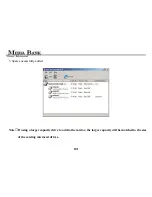
Страница 101: ...101 3 Spare successfully added Note If using a larger capacity drive to add to the mirror the larger capacity will be matched to the size of the existing mirrored drives...

Страница 102: ...102 6 6 6 Remove Spare Disk Removes a spare disk from the fault tolerant RAID disk group 1 Right click select Remove Share Disk 2 Choose the Removed Disk and click OK...
Страница 103: ...tinue to use Mirrored NDAS devices as before But users cannot modify the Mirrored NDAS devices If so the Mirrored devices will break Upgrading the driver without breaking the Mirrored NDAS device 1 Di...

Страница 104: ...r with 3 11 migrates the Mirrored NDAS device s binding information other users sharing the Mirrored NDAS device will no longer have access to the Mirrored NDAS devices if they are still running older...

Страница 105: ...Management window will list all the disks in the computer 4 Find the NDAS Device you want to initialize The NDAS Device is usually indicated by Not Initialized If the NDAS Device is described as Basic...

Страница 106: ...not a Dynamic one 7 Initialization is completed Before NDAS Device can be used it must be partitioned See 6 7 2 6 7 2 Partition NDAS Device 1 From the Computer Management window find the NDAS Device...

Страница 107: ...Letter or Path Select Assign the following driver letter Choose a letter for the drive from list Click Next 7 Format Partition Select Format this partition with the following Settings File System NTF...

Страница 108: ...click on My Computer 2 My Computer window will appear Right Click on your NDAS Device choose Format 3 The Format window will appear with a few options Check the box that says Quick Format Recommended...

Страница 109: ...NDAS Device Go to Start Programs NDAS Software Uninstall NDAS Software Windows Installer will appear Click Yes if you want to continue Otherwise click No NOTE A warning window may appear if any of the...

Страница 110: ...d drive larger than 32 GB FAT32 using Disk Management under Windows XP A That is the limitation by design of WinXP You need an additional formating utility to do the format for you You can find a very...

Страница 111: ...igh quality and most commonly used video compression decompression codec technology used for video distribution format Media Bank can decode DivX 3 x 4 x and 5 x without any problem 7 What are RM or R...

Страница 112: ...hy does my TV screen display in black and white and jump continuously when I play video file A Please confirm what kind the standards of your TV and setup it correctly Please refer to page 27 NDAS Gen...

Страница 113: ...first then the wireless computer When using wireless we also recommend 802 11g When using 802 11b we highly recommend hardwiring your computer when doing large file transfers because of the low bandwi...

Страница 114: ...ter on the network that has a different version of the NDAS software installed All machines must have the same exact version of our software Please make sure that all computers have the same exact ver...

Страница 115: ...resolution is to use a 3rd party partitioning software or use a Windows 98SE ME computer to format the entire drive to FAT32 With our Multi Write drivers NTFS is recommended anyways for stability and...

Страница 116: ...lick on the NDAS on your Desktop then you will be given an option to Eject the NDAS After that you can go into LAN Share Admin and Disable your NDAS If you are using USB then Ejecting the NDAS is all...

Страница 117: ...ggregation Aggregation can currently be done using eight 8 NDAS units USB 1 My LAN Share shows up as a Black dot when used with USB When used with USB mode the software is not needed therefore you wil...

Отзывы: