10
Assembly
Assembly of the cladding with insulation
Assembly of the cladding with
insulation
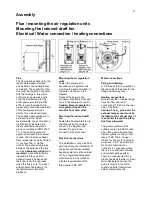
- Place the rear side cladding
(34) over the exhaust fume
nozzle onto the boiler.
- Slide in the base cladding (37).
- Hook the side claddings (28,
30) into the slots in the base
cladding (37) with the welded-
on bolts and fasten at the top,
but do not tighten yet.
- Release the cable loom with
the plug out of the left side
cladding (28) for attachment to
the control later.
- Connect the rear side cladding
(34) to the side claddings (28,
30) using spring steel clips and
self-tapping screws.
- Place the top insulating plate
(31) on top of the boiler.
- Hook in the front lid cladding
(2).
- Adjust the heights of the side
claddings (28, 30) using the
knurled nuts so that the front
edge of the side cladding (28,
30) aligns with the doors at the
front.
- Unhook the front lid cladding
(2), tighten the side claddings
(28, 30) at the top and bottom
and hook in the front lid
cladding again.
- Lay ready the actuator cover
cladding (11), the rear lid
cladding (27) and, in the case
of type L, the cover panels
(41).
Содержание 40S-70
Страница 27: ...23 Commissioning Circuit diagram ...
Страница 29: ...24 Commissioning Short operating instructions ...
Страница 31: ......
Страница 35: ...28 Notes ...
Страница 38: ......


