SATA-to-USB 2.0 DE110 User's Guide - Rev. A00
StorCase Technology, Inc.
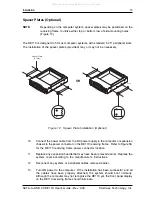
Installation
13
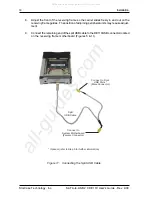
Figure 10: Receiving Frame Mounting Holes
Mounting
Holes
(Right)
Mounting
Holes
(Left)
0837
Mounting
Holes
(Bottom)
Front of Unit
7.
With the drive carrier locked in place inside the receiving frame, install the DE110
into the 5.25 drive opening in the computer or expansion chassis. Use the ap-
propriate guides to position the Data Express, and fasten it into place with the four
(4) #6-32 Phillips screws provided. Figure 10 illustrates the location of the mounting
holes. Mounting holes are provided on each side and the bottom of the receiving
frame to accommodate a variety of mounting configurations. Use the mounting holes
which best suit the computer or expansion chassis configuration. Note that bottom
mounting holes require self-tapping screws (not provided).
Disabled
Functional
Front
USB
Ports
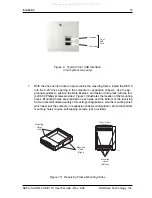
Figure 9: Typical Front USB Interface
(Your system may vary)
All manuals and user guides at all-guides.com

