26
Initial Configuration
T
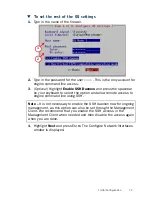
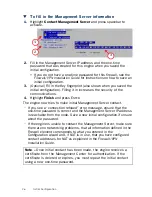
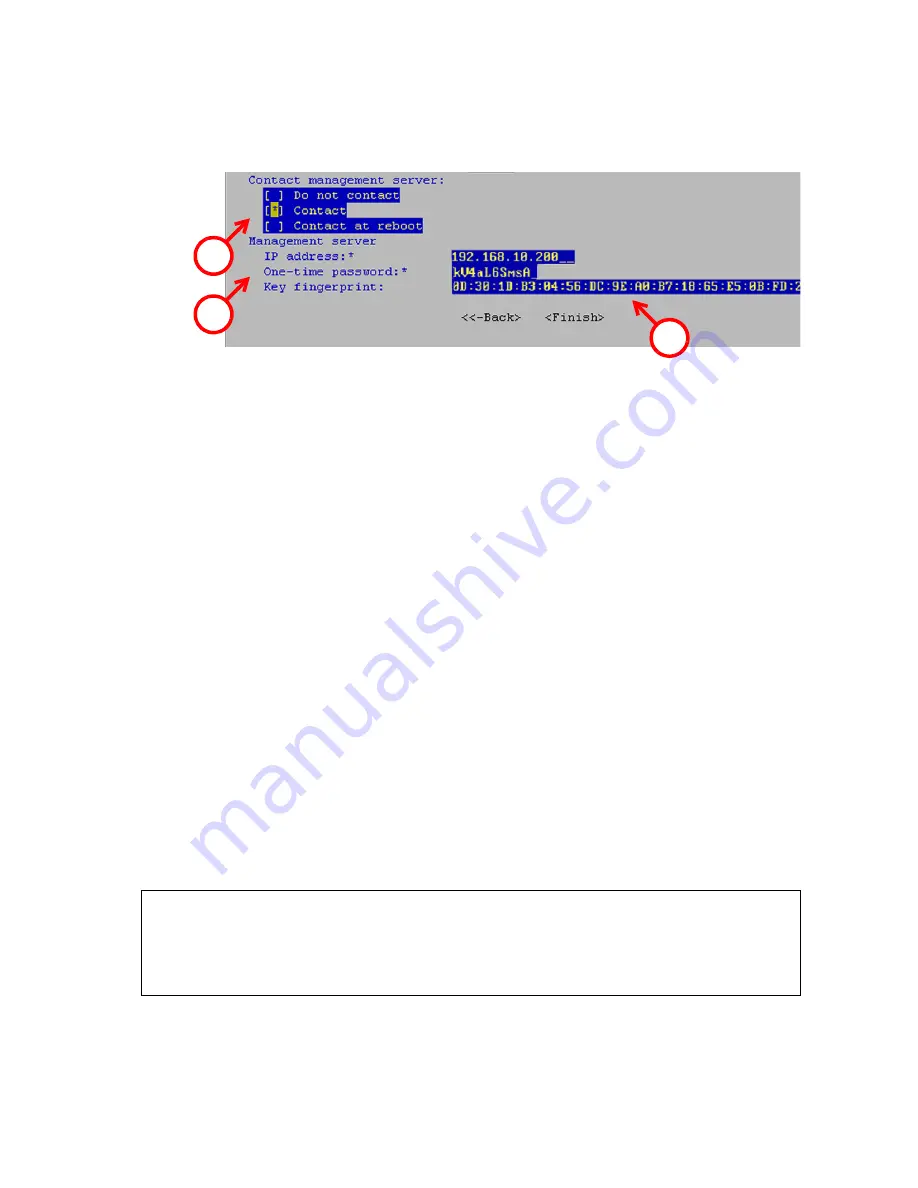
To fill in the Management Server information
1.
Highlight
Contact Management Server
and press spacebar to
activate.
2.
Fill in the Management Server IP address and the one-time
password that was created for this engine when you saved the
initial configuration.
•
If you do not have a one-time password for this firewall, see the
Firewall/VPN Installation Guide
for instructions on how to save an
initial configuration.
3.
(
Optional
) Fill in the Key fingerprint (also shown when you saved the
initial configuration). Filling it in increases the security of the
communications.
4.
Highlight
Finish
and press E
NTER
.
The engine now tries to make initial Management Server contact.
• If you see a “connection refused” error message, ensure that the
one-time password is correct and the Management Server IP address
is reachable from the node. Save a new initial configuration if unsure
about the password.
• If the engine is unable to contact the Management Server, make sure
there are no networking problems, that all information defined in the
Firewall element corresponds to what you entered in the
Configuration wizard and, if NAT is in use, that you have configured
contact addresses for NAT as explained in the
Firewall/VPN
Installation Guide
.
Note –
Once initial contact has been made, the engine receives a
certificate from the Management Center for authentication. If the
certificate is deleted or expires, you must repeat the initial contact
using a new one-time password.
1
2
3

