background image


- 38 - 

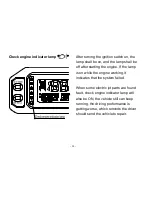
Check engine indicator lamp


After turning the ignition switch on, the 

lamp shall be on, and the lamp shall be 

off after starting the engine. If the lamp 

is on while the engine working, it 

indicates that the system failed. 


When some electric jet parts are found 

fault, check engine indicator lamp will 

also be ON, the vehicle still can keep 

running, the driving performance is 

getting worse, which reminds the driver 

should send the vehicle to repair. 


Содержание UTV800

Страница 1: ...UTV800 4 4ES OWNER S MANUAL ...

Страница 2: ...e handling Operator use only passengers prohibited This vehicle is designed and manufactured for OFF ROAD use only Driving on public streets roads or highways is illegal Always wear helmet and other protective equipment Do not operate this vehicle after consuming Alcohol or Drugs Gasoline is flammable when refueling Pis shut off engine to avoid sparks and open flame Read owner s manual carefully b...

Страница 3: ...erating procedures It also includes information about the general care and maintenance of your UTV Most importantly carefully read the following pages regarding safety warnings and active riding skills and precautions Children and adults differ in skills physical abilities and judgment Some children may not be able to operate an UTV safely Parents should always supervise their child s use of the U...

Страница 4: ...vements which may effect the illustrations or explanations without notice If you have any other questions regarding our UTV s operation or maintenance any authorized dealer can readily answer them Enjoy your UTV And if you respect your UTV respect the environment the local and state laws and act responsibly You will gain the respect of others P roduct and specifications are subject to change witho...

Страница 5: ...DRIVING 13 INTRODUCTION 14 IMPORTANT MANUAL INFORMATION 15 IMPORTANT NOTICE 16 HOW TO IDENTIFY YOUR UTV 17 Engine and Vehicle Identification Number Location 18 LOCATION OF THE WARNING AND SPECIFICATION LABELS 19 SAFETY INFORMATION 24 DESCRIPTION AND VEHICLE IDNTIFICATION 30 ...

Страница 6: ...34 Indicators Display 35 Odometer 36 Accelerator pedal 39 Brake pedal 40 Drive select lever 41 Fuel tank cap 42 Seats 42 Seat belts 43 Glove compartment 45 Cargo bed 46 Opening and closing the tailgate 46 Lifting and lowering the cargo bed 47 Trailer hitch bracket 49 Safe driving precautions 56 Parking Adjustment 60 ...

Страница 7: ...N CHECKS 65 Front and rear brakes 66 Fuel 67 Gasohol 67 Accelerator pedal 68 Seat belts 68 Steering 69 Fittings and fasteners 69 Lights 69 Switches 69 Tires 69 Tire wear limit 72 Jump starting 73 Warming up 74 Shifting 75 Engine break in 76 Parking on a slope 78 ...

Страница 8: ...hallow 90 Encountering obstacles on the trail 92 PERIODIC MAINTENANCE AND ADJUSTMENT 94 Periodic maintenance lubrication 95 HOOD 97 To open 97 To close 97 Console 98 Changing Oil 99 Rear knuckle upper and lower pivot lubrication 100 Steering shaft lubrication 100 Wheel removal 101 Wheel installation 101 ...

Страница 9: ... 106 Tail brake light bulb replacement 106 Troubleshooting 108 Engine overheating 111 CLEANING AND STORAGE 113 CLENANING 113 STORAGE 115 NOISE REGULATION 117 ENGINE 118 Engine Oil 118 Engine Coolant 122 Air Filter 125 Drive Belt 126 CVT Cover Drain Screw 126 ...

Страница 10: ... 9 Valve Adjustment 126 Gearbox Oil 128 MAINTENANCE CHART 130 SPECIFICATIONS 134 ...

Страница 11: ... own safety and understand the challenges you can meet while riding There is much that you can do to protect yourself when you ride You ll find many helpful recommendations throughout this manual The following are a few that we consider most important Follow the age recommendation The minimum recommended age of this UTV model is 16 Children under age 16 should never operate this vehicle Always wea...

Страница 12: ...familiar with your skills and get accustomed to the UTV is size and weight Because many accidents involve inexperienced or untrained riders we urge all riders to take a training course approved by the UTV safety institute Contact an authorized UTV dealer to find out about the training courses nearest you Be alert for off road hazards The terrain can present a variety of challenges when you ride of...

Страница 13: ...nk and ride and don t let your friends drink and ride either Keep your UTV in safe condition It s important to keep your UTV properly maintained and in safe riding condition Having a breakdown can be difficult especially if you are stranded off road far from your base To help avoid problems inspect your UTV before every ride and perform all recommended maintenance Your UTV comes with a hangtag and...

Страница 14: ...hen crossing the vehicles parked in front of to be very careful Because the driver of the vehicle may be invisible to you and the door opened the forward block in your way 3 Brake Lining may Motorcycle rinsing wetting lose their role so when cleaning End after walking ago should check all brake system For training please call ASI at 1 800 887 2887 ...

Страница 15: ...tanding of the features and operation of this vehicle It also includes basic maintenance and inspection procedures If you have any questions regarding the operation or maintenance of your vehicle please consult an dealer WARNING Please read this manual carefully before operating this vehicle Do not attempt to operate this vehicle until you have attained adequate knowledge of its controls and opera...

Страница 16: ...ATTENTION BECOME ALERT YOUR SAFETY IS INVOLVED WARNING Failure to follow WARNING instructions could result in severe injury or death to the vehicle operator a bystander or a person inspecting or repairing the vehicle CAUTION A CAUTION indicates special precautions that must be taken to avoid damage to the vehicle NOTE A NOTE provides key information to make procedures easier or clearer Product and...

Страница 17: ...street road or highway Such use is prohibited by law Check the laws and regulations in force before choosing where to operate this vehicle It is illegal to operate this vehicle on public lands where vehicles its size are prohibited This vehicle complies with almost all state off highway noise level and spark arrester laws and regulations ...

Страница 18: ... or to trace your vehicle in the event of loss These numbers are required by the authorized UTV dealer to complete warranty claims properly No warranty will be allowed by if the engine identification number EIN or vehicle identification number VIN is removed or mutilated in any way We strongly recommend that you take note of all the serial number on you vehicle and supply them to your insurance co...

Страница 19: ... 18 Engine and Vehicle Identification Number Location TYPICAL 1 EIN Engine Identification Number on left side under of the crankcase 2 VIN Vehicle Identification Number on right side under of the frame ...

Страница 20: ... 19 LOCATION OF THE WARNING AND SPECIFICATION LABELS ...

Страница 21: ......

Страница 22: ...s on you vehicle They contain important information for safe and proper operation of your vehicle Never remove any labels from your vehicle If a label becomes difficult to read or comes off a replacement label is available from your dealer 1 ...

Страница 23: ... 21 2 3 ...

Страница 24: ......

Страница 25: ... 22 5 6 4 ...

Страница 26: ... 23 7 8 9 ...

Страница 27: ...d Always be sure the driver and passenger are wearing seat belts Never give a ride to a passenger who is too small to reach and hold the handgrip on the enclosure Always avoid operating the vehicle on any paved surfaces including sidewalks driveways parking lots and streets Never operate this vehicle on any public street road or highway even a dirt or gravel one Never operate this vehicle without ...

Страница 28: ... hands arms feet and legs in side the vehicle at all times during operation Keep your feet on the floorboard Never hold onto the enclosure except when using the handgrip inside the enclosure Otherwise your hand could be injured if it is caught between the enclosure and an obstacle outside the vehicle Always keep both hands on the steering wheel when driving Never wrap your thumbs and fingers aroun...

Страница 29: ...low speeds before attempting to turn at faster speeds Do not attempt turns on steep inclines Never operate the vehicle on hills that are too steep for it or for your abilities Go straight up and down hills where possible Maximum slope angle 15 Never operate on hills that are slippery or ones where you will not be able to see far enough ahead of you Never go over the top of a hill at sped if you ca...

Страница 30: ...ays be sure there are no obstacles or people behind you when you operate in reverse When it is safe to proceed in reverse go slowly Do not brake abruptly when carrying loads in the cargo bed Always use the size and type of tires specified in this manual Always maintain proper tire pressure as described in this manual Never exceed the stated load capacity Cargo should be as far forward in the bed a...

Страница 31: ...nd clothes dryers When transporting the vehicle in another vehicle be sure it is kept in an upright position or other sources of ignition such as the pilot lights of water heaters Otherwise fuel may leak out of the carburetor or fuel tank HOW TO AVOID THE HAZARD Gasoline is poisonous and can cause injuries WHAT CAN HAPPEN If you should swallow some gasoline or inhale a lot of gasoline vapor or get...

Страница 32: ...ngine in a closed area POTENTIAL HAZARD Exhaust fumes are poisonous and may cause loss of consciousness and death within a short time WHAT CAN HAPPEN Always operate your vehicle in an area with adequate ventilation HOW TO AVOID THE HAZARD ...

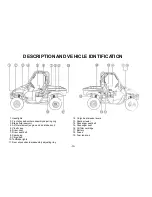
Страница 33: ...r filter element engine and air intake duct 5 V belt case 6 Driver seat 7 Driver seat belt 8 Spark plug 9 Cargo bed 10 Tail brake lights 11 Rear shock absorber assembly adjusting ring 12 Cargo bed release levers 13 Spark arrester 14 Passenger seat belt 15 Passenger seat 16 Oil filter cartridge 17 Battery 18 Fuses 19 Fuel tank cap ...

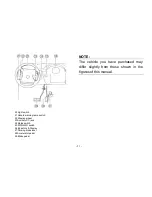
Страница 34: ... Steering wheel 23 Auxiliary DC jack 24 Mains switch 25 2WD 4WD switch 26 Indicators Display 27 Parking brake lever 28 Accelerator pedal 29 Brake pedal NOTE The vehicle you have purchased may differ slightly from those shown in the figures of this manual ...

Страница 35: ... electrical circuits are supplied with power and the headlights and taillights come on when the light switch is on S All electrical circuits are switched off The key can be removed in this position Q The electric starter is engaged by turning and holding the key in this position Release the key when the engine starts ...

Страница 36: ...peration of the electric starter to let it cool Do not turn the key to the D position with the engine running or damage to the electric starter can result See starting instructions prior to starting the engine Switches Light switch Set the switch to to turn on the low beam and the taillights Set the switch to to turn on the high beam and the taillights ...

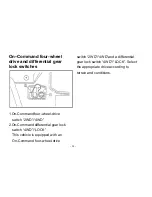
Страница 37: ...ommand four wheel drive switch 2WD 4WD 2 On Command differential gear lock switch 4WD LOCK This vehicle is equipped with an On Command four wheel drive switch 2WD 4WD and a differential gear lock switch 4WD LOCK Select the appropriate drive according to terrain and conditions ...

Страница 38: ... 35 Indicators Display ...

Страница 39: ...dograph and be switched betweens the figure of speed will display and update synchronous while switching between KM H and MPH in unit of pedometer Press the button of Time Set the user can set the hour and minute Then adjust hours or minute by ascending or descending by continuing press button of mode of Set Reset user can clean the record to zero for particular period of working mileage and time ...

Страница 40: ...ight It indicates the temperature of coolant If the temperature is above 102 stop engine immediately Check coolant lever and add if low see authorized dealer if temperature indicator stay on and overflow tank is full of coolant Oil pressure indicator light It indicates low high oil pressure when illuminated see authorized dealer if necessary ...

Страница 41: ... starting the engine If the lamp is on while the engine working it indicates that the system failed When some electric jet parts are found fault check engine indicator lamp will also be ON the vehicle still can keep running the driving performance is getting worse which reminds the driver should send the vehicle to repair ...

Страница 42: ... accelerator pedal fully returns to the idle position as soon as it is released WARNING Malfunction of the accelerator pedal POTENTLAL HAZARD The accelerator pedal could be hard to operate making it difficult to speed up or slow down then you need to This could cause an accident WHAT CAN HAPPEN Check the operation of the accelerator pedal before you start the engine If it does not work smoothly ch...

Страница 43: ...that the unit can engage park brake To release the unit press button in the front end of parking lever then push the parking lever to the bottom CAUTION Never use parking brake lever then the vehicle don t stop fully Adjust the parking cable if necessary Be sure to fully release the parking brake lever before starting the vehicle ...

Страница 44: ... Drive select lever The drive select lever is used to shift your vehicle the L H N R P and reverse positions CAUTION Never start the vehicle at N or R lever Stop the vehicle fully when shifting to reverse ...

Страница 45: ... tank cap by turning it counterclockwise 1 Fuel tank cap Seats To remove a seat pull its seat lock lever upward lift the front of the seat and then slide the seat forward and up 1 Driver seat 2 Passenger seat 3 Seat lock lever x2 ...

Страница 46: ...the seat is loose during operation WHAT CAN HAPPEN Make sure the seat is securely latched HOW TO AVOID THE HAZARD Seat belts This vehicle is equipped with three point seat belts for both the operator and passenger Always wear the seat belt while riding in the vehicle 1 Seat belt x2 2 Latch plate x2 3 Buckle x2 To wear the seat best belt properly do the following 1 Hold the latch plate as you pull ...

Страница 47: ... 2 Latch plate 3 Put the lap portion of the belt low on your hips Push down on the buckle end of the belt as you pull up on the shoulder part so the belt is snug across your hips 4 Position the shoulder belt over your shoulder and across your chest The shoulder belt should fit against your chest If it is loose pull the belt out all the way and then let it retract 5 To release the buckle firmly pre...

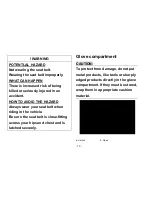
Страница 48: ... wear your seat belt when riding in the vehicle HOW TO AVOID THE HAZARD Be sure the seat belt is close fitting across your hips and chest and is latched securely Glove compartment CAUTION To protect from damage do not put metal products like tools or sharply edged products directly in the glove compartment If they must be stored wrap them in appropriate cushion material a Unlock b Open ...

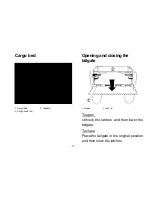
Страница 49: ...o bed 2 Tailgate 3 Cargo hook x4 Opening and closing the tailgate 1 Tailgate 2 Latch x2 Unhook the latches and then lower the tailgate To open Place the tailgate in the original position and then hook the latches To close ...

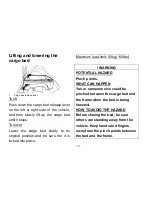
Страница 50: ... its original position and be sure the it is locked into place To lower Maximum load limit 50kg 110lbs WARNING Pinch points POTENTLAL HAZARD You or someone else could be pinched between the cargo bed and the frame when the bed is being lowered WHAT CAN HAPPEN Before closing the bed be sure others are standing away from the vehicle Keep hands and fingers away from the pinch points between the bed a...

Страница 51: ...VOID THE HAZARD Cargo should be properly distri buted and securely attached Reduce speed when carrying cargo Allow greater distance for braking WARNING Carrying a passenger in the cargo bed POTENTLAL HAZARD The passenger could fall be thrown out or be struck by objects in the cargo bed WHAT CAN HAPPEN Never carry a passenger in the cargo bed This cargo bed is designed to carry cargo only HOW TO AV...

Страница 52: ...both ready to drive To help get you prepared this section discusses how to evaluate your driving readiness what items you should check on your UTV800 and adjustments to make for your comfort convenience or safety Protective apparel For your safety we strongly recommit end that you always wear an approved motorcycle helmet eye protection boots gloves long pants and long sleeved shirt or jacket when...

Страница 53: ... full face helmet offers more Regardless of the style look for a DOT Department of Transportation sticker in any helmet you buy Always wear a face shield or goggles to protect your eyes and help your vision WARNING Operating this without wearing an approved motorcycle helmet eye protection and protective clothing could increase your chances of head or eye injury possibly death in the event of seve...

Страница 54: ...driven other UTVs 800 take time to become familiar with hoe this UTV800 in a safe area to build your skills Do not drive in rough terrain you get accustomed to the UTV800 s controls and feel comfortable with its size and weight WARNING Operating UTV800 without proper instruction could increase your risk of an accident which could lead to serious injury or death WARNING Attempt supporting with your...

Страница 55: ...ugs Alcohol drugs and driving don t mix Even a small amount of alcohol can impair your ability to operate a UTV800 safely Likewise drugs even if prescribed by a physician can be dangerous whiles operating a UTV800 consult your to be sure it is safe to operate a vehicle after taking medication WARNING Operating this UTV800 after consuming alcohol or drugs can seriously affect your judgment cause yo...

Страница 56: ... do not drive it until your UTV800 has been inspected by your dealer There maybe damages or other problems you can not see WARNING Improperly maintaining this UTV800 or failing to correct a problem before driving can cause a crash in which you can be seriously hurt or even dead Always perform a reprieve inspection before every drive and correct any problems Pre drive Inspection Check the following...

Страница 57: ...ible nuts bolts and fasteners are tight Underbody Exhaust System Check for and remove any dirt vegetation or other debris that could be fire hazard or interfere with the proper operation of the UTV800 Air Cleaner Check the air filter Replace it if needed Leaks Loose Part Walk around your UTV800 and look for anything that appears unusual such as a leak or loose cable Lights Make sure the headlight ...

Страница 58: ... pedal several times check for proper brake pedal free play Make sure there is no brake fluid leakage Engine stop When engine is running turn the switch key counterclockwise Make sure engine stops Steering Wheel Check that the wheels turn properly as you turn the steering wheel Cable Check the cable housing for wear Check the fittings are tight Replace or tighten as needed Tie rod Check the tie ro...

Страница 59: ... of control Never operate the on any paved surfaces including sidewalks driveways parking lots and strata When driving off road also remember to always obey local off road driving laws and regulations Obtain permission to drive on private property Avoid posted areas and obey no trespassing signs You should never drive your UTV800 on public streets roads or highways even if they are not paved Drive...

Страница 60: ...nd control of the UTV800 and may cause the vehicle to go out of control Never operate the on any paved surfaces including sidewalks driveways parking lots and strata Keep hands and feet on controls Always keep both hands on the steering wheel and both feet on controls When driving your UTV800 it is important to maintain your balance and control of the UTV800 Removing hands or feet away from the co...

Страница 61: ...sive speed increases the chance of an accident In choosing a proper speed you need to consider the capability of your UTV800 the terrain visibility and other operating conditions plus your own skills and experience WARNING Operating this UTV800 at excessive speeds increases your changes of losing control of the UTV800 which can result in an accident Always drive at a speed that is proper for your ...

Страница 62: ...rrain Always be alert to changing terrain conditions when operating the UTV800 Never drive past the limit of visibility Maintain a safe distance between your and other off road vehicles Always exercise caution and take extra care on rough slippery and loose terrain WARNING Failure to take extra care when operating on excessively rough slippery or loose terrain could cause loss of traction or vehic...

Страница 63: ...a safe and reasonable manner When driving always keep all wheels on the ground WARNING Attempting wheelies and other stunts increases the chance of an accident including an overturn Never attempt stunts such as wheelies or jumps Don t try to show off Parking Adjustment ...

Страница 64: ...push the parking lever to the bottom Adjust the parking cable if necessary Gear Shift Adjustment Before operating the vehicle check the shift lever as to change gearshift from 1 to 5 and reverse smoothly The shift lever should be vertical when the gear is in neutral If not adjust the shift cable and then tighten the nuts of the shift cable ...

Страница 65: ...le speed on the below schedule Starting and Operating Instructions Before starting the engine be sure that the driver is seated properly in the UTV800 and tighten the seat belts Testing the UTV800 in an open place at the beginning to learn how to start turn and stop Operate the UTV800 slowly until you are familiar with it The turning radius of this UTV800 is small and agile so the centrifugal forc...

Страница 66: ......

Страница 67: ...e work lights radios etc The auxiliary DC jack should only be used when the engine is running 1 Auxiliary DC jack cap 1 Set the light switch to OFF 2 Start the engine 3 Open the auxiliary DC jack cap and then insert the accessory power plug into the jack 1 Auxiliary DC jack Maximum rated capacity for the auxiliary DC jack DC 12V 120W 10A ...

Страница 68: ...ive cigarette lighter or other accessories with a plug that gets hot because the jack can be PRE OPERATION CHECKS Before using this vehicle check the following points WARNING Failure to inspect the vehicle before operating Failure to properly maintain the vehicle POTENTLAL HAZARD Increases the possibility of an accident or equipment damage WHAT CAN HAPPEN Always inspect your vehicle each time you ...

Страница 69: ...e they are working properly If the brakes do not provide proper braking performance inspect the brake system WARNING Driving with improperly operating brakes POTENTLAL HAZARD You could lose braking ability which could lead to an accident WHAT CAN HAPPEN Always check the brakes at the start of every ride Do not operate the vehicle if you find any problem with the brakes HOW TO AVOID THE HAZARD If a...

Страница 70: ...parts such as the valves and piston rings as well as to the exhaust system Gasohol There are two types of gasohol gasohol containing ethanol and that containing methanol Gasohol containing ethanol can be used if ethanol content does not exceed 10 Gasohol containing methanol is not recommended by because it may cause fuel system damage or vehicle performance problems ...

Страница 71: ...fuel tank cap is closed securely HOW TO AVOID THE HAZARD Accelerator pedal Check to see that the accelerator pedal operates correctly It must operate smoothly and fully spring back to the idle position when released Have an dealer repair as necessary for proper operation Seat belts Make sure that both seat belts are not frayed or damaged The seat belt must move smoothly when pulled The latch plate...

Страница 72: ...nd fasteners before a ride Take the vehicle to an dealer or refer to the Service Manual for correct tightening torque Lights Check the headlights and tail brake lights to make sure they are in working condition Repair as necessary for proper operation Switches Check the operation of all switches Have an dealer repair as necessary for proper operation Tires WARNING Operating this vehicle with impro...

Страница 73: ... THE HAZARD 2 The tires should be set to the recommended pressure Recommended tire pressure Front Rear 25 kPa 0 25 kgf cm2 Check and adjust tire pressures when the tires are cold 10psi Tire pressures must be equal on both sides 3 Tire pressure below the minimum specified could cause the tire to dislodge from the rim under severe riding conditions The following are minimums Front Rear 22 kPa 0 22 k...

Страница 74: ... use the second reading Dust or dirt in the gauge could cause the first reading to be incorrect Set pressure with tires cold Set tire pressures to the following specifications Recommended pressure Minimum Maximum Front Rear 25 kPa 0 25 kgf cm 2 10 psi 22 kPa 0 22 kgf cm 2 3 2 psi 26 kPa 0 26 kgf cm 2 11 psi Manufacturer size Front FAR EAST 25x8 12 Rear FAR EAST 25x10 12 ...

Страница 75: ...re a Tire wear limit OPERATION WARNING Operating vehicle without being familiar with all controls POTENTLAL HAZARD Loss of control which could cause an accident or injury WHAT CAN HAPPEN Read the Owner s Manual carefully If there is a control or function you do not understand ask your dealer HOW TO AVOID THE HAZARD ...

Страница 76: ... compartment cover 4 Using a charged 12V battery connect the positive lead of the jumper cable to the positive terminal of the battery in the vehicle and the other end of the positive lead to the positive terminal of the charged battery 1 Jumper cable positive lead 2 Jumper cable negative lead 5 Connect the negative lead of the jumper cable to the negative terminal of the negative lead to an unpai...

Страница 77: ...ay occur 6 Start the engine 7 After the engine starts disconnect the negative lead of the jumper cable from the vehicle and charged battery and then disconnect the positive lead of the jumper cable from the charged battery and the battery in the vehicle 8 Install the battery compartment cover 9 Close the hood Warming up To get maximum engine life always warm up the engine before starting off Never...

Страница 78: ...heck behind for people or obstacles then release the brake pedal 5 Press the accelerator pedal gradually and continue to watch to the rear while backing NOTE When in reverse the revere indicator light should be on If the light does not come on ask an dealer to inspect the reverse indicator light electrical circuit Due to the synchronizing mechanism in the engine the light may not come on until the...

Страница 79: ...ver a more important period in the life of your vehicle than the period between zero and 20 hours For this reason we ask that you carefully read the following material Because the engine is brand new you must not put an excessive load on it for the first several hours of running During the first 20 hours the various parts in the engine wear and polish them selves to the correct operating clearance...

Страница 80: ...r 0 10 hours Avoid continuous operation above half throttle Allow a cooling off period of five to ten minutes after every hour of operation Vary the speed of the vehicle from time to time Do not operate it at one set throttle position 10 20 hours Avoid prolonged operation above 3 4 throttle Rev the vehicle freely but do not use full throttle at any time After break in The vehicle can now be operat...

Страница 81: ...king on hills or other inclines If you must park on an incline apply the parking brake and block the front and rear wheels with rocks or other objects Do not park the vehicle at all no hills that are so steep you could not walk up them easily HOW TO AVOID THE HAZARD 1 Bring the vehicle to a stop by applying the brakes 2 Stop the engine 3 With the brakes applied set the parking brake ...

Страница 82: ...r dealer has a variety of genuine accessories Other accessories may also be available on the market However it is not possible for to test all control over the quality or suitability of them Choose a genuine accessory or one that is equivalent in design and quality Accessories should be rigidly and securely mounted An accessory which can shift position or come off while you are operating could aff...

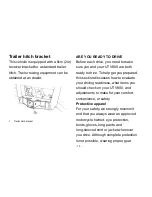
Страница 83: ...oaded vehicle can be unstable Choose a trailer hitch drawbar designed for use with a 5 cm 2in receiver Do not exceed the maximum tongue weight You can measure tongue weight with a bathroom scale Put the tongue of the loaded trailer on the scale with the tongue at hitch height Adjust the load in the trailer if you are carrying cargo and towing a trailer include the tongue weight in the maximum vehi...

Страница 84: ...e braking distance A heavier vehicle takes longer to stop Avoid making sharp turns unless at very slow speeds Avoid hills and rough terrain Choose terrain carefully Added weight affects the stability and handling of the vehicle WARNING Overloading this vehicle or carrying or towing cargo improperly POTENTIAL HAZARD Could cause changes in vehicle handling which could lead to an accident WHAT CAN HA...

Страница 85: ...on and warning labels on your vehicle This vehicle is designed for the operator and one passenger The driver and passenger must always wear a seat belt Never carry passengers in the cargo bed WARNING Not wearing the seat belt POTENTLAL HAZARD Wearing the seat belt improperly There is increased risk of being killed or seriously injured in an accident WHAT CAN HAPPEN Always wear your seat belt when ...

Страница 86: ...ing this vehicle orcarrying or towing cargo improperly POTENTIAL HAZARD Could cause changes in vehicle hand ling which could lead to an accident WHAT CAN HAPPEN Never exceed the stated load capacity for this vehicle HOW TO AVOID THE HAZARD Cargo should be properly distributed and securely attached Reduce speed when carrying cargo or pulling a trailer Allow greater distance for braking Always follo...

Страница 87: ...cle helmet eye protection and protective clothing POTENTIAL HAZARD Operating without an approved motorcycle helmet increases your chances of a severe head injury or death in the event of an accident Operating without eye protection can result in an accident and increases your chances of a severe injury in the event of an accident WHAT CAN HAPPEN Always wear an approved motorcycle helmet that fits ...

Страница 88: ...ugh terrain Do not attempt to turn around or make abrupt maneuvers on slopes Position your hands on the steering wheel so that your thumbs and fingers do not wrap around the wheel This is particularly important when driving in rough terrain The front wheels will move right and left as they respond to the terrain and this movement will be felt in the steering wheel A sudden jolt ...

Страница 89: ...y application of the brakes is more effective than abrupt braking particularly on loose surfaces like gravel Always allow for greater braking distance on rough loose or slippery surfaces Going uphill Do not attempt to climb hills until you have mastered basic maneuvers on flat ground Use proper driving techniques to avoid overturns on hills and slopes Drive straight up hills and avoid crossing the...

Страница 90: ...with slippery surfaces or ones where you will not be able to see far enough ahead of you WARNING Operating on excessively steep hills POTENTIAL HAZARD The vehicle can overturn move easily on extremely steep hills than on lever surfaces or small hills WHAT CAN HAPPEN Never operate your vehicle on hills too steep for it or your abilities Never operate vehicles on hills steeper than 15 HOW TO AVOID T...

Страница 91: ...he engine brake if necessary to slow your descent Release the brake and begin to coast down the hill Use engine braking as much as possible gently applying the brakes when necessary Going downhill Check the terrain carefully before going down a hill When possible choose a path that lets you drive your vehicle straight downhill Avoid sharp angles that could allow the vehicle to pitch or roll over C...

Страница 92: ... will let you use engine braking to help you go downhill slowly Go as slowly as possible If you are starting to go too fast apply the brakes gently Avoid sudden application of the brakes which could cause the vehicle to start sliding If you are sliding or skidding try to steer in the direction the vehicle is sliding to help you regain control If you must turn on the hill to avoid an obstacle do so...

Страница 93: ...r test your brakes If necessary apply the brakes several times to let friction dry out the linings WARNING Operating this vehicle through deep or fast flowing water POTENTIAL HAZARD Loss of control which could result in an accident including overturn which could increase the risk of drowning WHAT CAN HAPPEN Never operate this vehicle in fast flowing water or in water deeper than 33 cm 13 in HOW TO...

Страница 94: ...e damage to the vehicle or could lead to a rollover or accident Avoid jumping the vehicle as injury loss of control and damage to the vehicle could occur WARNING Failure to use extra care when operating this vehicle on unfamiliar terrain POTENTIAL HAZARD You can come upon hidden rocks bumps or holes without enough time to react Could result in the vehicle overturning or going out of control WHAT C...

Страница 95: ...accident or for brush that might enter the vehicle as you pass and strike the driver or passenger Never hold onto the enclosure so your hand is outside the vehicle Hold only onto the handgrip inside the enclosure Encountering obstacles on the trail If you cannot go around an obstacle such as a fallen tree trunk or a ditch stop the vehicle where it is safe to do so Set the parking brake and get out...

Страница 96: ...conditions If there is any question about your ability to maneuver safely over the obstacle you should turn around if the ground is flat and have the room or back up until you find a less difficult path WARNING Improperly operating over obstacles POTENTIAL HAZARD Could cause loss of control or a collision Could cause the vehicle to overturn WHAT CAN HAPPEN Before operating in a new area check for ...

Страница 97: ...ubrication are explained in the following pages WARNING Servicing an engine while it is running POTENTIAL HAZARD Moving parts can catch clothing or parts of the body causing injury WHAT CAN HAPPEN Electrical components can cause shocks or can start fires Turn off the engine when performing maintenance unless otherwise specified Have an dealer perform service if you are not familiar with vehicle se...

Страница 98: ...hours 20 75 150 150 300 Valves Check vale clearance Adjust if necessary Cooling system Check coolant leakage Repair if necessary Replace coolant every 24 months Spark plug Check condition Adjust gap and clean Air filter elements engine and air intake duct Clean Replace if necessary Every 20 40 hours More often in wet or dusty areas Carburetor Check idle speed starter operation Adjust if necessary ...

Страница 99: ...ing system Check operation and for looseness Replace if damage Check toe in Adjust if necessary Rearupperandlowerknucklepivots Lubricate with lithium soap based grease Drive shaft universal joint Lubricate with lithium soap based grease Engine mount Check for cracks or damage Correct bolt tightness Front and rear axle boots Check operation Replace if damage Stabilizer bushings Check for cracks or ...

Страница 100: ...l it stops 1 Latch x2 1 Hood To close Lower the hood slowly to its original position and then hook the hood latches Secure projections on the underside of the hood into slots on the back of the instrument panel Secure slots on the side of the hood around projections on the frame ...

Страница 101: ...t x2 4 Projection x2 Console To install 1 Place the console in its original position 2 Install the parking brake lever boot 3 Install the seats CAUTION When installing the console be sure not to pinch the cables or wires Make sure that the groove at the bottom of the parking brake lever boot and the drive select lever boot fits securely around the edge of the hole in the console ...

Страница 102: ...ure complete and rapid draining 1 Park the UTV on level ground 2 Place an oil drain pan under the oil drain plug 1 3 Remove the oil filler cap 2 and the drain plug 1 oil drain plug 2 oil filler cap Type Hypoid gear oil Viscosity weight SAE 80 Suggested oil Shaft drive oil of original manufacturer or equivalent ...

Страница 103: ...ubrication Lubricate the knuckle upper and lower pivots with a grease gun Recommended lubricant Lithium soap based grease Steering shaft lubrication Lubricate the pivot points Recommended lubricant Lithium soap based grease all purpose grease ...

Страница 104: ...e the nuts from the wheel 4 Remove the wheel 1 Nut x4 Wheel installation 1 Install the wheel and the nuts NOTE The arrow mark on the tire must point toward the rotating direction of the wheel Tapered nuts are used for both the front and rear wheels Install the nut with its tapered side towards the wheel 1 Arrow mark ...

Страница 105: ...led type battery Therefore it is not necessary to check the electrolyte or add distilled water in the battery If the battery seems to have discharged consult dealer CAUTION Do not try to remove the sealing caps of the battery calls You may damage the battery WARNING Failure to handle batteries or battery electrolyte carefully POTENTIAL HAZARD You could be poisoned You could be severely burned by t...

Страница 106: ...r for 15 minutes and get prompt medical attention Keep batteries away from sparks flames Ventilate when charging or using in a closed space Battery maintenance 1 When the vehicle is not used for a month or longer remove the battery and store it in a cool dark place Completely recharge the battery before reinstallation CAUTION The carburetor was set at the factory after many tests If the settings a...

Страница 107: ...s battery explosion and or serious damage to the electrical system may occur If a fuse blows All of the electrical circuits on your UTV have fuses to protect them from damage caused by excess current flow short circuit or overload If something electrical on your UTV stops working the first thing you should check for is a blown fuse 1 Check all the fuses before looking elsewhere for another possibl...

Страница 108: ...prevent accidental short circuiting turn off the main switch when checking or replacing a fuse 3 Remove the blown fuse and then install a new fuse of the specified amperage If a fuse blows All of the electrical circuits on your UTV have fuses to protect them from damage caused by excess current flow short circuit or overload If something electrical on your UTV stops working the first thing you sho...

Страница 109: ... Main relay 9 Fan relay 10 Fuel pump relay NOTE Replacing a fuse with one that has a higher rating greatly increases the chance of damage to the electrical system Tail brake light bulb replacement If a tail brake light bulb burns out replace it as follows 1 Remove panel A if replacing the left tail brake bulb or panel B if replacing the right tail brake bulb by removing the quick fasteners and bol...

Страница 110: ...sh the defective bulb in and turn it counterclockwise to remove it from the bulb holder 3 Push a new bulb in and turn it clockwise to install in the bulb holder 4 Install the bulb holder together with the bulb by turning it clockwise 5 Install the panel by installing the ...

Страница 111: ...pression or ignition systems can cause poor starting and loss of power The troubleshooting chart describes a quick easy procedure for making check If your vehicle requires any repair take it to dealer The skilled technicians at dealership have the tools experience and know how to properly service your vehicle Use only genuine parts on your vehicle Imitation parts may look like parts but they are o...

Страница 112: ...OTENTIAL HAZARD Fuel can ignite or explode causing WHAT CAN HAPPEN severe injury or property damage Do not smoke when checking the fuel system Make sure there are no open flames or sparks in the area including pilot lights from water heaters or furnaces HOW TO AVOID THE HAZARD ...

Страница 113: ...fuel Restart the engine No compression There is compression Compression normal Wipe clean with dry cloth Attach spark plug cap and ground to chassis Wet Dry Use the electric starter Spark is weak Spark is good No spark Ignition system is normal Adjust the spark plug gap or replace the spark plug Ask an dealer to inspect Ask an dealer to inspect Ask an dealer to inspect Check the connections rechat...

Страница 114: ...ot POTENTIAL HAZARD You can be burned by hot fluid and steam blown out under pressure WHAT CAN HAPPEN Wait for the engine to cool before removing the radiator cap Always use a thick rag over the cap Allow any remaining pressure to escape before completely removing the cap HOW TO AVOID THE HAZARD ...

Страница 115: ...as cooled Wait until the engine has cooled Restart the engine if the engine overheats afain ask an dealer to inspect and or repair the cooling system Ask an dealer to inspect and repair the cooling system Add coolant See NOTE NOTE If it is difficult to get the recommended coolant tap water can be temporarily used provided that it is changed to the recommended coolant as soon as possible ...

Страница 116: ...he spark plug and all filler caps are properly installed 2 If the engine case is excessively greasy apply degreaser with a paint brush Do not apply degreaser to the wheel axles 3 Rinse the dirt and degreaser off with a garden hose Use only enough pressure to do the job CAUTION Excessive water pressure may cause water seepage and deterioration of wheel bearings brakes transmission seals and electri...

Страница 117: ...e cover pliable and glossy 7 Automotive type wax may be applied to all painted and chrome plated surfaces Avoid combination cleaner waxes Many contain abrasives which may scratch the paint or protective finish When finished start the engine and let it idle for several minutes WARNING Operation with wet brakes after washing POTENTIAL HAZARD Wet brakes may have reduced stopping ability increasing th...

Страница 118: ...l system 2 Drain the fuel from the carburetor float chamber into a clean container by loosening the drain bolt this will help prevent fuel deposits from building up Pour the drained fuel onto the fuel tank Specified amount 1 oz of stabilizer to each gallon of fuel or 7 5 cc of stabilizer to each liter of fuel NOTE Use of fuel stabilizer and conditioner eliminates the need to drain the fuel system ...

Страница 119: ...let to prevent moisture from entering 7 If storing in a humid or salt air atmosphere coat all exposed metal surfaces with a light film of oil Do not apply oil to any rubber parts or the seat covers 8 Remove the battery and charge it Store it in a dry place and recharge it once a month Do not store the battery in an excessively warm or cold place less than 0 30 of move than 30 90 NOTE Make any nece...

Страница 120: ... vehicle for the purpose of noise control prior to its sale or delivery to the ultimate purchaser or while it is in use or the use of the vehicle after such device or element of design has been removed or rendered inoperative by any person AMONG THOSE ACTS PRESUMED TO CONSTUTE TAMPERING ARE THE ACTS LISTED BELOW These acts include tampering with the following systems i e modification removal etc E...

Страница 121: ... check the API service label certification on the oil container it must contain at least one of the above standards Oil Viscosity SAE 5W30 mineral based oil is recommended for all seasons However during the hottest days of the summer the XP S 10W40 mineral oil can be used NOTE For improved overall performance and all season applications use XP S 5W40 synthetic oil ...

Страница 122: ...fill Operating the engine with an improper level may severely damage engine Wipe off any spillage With vehicle on a level surface and engine cold not running check the oil level as follows 1 Unscrew dipstick then remove it and wipe clean 2 Reinstall dipstick screw in it completely ...

Страница 123: ...nnel into the dipstick tube to avoid spillage Add a small amount of recommended oil and recheck oil level Repeat the above procedures until oil level reaches the dipstick s upper mark Do not overfill Properly tighten dipstick Oil Change and Oil Filter Replacement Oil and filter are to be replaced at the same time Oil change should be done with a warm engine ...

Страница 124: ...e vehicle is on a level surface Remove dipstick Clean the oil drain plug area Place a drain pan under the oil drain plug area Unscrew oil drain plug TYPICAL 1 Oil drain plug Allow enough time for oil to flow out of oil filter Unscrew the oil filter cover 1 Oil filter cover 2 Exhaust pipe Remove the oil filter and replace with a new filter Check the cover O ring and change it if necessary ...

Страница 125: ...sure oil filter area and oil drain plug areas are not leaking Stop engine Wait a while to allow oi l to flow down to crankcase then ch eck oil level Refill as necessary Dispose of oil as per your local environmental regulations Engine Coolant Recommended coolant Always use ethylene glycol antifreeze containing corrosion inhibitors specifically for internal combustion aluminum engine Cooling system...

Страница 126: ...he coolant is added in the coolant reservoir check the level in the radiator too Add coolant if necessary WARNING In order to avoid getting burned do not remove the radiator cap if the engine is hot NOTE A cooling system that frequently requires coolant is the indication of leaks or engine problems See an authorized dealer Coolant Replacement WARNING In order to avoid potential burns do not remove...

Страница 127: ...Drain the system completely and reinstall the coolant drain plug Pinch hose between radiator and thermostat housing with a large pincher or an equivalent CAUTION Do not use vise grip pliers to pinch hose Fill the radiator until the coolant comes out by the thermostat housing hole Complete the radiator filling Check the level in the coolant reservoir ...

Страница 128: ...never remove or modify any component in the air filter housing Otherwise engine performance degradation or damage can occur The engine is calibrated to operate specifically with these components Remove access panel Loosen clamp and remove air filter 1 Clamp 2 Air filter Cleaning Pour cleaning solution or an equivalent into a bucket Put the filter in to soak While filter soaks clean inside the air ...

Страница 129: ...ibly damage the valves Excessive clearance will cause noise Spark Arrester The muffler must be periodically purged of accumulated carbon WARNING Never run engine in an enclosed area Never perform this operation immediately after the engine has been run because exhaust system is very hot Make sure that there are no combustible materials in the area Wear eye protection and gloves Never stand behind ...

Страница 130: ...d dirt leaves and any other deposit that would prevent the radiator to cool properly Remove as much deposits as you can with your hands If water is available in proximity try rinsing the radiating fans If available use a garden hose to rinse the radiating fins WARNING Never clean radiator with your hands when it is hot Let the radiator cool down before cleaning CAUTION Be careful not to damage the...

Страница 131: ... gearbox Wipe off any spillage Place the vehicle on a level surface Select NEUTRAL position then apply parking brake Check the gearbox oil level by removing the gearbox oil level plug 1 Oil level plug 2 Oil drain plug The oil should be level with the bottom of the oil level bole Refill as required until gearbox oil level flows through oil level hole Gearbox Oil Change Place the vehicle on a level ...

Страница 132: ...x using XP S chaincase oil or an equivalent CAUTION Do not use other unrecommended types of oil when servicing Do not mix with other types of oil The oil should be level with the bottom of the oil level hole Refill as required through the breathe pipe until gearbox oil level flows through oil level hole 1 breathe pipe Reinstall oil level plug ...

Страница 133: ...thorized dealer PERIODIC MAINTENANCE CHART A ADJUST INITIAL INSPECTION 10 HOURS OR 300 KM OR 300 km C CLEAN The initial maintenance is very important and must not to be neglected I INSPECT 25 HOURS OR 750 KM L LUBRICATE 50 HOURS OR 1500 KM R REPLACE 100 HOURS OR 3000 KM OR 1 YEAR 200 HOURS OR 6000 KM OR 2 YEAR TO BE PERFOMED BY PART TASK LEGEND ...

Страница 134: ...ow wet or muddy conditions Engine oil and filter R R Customer Valve adjustment I A I A Dealer Engine mount fasteners I I Dealer Air filter 2 C 4 R 4 Customer Exhaust system I I Dealer Spark arrester C Customer Condition of engine seals I I Dealer Coolant 2 I I 3 R Customer Cooling system pressure test I I Dealer radiator condition cleanliness radiator fins 4 I I Customer ...

Страница 135: ...ant and must not to be neglected I INSPECT 25 HOURS OR 750 KM L LUBRICAT E 50 HOURS OR 1500 KM R REPLACE 100 HOURS OR 3000 KM OR 1 YEAR 200 HOURS OR 6000 KM OR 2 YEAR TO BE PERFOMED BY PART TASK LEGEND SUSPENSION Trailing arms I Dealer Trailing arm bearings I I Dealer Shock absorbers I Dealer A arms I L Customer Ball joints I Dealer ...

Страница 136: ... such dusty area sand snow wet or muddy conditions Brake pads I 4 Customer Brake system discs hoses etc I Customer BODY FRAME Engine compartment I C I C Customer 4 More often under severe use such dusty area sand snow wet or muddy conditions Frame I Dealer Chassis fasteners I Customer Seat fasteners EVERY RIDE Customer ...

Страница 137: ...m Ground clearance 285mm Basic weight With oil and full fuel tank 550kg Final gear case oil Type Wet tank lubrication oil filters can be changed Quantity 2 2 L Fuel Type Unleaded gasoline only 93 or higher Fuel tank capacity 25 0 L Spark plug Type manufacturer DCPR8E NGK Transmission Transmission type Four speed one reverse Operation Manual ...

Страница 138: ...ront and rear unified Type Front Dual disc brake Type Rear Single disc brake Operation Foot operation Suspension Front suspension Double wishbone Rear suspension Double wishbone Shock absorber Front shock absorber Coil spring oil damper Rear shock absorber Coil spring oil damper Wheel travel Front wheel travel 185 0 mm 7 28 in Rear wheel travel 185 0 mm 7 28 in ...

Страница 139: ...TV800 Engine model 2V91 Type Two cylinder overhead cam SOHC water cooling Cylinder diameter 91 mm Piston stroke 61 5 mm Compression ratio 10 3 1 Displacement 7 97 L Maximum torque 73N m 5000 RPM Idle speed 1250rpm ...

Отзывы: