background image


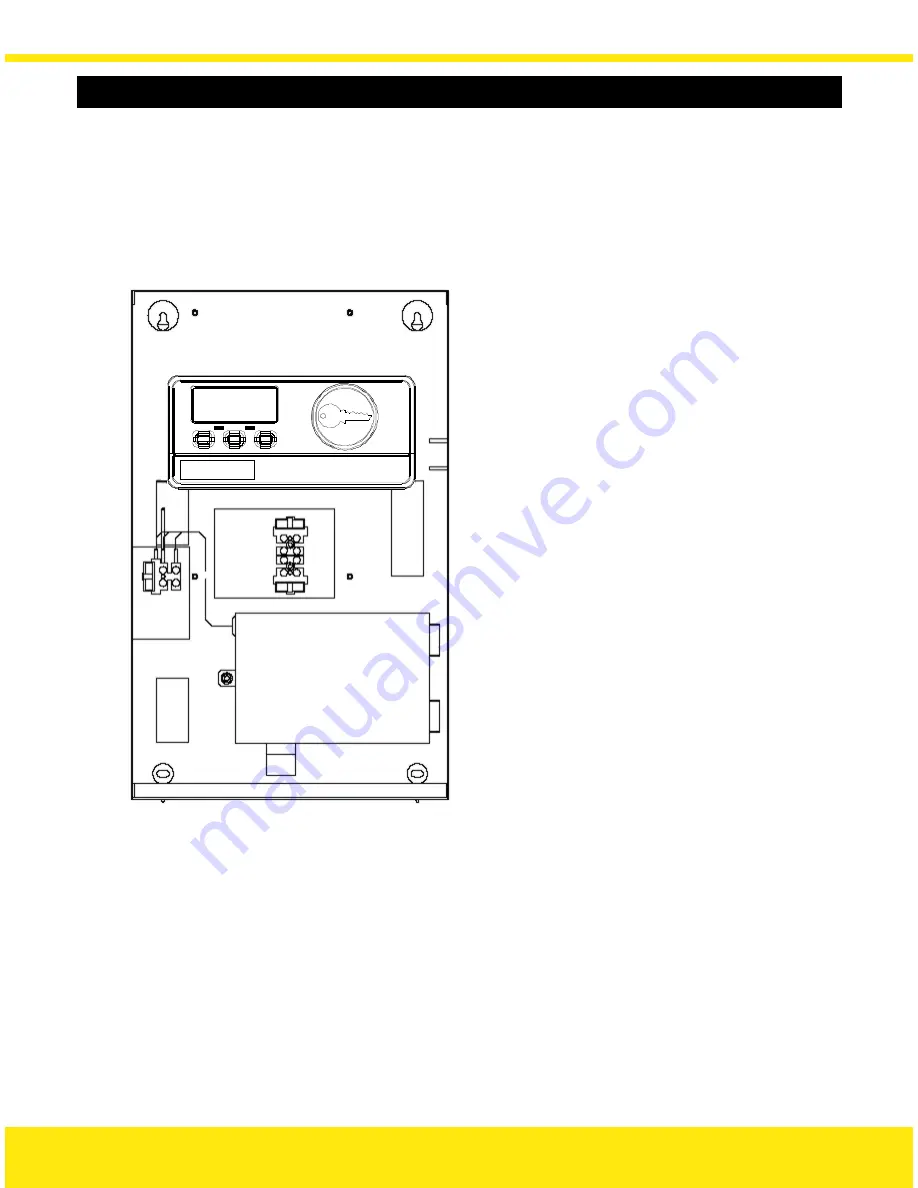
Mounting the Cabinet — Boxed Easikey 250 with Cutout 

1.  Using the keyholes at the top as a template, temporarily hang the cabinet and 

then use the two lower holes as a template to mark the position of the fixing 
points. 

2.  Use Nº 8 1½" self-tapping screws and appropriate fixings to attach the cabinet 

to the wall. 


25 

Содержание Easikey 250

Страница 1: ...User and Installation Guide Easikey 250 17410 v1 0 August 09...

Страница 2: ...How to Use Easikey 250 7 Installation 13 Boxed Easikey 250 23 Initial Programming 29 Set Reset Latch 37 Database Copy 38 Dual Controller Option 41 Easikey 250 System Troubleshooting 44 Other Easikey 2...

Страница 3: ...ader Controls one or two doors Up to 250 keyholders Up to three Editor Keys Individual keys may be added and deleted Each lock may be Fail Safe Fail Open or Fail Secure Fail Closed Request to Exit inp...

Страница 4: ...Editor Keys Selectable 1 2 or 3 Other Features Request to Exit input Set Reset Latch Database copy Display last 5 keys given access About this Guide This document contains details on installing and us...

Страница 5: ...E F G H J Door 1 Door 2 LCD Display Green LED Red LED K L M N P Left Button Middle Button Right Button Controller Reader Removable Cover Q R S Request to Exit Switch on other side of door Example Mag...

Страница 6: ...C key contains a unique code The controller can store the code of up to 250 keys in its non volatile memory When a key is presented to a reader the code in the key is passed by the reader to the contr...

Страница 7: ...250 keys in its memory Door access permission can be set for every key as follows Door 1 only Door 2 only or both doors Up to three of these user keys are also given the ability to make changes to the...

Страница 8: ...ksheet has an unlabelled column in the keyholder section You can use this for recording your own information Typically you may record Department or Office in a commercial system or Flat Building or Bl...

Страница 9: ...hange tens Press to change hundreds Press to change units Free index 38 Present the key again New user 38 1 Y 2 Y the middle button Press 3 Change access level Press to change Door 1 access Press to c...

Страница 10: ...5 seconds Batch Mode 1 Change access level for keys you are about to add Press to change Door 1 access Press to change Door 2 access User key 1 N 2 Y Note You cannot set the access level to 1 N 2 N 2...

Страница 11: ...s 23 Saved Memory full you must delete some keys before you can add any more Memory is Full Editing Keys To change a key s number or access level first delete the key then add it again selecting a dif...

Страница 12: ...tens Press to change hundreds Press to change units Erase token 38 3 Present an Editor Key Erased 38 Note You cannot use an Editor Key to delete itself Showing the Last 5 Users 1 Press the Left butto...

Страница 13: ...ore then you can follow this simple step by step checklist to get the system up and running If you are new to Easikey 250 then all the steps below are described in detail in the following pages Step 9...

Страница 14: ...inet or enclosure containing the power supply and batteries if used It should be easily accessible for programming the display should be at about eye level Note The Easikey 250 has the same dimensions...

Страница 15: ...screws as distortion of the mounting plate may make it difficult to mount the controller Screw here Screw here 2 Locate the two slots in the top edge of the unit into the two tabs indicated below and...

Страница 16: ...he cable cover Screw here Removing the Unit 1 Take out the securing screw and apply gentle forward pressure to the underside of the cable cover which should cause it to unlatch from the upper section...

Страница 17: ...e powered from a 12v AC or DC power supply The locks are controlled by switching power from the same or different supply The relays that control the locks are able to switch 24v DC at up to 2 Amps A p...

Страница 18: ...rating of batteries is usually given as a 10 hour discharge rate If the batteries discharge over a shorter period of time they will last for less than their quoted capacity Example An Easikey 250 wit...

Страница 19: ...to use the RTE switch then unscreened 4 core cable will be suitable otherwise use 6 core cable V1 S1 R1 A1 V1 V SIG VCA V A B C 100 mA Reader Wiring including RTE A Terminal Block B RTE C Reader Use 7...

Страница 20: ...supplied to unlock The type of cable used should be sufficient to provide the correct operating voltage at the lock Usually at least 0 5mm will be required for a range of up to 100m Lock Suppression I...

Страница 21: ...P1 P2 L1 L2 1 L3 L4 Z Z X Single Power Supply X Fuse Z MOV P1 P2 L1 L2 L3 L4 Z Z X X 1 2 Separate Power Supply for Controller and Lock X Fuse Z MOV 21...

Страница 22: ...ck supply wiring so that in an emergency the Fail Safe lock can be immediately depowered B A Checking the System After completing the wiring of power supply readers and locks you should make the follo...

Страница 23: ...s control system can be installed The assembly as supplied provides the following features 18 swg Mild Steel Cabinet with hinged lid with space for two 6Ah Batteries 3 Amp Power Supply with Battery Ba...

Страница 24: ...cation allowing personnel easy access The cabinet should be positioned so that the controller display is at about eye level Mounting the Cabinet Boxed Easikey 250 1 Using the keyhole at the top centre...

Страница 25: ...sing the keyholes at the top as a template temporarily hang the cabinet and then use the two lower holes as a template to mark the position of the fixing points 2 Use N 8 1 self tapping screws and app...

Страница 26: ...t also has two 15mm knockouts Cable Entry Options Boxed Easikey 250 with Cutout Two holes in the back of the cabinet for rear entry Two knockouts on the top suitable for use with 25 16mm trunking A 20...

Страница 27: ...Fuse 3 15 Amp Fuse 1 0 Amp 240v AC Battery Fuse 3 15 Amp Lock Fuse 3 15 Amp Max dist 100m Reader wiring not shown Batteries Lock 1 Lock 2 MOV MOV P1 P2 L1 L2 L3 L4 Reader Wiring See the section on Re...

Страница 28: ...key 250 Boxed Easikey 250 with Cutout 1 With the mains supply connected power up the system with no locks or readers connected 2 Using a multimeter set to DC volts measure the voltage across the P1 an...

Страница 29: ...ey 250 s memory again However the actual Editor Keys can be removed and added see the sections on Adding Editor Keys and Deleting Keys Record the number of Editor Keys on the Programming Worksheet Ini...

Страница 30: ...number of Editor Keys that you selected when you initialised the controller keys number 0 and possibly 1 and 2 will be Editor Keys all the other keys will be user keys You can add Editor Keys using an...

Страница 31: ...ond Editor Key Editor Key 1 Saved Editor Key 1 N 2 Y 4 Change access level for third Editor Key Press to change Door 1 access Press to change Door 2 access Editor Key 1 N 2 Y 5 Add third Editor Key Ed...

Страница 32: ...ock 1 may also be set to operate in a Toggle function see Set Reset Latch for details Adjusting Lock Time and Fail Safe Fail Secure Settings 1 Present an Editor Key Editor Key 0 1 Y 2 Y 2 Choose a doo...

Страница 33: ...eir place using one of the other Editor Keys However if all the Editor Keys are lost a new Editor Key 0 can be enrolled without having to clear completely all the user key information Enrolling a New...

Страница 34: ...ent Firmware Version Number 1 Remove power from the Easikey 250 2 Re apply power PAC Easikey 250 V1 00 Silent Mode Operation Configuring the Buzzer on the Controller 1 Present an Editor Key Editor Key...

Страница 35: ...lows Controller Only Buzzer sounds only when a token is shown to the controller reader Reader Only Buzzer sounds only when access is granted denied Silent Mode On Buzzer is silent Silent Mode Off Buzz...

Страница 36: ...rwegian Changing the Language 1 Present an Editor Key Editor Key 0 1 Y 2 Y 2 Press and hold the Right button for 2 seconds Select Language English UK 3 Press the Left button to select the required lan...

Страница 37: ...be used like a toggle to operate another system Note When this facility is used the Request to Exit facility for Door 1 will no longer be available Setting Up the Set Reset Latch Facility 1 Present an...

Страница 38: ...u cannot copy from an Easikey 250 to an Easikey 99 Connecting Two Easikey 250 Controllers for Database Copy 1 Remove power from both Easikey 250s Only one Easikey 250 needs to be powered during the co...

Страница 39: ...is displayed 2 On the sending Easikey 250 press the Left button Copying database 38 Copying database 38 Copy complete 100 Note Each packet of data is verified during the transfer process to ensure com...

Страница 40: ...ikey 99 present an Editor Key 3 On the Easikey 99 press both buttons Easikey99 Found 2 On the Easikey 99 press the Blue button Copying database 20 Copy complete 100 Note Each packet of data is verifie...

Страница 41: ...or connect an Easikey 250 and an Easikey 99 In the diagrams below Controller 1 is always an Easikey 250 Controller 2 may be either an Easikey 250 or an Easikey 99 The connections for reader and lock...

Страница 42: ...wer will be applied Fail Safe locks are wired with the relays in series so whenever one relay opens power will be removed P1 P2 L1 L2 L1 L2 1 2 Z X P P1 P2 Power and Lock Wiring for Dual Controllers F...

Страница 43: ...e same Editor Keys to each Easikey 99 250 Ensure that the Lock Release Times for each lock are programmed in exactly the same way on each controller The lock type Fail Safe Fail Secure must be the sam...

Страница 44: ...Check power at reader should be 9 16VDC Reader wiring incorrect Check wiring One reader OK but other is not Key does not have access Check key has access through both doors Power supply is not capable...

Страница 45: ...ible screwdriver e g 1950 Screwdriver below 20042 Black Yellow 20049 Blue Grey OneProx Panel Mount Reader For fitting in steel panels e g as part of a door entry system 1950 Screwdriver For Vandal Res...

Страница 46: ...rom Stanley Security Products The Easikey 250 uses a non harmonised frequency 10kHz and has approval from the following members of the European Conference of Postal and Telecommunications Administrati...

Страница 47: ...Humidity Controller 0 to 90 relative humidity non condensing Reader Sealed construction Power Requirements Input Voltage 10 5V to 20V DC 8V to 14 5V AC 50 60Hz Current Controller 190mA Max Reader 90m...

Страница 48: ...eyworks com Knowledge Base www stanleysecurityproducts co uk support United States of America Stanley Security Products Contact Technical Support Tel 800 414 3038 Fax 800 414 3039 E mail support stanl...

Отзывы: