background image

10 

Plug and connection assignment

This chapter will help you select the right cables and plugs to connect your valuable

equipment so that a perfect light experience is guaranteed.
Please take our tips, because especially in ‘Sound & Light’ caution is indicated: Even if

a plug fits into a socket, the result of an incorrect connection may be a destroyed

DMX controller, a short circuit or ‘just’ a not working light show!

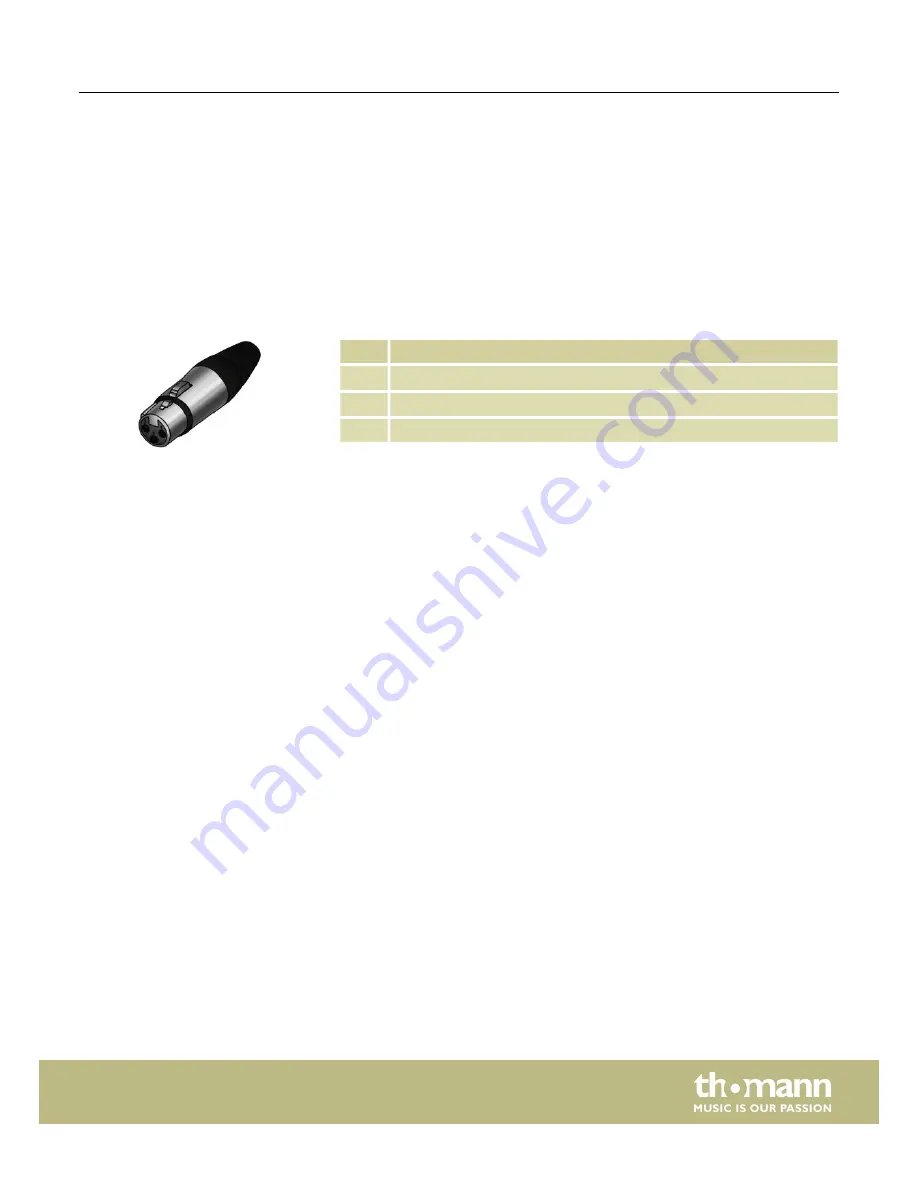
A female 3-pin XLR socket is used for the DMX output. The figure and the table below

show the pin assignment.

Pin

Assignment

1

Ground (shielding)

2

Signal inverted (DMX–, ‘cold’)

3

Signal (DMX+, ‘hot’)

Introduction

DMX socket

Plug and connection assignment


DMX-Master 3-FX

47

Содержание DMX-Master 3-FX

Страница 1: ...DMX Master 3 FX DMX controller user manual...

Страница 2: ...Musikhaus Thomann Thomann GmbH Hans Thomann Stra e 1 96138 Burgebrach Germany Telephone 49 0 9546 9223 0 E mail info thomann de Internet www thomann de 03 05 2017 ID 294610 V3 SW V1 5...

Страница 3: ...on 17 8 2 Scenes and banks 19 8 3 Chasers 22 8 4 Blackout 25 8 5 Overlay scenes 27 8 6 Effects generator 28 8 7 Cross fades 32 8 8 Channel inversion 33 8 9 Assigning the jog wheels Pan and Tilt for ro...

Страница 4: ...l is also available as PDF file for you to download Keyword search Use the search function in the electronic version to find the topics of interest for you quickly Online guides Our online guides prov...

Страница 5: ...mple See Cross references on page 5 1 3 Symbols and signal words In this section you will find an overview of the meaning of symbols and signal words that are used in this manual Signal word Meaning D...

Страница 6: ...y small parts e g knobs or the like from the unit They could swallow the pieces and choke Never let children unattended use electrical devices NOTICE External power supply The device is powered by an...

Страница 7: ...r n fade in time fade out time and speed for scenes and chases can be adjusted per channel n all channels invertible n jog wheels for the control of pan and tilt movements n operating modes Play Mode...

Страница 8: ...ansportation or storage use the original packaging or your own packaging material suitable for transport or storage respectively The device is designed for mounting in 19 racks it occupies four rack u...

Страница 9: ...r to the 9V connector of the unit and then plug the power adapter into a wall outlet Turn on the device using the main switch on the rear panel Turn on the device using the main switch at the back sid...

Страница 10: ...indicator LED shows whether the respective channel is switched LED on or deactivated LED off 2 Button Fog Machine Activates a connected fog machine The LEDs Heating and Ready indicate the operating st...

Страница 11: ...8 Button block Overlay FX Select Buttons 1 to 6 for enabling disabling of the Overlay scenes The LEDs indicate which scenes are enabled LED is on 9 Slider with dual function for adjusting DMX channels...

Страница 12: ...ivates the automatic control 18 Button Black Out Button to override the DMX outputs with user specific data such as all shutter channels to 0 19 Button Freeze Enables the Freeze function 20 Button Tap...

Страница 13: ...function 27 Button FX Clear Button for resetting the custom effects settings 28 Button FX Editor Activates the effects editor 29 AUDIO RCA input for connecting audio equipment for sound control Once y...

Страница 14: ...32 DMX OUT Lockable DMX output socket 33 DC IN Connection socket for the 9 V power supply unit 34 OFF ON Main switch to turn the device on and off Connections and controls DMX controller 14...

Страница 15: ...eceiver is connected to the input of the second one and so on The output of the last receiver in the DMX chain must be terminated using a resistor 110 W If the cable length exceeds 300 m 328 yds or th...

Страница 16: ...ounting method of the device determines the first channel Depending on the device the channel numbers may start from 0 or from 1 The address range may therefore reach from 0 to 511 or from 1 to 512 Ad...

Страница 17: ...MIDI controlled n Program Mode In this mode scenes effects banks chaser sequences cross fades and blackouts can be programmed n Setup Mode In this mode different parameters can be adjusted MIDI chann...

Страница 18: ...Setup Mode In this mode the name of the currently opened menu appears in the second line see the following table for menu items n Easy Mode In this mode no value is displayed in the second display lin...

Страница 19: ...ere the new scene is to be stored If neces sary use Up or Down to change between the memory banks The LED flashes three times briefly use Release to reset all channels to 0 simultaneously 7 To return...

Страница 20: ...hat are assigned to a DMX device to another 1 To enter Program Mode keep Program pressed for three seconds 2 Keep pressed the Fixture button assigned to the DMX device whose settings you want to copy...

Страница 21: ...red 3 Simultaneously press DELETE and the Scene button of the scene you want to delete The LED flashes three times briefly This indicates that the scene has been deleted successfully 4 To return to Pl...

Страница 22: ...sequence 3 Press die Scene button of the scene you want to insert 4 Press Record The LED flashes three times briefly This indicates that the scene has been inserted successfully The upper line of the...

Страница 23: ...or banks into an existing chaser sequence 1 To enter Program Mode keep Program pressed for three seconds 2 Press the CHASER of that chaser sequence you want to edit If you select a chaser sequence th...

Страница 24: ...cenes after the initial edit point are removed 6 To return to Play Mode keep Program pressed for three seconds With this function a chaser sequence is deleted i e all the scenes are removed from it 1...

Страница 25: ...d to step 5 4 Press BLACKOUT once to load an existing configuration 5 Press the Fixture buttons assigned to those DMX devices whose blackout set tings you want to edit 6 Activate or deactivate channel...

Страница 26: ...am Mode keep Program pressed for three seconds 2 Use Up or Down to select bank 31 The display shows Overlay 3 Simultaneously press DELETE and BLACKOUT The LED flashes three times briefly This indicate...

Страница 27: ...ot be loaded The display shows NULL 5 Press die Fixture buttons assigned to those DMX devices whose overlay set tings you want to edit 6 Activate or deactivate channels via the Scene buttons The displ...

Страница 28: ...r can save movement pattern for rotation pan and inclination tilt for moving heads and scanners along with normal DMX values in an overlay scene 12 different movement patterns can be selected and adju...

Страница 29: ...nally to the right Sawtooth 1 Sawtooth like movement pattern of the rotation Sawtooth 2 Sawtooth like movement of the inclination Triangle Movement in a triangular shape Linear Straight up and down mo...

Страница 30: ...on next time the devices split up in two groups that perform alter nating movements opposite to each other If you press Create Wave again a back ward travelling wave is generated The wave disappears w...

Страница 31: ...alues also while the Effects Gen erator is opened The values set here for rotation and tilt become the basis for the effect Use PAGE to switch between channels 1 8 and 9 16 7 If necessary repeat steps...

Страница 32: ...tomatically Cross fades are useful only for movements and dimmer settings Therefore it is pos sible with this function to define which channels are affected and which are not To set up the cross fade...

Страница 33: ...te the device memory Initializing device memory on page 43 To turn the channel inversion for a DMX channel on or off proceed as follows 1 To enter Setup Mode keep Program pressed for three seconds 2 U...

Страница 34: ...unit 2 Nevertheless you can use the jog wheels for both DMX devices After deleting the device memory the jog wheels for all DMX devices are assigned to channels 1 and 2 Initializing device memory on p...

Страница 35: ...scene to be detached during a quiet passage of music Using this function a bank made of saved scenes or a chaser sequence is played back in an endless loop 1 Press Auto The last stopped auto beat is...

Страница 36: ...steps from 0 to 255 how fast the device fades from one step to the next The longest fade time is 32 seconds Smaller movements are executed faster 5 To turn the music control off press again Music Ban...

Страница 37: ...time Then they run in par allel At the end of the top line the display shows the number of the cur rently running chaser sequence 1 Press at least one of the Chaser buttons If you press the button ag...

Страница 38: ...vailable in Play Mode 1 Press Freeze to freeze the running playback 2 Press Freeze again to resume playback 8 11 MIDI control You can control the device using a MIDI keyboard or another MIDI device Th...

Страница 39: ...ff 114 Scene 3 bank 2 on off 115 Scene 4 bank 2 on off 116 Scene 5 bank 2 on off 117 Scene 6 bank 2 on off 118 Scene 7 bank 2 on off 119 Scene 8 bank 2 on off Chaser sequence 1 120 Chaser sequence 1 o...

Страница 40: ...ff 069 Overlay 4 on off 070 Overlay 5 on off 071 Overlay 6 on off Fourth last black key 073 Freeze on Fifth last black key 075 Freeze off Three last black keys 078 Auto Beat on off 080 Music control o...

Страница 41: ...X Speed and Fade Time The Scene buttons serve as flash buttons for the first eight channels of each DMX device The scene Blackout turns all 160 DMX channels to 0 Other functions except key lock are di...

Страница 42: ...e display shows Saved OK Now all data is stored on the USB drive in the file CA 1616 1 Copy the data to be loaded to a USB drive and connect this USB drive to the device 2 Simultaneously press Record...

Страница 43: ...3 Release the buttons All LEDs will flash three times briefly The device is equipped with an optional key lock desklock which blocks the user interface and thus prevents accidental changes To activat...

Страница 44: ...Mode keep Setup pressed for three seconds Applying the current playback configuration for auto start You can save the current playback configuration in a way that it automatically becomes active when...

Страница 45: ...lder in the root directory of the USB drive named DMX MASTER 3 FX 2 Copy the file DMX MASTER 3 FX SUP to the DMX MASTER 3 FX folder 3 Connect the USB drive to the device 4 Switch off the device 5 Simu...

Страница 46: ...9 Technical data Mains power supply 12 V DC Dimensions W H D 526 mm 232 mm 88 mm 4 rack units 20 7 in 9 1 in 3 4 in Weight 3 5 kg 7 7 lbs Technical data DMX controller 46...

Страница 47: ...aution is indicated Even if a plug fits into a socket the result of an incorrect connection may be a destroyed DMX controller a short circuit or just a not working light show A female 3 pin XLR socket...

Страница 48: ...Please follow the notes and markings on the packaging This product is subject to the European Waste Electrical and Electronic Equipment Directive WEEE Do not dispose with your normal household waste D...

Страница 49: ...Notes DMX Master 3 FX 49...

Страница 50: ...Notes DMX controller 50...

Страница 51: ......

Страница 52: ...Musikhaus Thomann Hans Thomann Stra e 1 96138 Burgebrach Germany www thomann de...

Отзывы: