12
Connection to 3 phase rectifier (optional) or the enclosed charge regulator. According
to the charge regulator ordered please read the enclosed manual.
Congratulations
now you can go ahead .
9. Run and Stop
Switch the enclosed stop-switch or the stop-switch of the charge regulator in position
run. If the wires are correctly connected to the battery (without having mixed up the
polarity) the Silentwind generator should start charging if windspeed is sufficient. You
can control this on the LCD-display of the charge regulator.
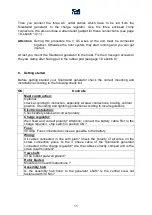
10. Charging indicator
A blue LED at the bottom of the body shows you when the charging process starts.
This depends on the state of charge of the battery – normally 12.5 volt.
Attention
If you operate the system with a 3 phase rectifier (optional), you must
manually disconnect the battery. Otherwise there is a risk of overcharging
and explosion due to a mixture of hydrogen and oxygen in case of
sparks. The use of a rectifier may prolong the charging process.
11. Check ups
Your Silentwind generator was constructed for long term use without any
maintenance. However, simple and regular check ups ensure the necessary security.
Saftey first !
Before you start the check up make sure that the blades are stopped and the battery
is not connected to the charge regulator.
Содержание Silentwind
Страница 1: ...instructions for use installation manual SILENTWIND...
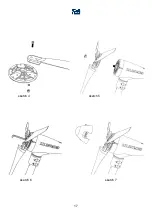
Страница 16: ...16 14 Attachment sketches sketch 1 sketch 2 sketch 3...
Страница 17: ...17 sketch 4 sketch 5 sketch 6 sketch 7...
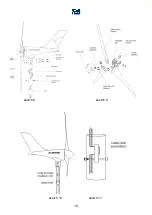
Страница 18: ...18 sketch 8 sketch 9 sketch 10 sketch 11...
Страница 20: ...20 Notice...

