32
ASSEMBLY INSTRUCTION
WARNING
Please be extremely careful that the small parts such as screws and nuts do not fall into the
openings of the main frame. If this happens, the small parts are hard to retrieve it and could interfere
with the operation!
OPEN THE BOXES
Make sure to inventory all the parts that are included in the boxes. Check The Hardware Chart
for a full count of the number of parts included for proper assembly.
CLEAR YOUR WORK AREA
Make sure that you have cleared away a large enough space to properly
assemble the unit. Make sure the space is free from anything that may cause
injury during assembly. After the unit is fully assembled, make sure there is a
comfortable amount of free area around the unit for unobstructed operation.
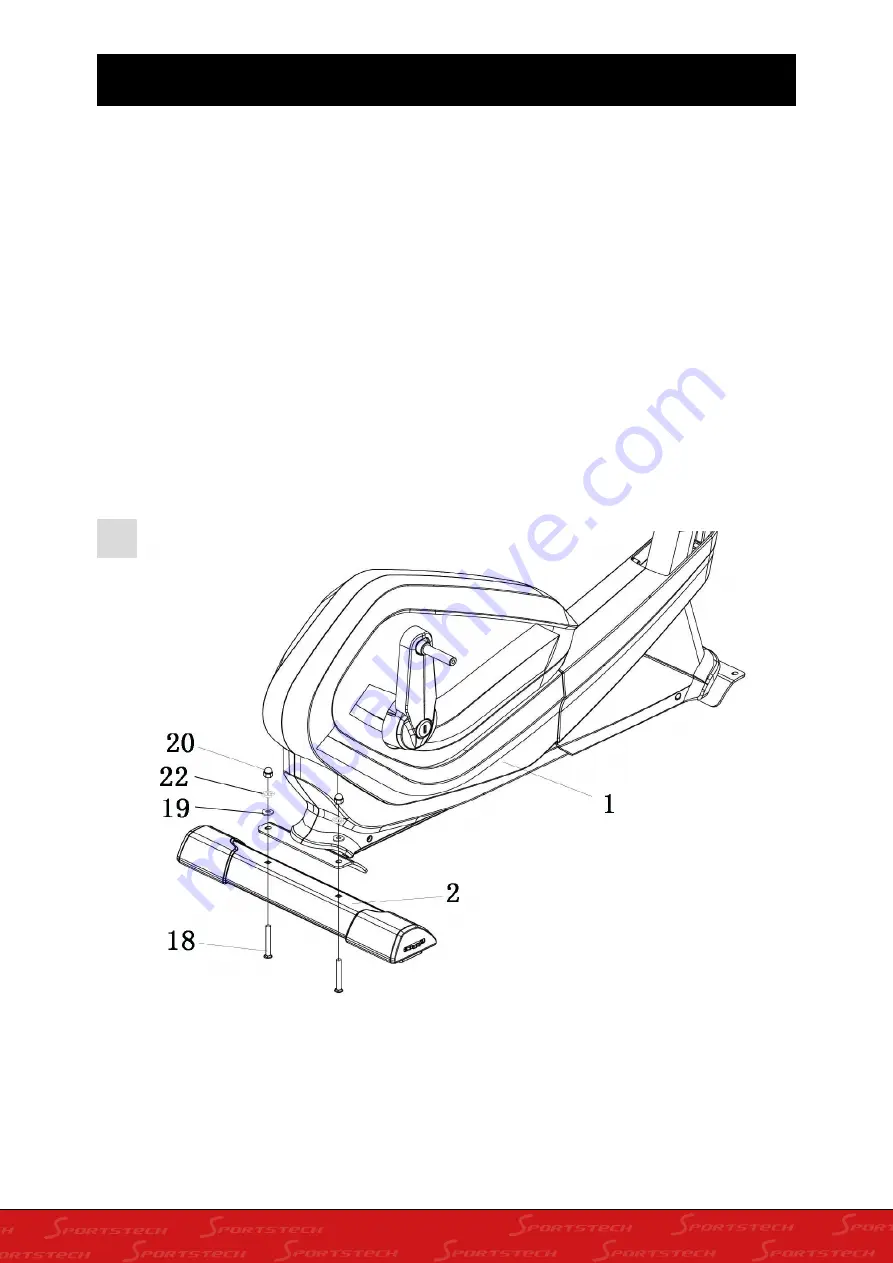
1
Mount the rear stand (2) to the main frame (1) using the carriage screws (18), washers (19) spring
washers (22), cup nut M10 (20).
Содержание CX70
Страница 1: ...DE EN ES FR IT NL CX70 ...
Страница 2: ......
Страница 16: ...16 14 Schrauben Sie den Flaschenhalter 17 mit den Kreuzschrauben 39 an den senkrechten Rahmen 4 ...
Страница 25: ......
Страница 39: ...39 14 Screw the bottle holder 17 to the vertical frame 4 with the Phillips screws 39 ...
Страница 48: ......
Страница 62: ...62 14 Atornilla el soporte de la botella 17 al bastidor vertical 4 con los tornillos Phillips 39 ...
Страница 71: ...MANUEL FRANÇAIS ...
Страница 85: ...85 14 Visser le porte bouteille 17 sur le cadre vertical 4 à l aide des vis cruciformes 39 ...
Страница 94: ...MANUALE D USO ITALIANO ...
Страница 108: ...108 14 Fissate il portabottiglie 17 con le viti a croce 39 sul telaio perpendicolare 4 ...
Страница 117: ...GEBRUIKSAANWIJZING NEDERLANDS ...
Страница 131: ...131 14 Schroef de flessenhouder 17 met de kruisschroeven 39 op het verticale frame 4 ...


