30
►
Guide the Ethernet cable through the screw connection - use a suitable cable and observe the torque
(screw connection torque 8 Nm).
►
Connect the Ethernet cable to the intended connecting point, see fig. 1 -
LAN line connection
.
Ensure for a sufficient bending radii when routing the Ethernet cable.
►
Energise the mains voltage at the station, the station is ready for operation after approx. 1 minute.
►
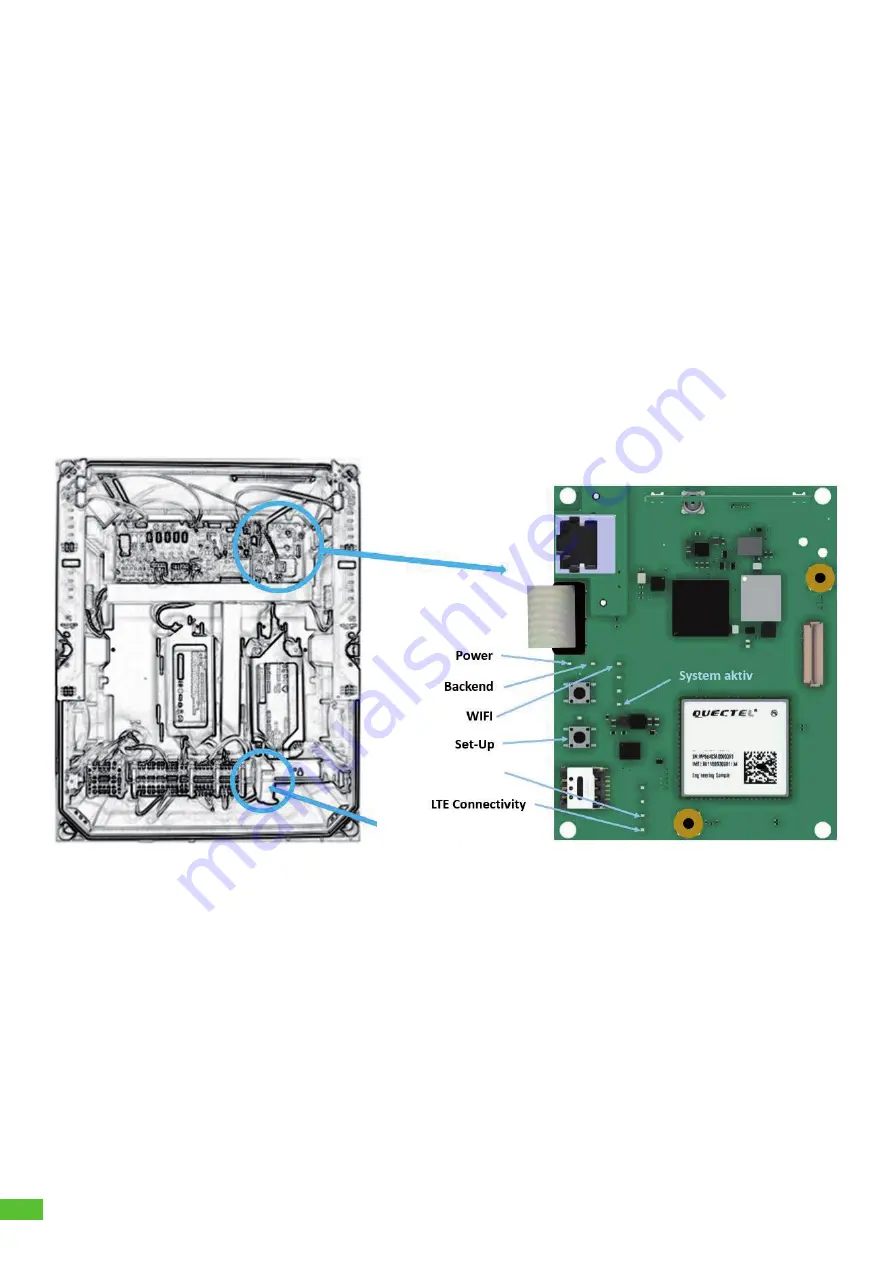
Successful connection can be viewed on the BACKEND LED (illuminates green),
see figure 2 - Status LED BACKEND.
Note:
If an Ethernet cable is inserted, an attempt is always made to connect via Ethernet.
In case the BACKEND LED does not illuminate for some time, check the following requirements:
►
Is the cable connected to the router provided on-site?
►
Do the LEDs illuminate at the port connection there?
►
Does the router have a connection to the internet?
►
If necessary, does the router have any rules for blocking third-party devices? –
Setup the BCS SMART as approved device.
Connection via WLAN to an existing router
For setting up the WLAN connection to an existing router, you require
the SSID and access password of the router
a smartphone or computer with WLAN function and conventional internet browser
Proceed as follows:
►
Open the housing and take off the cover.
►
Energise the mains voltage at the station, the station is ready for operation after approx. 1 minute.
Using an electrically insulated tool or object, briefly press the SETUP button,
see figure 16 - WLAN SETUP button and LED. The SETUP LED illuminates on the button.
Now the charging station opens a separate configuration access via WLAN hotspot.
Network search
LAN female
Содержание 58012201
Страница 25: ...25 Figure 3 Distances for wall assembly in mm Assembly dimensions in mm 1400 min 700 min 700 min ...
Страница 38: ...38 ...
Страница 39: ...39 ...


