Engl
ish
25
Configuring the
UHF Module
The standard settings of the UHF module can easily be
changed from the field software.
For more advanced radio settings, use the procedure below:
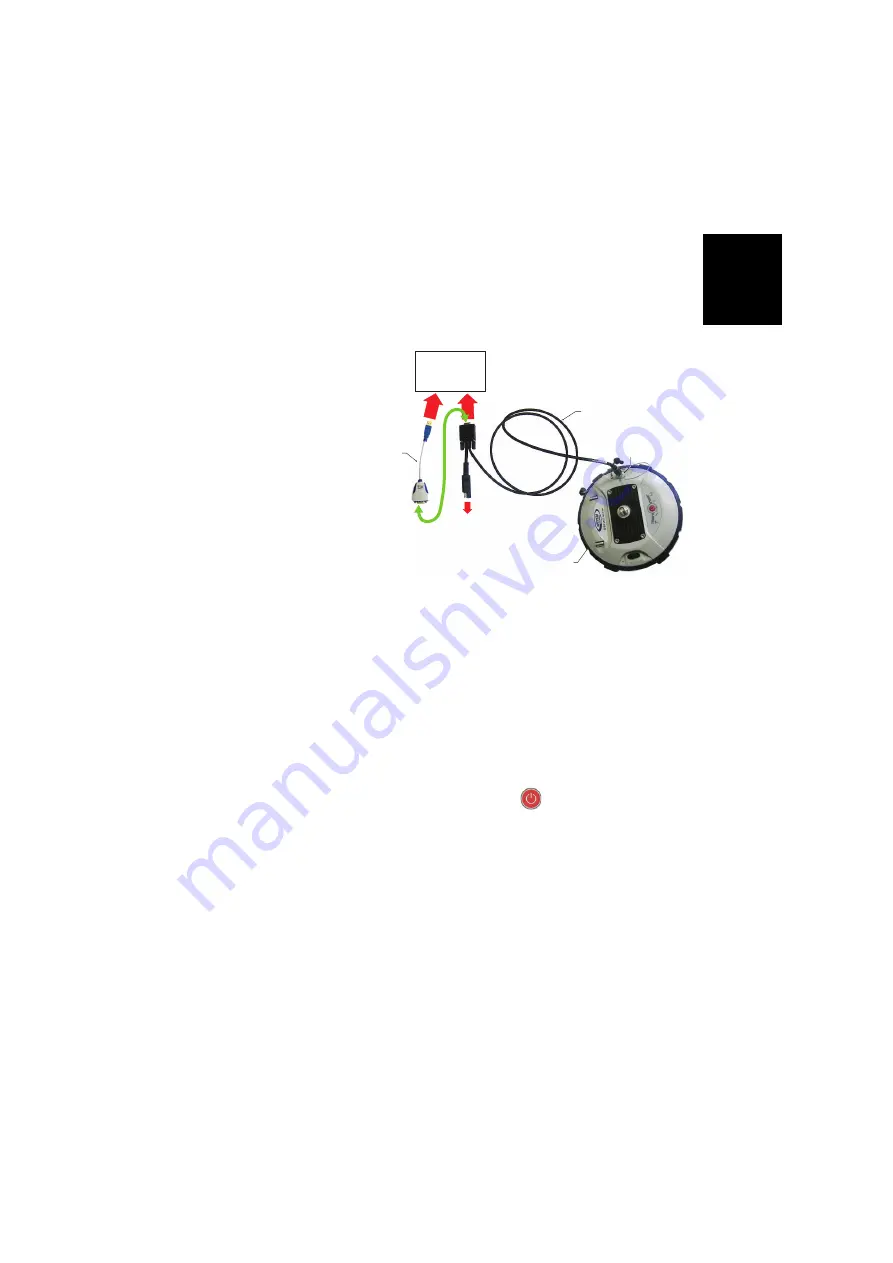
• Use cable P/N59044-10-SPN from the Office Power Kit
to connect the receiver to the computer (see diagram
below).
*: All these items are part of the Office Power Kit P/N 94336 (option).
Use the RS232-to-USB adapter cable if your computer is fitted with USB
connectors (and no DB9 connector).
NOTE: Cable P/N59044-10-SPN is a Y-shaped cable also
allowing you to power the receiver from an AC outlet (via
the AC/DC power block) rather than from the receiver
battery (see also
Connecting SP60 to your Computer on
). When applied to the receiver’s DC input, the
external power source has priority over the internal battery,
which means the battery can be left safely inside the
receiver (it won’t be drained).
• Make three brief presses on
, then hold this button
depressed for about 2 seconds until the buzzer beeps. As
a result, the receiver switches to radio mode, providing
direct access to the UHF module via the receiver’s port A.
• Run Pacific Crest
ADLCONF
software on the computer
and configure the radio to meet your requirements. Refer
to
ADLCONF
instructions to complete this step.
Power/Data Cable *
SP60
To Office
Computer
(If required, may be
connected to AC/DC
power block via
SAE/Jack Adapter Cable *)
RS232-to-USB
Adapter Cable *
RS232
Serial Port A
and DC Input
Via USB or DB9


