


12
Operation and settings
> Sensor Framerate: Select the Sensor Framerate value.
Note:
•
FPS maximum value cannot exceed the value of Sensor
Framerate.
•
Pivot, Video out, WDR, Max Stream Count are limited,
depending on the Install Preset setting.
•
You need to reset the Motion Detect and Smart Analytics
in the Event menu every time Pivot Mode is selected or
deselected.
> WDR: WDR (Wide dynamic range) feature can be very
helpful to cope with very challenging lighting conditions. It
is capable of capturing both of the dark part and bright part
and combining the differences into a scene to generate a
highly realistic image as original scene.
Note:
When WDR is running, [Dynamic Range Enhancer] is
operated and [Minimum Shutter Speed] is adjusted
automatically.
> Image Stabilization: The image stabilizer function minimizes
the appearance of shaky images caused by low-frequency
vibration. This function is useful for outdoor surveillance.
Select the option and set to [On] or [Off].
> Image Effect: You can select the digital effect.
- Mirror: Turn on the mirror effect.
- V-Flip: Flip the picture vertically.
Note:
•
Video codec settings should be set to H.264 or
H.264_HIGH to operate the Image Stabilization and Pivot
function.
•
When you change the settings of [Install Preset],
[Sensor Framerate] and [WDR], the system may be
rebooted or video may be disconnected temporary.
•
The [Mirror] and [V-Flip] function can both be selected.
•
Install settings will be updated at the time of entering
the Install tab.
•
Save: Click this button to confirm the settings.
•
Default: Click this button to restore back to original factory
settings.
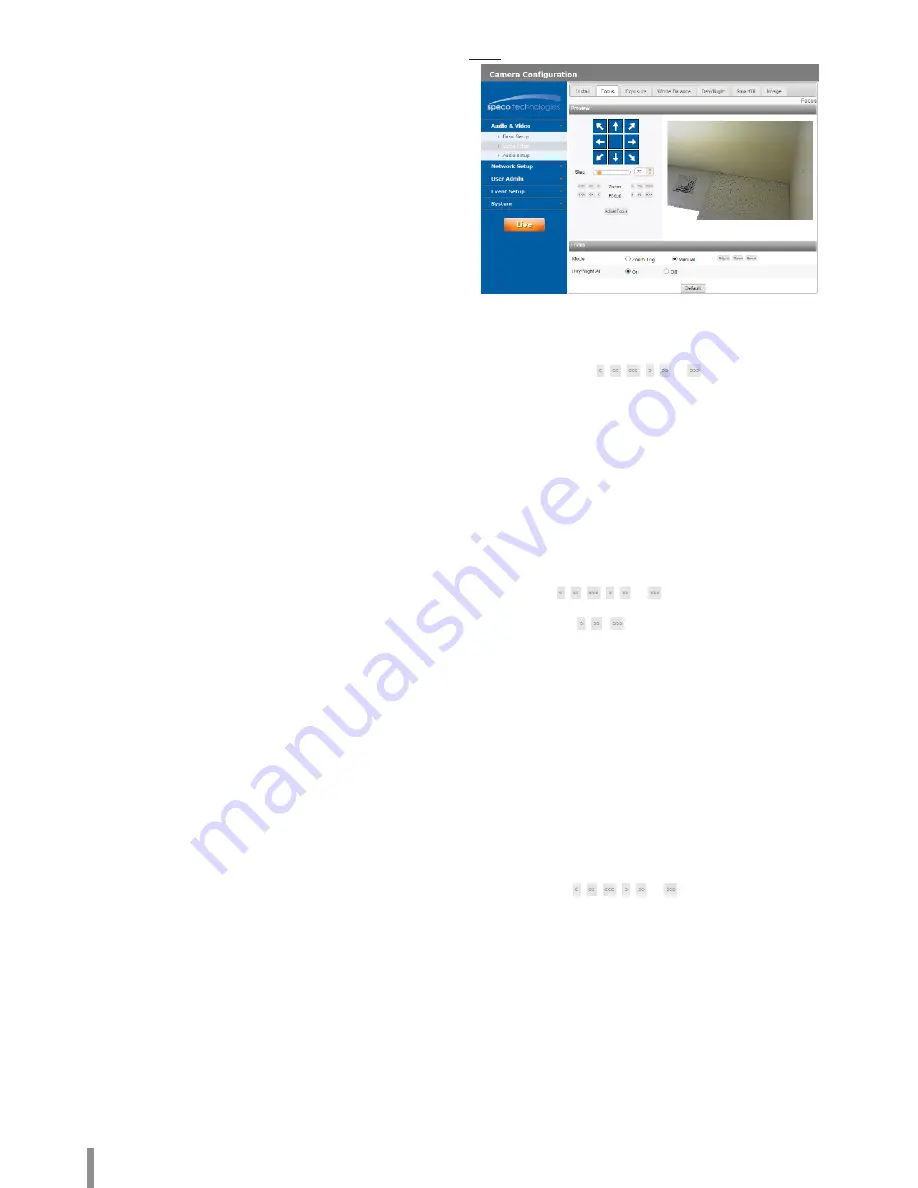
Focus
> Mode: Under the [Mode] option in the [Focus] menu, select
the following mode.
- Zoom Trig: After changing the zoom on the camera,
autofocus is performed.
- Manual: Use , , , , or button to adjust the
focus position manually.
- Adjust: This function will be activated to adjust the focus.
- Save: Saves the position of Zoom and Focus. The focus
moves to the stored position even if the camera is reset.
- Reset: If the abnormal operating occurs or the camera is
set out of focus by external shocks or other reasons, click
this button to initialize the lens and return to the current
location.
Note:
•
After installation, the focus may be changed by external
shocks. In this case, press the [Focus Reset] button to
initialize the lens.
•
Click , , , , or button to move once within a
narrow range. And the movement range depends on a
shape of , , buttons.
> Day/Night AF: You can set the Day&Night function with AF
function.
- ON: If you set to On, the AF function will be activated
automatically when the D/N function is activated.
- OFF: Not used.
Note:
•
Autofocus may not work properly in the following situations.
1. When the environment is too dark to distinguish the object.
2. When the brightness of the surrounding is sharply changed.
3. When the object is too away or a movement is severe.
4. When the image contrast is low.
5. When the strong light source is in the front and back.
6. When the camera is shaken by external vibration or shock.
If the camera is out of focus after autofocus, adjust the focus
manually using , , , , or button.
•
In the conditions as above, it may be out of focus when the
Day / Night mode is converted. In this case, it is recommended
to select [Off].
•
Default: Click this button to restore back to original factory
settings.
Содержание O2B16
Страница 30: ......


