8.4 Wall-Mounted Bracket Installation
13
14
Tools required before installing the Wall-Mounted charger, gather the
following tools:
• Wire stripper
• Crimpers for European terminals
• Phillips screwdriver for M5
• Slotted screwdriver for 4~5.5MM
• Adjustable Wrench M6
• Head gasket screw 10-10.5mm
• Voltmeter or digital multi-meter (for measuring AC voltage at the
installation site)
• The inserting cable should meet the best waterproof performance. It is
recommended to use 3 core / 7AWG cable (XLPE or equivalent cable) to
pull the cable from the distribution box.
• Level ruler
• Pencil or marker
• Machine drill
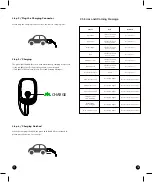
Step 1:
• Set the positions of the 4 screw holes and drill them, with a diameter of
8mm and
a depth of 52mm.
• Use 4 sets expansion screw and M6 screw to fix the wall-mounted bracket
on the wall.
Step 2:
Align the rear notch of charger into the wall-mounted bracket and fit the
screw holes of the right and left side.
Installation Instructions
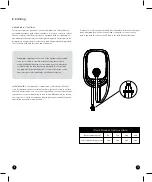
“This device shall be mounted at a sufficient height from
grade such that the height of the storage means for the
coupling device is located between 600mm (24 inches) and
1.2m (4 feet) from grade.”
8.3 Tools and Materials Required
Содержание Home
Страница 1: ...HOME U S E R M A N U A L Fast Level 2 Eletric Vehicle Charger ...
Страница 2: ...THANK YOU for accelerating Earth s transition to sustainable energy ...
Страница 13: ...SOP OF CONFIGURATION OF APP ...
Страница 20: ...HOME www thesparko com ...


