O
per
at
ion
Before Printing
9
Operation
Before Printing
This section describes the operations that must be
performed prior to starting printing. This explanation
assumes that the printer has already been installed and
that all connections have been made.
• Loading an ink ribbon cassette (on this page)
• Loading the paper (page 10)
Once these operations have been completed, there
should be no need to perform them again during routine
printing.
Notes
• When replacing the ink ribbon or paper, do not turn off
the power. Turning off the power will cause the image
stored in the memory to be lost.
• Use the ink ribbon suitable for the type of print
material. Before attempting to load an ink ribbon,
make sure that the combination of the ribbon and
paper is compatible. (See “Ink Ribbon and paper” on
page 19.)
•
Use only ink ribbon and paper designed for use
with this printer. Failing to do so is likely to result
in unsatisfactory printing or malfunctions.
(See
“Ink Ribbon and paper” on page 19.)
Loading an Ink Ribbon Cassette
Load the ink ribbon to the supplied ink ribbon holder,
and load the ink ribbon cassette (referring to the ink
ribbon holder loaded with the ink ribbon) to the printer’s
ribbon compartment.
Notes
• When you use the printer at the first time, the thermal
head was locked at the factory. Turn on the printer first
to unlock the thermal head, then start to load an ink
ribbon cassette.
• Once an ink ribbon has been completely used, replace
it. Ink ribbons are not reusable.
• Do not rewind the ink ribbon for reuse.
• Do not touch the ink ribbon or place it in a dusty
location. Finger prints or dust on ink ribbon will result
in imperfect printing.
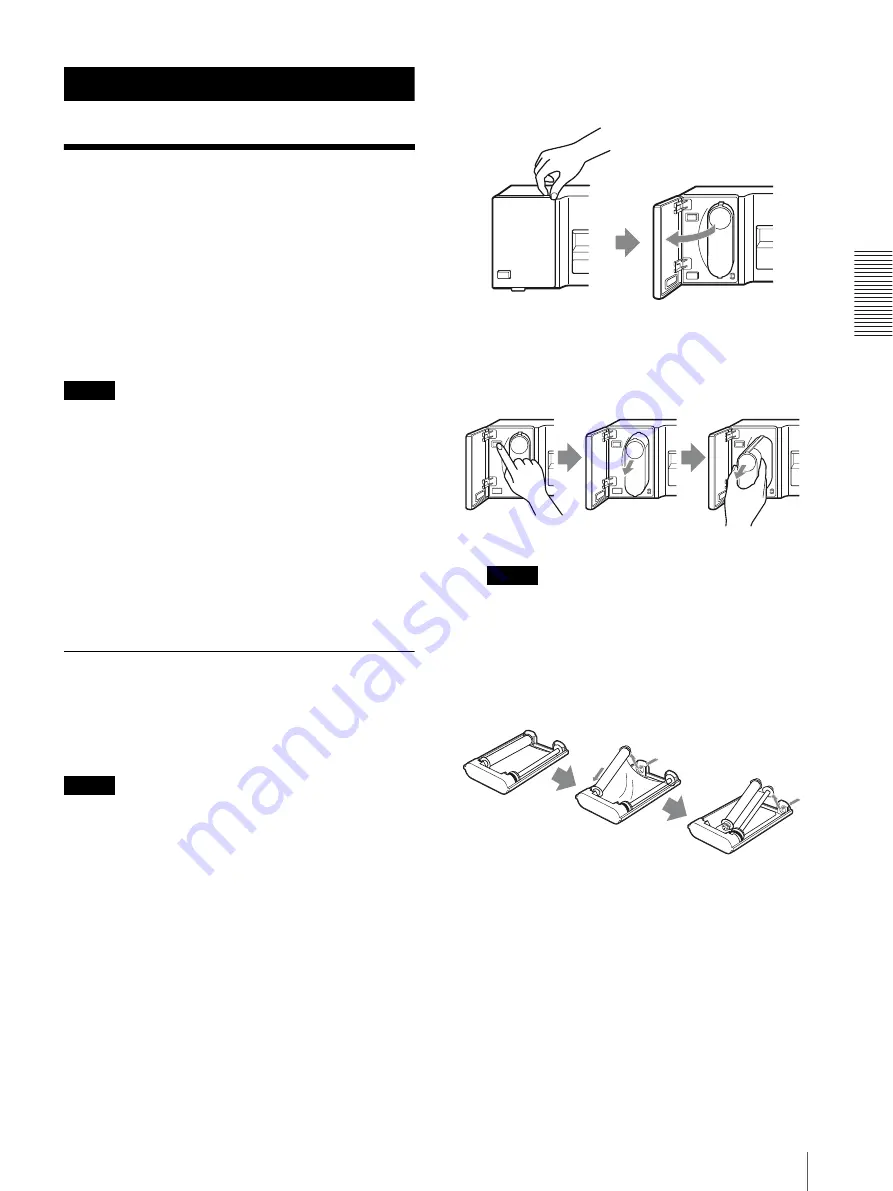
1
Open the ribbon door by pulling the tab on the
ribbon door and marked with PULL.
2
Remove the ink ribbon cassette by pressing the
EJECT button.
The ink ribbon cassette pops out.
Note
Never put your hand into the ink ribbon
compartment. The thermal head becomes very hot.
You may burn yourself if you touch it.
3
Detach the used ink ribbon from the ink ribbon
holder.
1
Remove the spool
with the ink ribbon,
while pressing in
the arrow
direction.
2
Remove the
other spool.
Содержание UP-D77MD
Страница 32: ...Sony Corporation ...


