background image

281

Autres

4

Connecteur de la borne de masse

équipotentielle
Permet un raccordement à la borne
équipotentielle afin d’amener les différents
composants d’un système au même potentiel.
Voir la section “Instructions de sécurité
importantes en vue d’une utillsation dans un
environnement médical (Pour UP-51MD/
51MDU/51MDP)”, page 144.

5

Sélecteur NTSC/PAL (système NTSC/PAL
TV) (216, 217) (uniquement pour modèles
autres que UP-51MDU)
Réglez ce sélecteur sur la position
correspondant au système de télévision du
signal d’entrée. Si vous changez ce réglage,
mettez l’imprimante hors tension puis à
nouveau sous tension.

6

Connecteur REMOTE 1 (miniprise

spéciale) (218)
Permet de raccorder une télécommande RM-
5500 (non fournie) à utiliser comme
télécommande filaire.

7

Connecteur REMOTE 2 (miniprise

stéréo) (218)
Permet de raccorder une télécommande RM-
91 ou une commande au pied FS-36 (non
fournies).

8

Connecteur REMOTE 3 (D-sub à 9

broches) (218)
Permet de raccorder une commande au pied
FS-30 ou d’entrer des signaux d’impulsion de
commande à distance pour les impressions
automatiques.

9

Connecteur RS-232C (218)
Permet de raccorder un ordinateur pour
commander l’imprimante. Pour plus de détails,
consultez votre revendeur Sony.

0

Connecteur 

-

 AC IN

Permet de raccorder l’imprimante à une prise
murale au moyen du cordon d’alimentation
fourni.

qa

T

 Connecteurs OUTPUT (217)

Permettent de raccorder le moniteur vidéo.
Voir la section “Instructions de sécurité
importantes en vue d’une utillsation dans un
environnement médical (Pour UP-51MD/
51MDU/51MDP)”, page 144.

Position du sélecteur

NTSC

PAL

Connecteur

S-VIDEO

VIDEO

RGB SYNC

COLOR : 200

Q1    A                     4F:1                      S  

Q 1

A

4 F : 1

S

CO L OR : 2 0 0

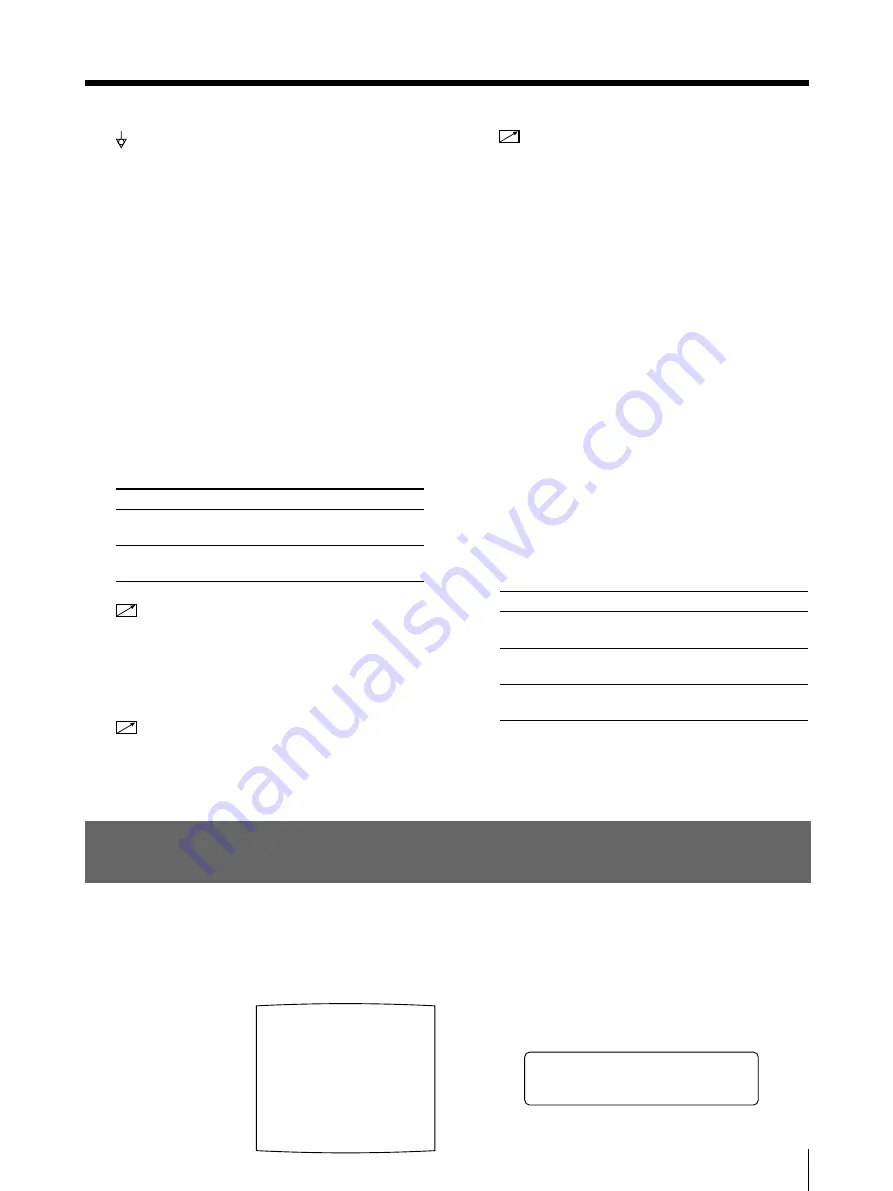
Fenêtre d’affichage de l’imprimante et affichage du
moniteur vidéo

Vous pouvez commander le fonctionnement de l’imprimante via la fenêtre
d’affichage de l’imprimante ou au travers de l’affichage du moniteur vidéo. La
fenêtre d’affichage de l’imprimante possède une plage d’affichage plus étroite et ne
présente qu’un nombre limité de caractères. Utilisez la méthode de votre choix.

Réglage

Un appareil vidéo NTSC est
raccordé.

Un appareil vidéo PAL est
raccordé.

Appareils pouvant être raccordés

Appareil vidéo doté d’un connecteur
d’entrée Y/C séparé

Appareil vidéo doté d’un connecteur
d’entrée de signal vidéo composite

Appareil vidéo à connecteurs de
d’entrée RGB/SYNC

Ecran normal

Содержание UP-50

Страница 1: ...3 203 596 12 1 2000 Sony Corporation Color Video Printer UP 50 UP 51MD UP 51MDU UP 51MDP Instructions for Use Page 2 Mode d emploi Page 144 Gebrauchsanweisung Seite 286 GB FR DE For UP 51MD 51MDP ...

Страница 2: ... these measures Relocate the unit with respect to the susceptible equipment Plug this unit and the susceptible equipment into different branch circuit Consult your dealer According to standard EN60601 1 2 and CISPR11 Class B Group 1 Caution When you dispose of the unit or accessories you must obey the law in the relative area or country and the regulation in the relative hospital For UP 51MD 51MDU...

Страница 3: ...t Reduced Images 35 Making a Printout of Identical Reduced Images 50 Making a Printout with an Insert 52 Making a Printout of Mirror Images 53 Making Printouts With a Caption 55 Displaying the CAPTION Menu 56 Entering a Caption 57 Deleting the Images Stored in Memory 64 Setting the Function of the CLEAR Button 64 Deleting Images Stored in Memory 66 About the Screen Display 68 Erasing the Screen Di...

Страница 4: ...play 110 Selecting Whether the Operation and Error Tones Sound 112 Setting the Baud Rate for Computer Communication 113 Selecting the Lamination Pattern 114 Registering a User Set 116 Others Precautions 120 Safety 120 Installation 120 Before Transporting the Printer 121 Cleaning 121 Ink Ribbon and Paper 124 Specifications 125 Error Warning Messages 129 Error Messages 129 Warning Messages 130 If th...

Страница 5: ...how to make connections and make adjustments using the menus displayed on the video monitor and printer window display Once all connections and adjustments have been made there should be no need to perform these operations again during normal printing operations These operations must however be performed after reinstalling or if the picture quality degrades or if adjustment becomes necessary becau...

Страница 6: ...s that you should be aware of to operate the printer correctly and prevent malfunctions Index Use the index in addition to the table of contents to find information you need when using the printer Monitor and printer window displays Some monitor displays and window displays illustrated in this manual may differ slightly from the actual display The operation of the printer however remains as descri...

Страница 7: ... the buttons and setup the printer interactively by picking from displayed menus Printouts that can be made with the printer In addition to the above printouts of multiple reduced images printout of multiple reduced images with white borders can be made Also you can make a printout of mirror image s where the image is rotated about its vertical axis Printout of a full size image page 17 Printout o...

Страница 8: ...source source image and the image to be printed memory image Also displays the printer menus and messages When the printer power switch is set to off you can view the image from the video source Color video printer Foot switch not supplied allows you to operate the printer remotely Remote control unit not supplied allows you to operate the printer remotely System Overview Continued System Configur...

Страница 9: ...ake printouts an ink ribbon cartridge an ink ribbon holder which has been loaded with an ink ribbon and paper must be loaded Load an ink ribbon into the supplied ink ribbon holder then load the ink ribbon cartridge into the printer s ribbon compartment Notes When you use the printer for the first time the thermal head may be out of position Before attempting to use the ink ribbon cartridge turn on...

Страница 10: ... compartment The thermal head becomes very hot You may burn yourself if you touch it When the ink ribbon cartridge cannot be ejected Turn the power off then back on again Then after a while press the EJECT button Note Turning off the power will cause the image stored in the memory to be lost In this case capture the image again before printing 3 Detach the spent ink ribbon from the ink ribbon hold...

Страница 11: ...e ink ribbon holder that is designed for this printer When the ink ribbon cartridge cannot be inserted Turn the power off then back on gain Then insert the ink ribbon cartridge again 7 Close the front panel Spool holding the ink ribbon Ink ribbon holder Start position mark 1 Load the spool holding the ink ribbon into the left hand part of the holder 2 Fit the other spool into the right hand part o...

Страница 12: ...ot to touch the printing surface Notes You can load paper regardless of whether the power is on or off However turning off the power will cause the image stored in the memory to be lost Use the only paper that we recommend Failing to do so is likely to result in malfunctions such as paper jam Also do not use the paper as specified for the UP 5000 5100 and UP 5500 series color video printer See Ink...

Страница 13: ... may not be fed properly Be sure to riffle the paper with the protection sheets before attempting to place the paper in the paper tray If the printing position shifts load fewer sheets in the paper tray Do not place different types of paper in the tray 4 Slide the paper tray back into the printer until it clicks into place 5 Close the front panel Notes When handling the paper Do not touch the prin...

Страница 14: ...menu Selecting the input signal by using the INPUT SELECT button 1 Turn on the video monitor and the printer The following appears once the printer is ready to operate 2 Press the INPUT SELECT button The currently selected input signal appears The selected signal is lit in green on the video monitor screen and spelled out in the printer window display If you do not perform any operation after you ...

Страница 15: ...the VIDEO INPUT connector Signal from video equipment connected to the S VIDEO INPUT connector Signal from video equipment connected to the RGB SYNC INPUT connectors To confirm the currently selected input signal Press the INPUT SELECT button The currently selected input signal appears in green on the video monitor and is spelled out in the printer window display for about 3 seconds Note If you pr...

Страница 16: ...T ALARM POWER Selecting the input signal on the menu 1 Turn on the video monitor and the printer 2 Press the INPUT SETUP button The INPUT SETUP menu appears 3 Select INPUT SEL by pressing the F or f button 4 Select the desired input signal by pressing the G or g button 5 Press the INPUT SETUP button The regular screen appears 1 2 5 3 4 Position the cursor at INPUT SEL by pressing the F or f button...

Страница 17: ...e input signal to be used to make a printout See page 14 Set the printer to capture one full size image into memory See page 36 Select the appropriate memory page See page 38 Confirm the printout color quality using for example the LOAD COLOR number See page 86 1 Turn on the video monitor and the printer 2 Start the video source to display the source image on the video monitor This operation is do...

Страница 18: ...press the MEMORY FRM FLD button The currently selected memory mode appears lit in green on the video monitor and spelled out in the printer window display for about three seconds then disappears You can change the memory mode only when selecting 1 full size image 2 two reduced images or 4 four reduced images The number of usable memory pages depends on the selected memory mode See page 38 To chang...

Страница 19: ...ver When you make multiple copies reset the printout quantity to 1 while the first copy is being printed See Making Multiple Copies of Identical Printouts on page 23 If the printer does not print The printer will fail to print in the following cases While an error message is displayed on the video monitor screen and printer window display Proceed as described in Error Warning Messages on page 129 ...

Страница 20: ...lack line can be eliminated from the printout See Changing the Printout Size Printout Area page 94 If the color quality of printouts is not satisfactory You can obtain the satisfactory color quality of printout by compensating for the input signal and or adjust the color quality of the printouts See Compensating for the Input Signals on page 78 and Adjusting the Printout Color on page 86 Notes Whe...

Страница 21: ...ser settings and make printouts Note If you change the currently selected user set to another one the image stored in memory pages will be cleared 1 Turn on the video monitor and printer 2 Start the video source to display the source image on the video monitor This operation is done using the controls of the video equipment acting as the source 3 Press the LOAD USER button The currently selected u...

Страница 22: ...1 The selected user set number will disappear within about three seconds 5 Press the EXEC button The user set selected in step 4 is executed While the selected user set is being executed the following message appears 6 Press the CAPTURE button at the instant the image you want to print appears on the screen The image is captured into memory 7 Press the PRINT button The printer makes printouts acco...

Страница 23: ...he button to decrease the number of printouts Using the menu You can change the designated number of copies before printing or any time during printing To set the printout quantity by using the PRINT QTY button 1 Press the PRINT QTY button The following screen appears If you do not perform any operation after you press the PRINT QTY button the currently set number of copies appears for about 3 sec...

Страница 24: ...up to a maximum of 9 To decrease the number of copies While the screen which appears in step 1 is being displayed press the G button Each time you press the G button the number decreases and stops at 1 Setting the printout quantity using the menu 1 Press the MENU button The menu previously opened appears 2 Select PRN by pressing the G or g button The PRINTER SETUP menu appears 1 5 2 4 3 Switch PRN...

Страница 25: ...pies by pressing the G or g button When you want to Button Increase the quantity g Decrease the quantity G 5 Press the MENU button The regular screen appears If the paper runs out during printing Load the paper into the paper tray and press the PRINT button However the printout quantity is reset to the original quantity requested when printing is stopped For example if the printout quantity is set...

Страница 26: ...ches the memory page 2 Press the CAPTURE button at the instant the image you want to print appears on the screen 3 Press the PRINT button The image captured in step 2 is queued The image is printed as soon as all previous printing jobs have been completed The available memory pages appear in white SOURCE MEMORY MEMORY PAGE CAPTURE PRINT PRINT ALARM POWER 1 2 3 The currently selected memory page Me...

Страница 27: ...ote Another image cannot be stored in a memory page in which an image has already been queued for printing In such a case the PLEASE WAIT PRINTING MEMORY appears 4 To queue another memory page repeat steps 1 2 and 3 ...

Страница 28: ...4 5 6 XYZ ABC 456 H I J KLM 123 EFG 789 XYZ ABC ABC ABC ABC Printout of a full size image Printout of two reduced images Printout of four reduced images Printout of eight reduced images Printout of 16 reduced images Printout of identical images a Printout with an insert a You can make printouts of two four eight or 16 identical reduced images You can make a printouts of multiple reduced images wit...

Страница 29: ... or DUPLICATE you can make a printout of different multiple images or identical multiple images When you use the printer for the first time the STANDARD application mode for full size image printouts is selected Select the application mode according to what kind of printouts you want to make Note Changing the application mode results in clearing images stored in all of the memory pages i 1 Press t...

Страница 30: ...PRN SPEED HIGH MOTION CHK PRN SPEED 3 Select PRN SPEED by pressing the F or f button When you use the UPC 540 Self Laminating Printing Pack you can select the finish of the printouts See Selecting the Lamination Pattern on page 114 4 Select the desired PRN SPEED by pressing the G or g button When you want to PRN SPEED Make a printout at normal speed NORMAL Make a printout at high speed HIGH 5 Sele...

Страница 31: ...ing the F or f button 8 Select the desired application mode by pressing the G or g button Application mode STANDARD DUPLICATE 9 Select PRN SETUP by pressing the F or f button 10 Press the g button The PRINTER SETUP menu appears 11 Press the MENU button The regular screen appears Position the cursor at APPLI by pressing the F or f button Press the F or f button until APPLI appears Switch the desire...

Страница 32: ...f usable memory pages depends on the type of the reduced images selected and on the memory mode For detailed information see Selecting the memory page on page 38 Note You can select the filed mode only when you select the full image type of printout two reduced image printout or four reduced image printout In frame mode In field mode Q1 A 1 S The image displayed in the video monitor is captured in...

Страница 33: ... FRM FLD button the currently selected memory mode appears for about 3 seconds after which it disappears 2 Select the desired memory mode by pressing the MEMORY FRM FLD button Press the MEMORY FRM FLD button repeatedly until the color of the desired memory turns lit green on the video monitor or until the desired memory mode is displayed in the capital letters on the printer window display Each ti...

Страница 34: ...RROR LAMINATION GLOSSY WINDOW PRESS CAPTION PRESS Q1 A 1 S To select the memory mode using the menu 1 Press the MENU button The previously selected menu appears 2 Select LAY by pressing the G or g button The LAYOUT SETUP menu appears 3 Select MEMORY by pressing the F or f button 1 5 2 4 3 Switch LAY to green by pressing the G or g button Display LAY in capital letters by pressing the G or g button...

Страница 35: ...a memory page and make a printout with those reduced images This section explains how to make a printout with multiple reduced images A printout having multiple reduced images is made using the following the procedure below Setting the printer application mode to STANDARD See page 31 Determining the number of reduced images See the following page Selecting the memory page See page 38 Selecting the...

Страница 36: ...g the MULTI PICTURE button Press the MULTI PICTURE button repeatedly until the color of the type of reduced images to be captured in memory turns green on the video monitor or until the type of reduced images to be captured in the memory is displayed on the printer window display Each time you press the MULTI PICTURE button the type of reduced image printout changes in order 1 2 4 8 16 1 Type Numb...

Страница 37: ...Y WINDOW PRESS CAPTION PRESS Q1 A 1 S To select the type of reduced images to be captured in the memory using the menu 1 Press the MENU button The previously selected menu appears 2 Select LAY by pressing the G or g button The LAYOUT SETUP menu appears 3 Select MULTI PIX by pressing the F or f button 1 5 2 4 3 Switch LAY to green by pressing the G or g button Display LAY in capital letters by pres...

Страница 38: ...n memory by pressing the G or g button Usable memory page FRAME A B C D E F G H A B C D A B A B C D A B A B C D E F G H Making Variations of Printouts Continued Priter application mode Type of reduced images to be captured in memory STANDARD Full image Two reduced images Four reduced images Eight reduced images 16 reduced images DUPLICATE All types 1 2 4 8 and 16 UP 51MDU FIELD A1 A2 B1 B2 C1 C2 D...

Страница 39: ...S Q1 A 1 S SOURCE MEMORY MEMORY PAGE CAPTURE PRINT PRINT ALARM POWER To select the memory page Press the MEMORY PAGE button MEMORY PAGE button Press the MEMORY PAGE button repeatedly until the desired memory page appears ...

Страница 40: ...itor screen or capturing images sequentially to all reduced image positions of a memory page at regular intervals Deciding which image displays on the video monitor screen after capturing an image a memory image or a source image 1 Press the MENU button The previously selected menu appears 2 Select PRN by pressing the G or g button The PRINTER SETUP menu appears When you select the type of reduced...

Страница 41: ...pressing the G or g button When you want to Capture only the image currently displayed on the video monitor screen by pressing the CAPTURE button Capture images sequentially to all positions of a memory page at regular intervals by pressing the CAPTURE button 5 Select FUNCTION by pressing the F or f button 6 Press the g button The FUNCTION SETUP menu appears Position the cursor at INTERVAL by pres...

Страница 42: ...image then after a few seconds the source memory appears whenever you press the CAPTURE button 9 Press the MENU button The regular screen appears To return to the PRINTER SETUP menu In step 9 position the cursor at PRN SETUP and press the g button The PRINTER SETUP menu appears again AUTO L I VE FUNCTION SETUP COLOR 200 PRN SETUP AUTO LIVE OFF ON OFF ON RM2 FUNC C PRINT RM3A FUNC PRINT PAGE RM3B F...

Страница 43: ... image See page 40 Select whether the white borders are to be added See page 49 You can select whether the white borders are added before or after capturing the four reduced images in the memory 1 Start the video source This operation is done using the controls of the video equipment acting as the source 2 3 MEMORY FRM FLD button MOTION CHECK button F f G and g buttons Blinks green to indicate tha...

Страница 44: ...ER SETUP menu is set to ON the image is automatically captured sequentially to four positions at regular intervals In this case go to step 5 When the source image is displayed at the position where the next image is to be captured go to step 4 3 Press the SOURCE MEMORY button The source image appears on the video monitor screen 4 Repeat steps 2 and 3 until you have captured four images when the me...

Страница 45: ...e previously stored image is replaced with the newly stored image To skip a previously captured image When an image has already been captured the previously captured image can be replaced by pressing the CAPTURE button Skip images that you want to keep by pressing the F f G or g button 5 Press the PRINT button The four reduced images are printed on one sheet of paper Whether white borders are atta...

Страница 46: ...d memory mode appears for about three seconds then disappears To confirm whether the captured images are blurred on the video monitor You can check whether the full image or the two or four reduced images captured in memory are blurred on the video monitor When you select full image You can check whether the captured image is blurred by displaying the memory image on the video monitor When you sel...

Страница 47: ... of the desired setting turns green on the video monitor or until the desired setting is displayed in capital letters on the printer window display Each time you press the MOTION CHECK button the setting changes When you want to See the letters or fine images on the video monitor Confirm whether the two or four reduced images captured in the memory are blurred The screen is reset to the regular sc...

Страница 48: ...AD USER 1 2 3 EXEC SYSTEM PRESS FUNCTION PRESS C BALANCE PRESS Q1 A 1 S To select the setting using the menu 1 Press the MENU button The previously selected menu appears 2 Select PRN by pressing the G or g button The PRINTER SETUP menu appears 3 Select MOTION CHK by pressing the F or f button 4 Select the desired setting by pressing the G or g button 5 Press the MENU button The regular screen appe...

Страница 49: ...ON PRESS Q1 A 1 S Making a printout with white borders The unit allows you to decide whether or not the images are printed with white borders 1 Press the MENU button The previously selected menu appears 2 Select LAY by pressing the G or g button The LAYOUT SETUP menu appears 3 Select SEPARATE by pressing the F or f button 1 5 2 4 3 Switch LAY to green by pressing the G or g button Display LAY in c...

Страница 50: ...ou can make a printout of identical reduced images Before making the printout of identical reduced images Set the printer application mode to DUPLICATE See page 31 Select the desired type of the identical reduced images to be captured in memory See page 36 Select the appropriate memory page See page 38 Select whether the white borders are to be added See page 49 You can select whether white border...

Страница 51: ...n the whole screen The image is displayed in full size To change the image in memory 1 Start the video source 2 Press the CAPTURE button at the instant the image you want to print appears The previously captured image is replaced with the newly captured image 3 Press the PRINT button The identical reduced images are printed on one sheet of paper Indicates that the printer is set to the DUPLICATE a...

Страница 52: ...ANDARD printer application mode is selected See Selecting the number of reduced images to be captured in memory on page 36 3 Capture the image to be inserted 1 Select the position where the reduced image is to be inserted by pressing the G g F or f button Example To insert the image in the lower left position 2 Press the CAPTURE button at the instant the image you want to insert appears The image ...

Страница 53: ...on the video monitor 5 Press the PRINT button The image with an insert is printed Making a Printout of Mirror Images You can set the printer so that images captured in the memory are rotated about the vertical axis mirror images and make a printout of these mirror images 1 Press the MENU button The previously selected menu appears 2 Select LAY by pressing the G or g button The LAYOUT SETUP menu ap...

Страница 54: ... f button 4 Select whether the captured images are to be rotated or not When you want to Setting Print the images in the normal direction OFF Rotate the images about the vertical axis MIRROR 5 Press the MENU button The regular screen appears Note Even if you set MIRROR to MIRROR a caption entered in the CAPTION window will be printed in the normal direction Position the cursor at MIRROR by pressin...

Страница 55: ...ition where a character can be entered The entered characters are displayed here Character entry area The character or symbol where the cursor is located is highlighted in green and this highlighted character is to be entered Symbols and words can be used to enter a caption ON displayed when printing with a caption OFF displayed when printing without a caption OFF is displayed as the factory setti...

Страница 56: ... Q1 A 1 S C OF F A 1 OFF ON Displaying the CAPTION Menu The following two methods are available to display the CAPTION menu Using the CAPTION INPUT button Using the menu Press the CAPTION INPUT button The CAPTION menu appears To display the CAPTION menu by using the LAYOUT SETUP menu Position the cursor at CAPTION on the LAYOUT SETUP menu by pressing the F or f button the press the g button The CA...

Страница 57: ...g printing you cannot enter or edit the caption in the CAPTION menu 1 Press the CAPTION INPUT button The CAPTION menu appears 2 Position the cursor the line lit in green at the point where you want to enter the character in the character display area To move the cursor 1 Select the arrow corresponding to the direction in which you want to move the green cursor in the character display area by pres...

Страница 58: ..._ _ _ _ _ _ _ _ _ _ _ _ _ _ _ _ _ _ _ _ _ _ _ _ _ _ _ _ _ _ _ A B C D E F G H I J K L M N O P Q R S T U V W X Y Z 0 1 2 3 4 5 6 7 8 9 SHIFT INS DEL SP EXIT Q1 A 1 S C OF F L EF T 3 OFF ON CAPTION OFF Example Move the cursor to the left by two Note When OFF is displayed the CAPTION input mode is set to off Thus you cannot add a caption to the printouts See Making printouts with a caption on page 63...

Страница 59: ...ntry area SHIFT is displayed in the printer window display When displayed in lower case letters shift is displayed 2 Press the EXEC button Capital letters are changed to small letters or small letters are changed to capital letters in the character entry area Note Characters already entered displayed in the character display area are not changed even if letters are changed in the character entry a...

Страница 60: ...e is entered that character is deleted and a single space is left To replace a previously entered character without changing the number of characters You can replace a previously entered character with a new one 1 Position the green cursor at the character to be replaced by performing the operations explained in step 2 2 Overwrite the invalid character with the correct character by performing the ...

Страница 61: ... using the following method 6 Highlight EXIT by pressing the F f G or g button then press the EXEC button The entered characters are stored in memory The LAYOUT SETUP menu appears 7 Press the MENU button Note If you turn off the printer before performing the operation in step 6 characters entered in steps 2 3 4 and 5 are cleared without being stored in memory 1 Move the cursor at B B is highlighte...

Страница 62: ... Y Z 0 1 2 3 4 5 6 7 8 9 SHIFT INS DEL SP EXIT Q1 A 1 S A C EBC OF F ON 5 OFF ON A B E C To make printouts with a caption The CAPTION menu allows you to set whether a caption is attached or not to a printout Perform the following in step 6 before pressing the CAPTION INPUT button 1 Select ON by pressing the F f G or g button Select OFF to make printouts without a caption 2 Press the EXEC button Af...

Страница 63: ...seconds 2 Select ON Press the CAPTION ON OFF button repeatedly until the color of ON turns green on the video monitor or until ON is displayed in capital letters on the printer window display Each time you press the CAPTION ON OFF button the setting changes in the order ON c OFF c ON To make a printout without a caption Select OFF 3 Press the PRINT button The printout with a caption is made 1 2 3 ...

Страница 64: ...in the FUNCTION SETUP menu Setting the Function of the CLEAR Button 1 Press the MENU button The previously selected menu appears 2 Select PRN by pressing the G or g button The PRINTER SETUP menu appears 3 Select FUNCTION by pressing the F or f button 1 2 6 3 5 7 4 PRN SPEED HIGH MOTION CHK P c l PRN i o R I NTER SETUP PRINTER SETUP COLOR 200 COL LAY PRN IN OUT PRINT QTY 1 1 9 INTERVAL OFF ON GAMMA...

Страница 65: ... all memory pages ALL Delete images of a single memory page PAGE Deactivate the CLEAR button OFF 7 Select PRN SETUP by pressing the F or f button Then press the g button The PRINTER SETUP menu appears Once you set the function of the CLEAR button the CLEAR button functions according to the setting until the function setting is changed To return to the regular screen Press the MENU button F PRN UNC...

Страница 66: ...o ALL in the FUNCTION SETUP menu Press the CLEAR button All images stored in the printer are cleared Note Even if you press the CLEAR button when the source image is displayed on the video monitor the memory image appears without deleting images in the memory pages In this case press the CLEAR button again All images stored in the printer are cleared CLEAR button Deleting the Images Stored in Memo...

Страница 67: ...he FUNCTION SETUP menu 1 Press the SOURCE MEMORY button when the source image is displayed on the video monitor screen The image stored in memory is displayed on the screen 2 Select the memory page from which images are to be deleted by pressing the MEMORY PAGE button 3 Press the CLEAR button The image in the memory page selected in step 2 is deleted 1 2 3 ...

Страница 68: ...deo monitor Since the same message are displayed in the printer window display perform operations watching these messages in the printer window display 1 Press the DISPLAY button The current setting appears The video monitor screen is reset to the regular screen after a few seconds 2 Select OFF Press the DISPLAY button repeatedly until the color of OFF turns green on the video monitor or until OFF...

Страница 69: ...e an image that is hedden below a menu You can erase the menu temporarily while holding the DISPLAY button down Note The error messages are always displayed regardless of the setting of the monitor display Displaying the Type and Remaining Amount of the Ink Ribbon You can always display the type of the ink ribbon and its remaining amount on the video monitor 1 Press the RIBBON REMAIN button The cu...

Страница 70: ... setting for the display of ink ribbon information using the menu You can also set whether the type of ink ribbon and its remaining amount are displayed on the video monitor by changing RBN REMAIN to ON or OFF in the OUTPUT SETUP menu The setting of the RIBBON REMAIN button also changes according to the setting of RBN REMAIN in the OUTPUT SETUP menu and vice versa R OF o n BN REMA I N RBN REMAIN O...

Страница 71: ...the future Remove the ink ribbon cartridge and paper tray when transporting the printer When transporting the printer secure the thermal head For detailed information on how to secure see page 121 Paper cover 1 Paper tray 1 AC power cord 1 Color printing pack a 1 Thermal head cleaning kit 1 Warranty card 1 for US and Canadian model only Instructions For Use 1 Ink ribbon holder 1 a Use the ink ribb...

Страница 72: ...RY PAGE CAPTURE PRINT SOURCE MEMORY MEMORY PAGE CAPTURE PRINT Ink ribbon holder page 9 Attach the ink ribbon cartridge after loading the ink ribbon into the ink ribbon holder Paper tray page 12 Paper cover Supplied Accessories Continued To attach the fan cover and the filter Attach the filter to the fan cover then mount them on the left side of the printer Fan cover Filter Ventilation holes ...

Страница 73: ... page 136 You can use the remote control unit s buttons which have the same names as those on the printer To use the RM 5500 remote control unit not supplied as a wireless unit When using the remote control unit as a wireless unit aim the head of the remote control unit at the remote sensor on the printer With fresh batteries the range of the remote control unit is about 3 meters Using the RM 91 F...

Страница 74: ... Images Connect the video equipment providing the video images to be printed Connect the video equipment which will be used in actual printing using the following diagram as a guide Before connecting the video equipment see Important safeguards notices for use in the medical environments for UP 51MD 51MDU 51MDP on page 2 to RGB output connectors to S VIDEO output connector to composite video outpu...

Страница 75: ...eo monitor which will be used in actual printing using the following diagram as a guide Before connecting the video equipment see Important safeguards notices for use in the medical environments for UP 51MD 51MDU 51MDP on page 2 to S VIDEO OUTPUT to VIDEO OUTPUT to RGB SYNC OUTPUT b to S VIDEO input connector to composite video input connector to RGB input connectors Video monitor to AC IN AC powe...

Страница 76: ...to Enable Remote Control The printer can be controlled remotely by connecting an RM 5500 Remote Control Unit not supplied RM 91 Remote Control Unit not supplied an FS 30 FS 36 Foot Switch not supplied or a personal computer a When connecting a personal computer select the appropriate baud rate from the SYSTEM SETUP menu See Setting the Baud Rate for Computer Communication on page 113 b You can als...

Страница 77: ... of the printout Selecting the print mode Confirming whether the memory image is blurred Adjusting the color balance Adjusting the brightness of the printer window display Setting the baud rate for computer communication Selecting whether the operation and error tones sound Selecting the application mode printer operation mode Compensating for the level of the input signal Registering user setting...

Страница 78: ...ble the operation and error tones page 112 Setting the baud rate for computer communication page 113 Selecting the lamination pattern page 114 Registering the printer settings and adjusted values as a user set page 116 Compensating for the Input Signals A video image recorded under poor conditions may be of poor color quality If the signal is an NTSC or PAL composite video signal or separate lumin...

Страница 79: ...ideo signal or a separated luminance Y and chrominance C signal c On a setting of step 14 OFF appears and the image displayed on the monitor screen becomes black and white d To perform adjustment of GAIN set the AGC explained below to OFF When the printout or monitor image appears blackish or whitish Adjust the input signal to the optimum level for printing Menu adjustment item AGC Automatic Gain ...

Страница 80: ...ults 0 Place the cursor at the adjustment item to be reset then press the G and g buttons simultaneously 4 Press the MENU button The regular screen appears 1 Position the cursor at the desired item by pressing the F or f button 2 Make adjustment by pressing the G or g button 1 Press the F or f button until the desired item appears 2 Make adjustment by pressing the G or g button Setting Up the Prin...

Страница 81: ...to poor contrast adjustment even if AGC for the input signal is compensated In such a case you can adjust the contrast by adjusting GAIN in the INPUT SETUP menu However if you do not want to change the contrast of the video monitor screen compensate for the level of the input signal in the SYSTEM SETUP menu Note You cannot adjust an image once it has been captured in memory Capture an image after ...

Страница 82: ... by pressing the G or g button The selected IRE is displayed in three digits When IRE value Resetting to the standard adjustment 10 t 100 The printout is a little whitish 11 t 110 The printout is whitish 12 t 120 The printout is very whitish 13 t 130 Note Do not compensate for the input signal too much Doing so results in the whole of the printout becoming dark 5 Press the MENU button The regular ...

Страница 83: ...olor is correctly adjusted Check the color of the video monitor before adjusting the printout color In such a case use the THRU signal by setting SOURCE to THRU in the OUTPUT SETUP menu or turning off the power of the printer to send out the through signal from the video equipment to the video monitor After adjusting the color of the video monitor using video monitor controls adjust the color of t...

Страница 84: ...button 3 Select EE by pressing the G or g button 4 Press the MENU button The regular screen appears 5 Capture a new image in memory and make a printout Adjust the settings on the printer side by comparing the printout with the image on the monitor as follows 6 Press the MENU button then select OUT by pressing the G or g button The OUTPUT SETUP menu appears Position the cursor at SOURCE by pressing...

Страница 85: ... press the G and g buttons simultaneously 8 Press the MENU button The regular screen appears When you want to Make the screen more reddish Make the screen become cyan blue Make the screen more greenish Make the screen become magenta pink Make the screen more bluish Make the screen more yellowish Adjustment direction on the menu Toward R red Toward C cyan Toward G green Toward M magenta Toward B bl...

Страница 86: ...ss of a printout are determined by recalling one of the three settings according to their LOAD COLOR numbers This is useful when you are using more than one item of video equipment each having different characteristics when you want to print images having different color qualities and picture contrast and when multiple users access a single printer Also you can make a printout using temporarily se...

Страница 87: ...0 Q1 A 1 S 0 0 8 OFF ON 2 Select LOAD COLOR by pressing the F or f button 3 Select the LOAD COLOR number of the values to be adjusted or to be modified by pressing the G or g button When modifying you can preserve the original settings See To retain the originally set value on page 91 Position the cursor at LOAD COLOR by pressing the F or f button Display LOAD COLOR by pressing the F or f button S...

Страница 88: ...or SHARPNESS is divided into 15 steps from 1 to 15 indicated by a value and graph A setting of step 8 corresponds to the standard sharpness For INTERPOL interpolation select either ON or OFF depending on the type of image When adjusting the RED GREEN BLUE color intensity Menu Adjustment item CYN RED MAG GRN YEL BLU When you want to Make the image reddish Make the image cyan Make the image magenta ...

Страница 89: ...ou want to Content of settings Make a soft outline To the left toward step 1 Make a normal outline Centered step 8 Make a sharp outline To the right toward step 15 The contrast in the dark area or light area is increased in the direction by pressing the g button The contrast in the dark area or light area is weakened in the direction by pressing the G button The number and the corresponding sharpn...

Страница 90: ...f SHARPNESS may differ between ON and OFF settings of INTERPOL To reset items to defaults 0 Place the cursor at the adjustment item to be reset then press the G and g buttons simultaneously Once you have changed the value Once you have changed the value TEMP temporary appears on the menu screen TEMP indicates that the settings are temporary and have not yet been stored If you turn off the power of...

Страница 91: ... press the MENU button The regular screen appears To copy the settings made for one LOAD COLOR number to another LOAD COLOR number 1 Select the source LOAD COLOR number for which the settings to be copied are stored in the COLOR ADJUST menu 2 Select the target SAVE COLOR number to which data is to be copied 3 Press the EXEC button Settings stored to the LOAD COLOR number selected in step 1 are cop...

Страница 92: ...TEM PRESS FUNCTION PRESS C BALANCE PRESS Q1 A 1 S PRN SPEED HIGH MOTION CHK Adjusting the tone of the printout You can adjust the tone so that the details in the white or black part are clearly printed 1 Press the MENU button then select PRN by pressing the G or g button The PRINTER SETUP menu appears 2 Select GAMMA by pressing the F or f button 1 4 2 3 Switch PRN to green by pressing the G or g b...

Страница 93: ...ge where there are a lot of black or dark colored areas 4 Press the MENU button The regular screen appears PRN SPEED HIGH MOTION CHK G s NORMA L h AMMA PRINTER SETUP COLOR 200 COL LAY PRN IN OUT PRINT QTY 1 1 9 INTERVAL OFF ON S NORMAL H OFF ON LOAD USER 1 2 3 EXEC SYSTEM PRESS FUNCTION PRESS C BALANCE PRESS Q1 A 1 S GAMMA Switch the desired tone to green by pressing the G or g button Display the ...

Страница 94: ...here is no video signal is printed in black This may occur when you make printouts after connecting a different video source or play back using different video software In such a case you can adjust the printout area by moving the screen either horizontally or vertically When a black frame appears around the printout even after the printout area has been shifted narrow the printout size because th...

Страница 95: ...SSY WINDOW PRESS CAPTION PRESS Q1 A 1 S 2 Select WINDOW by pressing the F or f button Note If you go to the next step after you select WINDOW in step 2 the images stored in the memory will be cleared 3 Press the g button The WINDOW SETUP menu appears 4 Adjust the printer according to the printout obtained 1 Select the item to be adjusted by pressing the F or f button 2 Perform the adjustment by pr...

Страница 96: ...lt The image position shifts to the right with the size remaining as is The image position shifts to the left with the size remaining as is The image position shifts up with the size remaining as is The image position shifts down with the size remaining as is Button to be used g button G button g button G button Menu adjustment item defaults H START NTSC PAL 0 V START NTSC PAL 0 When you want to C...

Страница 97: ... button then press the EXEC button The adjusted values are stored The LAYOUT SETUP menu appears 6 Press the MENU button The regular screen appears To clear the adjusted value Select CANCEL in step 5 then press the EXEC button on the sub panel The values adjusted in step 4 are cleared and the values are reset to the original ones To reset the adjusted value to defaults Press the G and g buttons sim...

Страница 98: ...g on each pair It is recommended that you adjust the color balance each time you load a new ink ribbon and paper Before adjusting the color balance Reset all items in the COLOR ADJUST menu to defaults See Adjusting the Printout Color on page 86 1 Display the source image on the video monitor by using the SOURCE MEMORY button 2 Press the MENU button then select PRN by pressing the G or g button The...

Страница 99: ...ce for the first time after you purchase the printer the values of BAL X BAL Y and BAL STEP are set to 50 50 and 05 at the factory The BAL STEP is the adjustable range for each color balance When you have adjusted color balance already the values adjusted previously are displayed on the COLOR BALANCE menu To reset the values to defaults 50 50 05 Select each item by pressing the F or f button then ...

Страница 100: ...ource image to be used for adjusting the color balance To decide the position of the source image move the highlighted area by pressing the F f G or g button while holding down the DISPLAY button on the sub panel 6 Press the CAPTURE button The image captured in memory appears 7 Select TEST PRINT by pressing the F or f button Move the highlighted part to the desired image position by pressing the F...

Страница 101: ...ge which has the best color balance among the nine images If you want to change the color balance after you see the printout adjust the color balance again referring to To readjust the color balance on page 102 Indicates the color balance of the images printed at the top From the left 45 45 50 45 55 45 Indicates the color balance of the images printed in the middle From the left 45 50 50 50 55 50 ...

Страница 102: ...u can also perform fine adjustment following the same operation procedures 1 Display the values of BAL X and BAL Y of the image which is the most appropriate among nine images In this case you can perform fine adjustment or rough adjustment by changing the value of BAL STEP To perform fine adjustment To perform color balance adjustment within the current color balance range reduce the value of BAL...

Страница 103: ...rease the value of the BAL STEP 2 Make a test print by repeating steps 5 6 7 and 8 in Adjusting the Color Balance on page 98 3 Select the image with the best color balance among the 9 images if you can decide Then display the values of BAL X and BAL Y by using the F f G or g button Repeat steps 1 and 2 until you have obtained the best color balance 4 Go back to step 10 in Adjusting the Color Balan...

Страница 104: ...nter by using a remote control unit which sends the remote control signal to the Pin No 5 of the REMOTE 3 connector Using the menu you can assign the desired functions to the remote control unit connected to the REMOTE 2 or REMOTE 3 connector In addition the printer can be remotely controlled by a pulse signal input to REMOTE 2 or REMOTE 3 See pages 126 and 127 Also you can control the printer usi...

Страница 105: ... ON GAMMA S NORMAL H OFF ON LOAD USER 1 2 3 EXEC SYSTEM PRESS PRESS C BALANCE PRESS Q1 A 1 S INTERVAL FUNCTION PRESS PRN SPEED HIGH MOTION CHK 2 Select FUNCTION by pressing the F or f button 3 Press the g button The FUNCTION SETUP menu appears To assign the functions of a remote control unit connected to REMOTE 2 go to step 4 To assign the functions of a remote control unit connected to REMOTE 3 3...

Страница 106: ...ing for the REMOTE 2 connector see page 126 Notes Select ON when you want to capture the image at the precise timing controlled from the computer To assign the function to the remote control unit connected to the REMOTE 2 connector on the FUNCTION SETUP menu set the IMMED CAP item on the FUNCTION SETUP menu to OFF 6 Select the remote control unit and assign the function to the selected remote cont...

Страница 107: ...y page is not changed Has the same function as the CAPTURE button on the printer Has the same function as the PRINT button on the printer Captures an image to a memory page where there is not queued image to be printed If you press the switch while printing is being performed the selected image is queued with the queued image being printed once printing has been completed Captures images to memory...

Страница 108: ...ry page If the image has not been captured in the memory page the printer does not work correctly when you press the switch of the remote control unit When you press and hold down the switch of the remote control unit the source image appears When you release the switch the image showing at the instant you release the switch is captured The memory page is not changed When you press and hold down t...

Страница 109: ...on can be selected by pressing the G or g button Display the desired function by pressing the G or g button When is displayed at the right or left end another function can be selected by pressing the G or g button The function that can be assigned depends on the remote control unit selected in step 1 Function to be assigned GRAB CAPTURE PRINT C PRINT CYCLIC C CAP STOP BACK SP POINTER STOP CAP SRC ...

Страница 110: ...menu 1 Press the MENU button then select PRN by pressing the G or g button The PRINTER SETUP menu appears on the source image 2 Select SYSTEM by pressing the F or f button 1 7 2 4 6 3 6 1 5 HIGH PRN SPEED MOTION CHK P c l PRN i o R I NTER SETUP PRINTER SETUP COLOR 200 COL LAY PRN IN OUT PRINT QTY 1 1 9 INTERVAL OFF ON GAMMA S NORMAL H OFF ON LOAD USER 1 2 3 EXEC SYSTEM PRESS FUNCTION PRESS C BALAN...

Страница 111: ...YSTEM SETUP menu appears 4 Select LCD CNTR by pressing the F or f button 5 Adjust the brightness of the printer window display by pressing the G or g button Note If you select the left end scale OFF is displayed In this case no messages appears in the printer window display when the video monitor returns to the regular screen 6 Select PRN SETUP by pressing the F or f button then press the g button...

Страница 112: ...nds one time When an error occurs the alarm tone sounds three times You can turn these tones on and off using the menu 1 Display the SYSTEM SETUP menu To display the SYSTEM SETUP menu see steps 1 to 3 in Adjusting the Brightness of the Printer Window Display on page 110 2 Select BEEP by pressing the F or f button 3 Select whether the operation and error tones sound by pressing the G or g button Wh...

Страница 113: ... the Baud Rate for Computer Communication When controlling the printer with a computer connected to the printer s RS 232C connector select the appropriate baud rate For details contact your nearest Sony dealer 1 Display the SYSTEM SETUP menu To display the SYSTEM SETUP menu see steps 1 to 3 in Adjusting the Brightness of the Printer Window Display on page 110 2 Select BAUD RATE by pressing the F o...

Страница 114: ...he PRINTER SETUP menu appears 5 Press the MENU button The regular screen appears Selecting the Lamination Pattern Using the UPC 540 Self Laminating Color Printing Pack ensures that the printout is well preserved You can select the lamination pattern according to the finish you want to have on the printout Baud rate displayed on the menu The display changes from first two digit indication to four d...

Страница 115: ...Select LAMINATION by pressing the F or f button 3 Select the amination pattern according to the desired finish of printouts by pressing the G or g button When you want to Lamination pattern Make a glossy printout GLOSSY Make a printout with a textured finish TEXTURE Make a matte printout MATTE 4 Press the MENU button The regular screen appears Switch LAY to green by pressing the G or g button Disp...

Страница 116: ...e user set If the data of the recalled user set is modified the printer operates according to the modified data In such a case the modified data remains effective until another user set is recalled with the LOAD USER button even if you turn off the power After you finish all of required settings proceed as follows to register them as a user set 1 Display the SYSTEM SETUP menu To display the SYSTEM...

Страница 117: ...to enter characters see Entering a Caption on page 57 You can use up to 16 characters 4 Select EXIT by pressing the F f G or g button on the USER NAME menu then press the EXEC button The user name is stored and the SYSTEM SETUP menu appears again 5 Select SAVE USER by pressing the F or f button 6 Select the desired user set number by pressing the G or g button 7 Press the EXEC button All data curr...

Страница 118: ...on to execute the selected user set The printer operates according to the recalled user set If you modify the set value the printer operates according to the modified data until you recall another user set Note If the user set is changed all images stored in memory will be cleared To retain the originally set values Example Modify the settings made for user set 1 Retain the original settings of us...

Страница 119: ...sing the LOAD USER button 2 Press the EXEC button to execute the selected user set Note If the user set is changed all images in memory will be cleared 3 Select the target user set number with SAVE USER on the SYSTEM SETUP menu 4 Press the EXEC button The set values of the source user set selected in step 1 are copied to the target user set number selected in step 3 ...

Страница 120: ...ive sunlight extremely high or low temperatures Do not use other electronic equipment near the unit The unit will not work properly in strong electromagnetic fields Do not place a heavy object such as a monitor on the printer Condensation If the printer is subject to wide or sudden changes in temperature such as when it is moved from a cold room to a warm room or when it is left in a room with a h...

Страница 121: ...cure the internal thermal head as follows 1 Use the POWER switch to turn on the printer 2 Press the MENU G and gbuttons of the cursor keys on the sub panel simultaneously 3 Use the POWER switch to turn off the printer The thermal head is now secured To release the thermal head Turn on the printer again The thermal head moves so that you can now install the ink ribbon cartridge again Cleaning Note ...

Страница 122: ...ead cleaning is completed Q1 turns lit again When the END mark appears The END mark is attached at the end of the cleaning ribbon When this mark appears rewind the cleaning ribbon up to its starting point then reuse it To store the cleaning kit Store a partially used cleaning kit in its original package so that dust will not accumulate Note The surface of the thermal head is scraped away while cle...

Страница 123: ...printer then remove the filter from the fan cover 2 Clean the filter using a vacuum cleaner or the like Notes Be careful that the filter does not get caught inside the cleaner Do not rub the net of the filter strongly 3 Reset the fan cover and the filter then mount them on the side panel as they were Fan cover Filter ...

Страница 124: ...idge and paper designed for use with this printer If you use a different type the printer may not print properly or malfunction Use the ink ribbon with the paper contained in the same package Not doing so may result in degradation of the print picture quality and occurrence of a trouble If the printer detects an incompatible combination an error message appears in the printer window display Ink ri...

Страница 125: ...tor for UP 50 51MD 51MDP In NTSC mode NTSC EIA standards In PAL mode PAL B G I standards Input connectors RGB SYNC analog RGB signal BNC connector 4 RGB 0 7 Vp p 75 ohm termination switch set to ON SYNC 0 3 to 4 Vp p SYNC ON G Automatic discrimination 75 ohms 75 ohm termination switch set to ON sync negative S VIDEO Separate luminance Y and chrominance C signals 4 pin mini DIN 1 Y 1 Vp p C For NTS...

Страница 126: ...s for Use 1 Optional accessories UPC 510 Color Printing Pack UPC 540 Self laminating Color Printing Pack Medical Specifications for UP 51MD 51MDU 51MDP Protection against electric shock Class I Protection against harmful ingress of water Ordinary Degree of safety in the presence of flammable anesthetics or oxygen Not suitable for use in the presence of flammable anesthetics or oxygen Mode of opera...

Страница 127: ...red to zero Length of a remote control pulse Amplitude of a remote control pulse MIN 3 100 TYP MAX 12 5 Unit msec msec V Remarks This value is based on TTL standards When IMMED CAP is set to ON Notation tRPE tRPW VRP Parameter Time within which a remote control pulse should be cleared to zero Length of a remote control pulse Amplitude of a remote control pulse MIN 3 100 TYP MAX 10 5 Unit msec msec...

Страница 128: ... printer and the user wants to capture the image in a certain memory location but cannot because the image stored in that memory location is being printed Note When AUTO LIVE of the FUNCTION SETUP menu is set to OFF the memory image is displayed on the screen after the image is captured in memory In such a case whenever you store the image press the SOURCE MEMORY button so that the source image ap...

Страница 129: ...per tray See page 12 When RIBBON REMAIN 0 is displayed replace the ink ribbon See page 9 An ink ribbon cartridge and paper are not loaded t Load the ink ribbon cartridge and paper See pages 9 and 12 The maximum number of printouts has accumulated on the paper cover t Remove the printouts from the paper cover The paper jams around the paper tray as it is being fed into the ribbon area t Remove any ...

Страница 130: ...ty or your Sony dealer to clear the error status The paper has jammed inside the printer t Check the position where paper has jammed and remove any jammed paper from the printer See page 131 Warning Messages In case of a warning only warning messages appear The ALARM lamp does not light Warning message On the monitor HIT ANY KEY INPUT MISMATCH In the printer window display HIT ANY KEY INPUT MISMAT...

Страница 131: ... 74 The image is not captured in memory t Capture the image in memory then start printing See page 19 In the selected memory page the captured image is being printed or queued t Retry the operation once the printer finishes printing The thermal head has overheated t Leave the printer until the head cools down and this message disappears The printer starts printing automatically The thermal head is...

Страница 132: ... is jammed inside the printer If you find a jammed sheet slowly pull it into the paper tray Note Never attempt to pull a piece of jammed paper down up backwards or forwards the paper may tangle or tear 4 Remove the paper tray 5 Load the paper into the paper tray correctly Do not reuse the paper put back in step 3 Discard that paper Use only paper recommended in this manual 6 Re insert the removed ...

Страница 133: ...ars when the SOURCE MEMORY button is pressed SOURCE on the OUTPUT SETUP menu is set to THRU t Change the SOURCE setting to EE See page 84 When the menu is displayed by pressing the MENU button the DISPLAY setting of the video monitor is set to OFF t Set the DISPLAY setting to ON by pressing the DISPLAY button See page 68 The contrast of the printer display window is not set correctly t Adjust the ...

Страница 134: ...weakened The video monitor screen is dark Possible causes and remedies An ink ribbon cartridge that can not be used with this printer is used t Insert the appropriate ink ribbon cartridge page 9 The 75 ohm termination switch is set to the wrong position t Set 75 ohm termination swtich to the correct position page 74 Troubleshooting Continued ...

Страница 135: ...the head of the remote control unit toward this sensor 4 MEMORY PAGE button 26 39 67 Press to select the memory page 5 SOURCE MEMORY button 44 67 78 98 Press to select which signal is to be output to the monitor The memory image and source image are toggled each time you press this button 6 CAPTURE button 18 26 44 51 52 100 Press to capture an image in a memory page 7 PRINT button 19 26 51 53 63 P...

Страница 136: ...cted user set to be is displayed for about three seconds To recall another user set release the button while the desired user set number is displayed Each time you press this button user set is switched in the order of 1 2 3 3 MULTI PICTURE button 36 52 Press this button to select the desired printout type on the regular screen When you press this button the currently selected printout type is dis...

Страница 137: ...he order of ON OFF ON The setting of MOTION CHK on the PRINTER SETUP menu changes linked with this button setting 9 CAPTION INPUT button 56 Press this button to display or clear the CAPTION menu on the regular screen 0 CAPTION ON OFF button 63 Used to determine whether a caption is printed on the printout To make a printout with a caption press this button to display ON To make a printout without ...

Страница 138: ...lying the source image Connectable equipment Video equipment with Y C separated output connector Video equipment with composite video signal output connector Video equipment with RGB SYNC output connectors Connector S VIDEO VIDEO RGB SYNC 2 75 Ω ON OFF termination switch 74 Provided for the RGB input Normally set this switch to ON Set it to OFF if the input signal should drop when you connect addi...

Страница 139: ...r 0 AC IN connector Used to connect the printer to a wall outlet with the supplied power cord qa T OUTPUT connectors 75 Used to connect the video monitor Refer to Important safeguards notices for use in the medical environment for UP 51MD 51MDU 51MDP on page 2 When The NTSC system video equipment is connected The PAL system video equipment is connected Selector position NTSC PAL Connector S VIDEO ...

Страница 140: ...n SEPARATE image with white borders is set to ON on the LAYOUT SETUP menu F is attached DUP1 Indicates that full size image and the DUPLICATE mode are selected DUP4 Indicates that four reduced images and the DUPLICATE mode are selected a Indicates the type of printout b Indicates the position where the cursor is currently placed and where an image will be captured 6 Memory page display section Ind...

Страница 141: ...F ON MONI C B MONI M G MONI Y B RBN REMAIN OFF ON Q1 A 1 S 0 0 0 COLOR ADJUST COLOR 200 COL LAY PRN IN OUT LOAD COLOR 1 2 3 TEMP 1 2 3 EXEC MAG GRN 0 YEL BLU 0 DARK LIGHT SHARPNESS INTERPOL SAVE COLOR CYN RED 0 Q1 A 1 S 0 0 8 OFF ON WINDOW SETUP COLOR 200 LAY SETUP H START 0 DOT S V START 0 DOT S H WIDTH 896 DOTS SAVE PRESS EXEC CANCEL PRESS EXEC PRESS Q1 A 1 S V WIDTH 464 DOTS SYSTEM SETUP LCD CN...

Страница 142: ...ining amount of the ink ribbon 69 E Eliminating the blur 18 Entering a caption adding characters mid ways 60 entering a caption 57 entering a space 60 replacing a previously entered character 60 when you enter a wrong character 59 Error messages 129 F G H Foot switch 73 76 104 Full size image printout making 17 setting 36 FUNCTION SETUP menu 42 64 104 105 I J K Ink ribbon and paper 124 Ink Ribbon ...

Страница 143: ...g for the input signals 78 eliminating the blur 18 Printouts with a black line 96 with black frame 96 partially cut 96 notes on storing 20 Printouts variations 7 28 Pulse signals 127 R S Remote control unit not supplied foot switch 73 76 104 remote control unit 73 76 104 Safety precautions 120 Screen display erasing 68 erasing menu temporarily 69 Selecting the input signal 14 Setting up the printe...

Страница 144: ...s Pour UP 51MD 51MDU 51MDP Symbole Ce symbole indique la borne équipotentielle qui ramène les différentes parties d un système à la même tension Ce symbole est destiné à attirer l attention de l utilisateur sur la présence d instructions d utilisation et de maintenance réparation importantes dans la documentation accompagnant l appareil Instructions de sécurité importantes en vue d une utillsation...

Страница 145: ...uction 177 Réalisation d un tirage de plusieurs images identiques en réduction 192 Réalisation d un tirage avec une incrustation 194 Réalisation d un tirage d images en miroir 195 Réalisation de tirages avec une légende 197 Affichage du menu CAPTION 198 Saisie d une légende 199 Suppression des images enregistrées dans la mémoire 206 Sélection de la fonction de la touche CLEAR 206 Suppression des i...

Страница 146: ...d erreur 254 Réglage du débit en bauds pour la communication avec l ordinateur 255 Sélection du mode de laminage 256 Enregistrement d un jeu d utilisateur 258 Autres Précautions 262 Sécurité 262 Installation 262 Avant de transporter l imprimante 263 Nettoyage 264 Cassette à ruban encreur et papier d impression 266 Spécifications 267 Messages d erreur avertissement 271 Messages d erreur 271 Message...

Страница 147: ...s au moyen des menus affichés sur le moniteur vidéo et sur la fenêtre d affichage de l imprimante Lorsque tous les raccordements et réglages auront été effectués il ne sera plus nécessaire de recommencer ces opérations durant les opérations d impression normales Ces opérations doivent cependant à nouveau être exécutées après une réinstallation ou si la qualité de l image se dégrade ou encore si un...

Страница 148: ...e pour exploiter correctement cette imprimante et éviter tout risque de dysfonctionnement Index Utilisez l index en plus de la table des matières pour trouver les informations dont vous avez besoin au sujet de l utilisation de cette imprimante Ecrans du moniteur Certains écrans de moniteur et certaines fenêtres d affichage illustrés dans le présent mode d emploi peuvent légèrement différer des écr...

Страница 149: ...es menus affichés Impressions réalisables au moyen de cette imprimante En plus des impressions ci dessus de plusieurs images en réduction vous pouvez effectuer une impression de plusieurs images en réduction avec des bords blancs De plus vous pouvez exécuter une impression d une image en miroir dans laquelle l image est retournée par rapport à son axe vertical Impression pleine page d une image pa...

Страница 150: ...rce et l image à imprimer image mémoire Affiche également les menus de l imprimante et les messages Lorsque le commutateur d alimentation de l imprimante est réglé sur la position OFF vous pouvez visualiser l image de la source vidéo Imprimante vidéo couleur La commande au pied non fournie permet de commander l imprimante à distance La télécommande non fournie permet de commander l imprimante à di...

Страница 151: ...tte à ruban encreur Pour pouvoir réaliser des tirages vous devez installer une cassette à ruban encreur un porte ruban encreur doté d un ruban encreur et charger du papier Chargez un ruban encreur dans le porte ruban encreur fourni puis installez la cassette à ruban encreur dans le compartiment du ruban de l imprimante Remarques Lors de la première utilisation de l imprimante la tête thermique peu...

Страница 152: ...e de la tête thermique peut être très élevée et vous risquez de vous brûler si vous la touchez Si la cassette à ruban encreur ne peut être éjectée Mettez successivement l imprimante hors puis sous tension Après quelques instants appuyez sur la touche EJECT Remarque Une mise hors tension de l imprimante entraîne la perte de l image mémoire Dans ce cas capturez à nouveau l image avant d imprimer 3 D...

Страница 153: ... conçu pour l imprimante Si la cassette à ruban encreur ne peut être introduite Mettez successivement l imprimante hors puis sous tension Introduisez ensuite à nouveau la cassette à ruban encreur 7 Refermez le panneau frontal Bobine maintenant le ruban encreur Porte ruban encreur Marque de position de départ 1 Chargez la bobine maintenant le ruban encreur dans la partie gauche du porte ruban 2 Pla...

Страница 154: ...er la surface d impression du papier Remarques Vous pouvez charger du papier que l imprimante soit hors ou sous tension Toutefois une mise hors tension de l imprimante entraîne la suppression de l image mémoire Utilisez uniquement le papier recommandé faute de quoi l imprimante risque de ne pas fonctionner correctement bourrages papier par exemple De plus n utilisez pas le papier spécifié pour les...

Страница 155: ...ns le magasin Ne placez pas différents types de papiers en même temps dans le magasin 4 Réintroduisez le magasin à papier dans l imprimante jusqu à ce qu il s encliquette 5 Refermez le panneau frontal Remarques Manipulation du papier d impression Ne touchez pas la surface d impression De la poussière ou des traces de doigts risquent d entraîner des résultats d impression insatisfaisants ou un dysf...

Страница 156: ... la touche INPUT SELECT 1 Mettez le moniteur vidéo et l imprimante sous tension Une fois l imprimante prête à fonctionner le message suivant apparaît 2 Appuyez sur la touche INPUT SELECT Le signal d entrée actuellement sélectionné apparaît Le signal sélectionné apparaît en vert sur l écran du moniteur vidéo et est affiché en toutes lettres dans la fenêtre d affichage de l imprimante Si vous n effe...

Страница 157: ...VIDEO INPUT Signal de l équipement vidéo connecté au connecteur S VIDEO INPUT Signal de l équipement vidéo connecté au connecteur RGB SYNC INPUT Confirmation du signal d entrée actuellement sélectionné Appuyez sur la touche INPUT SELECT Le signal d entrée actuellement sélectionné apparaît en vert sur le moniteur vidéo et est affiché en toutes lettres dans la fenêtre d affichage de l imprimante pen...

Страница 158: ...u 1 Mettez le moniteur vidéo et l imprimante sous tension 2 Appuyez sur la touche INPUT SETUP Le menu INPUT SETUP apparaît 3 Sélectionnez INPUT SEL en appuyant sur la touche F ou f 4 Sélectionnez le signal d entrée souhaité en appuyant sur la touche G ou g 5 Appuyez sur la touche INPUT SETUP L écran normal apparaît 1 2 5 3 4 Placez le curseur sur INPUT SEL en appuyant sur la touche F ou f Appuyez ...

Страница 159: ...6 Sélectionnez le signal d entrée à utiliser pour la réalisation du tirage voir page 156 Réglez l imprimante en vue de l enregistrement d une image pleine page dans la mémoire voir page 178 Sélectionnez la page mémoire appropriée voir page 180 Confirmez la qualité couleur de l impression telle que le numéro LOAD COLOR page 228 1 Mettez le moniteur vidéo et l imprimante sous tension 2 Démarrez la s...

Страница 160: ...uellement sélectionné s affiche en vert lumineux sur le moniteur vidéo et est affiché en toutes lettres dans la fenêtre d affichage de l imprimante pendant trois secondes puis disparaît Vous pouvez uniquement modifier le mode de mémoire lors de la sélection de 1 image pleine page 2 deux images en réduction et 4 quatre images en réduction Le nombre de pages mémoire utilisables est fonction du mode ...

Страница 161: ...plusieurs copies réinitialisez la quantité de tirages sur 1 lorsque la première copie est en cours d impression Voir la section Réalisation de plusieurs copies de tirages identiques page 165 Si l imprimante ne fonctionne pas L imprimante refuse d imprimer un tirage dans les cas suivants Un message d erreur apparaît sur l écran du moniteur et dans la fenêtre d affichage de l imprimante Procédez de ...

Страница 162: ... la section Changement du format d impression zone d impression page 236 Si la qualité couleur des tirages n est pas satisfaisante Vous pouvez obtenir une qualité d impression satisfaisante pour les tirages en compensant pour le signal d entrée ou en ajustant la qualité des couleurs des tirages Voir les sections Compensation des signaux d entrée page 220 et Réglage des couleurs des tirages page 22...

Страница 163: ...aramètres d utilisateur sélectionnés et réaliser des tirages Remarque Si vous modifiez le jeu d utilisateur actuellement sélectionné l image stockée en mémoire est effacée 1 Mettez le moniteur vidéo et l imprimante sous tension 2 Démarrez la source vidéo pour afficher l image source sur le moniteur vidéo Cette opération est exécutée à l aide des commandes de l appareil vidéo faisant office de sour...

Страница 164: ...1 c 2 c 3 c 1 Le numéro du jeu d utilisateur sélectionné disparaît au bout de trois secondes 5 Appuyez sur la touche EXEC Le jeu d utilisateur sélectionné à l étape 4 est exécuté Durant l exécution du jeu d utilisateur sélectionné le message suivant s affiche 6 Appuyez sur la touche CAPTURE au moment où l image à imprimer apparaît à l écran L image est saisie dans la mémoire 7 Appuyez sur la touch...

Страница 165: ...he PRINT QTY Vous ne pouvez pas diminuer le nombre de tirages Dans le menu Vous pouvez modifier le nombre de copies défini à tout moment durant l impression Définition du nombre de copies à l aide de la touche PRINT QTY 1 Appuyez sur la touche PRINT QTY L écran suivant apparaît Si vous n exécutez aucune opération après avoir appuyé sur la touche PRINT QTY le nombre de copies sélectionné apparaît p...

Страница 166: ...s arrête Pour diminuer le nombre de copies Lorsque l écran de l étape 1 est affiché appuyez sur la touche G A chaque fois que vous appuyez sur la touche G le nombre diminue et s arrête à 1 Définition du nombre de tirages dans le menu 1 Appuyez sur la touche MENU Le dernier menu consulté apparaît 1 5 2 4 3 P 3 1 9 R I NT QTY PRINT QTY 3 1 9 Appuyez sur la touche PRINT QTY ou g jusqu à ce que le nom...

Страница 167: ... Touche Pour augmenter g Pour diminuer G 5 Appuyez sur la touche MENU L écran normal apparaît Si la réserve de papier s épuise en cours d impression Chargez le papier d impression dans le magasin et appuyez sur la touche PRINT Néanmoins la qualité d impression revient à sa valeur originale lorsque l impression est arrêtée Par exemple la quantité de tirage est défini sur 5 Même si le papier est épu...

Страница 168: ... 2 Appuyez sur la touche CAPTURE au moment où l image à imprimer apparaît à l écran 3 Appuyez sur la touche PRINT L image saisie à l étape 2 est placée dans la file d attente L image est imprimée dès que tous les travaux d impression précédents ont été réalisés SOURCE MEMORY MEMORY PAGE CAPTURE PRINT PRINT ALARM POWER 1 2 3 Page mémoire dont l image a été placée dans la file d attente d impression...

Страница 169: ...une autre image dans une page mémoire dont une image a déjà été mise dans la file d attente pour l impression Dans un tel cas le message PLEASE WAIT PRINTING MEMORY apparaît 4 Pour placer une autre page mémoire dans la file d attente répétez les étapes 1 2 et 3 ...

Страница 170: ...9 XYZ ABC ABC ABC ABC Impression pleine page d une image Impression de deux images en réduction Impression de quatre images en réduction Impression de huit images en réduction Impression de seize images en réduction Impression d images identiques a Impression avec une légende a Vous pouvez réaliser des tirages de deux quatre huit ou seize images identiques en réduction Vous pouvez réaliser un tira...

Страница 171: ...fectuer un tirage de plusieurs images différentes ou identiques La première fois que vous utilisez l imprimante le mode d application STANDARD pour tirages d images pleine page est sélectionné Sélectionnez le mode d application suivant le type de tirages à réaliser Remarque La modification du mode d application entraîne la suppression des images conservées dans toutes les pages mémoire 1 Appuyez s...

Страница 172: ...ED 3 Sélectionnez PRN SPEED en appuyant sur la touche F ou f L ensemble pour impression couleur autolaminant UPC 540 permet de sélectionner la finition des tirages voir la section Sélection du mode de laminage page 256 4 Sélectionnez la vitesse d impression PRN SPEED souhaitée en appuyant sur la touche G ou g Pour PRN SPEED Réaliser un tirage à la vitesse normale NORMAL Réaliser un tirage à la vit...

Страница 173: ...ité en appuyant sur la touche G ou g Mode d application STANDARD DUPLICATE 9 Sélectionnez PRN SETUP en appuyant sur la touche F ou f 10 Appuyez sur la touche g Le menu PRINTER SETUP apparaît 11 Appuyez sur la touche MENU L écran normal apparaît Placez le curseur sur APPLI en appuyant sur la touche F ou f Appuyez sur la touche F ou f jusqu à ce que APPLI apparaisse Allumez le mode souhaité en vert ...

Страница 174: ...e est appelée page mémoire Le nombre de pages mémoire utilisables dépend du type d images en réduction sélectionné et du mode de mémoire Pour plus d informations reportez vous à la section Sélection de la page mémoire page 180 Remarque Vous pouvez uniquement choisir le mode de champ lors de la sélection du tirage d une image pleine page de deux images en réduction et de quatre images en réduction ...

Страница 175: ...moire actuellement sélectionné apparaît pendant 3 secondes puis disparaît 2 Sélectionnez le mode de mémoire souhaité en appuyant sur la touche MEMORY FRM FLD Appuyez plusieurs fois sur la touche MEMORY FRM FLD pour afficher le mode de mémoire en vert sur le moniteur vidéo ou jusqu à ce que le mode de mémoire souhaité apparaisse en majuscules sur la fenêtre d affichage de l imprimante A chaque fois...

Страница 176: ...ROR OFF MIRROR LAMINATION GLOSSY WINDOW PRESS CAPTION PRESS Q1 A 1 S Pour sélectionner le mode de mémoire sur le menu 1 Appuyez sur la touche MENU Le dernier menu consulté apparaît 2 Sélectionnez LAY en appuyant sur la touche G ou g Le menu LAYOUT SETUP apparaît 3 Sélectionnez MEMORY en appuyant sur la touche F ou f 1 5 2 4 3 Allumez LAY en vert en appuyant sur la touche G ou g Affichez LAY en maj...

Страница 177: ...ans une page mémoire et réaliser une impression de ces images en réduction Cette section explique comment réaliser une impression de plusieurs images en réduction Appliquez la procédure ci dessous pour réaliser une impression de plusieurs images en réduction Définition du mode d application de l imprimante sur STANDARD page 173 Définition du nombre d images en réduction page 178 Sélection de la pa...

Страница 178: ...istrer dans la mémoire en appuyant sur la touche MULTI PICTURE Appuyez plusieurs fois sur la touche MULTI PICTURE pour afficher en vert sur le moniteur vidéo le type d images réduites souhaité à enregistrer dans la mémoire ou jusqu à ce que ce dernier apparaisse dans la fenêtre d affichage de l imprimante A chaque fois que vous appuyez sur la touche MULTI PICTURE le type d impression d images rédu...

Страница 179: ...CAPTION PRESS Q1 A 1 S Pour sélectionner dans le menu le type d images réduites à enregistrer dans la mémoire 1 Appuyez sur la touche MENU Le dernier menu consulté apparaît 2 Sélectionnez LAY en appuyant sur la touche G ou g Le menu LAYOUT SETUP apparaît 3 Sélectionnez MULTI PIX en appuyant sur la touche F ou f 1 5 2 4 3 Allumez LAY en vert en appuyant sur la touche G ou g Affichez LAY en majuscul...

Страница 180: ...é à enregistrer dans la mémoire en appuyant sur la touche G ou g Pour UP 50 51MD 51MDP Mode d application STANDARD DUPLICATE Type d images réduites à enregistrer dans la mémoire Image pleine page Deux images réduites Quatre images réduites Huit images réduites Seize images réduites Tous les types 1 2 4 8 16 Page mémoire utilisable FRAME A B C D E F G H A B C D A B A B C D A B A B C D E F G H FIELD...

Страница 181: ...OURCE MEMORY MEMORY PAGE CAPTURE PRINT PRINT ALARM POWER Pour sélectionner la page mémoire Appuyez sur la touche MEMORY PAGE Touche MEMORY PAGE Appuyez plusieurs fois sur la touche MEMORY PAGE pour afficher la page mémoire souhaitée ...

Страница 182: ...e affichée sur l écran du moniteur vidéo ou mémorisation séquentielle d images dans toutes les pages mémoire à des intervalles réguliers Choix de l image affichée sur l écran du moniteur vidéo après saisie de l image de l image mémoire ou de l image source 1 Appuyez sur la touche MENU Le dernier menu consulté apparaît 2 Sélectionnez PRN en appuyant sur la touche G ou g Le menu PRINTER SETUP appara...

Страница 183: ...NCTION PRESS C BALANCE PRESS Q1 A 1 S INTERVAL 4 Sélectionnez la méthode de saisie des images souhaitée en appuyant sur la touche G ou g Si vous sélectionnez Mémoriser uniquement l image affichée sur l écran du moniteur vidéo en appuyant sur la touche CAPTURE Mémoriser séquentiellement des images dans toutes les positions d une page mémoire à des intervalles réguliers en appuyant sur la touche CAP...

Страница 184: ... avoir été saisie par l imprimante et au bout de quelques secondes la mémoire source apparaît chaque fois que vous appuyez sur la touche CAPTURE 9 Appuyez sur la touche MENU L écran normal apparaît Pour revenir au menu PRINTER SETUP A l étape 9 placez le curseur sur PRINTER SETUP et appuyez sur la touche g Le menu PRINTER SETUP apparaît à nouveau AUTO L I VE FUNCTION SETUP COLOR 200 PRN SETUP AUTO...

Страница 185: ...ée dans la mémoire l image mémoire ou l image source voir page 182 Décidez si des bords blancs doivent être ajoutés voir page 191 Vous pouvez spécifier si des bords blancs sont ajoutés avant ou après la saisie des quatre images réduites dans la mémoire 1 Démarrez la source vidéo Cette opération est exécutée à l aide des commandes de l appareil vidéo faisant office de source 2 3 Touche MEMORY FRM F...

Страница 186: ...enu PRINTER SETUP l image est automatiquement enregistrée séquentiellement sur quatre positions à des intervalles réguliers Dans ce cas passez à l étape 5 Lorsque l image source est affichée à la position où l image suivante doit être enregistrée passez à l étape 4 3 Appuyez sur la touche SOURCE MEMORY L image source apparaît sur l écran du moniteur vidéo 4 Répétez les étapes 2 et 3 jusqu à ce que...

Страница 187: ...placée par la nouvelle image enregistrée Pour sauter une image précédemment mémorisée Si une image a déjà été mémorisée l image précédemment saisie peut être remplacée en appuyant sur la touche CAPTURE Sautez l image correspondante en appuyant sur la touche F f G ou g 5 Appuyez sur la touche PRINT Les quatre images réduites sont imprimées sur une feuille de papier L association de bords blancs est...

Страница 188: ...che MEMORY FRM FLD Le mode de mémoire actuellement sélectionné apparaît pendant trois secondes puis disparaît Pour confirmer si les images enregistrées sont floues sur le moniteur vidéo Vous pouvez vérifier sur le moniteur vidéo si l image pleine page ou les deux ou les quatre images réduites enregistrées en mémoire sont floues Lorsque vous sélectionnez Image pleine page Vous pouvez vérifier si l ...

Страница 189: ...rt sur le moniteur vidéo ou jusqu à ce que le paramètre souhaité apparaisse en majuscules sur la fenêtre d affichage de l imprimante A chaque fois que vous appuyez sur la touche MOTION CHECK le paramètre change Pour sélectionner L affichage de lettres ou d images détaillées sur le moniteur vidéo La confirmation du flou de deux ou quatre images réduites enregistrées en mémoire L écran revient à son...

Страница 190: ... ON LOAD USER 1 2 3 EXEC SYSTEM PRESS FUNCTION PRESS C BALANCE PRESS Q1 A 1 S Pour sélectionner le réglage sur le menu 1 Appuyez sur la touche MENU Le dernier menu consulté apparaît 2 Sélectionnez PRN en appuyant sur la touche G ou g Le menu PRINTER SETUP apparaît 3 Sélectionnez MOTION CHK en appuyant sur la touche F ou f 4 Sélectionnez le réglage souhaité en appuyant sur la touche G ou g 5 Appuye...

Страница 191: ...PRESS Q1 A 1 S Réalisation d un tirage avec des bords blancs L appareil permet d imprimer les images avec des bords blancs 1 Appuyez sur la touche MENU Le dernier menu consulté apparaît 2 Sélectionnez LAY en appuyant sur la touche G ou g Le menu LAYOUT SETUP apparaît 3 Sélectionnez SEPARATE en appuyant sur la touche F ou f 1 5 2 4 3 Allumez LAY en vert en appuyant sur la touche G ou g Affichez LAY...

Страница 192: ...en réduction Vous pouvez réaliser un tirage d images identiques en réduction Avant de réaliser le tirage d images identiques en réduction Réglez le mode d application de l imprimante sur DUPLICATE voir page 173 Sélectionnez le type d images identiques en réduction à enregistrer dans la mémoire voir page 178 Sélectionnez la page mémoire appropriée voir page 180 Décidez si des bords blancs doivent ê...

Страница 193: ... image est affichée à sa taille entière Pour changer l image dans la mémoire 1 Démarrez la source vidéo 2 Appuyez sur la touche CAPTURE au moment où l image à imprimer apparaît L image précédemment mémorisée est remplacée par la nouvelle image enregistrée 3 Appuyez sur la touche PRINT Les images réduites identiques sont imprimées sur une feuille de papier Indique que l imprimante est réglée sur le...

Страница 194: ...qu à ce que le type 8 ou 16 sans bords blancs et en mode d application d imprimante STANDARD soit sélectionné Voir la section Sélection du nombre d images réduites à enregistrer dans la mémoire page 178 3 Mémorisez l image à incruster 1 Sélectionnez la position où insérer l image réduite en appuyant sur la touche G g F ou f Exemple Pour insérer l image dans la position inférieure gauche 2 Appuyez ...

Страница 195: ...niteur vidéo 5 Appuyez sur la touche PRINT L image contenant une incrustation est imprimée Réalisation d un tirage d images en miroir Vous pouvez configurer l imprimante de sorte que les images en mémoire soient retournées autour de leur axe vertical images en miroir et réaliser un tirage des images en miroir 1 Appuyez sur la touche MENU Le dernier menu consulté apparaît 2 Sélectionnez LAY en appu...

Страница 196: ... sur la touche F ou f 4 Spécifiez si les images saisies doivent être retournées ou non Si vous sélectionnez Réglage L impression des images dans le sens normal OFF La rotation des images par rapport à l axe vertical MIRROR 5 Appuyez sur la touche MENU L écran normal apparaît Remarque Même si vous réglez MIRROR sur MIRROR une légende entrée dans la fenêtre CAPTION est imprimée dans le sens normal P...

Страница 197: ... la position où vous pouvez introduire un caractère Les caractères introduits sont affichés ici Zone de saisie des caractères Le caractère ou le symbole où se trouve le curseur est mis en évidence en vert et c est ce caractère mis en évidence qui est introduit Vous pouvez utiliser des symboles et des mots pour introduire une légende ON affiché durant une impression avec légende OFF affiché durant ...

Страница 198: ... OF F A 1 OFF ON Affichage du menu CAPTION Les deux méthodes suivantes permettent d afficher le menu CAPTION Utilisation de la touche CAPTION INPUT Dans le menu Appuyez sur la touche CAPTION INPUT Le menu CAPTION s affiche Pour afficher le menu CAPTION à partir du menu LAYOUT SETUP Placez le curseur sur CAPTION dans le menu LAYOUT SETUP en appuyant sur la touche F ou f puis appuyez sur la touche g...

Страница 199: ...cours d impression vous ne pouvez pas introduire ou modifier de légende dans le menu CAPTION 1 Appuyez sur la touche CAPTION INPUT Le menu CAPTION s affiche 2 Pl acez le curseur la ligne allumée en vert à l endroit de la zone d affichage des caractères où introduire le caractère Pour déplacer le curseur 1 Sélectionnez la flèche correspondant au sens dans lequel déplacer le curseur vert dans la zon...

Страница 200: ...B C D E F G H I J K L M N O P Q R S T U V W X Y Z 0 1 2 3 4 5 6 7 8 9 SHIFT INS DEL SP EXIT Q1 A 1 S C OF F L EF T 3 OFF ON CAPTION OFF Exemple Déplacez le curseur de deux positions vers la gauche Remarque Si OFF est affiché le mode de saisie CAPTION est désactivé Vous ne pouvez donc pas ajouter de légende aux tirages voir la section Réalisation de tirages avec une légende page 205 3 Sélectionnez ...

Страница 201: ...imprimante Lorsqu ils sont en minuscules shift est affiché 2 Appuyez sur la touche EXEC Les lettres majuscules deviennent des minuscules ou les lettres minuscules deviennent des majuscules dans la zone de saisie des caractères Remarque Les caractères déjà saisis présents dans la zone d affichage des caractères ne changent pas même si des lettres sont modifiées dans la zone de saisie des caractères...

Страница 202: ...cez un espace il est effacé pour ne laisser qu un espace Pour remplacer un caractère saisi précédemment sans changer le nombre de caractères Vous pouvez remplacer un caractère saisi précédemment par un autre 1 Placez le curseur vert sur le caractère à remplacer en exécutant les opérations expliquées à l étape 2 2 Ecrasez le caractère non valide par le caractère correct en exécutant les opérations ...

Страница 203: ...IT en évidence en appuyant sur la touche F f G ou g puis appuyez sur la touche EXEC Les caractères saisis sont enregistrés dans la mémoire Le menu LAYOUT SETUP apparaît 7 Appuyez sur la touche MENU Remarque Si vous mettez l imprimante hors tension avant d exécuter l étape 6 les caractères saisis aux étapes 2 3 4 et 5 sont effacés et non enregistrés dans la mémoire 1 Déplacez le curseur sur B B est...

Страница 204: ... 1 S A C EBC OF F ON 5 OFF ON A B E C Pour réaliser des tirages avec une légende Le menu CAPTION permet de spécifier si une légende doit être associée à un tirage A l étape 6 suivez la procédure suivante avant d appuyer sur la touche CAPTION INPUT 1 Sélectionnez ON en appuyant sur la touche F f G ou g Sélectionnez OFF pour réaliser des tirages sans légende 2 Appuyez sur la touche EXEC Au terme de ...

Страница 205: ...ON OFF pour afficher le paramètre souhaité en vert sur le moniteur vidéo ou jusqu à ce que le paramètre souhaité apparaisse en majuscules sur la fenêtre d affichage de l imprimante A chaque fois que vous appuyez sur la touche CAPTION ON OFF le paramètre change dans l ordre suivant ON c OFF c ON Pour réaliser un tirage sans légende Sélectionnez OFF 3 Appuyez sur la touche PRINT Le tirage sans légen...

Страница 206: ...menu FUNCTION SETUP Sélection de la fonction de la touche CLEAR 1 Appuyez sur la touche MENU Le dernier menu consulté apparaît 2 Sélectionnez PRN en appuyant sur la touche G ou g Le menu PRINTER SETUP apparaît 3 Sélectionnez FUNCTION en appuyant sur la touche F ou f 1 2 6 3 5 7 4 PRN SPEED HIGH MOTION CHK P c l PRN i o R I NTER SETUP PRINTER SETUP COLOR 200 COL LAY PRN IN OUT PRINT QTY 1 1 9 INTER...

Страница 207: ... ALL Pour effacer les images d une seule page mémoire PAGE Pour désactiver la touche CLEAR OFF 7 Sélectionnez PRN SETUP en appuyant sur la touche F ou f Appuyez ensuite sur la touche g Le menu PRINTER SETUP apparaît Une fois la fonction de la touche CLEAR définie la touche CLEAR fonctionne conformément au réglage sélectionné jusqu à ce que vous changiez à nouveau la fonction Pour revenir à l écran...

Страница 208: ...r ALL dans le menu FUNCTION SETUP Appuyez sur la touche CLEAR Toutes les images mémorisées dans l imprimante sont effacées Remarque Même si vous appuyez sur la touche CLEAR lorsque l image source est affichée sur le moniteur vidéo l image mémoire s affiche sans suppression des images dans les pages mémoire Dans ce cas appuyez à nouveau sur la touche CLEAR Toutes les images mémorisées dans l imprim...

Страница 209: ...u FUNCTION SETUP 1 Appuyez sur la touche SOURCE MEMORY lorsque l image source est affichée sur l écran du moniteur vidéo L image enregistrée en mémoire est affichée sur l écran 2 Sélectionnez la page mémoire dont les images doivent être effacées en appuyant sur la touche MEMORY PAGE 3 Appuyez sur la touche CLEAR L image dans la page mémoire sélectionnée à l étape 2 est effacée 1 2 3 ...

Страница 210: ...s mêmes messages apparaissant sur la fenêtre d affichage de l imprimante effectuez les opérations en consultant les messages sur cette dernière 1 Appuyez sur la touche DISPLAY Le réglage courant apparaît L écran du moniteur vidéo revient à son état normal après quelques secondes 2 Sélectionnez OFF Appuyez plusieurs fois sur la touche DISPLAY pour afficher OFF en vert sur le moniteur vidéo ou jusqu...

Страница 211: ...ge dissimulée par un menu Vous pouvez temporairement masquer le menu en maintenant la touche DISPLAY enfoncée Remarque Les messages d erreur sont toujours affichés quel que soit le réglage de l affichage du moniteur Affichage du type et de la quantité restante de ruban encreur Vous pouvez toujours afficher le type du ruban encreur et la quantité restante de ce dernier sur le moniteur vidéo 1 Appuy...

Страница 212: ...affichée Pour réaliser le réglage de l affichage des informations de ruban encreur sur le menu Vous pouvez également spécifier si le type et la quantité restante de ruban encreur sont affichés sur le moniteur vidéo en réglant RBN REMAIN sur ON ou OFF dans le menu OUTPUT SETUP Le réglage de la touche RIBBON REMAIN change également en fonction du réglage de RBN REMAIN dans le menu OUTPUT SETUP vice ...

Страница 213: ...agasin à papier lors du transport de l imprimante Lors du transport de l imprimante verrouillez la tête thermique Pour des informations plus détaillées voir page 263 Réceptacle à papier 1 Magasin à papier 1 Cordon d alimentation secteur 1 Jeu d impression couleur a 1 Kit de nettoyage de tête thermique 1 Carte de garantie 1 modèle pour les Etats Unis et le Canada uniquement Mode d emploi 1 a Utilis...

Страница 214: ...r la manière de les assembler reportez vous aux pages indiquées entre parenthèses SOURCE MEMORY MEMORY PAGE CAPTURE PRINT SOURCE MEMORY MEMORY PAGE CAPTURE PRINT Porte ruban encreur page 151 Attachez la cassette à ruban encreur après avoir chargé le ruban encreur dans le porte ruban Magasin à papier page 154 Réceptacle à papier Accessoiresfournis suite ...

Страница 215: ...ndaire page 278 Vous pouvez utiliser les touches de la télécommande qui portent le même nom que celles de l imprimante Utilisation de la télécommande RM 5500 non fournie comme télécommande sans fil Si vous utilisez la télécommande comme une télécommande sans fil dirigez sa tête vers le capteur de télécommande de l imprimante Avec des piles neuves la télécommande offre une portée efficace d environ...

Страница 216: ...s vidéo Raccordez l appareil vidéo transmettant les images vidéo à imprimer Raccordez l appareil vidéo qui sera utilisé pour l impression proprement dite en prenant le diagramme suivant comme guide de référence Avant de raccorder l appareil vidéo lisez la section Instructions de sécurité importantes en vue d une utillsation dans un environnement médical Pour UP 51MD 51MDU 51MDP page 144 vers conne...

Страница 217: ...roprement dite en utilisant le diagramme suivant comme guide de référence Avant de raccorder l appareil vidéo lisez la section Instructions de sécurité importantes en vue d une utillsation dans un environnement médical Pour UP 51MD 51MDU 51MDP page 144 vers S VIDEO OUTPUT vers VIDEO OUTPUT vers RGB SYNC OUTPUT b vers connecteur d entrée S VIDEO vers connecteur d entrée vidéo composite vers connect...

Страница 218: ...e à distance L imprimante peut être commandée à distance en raccordant une télécommande RM 5500 non fournie une télécommande RM 91 non fournie une commande au pied FS 30 FS 36 non fournie ou un ordinateur personnel B A C Ordinateur a vers RS 232C vers REMOTE 1 vers REMOTE 2 vers REMOTE 3 RM 91 non fournie b RM 5500 non fournie FS 30 non fournie c Connecteur RS 232C vers AC IN vers une prise murale...

Страница 219: ... de la mémorisation automatique d images multiples en réduction à intervalles réguliers Réglage de la tonalité des tirages Sélection du mode d impression Vérification du flou de l image mémoire Réglage de l équilibre des couleurs Réglage de la luminosité de la fenêtre d affichage de l imprimante Réglage du débit en bauds pour la communication avec l ordinateur Sélection de l activation des bips de...

Страница 220: ...n et d erreur page 254 Réglage du débit en bauds pour la communication avec l ordinateur page 255 Sélection du type de laminage page 256 Enregistrement des réglages et des valeurs ajustées de l imprimante sous forme d un jeu d utilisateur page 258 Compensation des signaux d entrée Il se peut qu une image vidéo enregistrée dans de mauvaises conditions présente une mauvaise qualité des couleurs Si l...

Страница 221: ... d un signal de luminance Y et de chrominance C distinct c Si vous réglez la graduation 14 OFF apparaît et l image affichée sur l écran du moniteur devient noir et blanc d Pour effectuer le réglage de GAIN réglez AGC décrit ci dessous sur OFF Si l image imprimée ou affichée sur le moniteur apparaît noirâtre ou blanchâtre Réglez le signal d entrée sur le niveau optimal en vue de l impression Paramè...

Страница 222: ...Placez le curseur sur le paramètre à réinitialiser puis appuyez simultanément sur les touches G et g 4 Appuyez sur la touche MENU L écran normal apparaît 1 Placez le curseur sur le paramètre voulu en appuyant sur la touche F ou f 2 Procédez au réglage en appuyant sur la touche G ou g 1 Appuyez sur la touche F ou f jusqu à ce que le paramètre voulu apparaisse 2 Procédez au réglage en appuyant sur l...

Страница 223: ...ntraste médiocre même si le gain AGC du signal d entrée est compensé Dans ce cas vous pouvez régler le contraste en ajustant GAIN dans le menu INPUT SETUP Toutefois si vous ne souhaitez pas modifier le contraste de l affichage du moniteur vidéo compensez le niveau du signal d entrée dans le menu SYSTEM SETUP Remarque Vous ne pouvez pas régler une image après qu elle a été enregistrée dans la mémoi...

Страница 224: ... La valeur IRE sélectionnée est affichée avec trois chiffres A sélectionner lorsque Valeur IRE Réinitialisation sur les réglages standard 10 t 100 Le tirage est un peu blanchâtre 11 t 110 Le tirage est blanchâtre 12 t 120 Le tirage est très blanchâtre 13 t 130 Remarque Ne compensez pas le signal d entrée Cette action entraîne l assombrissement de l ensemble du tirage 5 Appuyez sur la touche MENU L...

Страница 225: ...t réglées même si les couleurs de l imprimante le sont Vérifiez les couleurs du moniteur vidéo avant de procéder au réglage des couleurs des tirages Dans ce cas utilisez le signal THRU en réglant SOURCE sur THRU dans le menu OUTPUT SETUP ou mettez l imprimante hors tension pour envoyer le signal THRU issu de l appareil vidéo au moniteur vidéo Après avoir réglé les couleurs du moniteur vidéo à l ai...

Страница 226: ... sur la touche G ou g 4 Appuyez sur la touche MENU L écran normal apparaît 5 Saisissez une nouvelle image dans la mémoire et réalisez un tirage Réglez les paramètres du côté imprimante en comparant le tirage et l image sur le moniteur de la manière suivante 6 Appuyez sur la touche MENU puis sélectionnez OUT en appuyant sur la touche G ou g Le menu OUTPUT SETUP apparaît Placez le curseur sur SOURCE...

Страница 227: ...ur le paramètre à réinitialiser puis appuyez simultanément sur les touches G et g 8 Appuyez sur la touche MENU L écran normal apparaît Pour Rendre l écran plus rougeâtre Rendre l écran plus cyan bleu Rendre l écran plus verdâtre Rendre l écran plus magenta rose Rendre l écran plus bleuâtre Rendre l écran plus jaunâtre Sens de réglage dans le menu Vers R rouge Vers C cyan Vers G vert Vers M magenta...

Страница 228: ... moyen de son numéro LOAD COLOR Cette fonction s avère particulièrement utile lorsque vous utilisez plusieurs appareils vidéo dont chacun présente des caractéristiques différentes lorsque vous voulez imprimer des images offrant différentes qualités de couleurs et différents contrastes ainsi que lorsque plusieurs utilisateurs ont accès à une même imprimante Vous pouvez également réaliser un tirage ...

Страница 229: ... 2 Sélectionnez LOAD COLOR en appuyant sur la touche F ou f 3 Sélectionnez le numéro LOAD COLOR des valeurs à ajuster ou à modifier en appuyant sur la touche G ou g Lors de la modification vous pouvez conserver les paramètres d origine voir la section Pour conserver la valeur de réglage initiale page 233 Placez le curseur sur LOAD COLOR en appuyant sur la touche F ou f Affichez LOAD COLOR en appuy...

Страница 230: ...amètre SHARPNESS est divisé en 15 graduations comprises entre 1 et 15 qui sont représentées par une valeur et un graphique La graduation 8 correspond à la netteté standard Pour INTERPOL interpolation sélectionnez ON ou OFF en fonction du type d image Lors du réglage de RED GREEN BLUE intensité des couleurs Paramètre de réglage du menu CYN RED MAG GRN YEL BLU Pour Rendre l image plus rougeâtre Rend...

Страница 231: ...contours adoucis Vers la gauche vers la graduation 1 Obtenir des contours normaux Centrée graduation 8 Obtenir des contours nets Vers la droite vers la graduation 15 Le contraste dans la partie sombre ou dans la partie claire augmente dans le sens lorsque vous appuyez sur la touche g Le contraste dans la partie sombre ou dans la partie claire diminue dans le sens lorsque vous appuyez sur la touche...

Страница 232: ...orsque vous avez modifié la valeur Une fois la valeur modifiée TEMP temporaire apparaît dans l écran de menu TEMP indique que les valeurs de réglage sont temporaires et n ont pas encore été mémorisées Si vous mettez l imprimante hors tension alors que TEMP est affiché les valeurs ajustées ne sont pas mémorisées 5 Sélectionnez SAVE COLOR en appuyant sur la touche F ou f Placez le curseur sur SAVE C...

Страница 233: ...glages à copier sont mémorisés dans le menu COLOR ADJUST 2 Sélectionnez le numéro SAVE COLOR cible sous lequel copier les données 3 Appuyez sur la touche EXEC Les réglages mémorisés sous le numéro LOAD COLOR sélectionné à l étape 1 sont copiés sous le numéro SAVE COLOR sélectionné à l étape 2 Pour rappeler le numéro LOAD COLOR sous lequel les réglages des couleurs des tirages intensité contraste e...

Страница 234: ...Q1 A 1 S PRN SPEED HIGH MOTION CHK Réglage de la tonalité des tirages Vous pouvez régler la tonalité de façon à ce que les détails des parties blanches ou noires apparaissent clairement sur les tirages 1 Appuyez sur la touche MENU puis sélectionnez PRN en appuyant sur la touche G ou g Le menu PRINTER SETUP apparaît 2 Sélectionnez GAMMA en appuyant sur la touche F ou f 1 4 2 3 Commutez PRN sur le v...

Страница 235: ...RMAL Réaliser un tirage d une image comportant de nombreuses H t HARD zones noires ou de couleur sombre 4 Appuyez sur la touche MENU L écran normal apparaît PRN SPEED HIGH MOTION CHK G s NORMA L h AMMA PRINTER SETUP COLOR 200 COL LAY PRN IN OUT PRINT QTY 1 1 9 INTERVAL OFF ON S NORMAL H OFF ON LOAD USER 1 2 3 EXEC SYSTEM PRESS FUNCTION PRESS C BALANCE PRESS Q1 A 1 S GAMMA Commutez la tonalité souh...

Страница 236: ...squelles il n y a pas de signal vidéo sont imprimées en noir Cela peut se produire lorsque vous réalisez des tirages après avoir raccordé une autre source vidéo ou exploité un autre logiciel vidéo Dans ce cas vous pouvez ajuster la zone d impression en déplaçant l écran horizontalement ou verticalement Si un cadre noir apparaît encore autour du tirage après que vous avez décalé la zone d impressio...

Страница 237: ... PRESS Q1 A 1 S 2 Sélectionnez WINDOW en appuyant sur la touche F ou f Remarque Si vous passez à l étape suivante après avoir sélectionné WINDOW à l étape 2 les images enregistrées dans la mémoire sont effacées 3 Appuyez sur la touche g Le menu WINDOW SETUP apparaît 4 Réglez l imprimante en fonction du tirage obtenu 1 Sélectionnez le paramètre à régler en appuyant sur la touche F ou f 2 Procédez a...

Страница 238: ...du réglage La position de l image est décalée vers la droite le format restant inchangé La position de l image est décalée vers la gauche le format restant inchangé La position de l image est décalée vers le haut le format restant inchangé La position de l image est décalée vers le bas le format restant inchangé Touche à actionner Touche g Touche G Touche g Touche G Paramètre de réglage du menu dé...

Страница 239: ...eurs réglées sont mémorisées Le menu LAYOUT SETUP apparaît 6 Appuyez sur la touche MENU L écran normal apparaît Pour annuler la valeur réglée Sélectionnez CANCEL à l étape 5 puis appuyez sur la touche EXEC sur le panneau secondaire Les valeurs réglées à l étape 4 sont annulées et les paramètres sont ramenés aux valeurs de réglage initiales Pour réinitialiser les valeurs réglées sur celles par défa...

Страница 240: ...t recommandé d ajuster l équilibre des couleurs à chaque fois que vous chargez un nouveau ruban encreur et du papier Avant de régler l équilibre des couleurs Réinitialisez tous les réglages du menu COLOR ADJUST à leurs valeurs par défaut voir la section Réglage des couleurs des tirages page 228 1 Affichez l image source sur le moniteur vidéo à l aide de la touche SOURCE MEMORY 2 Appuyez sur la tou...

Страница 241: ...s l achat de l imprimante les valeurs de BAL X BAL Y et BAL STEP sont réglées sur 50 50 et 05 en usine Le paramètre BAL STEP est la gamme ajustable parmi chaque équilibre des couleurs Si vous avez déjà réglé l équilibre des couleurs les valeurs réglées précédemment sont affichées dans le menu COLOR BALANCE Pour réinitialiser les valeurs sur celles par défaut 50 50 05 Sélectionnez chaque paramètre ...

Страница 242: ...s couleurs Pour choisir la position de l image source déplacez la zone mise en évidence en appuyant sur la touche F f G ou g tout en maintenant enfoncée la touche DISPLAY sur le panneau secondaire 6 Appuyez sur la touche CAPTURE L image enregistrée dans la mémoire s affiche 7 Sélectionnez TEST PRINT en appuyant sur la touche F ou f Déplacez la zone en évidence vers la position de l image souhaitée...

Страница 243: ... les neuf images Si vous souhaitez modifier l équilibre des couleurs après la visualisation du tirage réglez à nouveau l équilibre des couleurs en vous reportant à la section Pour régler à nouveau l équilibre des couleurs page 244 Indique l équilibre des couleurs des images imprimées dans la partie centrale à partir de la gauche 45 et 50 50 et 50 55 et 50 Indique l équilibre des couleurs des image...

Страница 244: ...z également procéder à un réglage fin en suivant les mêmes procédures 1 Affichez les valeurs de BAL X et BAL Y de l image la plus appropriée parmi les neuf images Dans ce cas vous pouvez effectuer un réglage fin ou grossier en modifiant la valeur de BAL STEP Pour effectuer un réglage fin Pour régler l équilibre des couleurs dans la gamme d équilibre des couleurs courante diminuez la valeur de BAL ...

Страница 245: ...st d impression en répétant les étapes 5 6 7 et 8 de la section Réglage de l équilibre des couleurs page 240 3 Sélectionnez l image présentant le meilleur équilibre des couleurs parmi les neuf images si possible Affichez ensuite les valeurs de BAL X et BAL Y à l aide de la touche F f G ou g Répétez les étapes 1 et 2 jusqu à ce que vous obteniez un équilibre de couleurs optimal 4 Revenez à l étape ...

Страница 246: ...e commande distant sur la broche n 5 du connecteur REMOTE 3 En vous aidant du menu vous pouvez assigner les fonctions de votre choix à la télécommande raccordée au connecteur REMOTE 2 ou REMOTE 3 De plus l imprimante peut être commandée à distance par un signal d impulsion entré via le connecteur REMOTE 2 ou REMOTE 3 voir pages 268 et 270 Vous pouvez également commander l imprimante à l aide d un ...

Страница 247: ... 1 2 3 EXEC SYSTEM PRESS PRESS C BALANCE PRESS Q1 A 1 S INTERVAL FUNCTION PRESS PRN SPEED HIGH MOTION CHK 2 Sélectionnez FUNCTION en appuyant sur la touche F ou f 3 Appuyez sur la touche g Le menu FUNCTION SETUP apparaît Pour assigner la fonction de la télécommande raccordée au connecteur REMOTE 2 passez à l étape 4 Pour assigner la fonction de la télécommande raccordée au connecteur REMOTE 3 3A 3...

Страница 248: ...mpulsion de synchronisation transmise via le connecteur REMOTE 2 voir page 268 Remarques Sélectionnez ON si vous voulez saisir l image à un moment précis en commandant la procédure au départ d un ordinateur Pour assigner la fonction à la télécommande raccordée au connecteur REMOTE 2 du menu FUNCTION SETUP définissez l élément IMMED CAP du menu FUNCTION SETUP sur OFF 6 Sélectionnez la télécommande ...

Страница 249: ...odifiée Fonctionne de la même façon que le bouton CAPTURE de l imprimante Fonctionne de la même façon que le bouton PRINT de l imprimante Saisie d une image dans une page mémoire lorsqu il n y a aucune image en attente d impression Si vous appuyez sur la touche alors que l impression est en cours l image sélectionnée est mise dans la file d attente et l image en attente est imprimée à la fin du cy...

Страница 250: ...e dans la mémoire et que vous passez simultanément à la page mémoire suivante Si l image n a pas été saisie dans la page mémoire l imprimante ne fonctionne pas correctement lorsque vous appuyez sur la touche de la télécommande Lorsque vous appuyez et maintenez enfoncée la touche de la télécommande l image source s affiche Lorsque vous relâchez la touche l image est enregistrée La page mémoire n es...

Страница 251: ...eut être sélectionnée en appuyant sur la touche G ou g Affichez la fonction souhaitée en appuyant sur la touche G ou g Lorsque est affiché à l extrémité gauche ou droite une autre fonction peut être sélectionnée en appuyant sur la touche G ou g La fonction pouvant être assignée dépend de la télécommande sélectionnée à l étape 1 Fonction à assigner GRAB CAPTURE PRINT C PRINT CYCLIC C CAP STOP BACK ...

Страница 252: ...uyez sur la touche MENU puis sélectionnez PRN en appuyant sur la touche G ou g Le menu PRINTER SETUP s affiche sur l image source 2 Sélectionnez SYSTEM en appuyant sur la touche F ou f 1 7 2 4 6 3 6 1 5 HIGH PRN SPEED MOTION CHK P c l PRN i o R I NTER SETUP PRINTER SETUP COLOR 200 COL LAY PRN IN OUT PRINT QTY 1 1 9 INTERVAL OFF ON GAMMA S NORMAL H OFF ON LOAD USER 1 2 3 EXEC SYSTEM PRESS FUNCTION ...

Страница 253: ...CNTR en appuyant sur la touche F ou f 5 Réglez la luminosité de la fenêtre d affichage de l imprimante en appuyant sur la touche G ou g Remarque Si vous sélectionnez l échelle de gauche OFF est affiché Dans ce cas aucun message n apparaît sur la fenêtre d affichage de l imprimante lorsque le moniteur vidéo revient à son état normal 6 Sélectionnez PRN SETUP à l aide de la touche F ou f puis appuyez...

Страница 254: ...squ une erreur survient le bip d erreur retentit trois fois Vous pouvez activer et désactiver ces bips à l aide du menu 1 Affichez le menu SYSTEM SETUP Pour afficher le menu SYSTEM SETUP reportez vous aux étapes 1 à 3 de la section Réglage de la luminosité de la fenêtre d affichage de l imprimante page 252 2 Sélectionnez BEEP en appuyant sur la touche F ou f 3 Sélectionnez l activation des bips de...

Страница 255: ... avec l ordinateur Lorsque vous commandez l imprimante au départ d un ordinateur raccordé via le connecteur RS 232C de l imprimante sélectionnez le débit en bauds approprié Pour plus de détails consultez votre revendeur Sony 1 Affichez le menu SYSTEM SETUP Pour afficher le menu SYSTEM SETUP reportez vous aux étapes 1 à 3 de la section Réglage de la luminosité de la fenêtre d affichage de l imprima...

Страница 256: ...ER SETUP apparaît 5 Appuyez sur la touche MENU L écran normal apparaît Sélection du mode de laminage L utilisation de l ensemble pour impression couleur autolaminant UPC 540 permet une conservation optimale des tirages De plus vous pouvez sélectionner le mode de laminage en fonction de la finition des tirages de votre choix Le débit en bauds est affiché dans le menu L affichage passe des deux chif...

Страница 257: ...a touche F ou f 3 Sélectionnez le format d animation en fonction de la finition souhaitée pour les tirages en appuyant sur les boutons G ou g Pour Mode de laminage Obtenir un tirage glacé GLOSSY Obtenir un tirage avec une finition de texture TEXTURE Obtenir un tirage mat MATTE 4 Appuyez sur la touche MENU L écran normal apparaît Commutez LAY sur le vert en appuyant sur la touche G ou g Affichez LA...

Страница 258: ...tilisateur rappelé sont modifiées l imprimante fonctionne selon les données modifiées Dans ce cas les données modifiées restent effectives jusqu au rappel d un autre jeu d utilisateur via la touche LOAD USER même si vous mettez l imprimante hors tension Une fois tous les réglages requis effectués suivez la procédure ci dessous pour les enregistrer en tant que jeu d utilisateur 1 Affichez le menu S...

Страница 259: ...s pouvez entrer jusqu à 16 caractères 4 Dans le menu USER NAME sélectionnez EXIT en appuyant sur la touche F f G ou g puis appuyez sur la touche EXEC Le nom de l utilisateur est enregistré et le menu SYSTEM SETUP apparaît à nouveau 5 Sélectionnez SAVE USER en appuyant sur la touche F ou f 6 Sélectionnez le numéro de jeu d utilisateur souhaité en appuyant sur la touche G ou g 7 Appuyez sur la touch...

Страница 260: ... imprimante fonctionne selon le jeu d utilisateur rappelé Si vous modifiez une valeur définie l imprimante fonctionne selon les données modifiées jusqu au rappel d un autre jeu d utilisateur Remarque Si le jeu d utilisateur est modifié toutes les images en mémoire sont effacées Pour conserver la valeur de réglage initiale Exemple Modifiez les paramètres effectués pour le jeu d utilisateur 1 Conser...

Страница 261: ...LOAD USER 2 Appuyez sur la touche EXEC pour exécuter le jeu d utilisateur sélectionné Remarque Si le jeu d utilisateur est modifié toutes les images en mémoire sont effacées 3 Sélectionnez le numéro de jeu d utilisateur cible via l option SAVE USER du menu SYSTEM SETUP 4 Appuyez sur la touche EXEC Les valeurs du jeu d utilisateur source sélectionné à l étape 1 sont copiées vers le numéro de jeu d ...

Страница 262: ...e les obstruez pas en installant d autres appareils à côté ou en recouvrant l unité d une étoffe etc Si l imprimante fonctionne incorrectement ou si un corps étranger pénètre à l intérieur du châssis déconnectez immédiatement le cordon d alimentation secteur et consultez votre revendeur Sony Installation N installez pas l appareil dans un endroit soumis à des vibrations mécaniques une humidité imp...

Страница 263: ...ors de l extraction du jeu d impression de son emballage Lieu d installation Pour éviter toute surchauffe interne veillez à assurer un espace dégagé suffisant autour de l imprimante de façon à ce que de l air puisse circuler par les ouïes de ventilation sur le côté gauche du châssis Avant de transporter l imprimante Avant de transporter l imprimante conformez vous à la procédure suivante pour reti...

Страница 264: ... ruban de nettoyage à fond dans le compartiment du ruban encreur de l imprimante jusqu à ce que vous entendiez un déclic Le message suivant apparaît 2 Appuyez sur la touche EXEC L imprimante lance le nettoyage de la tête thermique Pendant le nettoyage l indication Q1 qui apparaît en bas et à gauche du moniteur clignote Lorsque le nettoyage de la tête est terminé l indication Q1 s allume de nouveau...

Страница 265: ...é la tête thermique contactez votre revendeur Sony Nettoyage du filtre Nous vous recommandons de nettoyer le filtre tous les trois mois 1 Retirez le capot du ventilateur de l imprimante puis désolidarisez le filtre et le capot du ventilateur 2 Nettoyez le filtre à l aide d un aspirateur ou d un appareil équivalent Remarques Veillez à ce que le filtre ne reste pas coincé dans l aspirateur Ne frotte...

Страница 266: ...creur et de papier d impression préconisés pour cette imprimante Si vous utilisez un type de ruban et de papier différent l imprimante risque de ne pas fournir de résultats satisfaisants ou de présenter un dysfonctionnement Utilisez le ruban encreur avec le papier d impression contenus dans le même emballage Si l imprimante détecte une combinaison incompatible un message d erreur apparaît dans la ...

Страница 267: ...ormes PAL B G I Connecteurs d entrée RGB SYNC signal RVB analogique Connecteur BNC 4 RGB 0 7 Vcc terminaison 75 ohms sur ON SYNC 0 3 à 4 Vcc SYNC ON G Détection automatique 75 ohms terminaison 75 ohms sur ON sync négative S VIDEO signaux de luminance Y et de chrominance C séparés miniconnecteur DIN à 4 broches 1 Y 1 Vcc C Normes NTSC EIA Impulsion de synchronisation couleur 0 29 Vcc Normes PAL B G...

Страница 268: ...40 Spécifications médicales pour UP 51MD 51MDU 51MDP Protection contre les chocs électriques Classe I Protection contre la pénétration néfaste d eau Ordinaire Degré de sécurité en présence d anesthésiants inflammables ou d oxygène Ne convient pas à une utilisation en présence d anesthésiants inflammables ou d oxygène Mode de fonctionnement Continu Exploitation de la fonction d impression automatiq...

Страница 269: ... distance doit être ramenée à zéro Longueur d une impulsion de commande à distance Amplitude d une impulsion de commande à distance MIN 3 100 TYP MAX 12 5 Unité msec msec V Remarques Cette valeur est basée sur les normes TTL IMMED CAP réglé sur ON Notation tRPE tRPW VRP Paramètre Délai dans lequel une impulsion de commande à distance doit être ramenée à zéro Longueur d une impulsion de commande à ...

Страница 270: ...l image dans une mémoire donnée mais ne peut pas car l image enregistrée dans cette mémoire est en cours d impression Remarque Si AUTO LIVE dans le menu FUNCTION SETUP est réglé sur OFF l image mémoire est affichée sur l écran après qu elle ait été enregistrée dans la mémoire Dans ce cas appuyez sur la touche SOURCE MEMORY chaque fois que vous mémorisez une image de façon à ce que l image source a...

Страница 271: ...é t Installez le magasin à papier page 154 Lorsque RIBBON REMAIN 0 est affiché remplacez le ruban encreur page 151 La cassette à ruban encreur et le papier n ont pas été chargés t Chargez la cassette à ruban encreur et le papier pages 151 et 154 Le nombre maximum de tirages est atteint sur le réceptacle à papier t Retirez les tirages du réceptacle à papier Le papier s est coincé au niveau du magas...

Страница 272: ... à l intérieur de l imprimante t Localisez le bourrage de papier et retirez le papier coincé de l imprimante page 273 Messages d avertissement En cas d avertissement seuls les messages d avertissement apparaissent Le témoin ALARM ne s allume pas Messaged avertissement Sur le moniteur HIT ANY KEY INPUT MISMATCH Danslafenêtred affichage de l imprimante HIT ANY KEY INPUT MISMATCH Possiblecausesandrem...

Страница 273: ...e t Enregistrez l image dans la mémoire et relancez ensuite l impression page 161 Dans la page mémoire sélectionnée l image enregistrée est en cours ou en attente d impression t Réessayez l opération après la fin de l impression en cours La tête thermique est en surchauffe t Laissez l imprimante jusqu à ce que la tête thermique ait refroidi et que ce message ait disparu L imprimante reprendra auto...

Страница 274: ... coincée retirez la délicatement du réceptacle à papier Remarque Ne tirez jamais une feuille de papier coincée vers le bas le haut l arrière ou l avant car le papier risque sinon de s emmêler ou de se déchirer 4 Retirez le magasin à papier 5 Placez correctement du papier dans le magasin à papier Ne réutilisez pas le papier retiré à l étape 3 Jetez ce papier Utilisez uniquement le papier recommandé...

Страница 275: ...z sur la touche SOURCE MEMORY le paramètre SOURCE du menu OUTPUT SETUP est réglé sur THRU t Modifiez le paramètre SOURCE sur EE page 226 Lorsque le menu est affiché via la touche MENU le paramètre DISPLAY du moniteur vidéo est réglé sur OFF t Réglez le paramètre DISPLAY sur ON en appuyant sur la touche DISPLAY page 210 Le contraste de la fenêtre d affichage de l imprimante n est pas correctement d...

Страница 276: ...ran du moniteur vidéo est sombre Causespossiblesetremèdes Une cassette à ruban encreur utilisée n est pas compatible avec cette imprimante t Insérez une cassette à ruban encreur appropriée page 151 Le commutateur de terminaison 75 ohm est réglé sur la mauvaise position t Réglez le commutateur de terminaison 75 ohm sur la position correcte page 216 Guide de dépannage suite ...

Страница 277: ...commande vers ce capteur 4 Touche MEMORY PAGE 168 181 209 Appuyez sur cette touche pour sélectionner la page mémoire 5 Touche SOURCE MEMORY 186 209 220 240 Appuyez sur cette touche pour sélectionner le signal à transmettre vers le moniteur L image mémoire et l image source sont commutées chaque fois que vous appuyez sur cette touche 6 Touche CAPTURE 160 168 186 193 194 242 Appuyez sur cette touche...

Страница 278: ...teur relâchez la touche durant l affichage du numéro de jeu d utilisateur souhaité A chaque fois que vous appuyez sur cette touche le jeu d utilisateur change dans l ordre 1 2 3 3 Touche MULTI PICTURE 178 194 Appuyez sur cette touche pour sélectionner le type de tirage voulu sur l écran normal Lorsque vous appuyez sur cette touche le type de tirage sélectionné s affiche pendant trois secondes A ch...

Страница 279: ...age de MOTION CHK dans le menu PRINTER SETUP est lié au réglage de cette touche 9 Touche CAPTION INPUT 198 Appuyez sur cette touche pour afficher ou masquer le menu CAPTION sur l écran normal 0 Touche CAPTION ON OFF 205 Permet de spécifier l impression d une légende sur le tirage Pour réaliser un tirage avec une légende appuyez sur cette touche pour afficher ON Pour réaliser un tirage sans légende...

Страница 280: ...e cette touche Arrière 1 t Connecteurs INPUT signal d entrée 216 Utilisés pour le raccordement de l appareil vidéo transmettant l image source Connecteur S VIDEO VIDEO RGB SYNC 2 Commutateur de terminaison ON OFF 75 Ω 216 Fourni pour la sortie RGB Réglez normalement ce commutateur sur ON Réglez le sur OFF en cas de chute du signal d entrée lors de la connexion d un matériel supplémentaire à l appa...

Страница 281: ... 9 Connecteur RS 232C 218 Permet de raccorder un ordinateur pour commander l imprimante Pour plus de détails consultez votre revendeur Sony 0 Connecteur AC IN Permet de raccorder l imprimante à une prise murale au moyen du cordon d alimentation fourni qa T Connecteurs OUTPUT 217 Permettent de raccorder le moniteur vidéo Voir la section Instructions de sécurité importantes en vue d une utillsation ...

Страница 282: ...cs est réglé sur ON dans le menu LAYOUT SETUP F est associé DUP1 Indique la sélection du type d image pleine page et du mode DUPLICATE DUP4 Indique la sélection du type de quatre images réduites et du mode DUPLICATE a Indique le type du tirage b Indique la position lorsque le curseur est actuellement placé et qu une image sera enregistrée 6 Section d affichage de la page mémoire Indique la page mé...

Страница 283: ... OFF ON Q1 A 1 S 0 0 0 COLOR ADJUST COLOR 200 COL LAY PRN IN OUT LOAD COLOR 1 2 3 TEMP 1 2 3 EXEC MAG GRN 0 YEL BLU 0 DARK LIGHT SHARPNESS INTERPOL SAVE COLOR CYN RED 0 Q1 A 1 S 0 0 8 OFF ON WINDOW SETUP COLOR 200 LAY SETUP H START 0 DOT S V START 0 DOT S H WIDTH 896 DOTS SAVE PRESS EXEC CANCEL PRESS EXEC PRESS Q1 A 1 S V WIDTH 464 DOTS SYSTEM SETUP LCD CNTR 7 BAUDRATE 24 48 9600 BEEP OFF ON APPLI...

Страница 284: ...nction des composants et des commandes arrière 280 écran du moniteur 282 panneau principal 277 panneau secondaire 278 F G H Flou élimination du tirage 160 vérification du flou de l image mémoire 238 I Image miroir 195 Impression à grande vitesse 161 création d un tirage avec un sous titre 205 création d un tirage avec une incrustation 194 création d un tirage d image pleine page 159 élimination du...

Страница 285: ...214 couleur du signal d entrée 225 couleurs du tirage 228 équilibre des couleurs 240 interpolation 232 luminosité de la fenêtre d affichage de l imprimante 252 netteté du tirage 231 niveau du signal d entrée 223 taille du tirage 238 tonalité du tirage 234 zone d impression 238 Réglage du nombre de tirages 165 S Saisie d une légende ajout de caractères à la moitié 202 entrée d un espace 202 entrée ...

Страница 286: ... das Netzkabel vom Gerät lösen Versuchen Sie bei Interferenzen folgendes Stellen Sie das Gerät weiter entfernt vom gestörten Gerät auf Schließen Sie dieses Gerät und das andere Gerät an verschiedene Stromkreise an Wenden Sie sich für weitere Informationen an Ihren Händler Entspricht Standard EN60601 1 2 und CISPR11 Klasse B Gruppe 1 Vorsicht Beachten Sie bei der Entsorgung des Geräts bzw des Zubeh...

Страница 287: ...schiedlichen verkleinerten Bildern 319 Ausdrucken von identischen verkleinerten Bildern 334 Ausdrucken eines Bildes mit eingefügtem Bild 336 Ausdrucken von Spiegelbildern 337 Ausdrucken von Bildern mit Untertitel 339 Aufrufen des Menüs CAPTION 340 Eingeben eines Untertitels 341 Löschen der Bilder im Speicher 348 Einstellen der Funktion der Taste CLEAR 348 Löschen von Bildern im Speicher 350 Die Bi...

Страница 288: ...d Fehlersignals 396 Einstellen der Baud Rate zur Kommunikation mit dem Computer 397 Auswählen des Beschichtungstyps 398 Speichern von Benutzerdefinitionen 400 Sonstiges Sicherheitsmaßnahmen 404 Sicherheit 404 Aufstellung 404 Vor einem Transport des Druckers 405 Reinigung 406 Farbband und Papier 408 Technische Daten 409 Fehler Warnmeldungen 413 Fehlermeldungen 413 Warnmeldungen 414 Beheben von Papi...

Страница 289: ...schließen und mit Hilfe der Menüs die auf dem Videomonitor und im Drucker Display angezeigt werden einstellen Wenn Sie die Anschlüsse und Einstellungen einmal vorgenommen haben sind diese Schritte bei normalen Druckvorgängen in der Regel nicht nochmals erforderlich Allerdings müssen Sie diese Schritte erneut ausführen wenn Sie das Gerät neu installieren wenn sich die Bildqualität verschlechtert od...

Страница 290: ... Sie erläutern wichtige Punkte zur korrekten Bedienung des Druckers und sollen Ihnen helfen Fehlfunktionen zu vermeiden Index Neben dem Inhaltsverzeichnis können Sie Informationen zum Arbeiten mit dem Drucker auch über den Index finden Bildschirmanzeigen Einige der in diesem Handbuch abgebildeten Bildschirm und Displayanzeigen können sich leicht von den eigentlichen Anzeigen unterscheiden Die in d...

Страница 291: ...den angezeigten Menüs konfigurieren Folgende Arten von Ausdrucken können mit dem Drucker erzeugt werden Zusätzlich zu den oben aufgeführten Ausdrucken mit mehreren verkleinerten Bildern können Sie auch Ausdrucke mit mehreren verkleinerten Bildern und weißen Rändern darum herum anfertigen Außerdem können Sie einen Spiegelbildausdruck anfertigen bei dem das Bild um die vertikale Achse gedreht ist Ei...

Страница 292: ...en Bilder Quellenbilder und des Bildes das ausgedruckt werden soll Speicherbild Darüber hinaus werden die Druckermenüs und meldungen hier angezeigt Wenn der Drucker ausgeschaltet ist können Sie das Bild von der Videoquelle hier anzeigen lassen Farbvideodrucker Fußschalter nicht mitgeliefert zum Fernsteuern des Druckers Fernbedienung nicht mitgeliefert zum Fernsteuern des Druckers Systemübersicht F...

Страница 293: ...ette Damit ein Ausdruck erstellt werden kann müssen eine Farbbandkassette also ein Farbbandhalter mit eingelegtem Farbband und Papier eingelegt sein Legen Sie ein Farbband in den mitgelieferten Farbbandhalter ein und setzen Sie die Farbbandkassette in das Farbbandfach des Druckers ein Hinweise Bevor Sie den Drucker zum ersten Mal benutzen kann der Thermodruckkopf verschoben sein Schalten Sie vor d...

Страница 294: ...rd sehr heiß und kann Verbrennungen verursachen wenn Sie ihn berühren Wenn sich die Farbbandkassette nicht auswerfen läßt Schalten Sie den Drucker aus und wieder ein Drücken Sie dann nach einer Weile die Taste EJECT Hinweis Wenn Sie den Drucker ausschalten geht das Bild im Druckerspeicher verloren Speichern Sie in diesem Fall das Bild vor dem Drucken erneut ab 3 Nehmen Sie das verbrauchte Farbband...

Страница 295: ...se den falschen Farbbandhalter Achten Sie darauf den für diesen Drucker konzipierten Farbbandhalter zu verwenden Wenn sich die Farbbandkassette nicht einlegen läßt Schalten Sie den Drucker aus und wieder ein Legen Sie dann die Farbbandkassette erneut ein 7 Schließen Sie die Abdeckung vorn Spule mit dem Farbband Farbbandhalter Startmarkierung 1 Setzen Sie die Spule mit dem Farbband links in den Hal...

Страница 296: ...i darauf die Druckoberfläche die zu bedruckende Seite des Papiers nicht zu berühren Hinweise Sie können Papier bei ein und bei ausgeschaltetem Drucker einlegen Wenn Sie das Gerät dazu jedoch ausschalten geht das Bild im Druckerspeicher verloren Verwenden Sie nur das empfohlene Papier Andernfalls kommt es unter Umständen zu Fehlfunktionen wie Papierstaus Verwenden Sie auch nicht das Papier für Farb...

Страница 297: ... Sie weniger Blätter in das Papierfach ein Legen Sie keine unterschiedlichen Papiertypen in das Fach 4 Schieben Sie das Papierfach wieder in den Drucker bis es mit einem Klicken einrastet 5 Schließen Sie die Abdeckung vorn Hinweise Druckpapier Berühren Sie die Druckoberfläche nicht Staub oder Fingerabdrücke führen zu mangelhaften Druckergebnissen oder Fehlfunktionen des Druckkopfes Halten Sie das ...

Страница 298: ...des Eingangssignals mit der Taste INPUT SELECT 1 Schalten Sie Videomonitor und Drucker ein Folgende Anzeige erscheint wenn der Drucker betriebsbereit ist 2 Drücken Sie die Taste INPUT SELECT Das momentan ausgewählte Eingangssignal erscheint Das ausgewählte Signal leuchtet auf dem Videomonitor grün und wird im Drucker Display als ganzes Wort angezeigt Wenn Sie nach dem Drücken der Taste INPUT SELEC...

Страница 299: ...deogerät am Anschluß VIDEO INPUT Signal von einem Videogerät am Anschluß S VIDEO INPUT Signal von einem Videogerät an den Anschlüssen RGB SYNC INPUT So bestätigen Sie das momentan ausgewählte Eingangssignal Drücken Sie die Taste INPUT SELECT Das momentan ausgewählte Eingangssignal wird etwa 3 Sekunden lang auf dem Videomonitor grün und im Drucker Display als ganzes Wort angezeigt Hinweis Wenn das ...

Страница 300: ... das Menü 1 Schalten Sie Videomonitor und Drucker ein 2 Drücken Sie die Taste INPUT SETUP Das Menü INPUT SETUP wird angezeigt 3 Wählen Sie mit der Taste F oder f die Option INPUT SEL aus 4 Wählen Sie das gewünschte Eingangssignal mit der Taste G oder g aus 5 Drücken Sie die Taste INPUT SETUP Die normale Anzeige erscheint 1 2 5 3 4 Stellen Sie den Cursor mit der Taste F oder f auf INPUT SEL Drücken...

Страница 301: ...d 408 Wählen Sie das Eingangssignal von dem ein Ausdruck erstellt werden soll siehe Seite 298 Stellen Sie den Drucker so ein daß ein Bild in voller Größe im Druckerspeicher abgelegt werden kann siehe Seite 320 Wählen Sie die entsprechende Speicherseite siehe Seite 322 Bestätigen Sie die Farbqualität der Ausdrucke z B LOAD COLOR Nummer Seite 370 1 Schalten Sie Videomonitor und Drucker ein 2 Starten...

Страница 302: ...r Einstellung für den Speichermodus drücken Sie die Taste MEMORY FRM FLD Der momentan ausgewählte Speichermodus erscheint etwa drei Sekunden lang grün auf dem Videomonitor bzw als ganzes Wort im Drucker Display und wird dann ausgeblendet Sie können den Speichermodus nur wechseln wenn Sie 1 Bild in voller Größe 2 zwei verkleinerte Bilder oder 4 vier verkleinerte Bilder auswählen Die Anzahl verwendb...

Страница 303: ... bis der Ausdruck in die Papierfachabdeckung ausgeworfen wird Wenn Sie mehrere Exemplare anfertigen setzen Sie die Druckmenge auf 1 zurück während das erste Exemplar gedruckt wird siehe Ausdrucken mehrerer Exemplare eines Bildes auf Seite 307 Falls der Drucker nicht druckt In folgenden Fällen druckt der Drucker nicht Eine Fehlermeldung erscheint auf dem Monitor und dem Drucker Display Gehen Sie wi...

Страница 304: ...e des Ausdrucks des Druckbereichs auf Seite 378 Wenn die Farbqualität der Ausdrucke nicht zufriedenstellend ist Sie können eine zufriedenstellende Farbqualität der Ausdrucke erzielen indem Sie das Eingangssignal kompensieren und oder die Farbqualität auf den Ausdrucken einstellen siehe Kompensieren der Eingangssignale auf Seite 362 und Einstellen der Farbe auf den Ausdrucken auf Seite 370 Hinweise...

Страница 305: ...usgewählten Benutzerdefinition ändern und Ausdrucke anfertigen Hinweis Wenn Sie die momentan ausgewählte Benutzerdefinition wechseln wird das Bild in den Speicherseiten gelöscht 1 Schalten Sie Videomonitor und Drucker ein 2 Starten Sie die Videoquelle und lassen Sie das Quellenbild auf dem Videomonitor anzeigen Hierzu verwenden Sie die Bedienelemente des Videogeräts das als Videoquelle ausgewählt ...

Страница 306: ... Sekunden ausgeblendet 5 Drücken Sie die Taste EXEC Die in Schritt 4 ausgewählte Benutzerdefinition wird ausgeführt Während die ausgewählte Benutzerdefinition ausgeführt wird erscheint die folgende Meldung 6 Drücken Sie die Taste CAPTURE in dem Moment in dem das zu druckende Bild auf dem Monitor erscheint Das Bild wird in den Speicher gestellt 7 Drücken Sie die Taste PRINT Der Drucker erstellt die...

Страница 307: ...ahl der Exemplare jedoch nicht verringern Das Menü Sie können die Anzahl der Exemplare vor dem Drucken und auch während des Druckens jederzeit ändern Einstellen der Druckmenge mit der Taste PRINT QTY 1 Drücken Sie die Taste PRINT QTY Der folgende Bildschirm erscheint Wenn Sie nach dem Drücken der Taste PRINT QTY nicht fortfahren erscheint die aktuell eingestellte Anzahl der Exemplare etwa 3 Sekund...

Страница 308: ...bis auf maximal 9 So verringern Sie die Anzahl der Exemplare Drücken Sie während der Bildschirm in Schritt 1 angezeigt wird die Taste G Mit jedem Tastendruck auf G verringert sich die Anzahl der Exemplare bis auf 1 Einstellen der Druckmenge im Menü 1 Drücken Sie die Taste MENU Das zuvor geöffnete Menü wird angezeigt 2 Wählen Sie mit der Taste G oder g die Option PRN aus Das Menü PRINTER SETUP wird...

Страница 309: ...rscheint Wenn das Druckpapier während des Druckens zu Ende geht Legen Sie neues Papier ins Papierfach ein und drücken Sie die Taste PRINT Die Druckmenge wird beim Stoppen des Druckvorgangs allerdings auf die ursprüngliche Menge zurückgesetzt Wenn als Druckmenge beispielsweise 5 eingestellt ist und das Papier nach dem Drucken von drei Exemplaren ausgeht wird die Druckmenge trotzdem auf 5 zurückgese...

Страница 310: ... Drücken Sie die Taste CAPTURE in dem Moment in dem das zu druckende Bild auf dem Monitor erscheint 3 Drücken Sie die Taste PRINT Das in Schritt 2 aufgezeichnete Bild wird in die Warteschlange gestellt Das Bild wird gedruckt sobald alle vorherigen Druckjobs beendet sind Die verfügbaren Speicherseiten werden weiß angezeigt SOURCE MEMORY MEMORY PAGE CAPTURE PRINT PRINT ALARM POWER 1 2 3 Die momentan...

Страница 311: ...cherseite stellen deren Bild bereits zum Drucken in die Warteschlange gestellt wurde Wenn Sie dies versuchen erscheint PLEASE WAIT PRINTING MEMORY auf dem Monitor 4 Um weitere Bilder in die Warteschlange zu stellen gehen Sie wie in Schritt 1 2 und 3 erläutert vor ...

Страница 312: ... ABC 4 5 6 H I J KLM 1 2 3 EFG 7 8 9 XYZ ABC ABC ABC ABC Ein normales Bild d h ein Bild in voller Größe Zwei verkleinerte Bilder Vier verkleinerte Bilder Acht verkleinerte Bilder 16 verkleinerte Bilder a Sie können Ausdrucke mit 2 4 8 oder 16 identischen verkleinerten Bildern erstellen Sie können Ausdrucke mit mehreren verkleinerten Bildern und weißen Rändern darum herum anfertigen Außerdem können...

Страница 313: ...stellen können Sie verschiedene bzw identische verkleinerte Bilder ausdrucken lassen Wenn Sie den Drucker zum ersten Mal verwenden ist der Betriebsmodus STANDARD für Bilder in voller Größe ausgewählt Stellen Sie den Betriebsmodus ein der für Ihre Zwecke am besten geeignet ist Hinweis Wenn Sie den Betriebsmodus ändern werden die Bilder in allen Speicherseiten gelöscht 1 Drücken Sie die Taste MENU D...

Страница 314: ...Sie den Drucksatz mit selbstbeschichtendem Papier UPC 540 verwenden können Sie die Beschichtung der Ausdrucke auswählen siehe Auswählen des Beschichtungstyps auf Seite 398 4 Wählen Sie den gewünschten Druckmodus mit der Taste G oder g aus Funktion Einstellung für PRN SPEED Druckmodus Erstellen eines Ausdrucks mit normaler Geschwindigkeit NORMAL Erstellen eines Ausdrucks mit hoher Geschwindigkeit H...

Страница 315: ... der Taste G oder g aus Betriebsmodus STANDARD DUPLICATE 9 Wählen Sie mit der Taste F oder f die Option PRN SETUP aus 10 Drücken Sie die Taste g Das Menü PRINTER SETUP wird angezeigt 11 Drücken Sie die Taste MENU Die normale Anzeige erscheint Stellen Sie den Cursor mit der Taste F oder f auf APPLI Drücken Sie die Taste F oder f so oft bis APPLI erscheint Lassen Sie den gewünschten Betriebsmodus mi...

Страница 316: ...chnet Die Anzahl der verfügbaren Speicherseiten hängt von der Art der verkleinerten Bilder und vom Speichermodus ab Einzelheiten dazu finden Sie unter Auswählen der Speicherseite auf Seite 322 Hinweis Sie können den Halbbildmodus nur auswählen wenn Sie Bilder in voller Größe zwei verkleinerte oder vier verkleinerte Bilder ausdrucken wollen Im Vollbildmodus Im Halbbildmodus Q1 A 1 S Das auf dem Vid...

Страница 317: ... nicht fortfahren erscheint der momentan ausgewählte Speichermodus etwa 3 Sekunden lang und wird danach ausgeblendet 2 Wählen Sie mit der Taste MEMORY FRM FLD den gewünschten Speichermodus aus Drücken Sie die Taste MEMORY FRM FLD so oft bis der gewünschte Speichermodus auf dem Videomonitor grün angezeigt wird bzw bis er im Drucker Display in Großbuchstaben angezeigt wird Mit jedem Tastendruck auf ...

Страница 318: ...N PRESS Q1 A 1 S So wählen Sie den Speichermodus über das Menü aus 1 Drücken Sie die Taste MENU Das zuvor ausgewählte Menü erscheint 2 Wählen Sie mit der Taste G oder g die Option LAY aus Das Menü LAYOUT SETUP wird angezeigt 3 Wählen Sie mit der Taste F oder f die Option MEMORY aus 1 5 2 4 3 Lassen Sie LAY mit der Taste G oder g grün anzeigen Lassen Sie LAY mit der Taste G oder g in Großbuchstaben...

Страница 319: ...len und diese Bilder verkleinert ausdrucken In diesem Abschnitt wird erläutert wie Sie einen Ausdruck mit mehreren verkleinerten Bildern anfertigen Mehrere verkleinerte Bilder können Sie folgendermaßen ausdrucken Stellen Sie den Betriebsmodus des Druckers auf STANDARD Seite 315 ein Legen Sie die Anzahl der verkleinerten Bilder fest unten auf der folgenden Seite Wählen Sie die Speicherseite aus Sei...

Страница 320: ...URE aus Drücken Sie die Taste MULTI PICTURE so oft bis der gewünschte Ausdrucktyp für die verkleinerten Bilder die gespeichert werden sollen auf dem Videomonitor grün angezeigt wird bzw bis er im Drucker Display angezeigt wird Mit jedem Tastendruck auf MULTI PICTURE wechselt der Ausdrucktyp für die verkleinerten Bilder in der Reihenfolge 1 2 4 8 16 1 Ausdrucktyp Anzahl verkleinerter Bilder 1 1 Bil...

Страница 321: ...SS Q1 A 1 S So wählen Sie den Ausdrucktyp für die zu speichernden verkleinerten Bilder über das Menü aus 1 Drücken Sie die Taste MENU Das zuvor ausgewählte Menü erscheint 2 Wählen Sie mit der Taste G oder g die Option LAY aus Das Menü LAYOUT SETUP wird angezeigt 3 Wählen Sie mit der Taste F oder f die Option MULTI PIX aus 1 5 2 4 3 Lassen Sie LAY mit der Taste G oder g grün anzeigen Lassen Sie LAY...

Страница 322: ... sollen mit der Taste G oder g anzeigen Anfertigen von verschiedenen Typen von Ausdrucken Fortsetzung Für UP 50 51MD 51MDP Betriebmodus STANDARD DUPLICATE Ausdrucktyp für die verkleinerten Bilder die gespeichert werden sollen Bild in voller Größe Zwei verkleinerte Bilder Vier verkleinerte Bilder Acht verkleinerte Bilder 16 verkleinerte Bilder Alle Typen 1 2 4 8 16 Verfügbare Speicherseite FRAME A ...

Страница 323: ...SOURCE MEMORY MEMORY PAGE CAPTURE PRINT PRINT ALARM POWER So wählen Sie die Speicherseite aus Drücken Sie die Taste MEMORY PAGE Taste MEMORY PAGE Drücken Sie die Taste MEMORY PAGE so oft bis die gewünschte Speicherseite erscheint ...

Страница 324: ...che für verkleinerte Bilder auf einer Speicherseite gestellt werden sollen Sie können festlegen welches Bild der Drucker nach dem Speichern des Bildes auf dem Videomonitor ausgeben soll das Speicherbild oder das Quellenbild 1 Drücken Sie die Taste MENU Das zuvor ausgewählte Menü erscheint 2 Wählen Sie mit der Taste G oder g die Option PRN aus Das Menü PRINTER SETUP wird angezeigt Wenn Sie den Ausd...

Страница 325: ...G oder g Funktion Mit der Taste CAPTURE wird nur das Bild aufgezeichnet das zur Zeit auf dem Videomonitor angezeigt wird Mit der Taste CAPTURE werden die Bilder nacheinander in bestimmten Abständen in alle Bereiche einer Speicherseite gestellt 5 Wählen Sie mit der Taste F oder f die Option FUNCTION aus 6 Drücken Sie die Taste g Das Menü FUNCTION SETUP wird angezeigt Stellen Sie den Cursor mit der ...

Страница 326: ...scheint jedesmal wenn Sie die Taste CAPTURE drücken das Quellenbild 9 Drücken Sie die Taste MENU Die normale Anzeige erscheint So schalten Sie zum Menü PRINTER SETUP zurück Stellen Sie in Schritt 9 den Cursor auf PRN SETUP und drücken Sie die Taste g Das Menü PRINTER SETUP wird wieder angezeigt AUTO L I VE FUNCTION SETUP COLOR 200 PRN SETUP AUTO LIVE OFF ON OFF ON RM2 FUNC C PRINT RM3A FUNC PRINT ...

Страница 327: ...lenbild siehe Seite 324 Legen Sie fest ob die Bilder mit weißen Rändern ausgedruckt werden sollen siehe Seite 333 Sie können festlegen ob die weißen Ränder vor oder nach dem Speichern der vier verkleinerten Bilder hinzugefügt werden sollen 1 Starten Sie an der Videoquelle die Wiedergabe Hierzu verwenden Sie die Bedienelemente des Videogeräts das als Videoquelle ausgewählt ist 2 3 Taste MEMORY FRM ...

Страница 328: ...den in die vier Bereiche gestellt Fahren Sie in diesem Fall mit Schritt 5 fort Wenn das Quellenbild an der Position angezeigt wird an der das nächste Bild gespeichert werden soll fahren Sie mit Schritt 4 fort 3 Drücken Sie die Taste SOURCE MEMORY Das Quellenbild erscheint auf dem Videomonitor 4 Wenn das Speicherbild weiterhin auf dem Videomonitor angezeigt wird wiederholen Sie Schritt 2 und 3 bis ...

Страница 329: ...rch das neue Bild ersetzt So überspringen Sie ein zuvor gespeichertes Bild Wurde bereits ein Bild gespeichert so können Sie das zuvor gespeicherte Bild mit der Taste CAPTURE ersetzen Überspringen Sie das Bild das Sie beibehalten wollen mit der Taste F f G oder g 5 Drücken Sie die Taste PRINT Die vier verkleinerten Bilder werden auf einem Blatt Papier ausgedruckt Ob die Bilder mit weißen Rändern au...

Страница 330: ...n lang angezeigt und dann ausgeblendet So überprüfen Sie durch Anzeigen auf dem Videomonitor ob die aufgezeichneten Bilder verschwommen sind Sie können durch Anzeigen auf dem Videomonitor überprüfen ob das Bild in voller Größe bzw die zwei oder vier verkleinerten Bilder im Speicher verschwommen sind Bei einem Bild in voller Größe Sie können überprüfen ob das aufgezeichnete Bild verschwommen ist in...

Страница 331: ...is die gewünschte Einstellung auf dem Videomonitor grün angezeigt wird bzw bis sie im Drucker Display in Großbuchstaben angezeigt wird Mit jedem Tastendruck auf MOTION CHECK wechselt die Einstellung Funktion Anzeigen von Buchstaben oder Bildfeinheiten auf dem Videomonitor Überprüfen ob die zwei oder vier verkleinerten Bilder im Speicher verschwommen sind Nach einigen Sekunden erscheint wieder die ...

Страница 332: ...ESS Q1 A 1 S So wählen Sie die Einstellung über das Menü aus 1 Drücken Sie die Taste MENU Das zuvor ausgewählte Menü erscheint 2 Wählen Sie mit der Taste G oder g die Option PRN aus Das Menü PRINTER SETUP wird angezeigt 3 Wählen Sie mit der Taste F oder f die Option MOTION CHK aus 4 Wählen Sie die gewünschte Einstellung mit der Taste G oder g aus 5 Drücken Sie die Taste MENU Die normale Anzeige er...

Страница 333: ...sdrucken der Bilder mit weißen Rändern Sie können festlegen ob die Bilder mit einem weißen Rand ausgedruckt werden sollen 1 Drücken Sie die Taste MENU Das zuvor ausgewählte Menü erscheint 2 Wählen Sie mit der Taste G oder g die Option LAY aus Das Menü LAYOUT SETUP wird angezeigt 3 Wählen Sie mit der Taste F oder f die Option SEPARATE aus 1 5 2 4 3 Lassen Sie LAY mit der Taste G oder g grün anzeige...

Страница 334: ... mit identischen verkleinerten Bildern anfertigen Stellen Sie den Betriebsmodus des Druckers auf DUPLICATE ein siehe Seite 315 Wählen Sie den gewünschten Ausdrucktyp für die identischen verkleinerten Bilder aus die gespeichert werden sollen siehe Seite 320 Wählen Sie die entsprechende Speicherseite siehe Seite 322 Legen Sie fest ob die Bilder mit weißen Rändern ausgedruckt werden sollen siehe Seit...

Страница 335: ...d h das Bild wird in voller Größe angezeigt So wechseln Sie das in den Speicher gestellte Bild 1 Starten Sie an der Videoquelle die Wiedergabe 2 Drücken Sie die Taste CAPTURE in dem Moment in dem das zu druckende Bild erscheint Das zuvor gespeicherte Bild wird durch das neue Bild ersetzt 3 Drücken Sie die Taste PRINT Die identischen verkleinerten Bilder werden auf einem Blatt Papier ausgedruckt Ze...

Страница 336: ...der ohne weiße Ränder und im Betriebsmodus STANDARD ausgewählt ist Näheres dazu finden Sie unter Festlegen der Anzahl verkleinerter Bilder die gespeichert werden sollen auf Seite 320 3 Speichern Sie das einzufügende Bild 1 Wählen Sie mit der Taste G g F oder f die Position aus an der das verkleinerte Bild eingefügt werden soll Beispiel Einfügen des Bildes an der Position links unten 2 Drücken Sie ...

Страница 337: ...itor 5 Drücken Sie die Taste PRINT Das Bild mit eingefügtem Bild wird ausgedruckt Ausdrucken von Spiegelbildern Sie können den Drucker so einstellen daß Bilder die in den Speicher gestellt werden um ihre vertikale Achse gedreht werden Spiegelbilder und Sie können einen Ausdruck dieser Spiegelbilder erstellen 1 Drücken Sie die Taste MENU Das zuvor ausgewählte Menü erscheint 2 Wählen Sie mit der Tas...

Страница 338: ...n Sie aus ob die gespeicherten Bilder gedreht werden sollen Funktion Einstellung Normales Drucken der Bilder OFF Drehen der Bilder um die vertikale Achse MIRROR 5 Drücken Sie die Taste MENU Die normale Anzeige erscheint Hinweis Auch wenn Sie MIRROR auf MIRROR setzen wird ein im Fenster CAPTION eingegebener Untertitel normal ausgedruckt Stellen Sie den Cursor mit der Taste F oder f auf MIRROR Drück...

Страница 339: ...igebereich Der grün leuchtende Cursor zeigt die Position an an der ein Zeichen eingegeben werden kann Die eingegebenen Zeichen werden hier angezeigt Zeicheneingabebereich Das Zeichen oder Symbol auf dem der Cursor steht ist grün hervorgehoben und kann eingegeben werden Diese Symbole und Begriffe können zum Eingeben eines Untertitels verwendet werden ON Wird angezeigt wenn ein Untertitel ausgedruck...

Страница 340: ... OF F A 1 OFF ON Aufrufen des Menüs CAPTION Zum Aufrufen des Menüs CAPTION stehen die beiden folgenden Möglichkeiten zur Verfügung Die Taste CAPTION INPUT Das Menü Drücken Sie die Taste CAPTION INPUT Das Menü CAPTION erscheint So rufen Sie das Menü CAPTION über das Menü LAYOUT SETUP auf Stellen Sie den Cursor im Menü LAYOUT SETUP mit der Taste F oder f auf CAPTION und drücken Sie die Taste g Das M...

Страница 341: ...hrend des Druckvorgangs können Sie keine Untertitel im Menü CAPTION eingeben oder bearbeiten 1 Drücken Sie die Taste CAPTION INPUT Das Menü CAPTION erscheint 2 Stellen Sie den Cursor die grüne Linie im Zeichenanzeigebereich an die Stelle an der Sie ein Zeichen eingeben wollen So bewegen Sie den Cursor 1 Wählen Sie mit der Taste F f G oder g den Pfeil für die Richtung aus in die Sie den grünen Curs...

Страница 342: ...C D E F G H I J K L M N O P Q R S T U V W X Y Z 0 1 2 3 4 5 6 7 8 9 SHIFT INS DEL SP EXIT Q1 A 1 S C OF F L EF T 3 OFF ON CAPTION OFF Beispiel Sie möchten den Cursor um zwei Positionen nach links bewegen Hinweis Wenn OFF angezeigt wird ist der Eingabemodus für CAPTION deaktiviert Sie können die Ausdrucke also nicht mit Untertiteln versehen siehe Ausdrucken von Bildern mit Untertitel auf Seite 347 ...

Страница 343: ...enn Kleinbuchstaben angezeigt werden wird shift angezeigt 2 Drücken Sie die Taste EXEC Im Zeicheneingabebereich werden Großbuchstaben zu Kleinbuchstaben bzw Kleinbuchstaben werden zu Großbuchstaben Hinweis Bereits eingegebene Zeichen im Zeichenanzeigebereich zu sehen ändern sich nicht auch wenn die Groß Kleinschreibung im Zeicheneingabebereich gewechselt wird 4 Drücken Sie die Taste EXEC Das in Sc...

Страница 344: ...der Position an der Sie das Leerzeichen einfügen ein anderes Zeichen befindet wird dieses Zeichen gelöscht und das Leerzeichen bleibt erhalten So ersetzen Sie ein zuvor eingegebenes Zeichen ohne die Zeichenanzahl zu ändern Sie können ein zuvor eingegebenes Zeichen durch ein neues ersetzen 1 Stellen Sie wie in Schritt 2 erläutert den grünen Cursor auf das zu ersetzende Zeichen 2 Überschreiben Sie d...

Страница 345: ...malen Anzeige zurückschalten 6 Heben Sie mit der Taste F f G oder g die Option EXIT hervor und drücken Sie dann die Taste EXEC Die eingegebenen Zeichen werden gespeichert Das Menü LAYOUT SETUP wird angezeigt 7 Drücken Sie die Taste MENU Hinweis Wenn Sie den Drucker ausschalten bevor Sie Schritt 6 ausgeführt haben werden die in Schritt 2 3 4 und 5 eingegebenen Zeichen gelöscht 1 Stellen Sie den Cur...

Страница 346: ...NS DEL SP EXIT Q1 A 1 S A C EBC OF F ON 5 OFF ON A B E C So drucken Sie Bilder mit Untertitel aus Im Menü CAPTION können Sie einstellen ob ein Bild mit oder ohne Untertitel ausgedruckt wird Gehen Sie in Schritt 6 vor dem Drücken der Taste CAPTION INPUT folgendermaßen vor 1 Wählen Sie mit der Taste F f G oder g die Option ON aus Wählen Sie OFF um Bilder ohne Untertitel auszudrucken 2 Drücken Sie di...

Страница 347: ...male Anzeige 2 Wählen Sie ON aus Drücken Sie die Taste CAPTION ON OFF so oft bis ON auf dem Videomonitor grün bzw im Drucker Display in Großbuchstaben angezeigt wird Mit jedem Tastendruck auf CAPTION ON OFF wechselt die Einstellung abwechselnd zwischen ON c OFF c ON So drucken Sie Bilder ohne Untertitel aus Wählen Sie OFF 3 Drücken Sie die Taste PRINT Der Ausdruck mit Untertitel wird erstellt 1 2 ...

Страница 348: ...tion der Taste CLEAR 1 Drücken Sie die Taste MENU Das zuvor ausgewählte Menü erscheint 2 Wählen Sie mit der Taste G oder g die Option PRN aus Das Menü PRINTER SETUP wird angezeigt 3 Wählen Sie mit der Taste F oder f die Option FUNCTION aus 1 2 6 3 5 7 4 PRN SPEED HIGH MOTION CHK P c l PRN i o R I NTER SETUP PRINTER SETUP COLOR 200 COL LAY PRN IN OUT PRINT QTY 1 1 9 INTERVAL OFF ON GAMMA S NORMAL H...

Страница 349: ...iten ALL Löschen der Bilder aus einer Speicherseite PAGE Deaktivieren der Taste CLEAR OFF 7 Wählen Sie mit der Taste F oder f die Option PRN SETUP aus Drücken Sie dann die Taste g Das Menü PRINTER SETUP wird angezeigt Nachdem Sie die Funktion der Taste CLEAR eingestellt haben funktioniert die Taste CLEAR gemäß dieser Einstellung bis Sie sie ändern So rufen Sie wieder die normale Anzeige auf Drücke...

Страница 350: ... SETUP auf ALL Drücken Sie die Taste CLEAR Alle im Drucker gespeicherten Bilder werden gelöscht Hinweis Wenn das Quellenbild auf dem Videomonitor angezeigt wird und Sie die Taste CLEAR drücken wird das Speicherbild trotzdem angezeigt und die Bilder in den Speicherseiten werden nicht gelöscht Drücken Sie in diesem Fall nochmals die Taste CLEAR Alle im Drucker gespeicherten Bilder werden gelöscht Ta...

Страница 351: ...ü FUNCTION SETUP auf PAGE 1 Drücken Sie die Taste SOURCE MEMORY wenn das Quellenbild auf dem Videomonitor angezeigt wird Das Bild im Speicher wird auf dem Monitor angezeigt 2 Wählen Sie mit der Taste MEMORY PAGE die Speicherseite aus der Sie die Bilder löschen wollen 3 Drücken Sie die Taste CLEAR Das Bild in der in Schritt 2 ausgewählten Speicherseite wird gelöscht 1 2 3 ...

Страница 352: ...zeigen im Drucker Display zu sehen sind können Sie die Funktionen auch ausführen und dabei die Anzeigen im Drucker Display beobachten 1 Drücken Sie die Taste DISPLAY Die aktuelle Einstellung wird angezeigt Nach einigen Sekunden erscheint auf dem Videomonitor wieder die normale Anzeige 2 Wählen Sie OFF Drücken Sie die Taste DISPLAY so oft bis OFF auf dem Videomonitor grün bzw im Drucker Display in ...

Страница 353: ... Bild sehen wollen das von einem Menü verdeckt wird Sie können das Menü vorübergehend ausblenden indem Sie die Taste DISPLAY gedrückt halten Hinweis Fehlermeldungen werden unabhängig von der Einstellung der Monitoranzeige immer angezeigt Anzeigen des Farbbandtyps und des restlichen Farbbandes Sie können auf dem Videomonitor jederzeit den Farbbandtyp und das restliche Farbband anzeigen lassen 1 Drü...

Страница 354: ...r das Anzeigen der Farbbandinformationen über das Menü vor Sie können auch über das Menüsystem einstellen ob der Farbbandtyp und das restliche Farbband auf dem Videomonitor angezeigt werden sollen Setzen Sie dazu RBN REMAIN im Menü OUTPUT SETUP auf ON oder OFF Die Einstellung der Taste RIBBON REMAIN wechselt ebenfalls je nach Einstellung von RBN REMAIN im Menü OUTPUT SETUP und umgekehrt R OF o n B...

Страница 355: ...e zum Transportieren des Druckers die Farbbandkassette und das Papierfach heraus Arretieren Sie den Thermokopf wenn Sie den Drucker transportieren wollen Näheres zum Arretieren des Thermokopfs finden Sie auf Seite 407 Papierfachabdeckung 1 Papierfach 1 Netzkabel 1 Farb Drucksatz a 1 Reinigungssatz für den Thermokopf 1 Garantiekarte 1 nur Modell für USA und Kanada Gebrauchsanweisung 1 a Mit der Far...

Страница 356: ...EMORY MEMORY PAGE CAPTURE PRINT Farbbandhalter Seite 293 Setzen Sie die Farbbandkassette ein nachdem Sie das Farbband in den Farbbandhalter eingelegt haben Papierfach Seite 296 Papierfachabdeckung Mitgeliefertes Zubehör Fortsetzung So bringen Sie die Lüftungsabdeckung und den Filter an Befestigen Sie den Filter an der Lüftungsabdeckung und bringen Sie beide Teile an der linken Seite des Druckers a...

Страница 357: ...g verwenden die denselben Namen wie die Tasten am Drucker haben So benutzen Sie die Fernbedienung RM 5500 nicht mitgeliefert als schnurlose Fernbedienung Wenn Sie die Fernbedienung schnurlos verwenden richten Sie den vorderen Teil der Fernbedienung auf den Fernbedienungssensor am Drucker Mit neuen Batterien beträgt die Reichweite der Fernbedienung etwa 3 Meter Die Fernbedienung RM 91 und der Fußsc...

Страница 358: ...s Netzkabel zuletzt an Anschlüsse zum Aufzeichnen von Videobildern Schließen Sie ein Videogerät als Bildquelle für die zu druckenden Videobilder an Schließen Sie anhand der folgenden Abbildung das Videogerät an das Sie beim Drucken benutzen wollen Schlagen Sie vor dem Anschließen des Videogeräts bitte unter Wichtige Sicherhleitshinweise für den Gebrauch in medizinischen Umgebungen für UP 51MD 51MD...

Страница 359: ... anhand der folgenden Abbildung den Videomonitor an den Sie beim Drucken verwenden wollen Schlagen Sie vor dem Anschließen des Videogeräts bitte unter Wichtige Sicherhleitshinweise für den Gebrauch in medizinischen Umgebungen für UP 51MD 51MDU 51MDP auf Seite 286 nach an S VIDEO OUTPUT an VIDEO OUTPUT an RGB SYNC OUTPUT b an Eingang S VIDEO an FBAS Videoeingang an RGB Eingänge Videomonitor an Netz...

Страница 360: ...d setzen Sie SYNC ON G auf OFF Anschlüsse zur Fernbedienung des Druckers Der Drucker läßt sich über die Fernbedienung RM 5500 nicht mitgeliefert die Fernbedienung RM 91 nicht mitgeliefert den Fußschalter FS 30 FS 36 nicht mitgeliefert oder einen PC fernsteuern a Wenn Sie einen PC anschließen wählen Sie die entsprechende Baud Rate im Menü SYSTEM SETUP aus siehe Einstellen der Baud Rate zur Kommunik...

Страница 361: ...Abständen ein neues Bild speichern soll Einstellen des Farbtons der Ausdrucke Auswählen des Druckmodus Überprüfen ob das Speicherbild verschwommen ist Einstellen der Farbbalance Einstellen der Helligkeit des Drucker Displays Einstellen der Baud Rate zur Kommunikation mit dem Computer Ein Ausschalten des Betriebs und Fehlersignals Auswählen des Anwendungsmodus Druckerbetriebsmodus Kompensieren des ...

Страница 362: ...triebs und Fehlersignals Seite 396 Einstellen der Baud Rate zur Kommunikation mit dem Computer Seite 397 Auswählen des Beschichtungstyps Seite 398 Speichern der Druckereinstellungen und eingestellten Werte als Benutzerdefinition Seite 400 Kompensieren der Eingangssignale Ein unter ungünstigen Bedingungen aufgenommenes Videobild kann von schlechter Farbqualität sein Bei NTSC oder PAL FBAS Videosign...

Страница 363: ...nsität und der Farbton des eingespeisten Bildes korrigiert werden c Bei einer Einstellung auf Stufe 14 erscheint OFF und das Bild auf dem Monitorbildschirm wird schwarzweiß d Wenn Sie GAIN einstellen wollen setzen Sie AGC unten erläutert auf OFF Wenn die Farben des Bildes auf dem Ausdruck oder dem Monitor zu hell oder zu dunkel sind Stellen Sie das Eingangssignal auf einen optimalen Wert für das D...

Страница 364: ... Sie den Cursor auf die Option die zurückgesetzt werden soll und drücken Sie gleichzeitig die Tasten G und g 4 Drücken Sie die Taste MENU Die normale Anzeige erscheint 1 Stellen Sie den Cursor mit der Taste F oder f auf die gewünschte Option 2 Nehmen Sie mit der Taste G oder g die Einstellung vor 1 Drücken Sie die Taste F oder f bis die gewünschte Option erscheint 2 Nehmen Sie mit der Taste G oder...

Страница 365: ...in auch wenn das Eingangssignal über AGC kompensiert wurde In diesem Fall können Sie den Kontrast über die Option GAIN im Menü INPUT SETUP einstellen Wenn Sie den Kontrast für den Videomonitor jedoch nicht ändern wollen kompensieren Sie den Pegel des Eingangssignals im Menü SYSTEM SETUP Hinweis Wenn ein Bild einmal gespeichert ist können Sie es nicht mehr verändern Speichern Sie das Bild also nach...

Страница 366: ...g aus Der ausgewählte IRE Wert wird mit drei Ziffern angezeigt Auswahl in folgenden Fällen IRE Wert Zurücksetzen der Option auf die Standardeinstellung 10 t 100 Der Ausdruck ist etwas hell 11 t 110 Der Ausdruck ist hell 12 t 120 Der Ausdruck ist sehr hell 13 t 130 Hinweis Kompensieren Sie das Eingangssignal nicht zu stark Andernfalls wird der ganze Ausdruck zu dunkel 5 Drücken Sie die Taste MENU D...

Страница 367: ...arben korrekt eingestellt sind Überprüfen Sie die Farben des Videomonitors bevor Sie die Farben für den Ausdruck einstellen Verwenden Sie in einem solchen Fall das THRU Signal indem Sie SOURCE im Menü OUTPUT SETUP auf THRU setzen oder den Drucker ausschalten Das Durchgangssignal wird jetzt vom Videogerät direkt an den Videomonitor ausgegeben Wenn Sie die Farben des Videomonitors mit den Bedienelem...

Страница 368: ...Sie ein neues Bild in den Speicher und erstellen Sie einen Ausdruck Vergleichen Sie den Ausdruck mit dem Bild auf dem Monitor und nehmen Sie die Einstellungen am Drucker folgendermaßen vor 6 Drücken Sie die Taste MENU und wählen Sie mit der Taste G oder g die Option OUT aus Das Menü OUTPUT SETUP wird angezeigt Stellen Sie den Cursor mit der Taste F oder f auf SOURCE Drücken Sie die Taste F oder f ...

Страница 369: ...en soll und drücken Sie gleichzeitig die Tasten G und g 8 Drücken Sie die Taste MENU Die normale Anzeige erscheint Funktion Verstärken der Rottöne auf dem Bildschirm Verstärken der Zyantöne auf dem Bildschirm Verstärken der Grüntöne auf dem Bildschirm Verstärken der Magentatöne pink auf dem Bildschirm Verstärken der Blautöne auf dem Bildschirm Verstärken der Gelbtöne auf dem Bildschirm Einstellric...

Страница 370: ...dschärfe eines Ausdrucks werden festgelegt indem Sie eine der drei Gruppen von Einstellungen anhand ihrer LOAD COLOR Nummer abrufen Diese Funktion ist nützlich wenn Sie mehrere Videogeräte mit unterschiedlichen Eigenschaften benutzen wenn Sie Bilder drucken wollen deren Farbqualität und Bildkontrast unterschiedlich sind oder wenn mehrere Benutzer auf einen einzigen Drucker zugreifen Außerdem könne...

Страница 371: ...f die Option LOAD COLOR aus 3 Wählen Sie mit der Taste G oder g die LOAD COLOR Nummer mit den einzustellenden bzw zu ändernden Werten aus Sie können temporäre Änderungen vornehmen und die ursprünglichen Einstellungen dabei beibehalten Näheres dazu finden Sie unter So behalten Sie die ursprünglich eingestellten Werte bei auf Seite 375 Stellen Sie den Cursor mit der Taste F oder f auf LOAD COLOR Las...

Страница 372: ...ardfarbe Die Bildschärfe SHARPNESS läßt sich in 15 Stufen von 1 bis 15 einstellen Diese werden durch einen Wert und ein Diagramm angegeben Die Einstellung der Bildschärfe auf Stufe 8 entspricht der Standardschärfe Für INTERPOL Interpolation wählen Sie je nach Bildtyp entweder ON oder OFF Einstellen von RED GREEN BLUE Farbintensität Menüoption CYN RED MAG GRN YEL BLU Funktion Verstärken der Rottöne...

Страница 373: ...cht der Standardschärfe Standardeinstellung Funktion Einstellung Weiche Konturen Nach links auf Stufe 1 zu Normale Konturen Mitte Stufe 8 Scharfe Konturen Nach rechts auf Stufe 15 zu Der Kontrast wird in dunklen bzw hellen Bereichen mit der Taste g erhöht Richtung Der Kontrast wird in dunklen bzw hellen Bereichen mit der Taste G verringert Richtung Die Zahl und die entsprechende Bildschärfe erhöhe...

Страница 374: ... Sie den Wert geändert haben Wenn Sie den Wert geändert haben erscheint TEMP temporär auf der Menüanzeige TEMP gibt an daß die Einstellungen temporär sind und noch nicht gespeichert wurden Wenn Sie den Drucker ausschalten während TEMP angezeigt wird werden die eingestellten Werte nicht gespeichert 5 Wählen Sie mit der Taste F oder f die Option SAVE COLOR aus Stellen Sie den Cursor mit der Taste F ...

Страница 375: ...den sollen 3 Drücken Sie die Taste EXEC Die Einstellungen die unter der in Schritt 1 ausgewählten LOAD COLOR Nummer gespeichert sind werden in die SAVE COLOR Nummer kopiert die Sie in Schritt 2 ausgewählt haben So rufen Sie eine LOAD COLOR Nummer mit Farbeinstellungen für den Ausdruck Farbintensität Kontrast und Bildschärfe ab Lassen Sie die gewünschte LOAD COLOR Nummer im Menü COLOR ADJUST grün a...

Страница 376: ...Q1 A 1 S PRN SPEED HIGH MOTION CHK Einstellen des Farbtons der Ausdrucke Sie können den Farbton so einstellen daß auch sehr helle oder dunkle Bereiche in guter Qualität ausgedruckt werden 1 Drücken Sie die Taste MENU und wählen Sie mit der Taste G oder g die Option PRN aus Das Menü PRINTER SETUP wird angezeigt 2 Wählen Sie mit der Taste F oder f die Option GAMMA aus 1 4 2 3 Lassen Sie PRN mit der ...

Страница 377: ...len schwarzen oder dunklen Bereichen 4 Drücken Sie die Taste MENU Die normale Anzeige erscheint PRN SPEED HIGH MOTION CHK G s NORMA L h AMMA PRINTER SETUP COLOR 200 COL LAY PRN IN OUT PRINT QTY 1 1 9 INTERVAL OFF ON S NORMAL H OFF ON LOAD USER 1 2 3 EXEC SYSTEM PRESS FUNCTION PRESS C BALANCE PRESS Q1 A 1 S GAMMA Lassen Sie den gewünschten Farbton mit der Taste G oder g grün anzeigen Lassen Sie den...

Страница 378: ...eosignal vorhanden ist schwarz gedruckt werden Dies kann der Fall sein wenn Sie Ausdrucke erstellen nachdem Sie eine andere Videoquelle angeschlossen oder zu einer anderen Video Software gewechselt haben In diesem Fall können Sie den Druckbereich einstellen indem Sie den zu druckenden Bereich horizontal oder vertikal verschieben Wenn ein schwarzer Rand um den Ausdruck erscheint obwohl der Druckber...

Страница 379: ...RESS Q1 A 1 S 2 Wählen Sie mit der Taste F oder f die Option WINDOW aus Hinweis Wenn Sie nach dem Auswählen von WINDOW in Schritt 2 mit dem nächsten Schritt fortfahren werden die Bilder im Speicher gelöscht 3 Drücken Sie die Taste g Das Menü WINDOW SETUP wird angezeigt 4 Stellen Sie den Drucker je nach dem angefertigten Ausdruck ein 1 Wählen Sie mit der Taste F oder f die einzustellende Option aus...

Страница 380: ...n auf dem Ausdruck ein schwarzer Streifen erscheint Stellen Sie den Druckbereich anhand der Position des Streifens auf dem Ausdruck mit den Optionen H START und V START im Menü ein Position des schwarzen Streifens Rechts Links Oben Unten Zu drückende Taste Taste g Taste G Taste g Taste G Menüoption Standard H START NTSC PAL 0 V START NTSC PAL 0 Menüoption Standard H WIDTH NTSC 896 PAL 896 V WIDTH ...

Страница 381: ...NU Die normale Anzeige erscheint So löschen Sie den eingestellten Wert Wählen Sie in Schritt 5 die Option CANCEL und drücken Sie anschließend die Taste EXEC im Bedienfeld innen Die in Schritt 4 eingestellten Werte werden gelöscht und die Einstellungen werden auf die ursprünglichen Werte zurückgesetzt So setzen Sie die eingestellten Werte auf die Standardeinstellung zurück Drücken Sie gleichzeitig ...

Страница 382: ...deshalb die Farbbalance jedesmal neu einzustellen wenn Sie ein neues Farbband und neues Druckpapier eingelegt haben Vor dem Einstellen der Farbbalance Setzen Sie alle Optionen im Menü COLOR ADJUST auf die Standardeinstellung zurück siehe Einstellen der Farbe auf den Ausdrucken auf Seite 370 1 Lassen Sie mit der Taste SOURCE MEMORY das Quellenbild auf dem Videomonitor anzeigen 2 Drücken Sie die Tas...

Страница 383: ...ebnahme des Druckers zum ersten Mal einstellen sind die Werte von BAL X BAL Y und BAL STEP werkseitig auf 50 50 bzw 05 eingestellt BAL STEP ist der einstellbare Bereich für jede Farbbalance Wenn Sie die Farbbalance bereits eingestellt haben werden die zuvor eingestellten Werte im Menü COLOR BALANCE angezeigt So setzen Sie die Werte auf die Standardeinstellung 50 50 05 zurück Wählen Sie die einzeln...

Страница 384: ...llen der Farbbalance verwendet wird Verschieben Sie dazu den hervorgehobenen Bereich indem Sie die Taste F f G oder g drücken während Sie die Taste DISPLAY im Bedienfeld innen gedrückt halten 6 Drücken Sie die Taste CAPTURE Das Speicherbild erscheint 7 Wählen Sie mit der Taste F oder f die Option TEST PRINT aus Verschieben Sie den hervorgehobenen Bereich an die gewünschte Bildposition indem Sie di...

Страница 385: ... aus den neun Bildern das mit der besten Farbbalance aus Wenn Sie die Farbbalance ändern wollen nachdem Sie den Ausdruck gesehen haben stellen Sie die Farbbalance erneut ein Gehen Sie dazu wie unter So stellen Sie die Farbbalance erneut ein auf Seite 386 erläutert vor Gibt die Farbbalance der oben gedruckten Bilder an von links 45 45 50 45 55 45 Gibt die Farbbalance der in der Mitte gedruckten Bil...

Страница 386: ...n auf dieselbe Weise auch eine Feineinstellung vornehmen 1 Lassen Sie von den neun Bildern die Werte des besten Bildes für BAL X und BAL Y anzeigen In diesem Fall können Sie durch Ändern des Wertes von BAL STEP eine Fein oder eine Grobeinstellung vornehmen So nehmen Sie eine Feineinstellung vor Wenn Sie die Farbbalance innerhalb des aktuellen Farbbalancebereichs feiner einstellen wollen verringern...

Страница 387: ...e wie in Schritt 5 6 7 und 8 unter Einstellen der Farbbalance auf Seite 382 erläutert vor und drucken Sie eine Testseite aus 3 Wählen Sie aus den neun Bildern das Bild mit der besten Farbbalance aus Lassen Sie dann mit der Taste F f G oder g die entsprechenden Werte für BAL X und BAL Y anzeigen Wiederholen Sie Schritt 1 und 2 bis Sie eine optimale Farbbalance erzielen 4 Fahren Sie mit Schritt 10 u...

Страница 388: ...rnsteuern die das Fernbedienungssignal an Stift Nr 5 des Anschlusses REMOTE 3 sendet Über das Menü können Sie der an den Anschluß REMOTE 2 oder den Anschluß REMOTE 3 angeschlossenen Fernbedienung bestimmte Funktionen zuweisen Außerdem kann der Drucker über ein an REMOTE 2 oder REMOTE 3 eingespeistes Impulssignal ferngesteuert werden siehe Seite 410 und 411 Der Drucker läßt sich zudem über einen PC...

Страница 389: ...EM PRESS PRESS C BALANCE PRESS Q1 A 1 S INTERVAL FUNCTION PRESS PRN SPEED HIGH MOTION CHK 2 Wählen Sie mit der Taste F oder f die Option FUNCTION aus 3 Drücken Sie die Taste g Das Menü FUNCTION SETUP wird angezeigt Wenn Sie die Funktion der an REMOTE 2 angeschlossenen Fernbedienung definieren wollen fahren Sie mit Schritt 4 fort Wenn Sie die Funktion der an REMOTE 3 3A 3B 3C 3E angeschlossenen Fer...

Страница 390: ...heres zum Timing am Anschluß REMOTE 2 finden Sie auf Seite 410 Hinweise Wählen Sie ON wenn Sie die Bilderfassung mit exaktem Timing über den Computer auslösen wollen Wenn Sie die Funktion für die Fernbedienung am Anschluß REMOTE 2 über das Menü FUNCTION SETUP definieren wollen setzen Sie IMMED CAP im Menü FUNCTION SETUP auf OFF 6 Wählen Sie die Fernbedienung aus und definieren Sie die Funktion für...

Страница 391: ...gewechselt Hat dieselbe Funktion wie die Taste CAPTURE am Drucker Hat dieselbe Funktion wie die Taste PRINT am Drucker Aufzeichnen eines Bildes in einer Speicherseite in der sich kein Bild zum Drucken befindet und Drucken Wenn Sie den Schalter während eines Druckvorgangs drücken wird das ausgewählte Bild in die Warteschlange gestellt und ausgedruckt sobald der aktuelle Druckvorgang beendet ist Zyk...

Страница 392: ...h nicht gewechselt Das zuvor gespeicherte Bild wird durch das neue Bild ersetzt Wenn ein Speicherbild angezeigt wird erscheint das Quellenbild sobald Sie den Schalter auf der Fernbedienung drücken Wenn ein Quellenbild angezeigt wird wird das Bild in den Speicher gestellt sobald Sie den Schalter drücken Die Speicherseite wird auch gewechselt Das aufgezeichnete Bild wird nicht gedruckt Wenn ein Bild...

Страница 393: ...ste G oder g eine weitere Funktion auswählen Lassen Sie die gewünschte Funktion mit der Taste G oder g anzeigen Wenn am rechten oder linken Rand angezeigt wird können Sie mit der Taste G oder g eine weitere Funktion auswählen Welche Funktion definiert werden kann hängt von der in Schritt 1 ausgewählten Fernbedienung ab Definierbare Funktion GRAB CAPTURE PRINT C PRINT CYCLIC C CAP STOP BACK SP POIN...

Страница 394: ...aste MENU und wählen Sie mit der Taste G oder g die Option PRN aus Das Menü PRINTER SETUP wird über dem Quellenbild angezeigt 2 Wählen Sie mit der Taste F oder f die Option SYSTEM aus 1 7 2 4 6 3 6 1 5 HIGH PRN SPEED MOTION CHK P c l PRN i o R I NTER SETUP PRINTER SETUP COLOR 200 COL LAY PRN IN OUT PRINT QTY 1 1 9 INTERVAL OFF ON GAMMA S NORMAL H OFF ON LOAD USER 1 2 3 EXEC SYSTEM PRESS FUNCTION P...

Страница 395: ...gt 4 Wählen Sie mit der Taste F oder f die Option LCD CNTR aus 5 Stellen Sie mit der Taste G oder g die Helligkeit des Drucker Displays ein Hinweis Wenn Sie die Helligkeit ganz nach links stellen wird OFF angezeigt In diesem Fall erscheinen keine Meldungen im Drucker Display wenn im Videomonitor wieder die normale Anzeige erscheint 6 Wählen Sie mit der Taste F oder f die Option PRN SETUP aus und d...

Страница 396: ...t der Warnton zu hören dreimal Diese akustischen Signale können Sie mit dem Menü ein und ausschalten 1 Rufen Sie das Menü SYSTEM SETUP auf Wie Sie das Menü SYSTEM SETUP aufrufen ist in Schritt 1 bis 3 unter Einstellen der Helligkeit des Drucker Displays auf Seite 390 beschrieben 2 Wählen Sie mit der Taste F oder f die Option BEEP aus 3 Wählen Sie mit der Taste G oder g aus ob das Betriebs und Fehl...

Страница 397: ...ur Kommunikation mit dem Computer Wenn Sie den Drucker mit einem Computer steuern der an den RS 232C Anschluß des Druckers angeschlossen ist müssen Sie die geeignete Baud Rate auswählen Nähere Informationen dazu erhalten Sie bei Ihrem Sony Händler 1 Rufen Sie das Menü SYSTEM SETUP auf Wie Sie das Menü SYSTEM SETUP aufrufen ist in Schritt 1 bis 3 unter Einstellen der Helligkeit des Drucker Displays...

Страница 398: ... SETUP wird angezeigt 5 Drücken Sie die Taste MENU Die normale Anzeige erscheint Auswählen des Beschichtungstyps Wenn Sie den Farb Drucksatz mit selbstbeschichtendem Papier UPC 540 verwenden bleiben die Ausdrucke gut erhalten Sie können den Beschichtungstyp je nach der gewünschten Oberfläche des Ausdrucks auswählen Im Menü angezeigte Baud Rate Die Anzeige im Display wechselt von der Angabe mit den...

Страница 399: ...t der Taste F oder f die Option LAMINATION aus 3 Wählen Sie den Beschichtungstyp je nach gewünschter Oberfläche der Ausdrucke mit der Taste G oder g aus Funktion Beschichtungstyp Glänzender Ausdruck GLOSSY Ausdruck mit strukturierter Oberfläche TEXTURE Matter Ausdruck MATTE 4 Drücken Sie die Taste MENU Die normale Anzeige erscheint Lassen Sie LAY mit der Taste G oder g grün anzeigen Lassen Sie LAY...

Страница 400: ...on geändert werden arbeitet der Drucker gemäß den geänderten Daten In einem solchen Fall gelten die geänderten Daten bis mit der Taste LOAD USER eine andere Benutzerdefinition abgerufen wird auch wenn Sie den Drucker ausschalten Wenn Sie alle erforderlichen Einstellungen vorgenommen haben gehen Sie wie im folgenden erläutert vor und speichern sie als Benutzerdefinition 1 Rufen Sie das Menü SYSTEM ...

Страница 401: ...e darf bis zu 16 Zeichen lang sein 4 Wählen Sie mit der Taste F f G oder g die Option EXIT im Menü USER NAME aus und drücken Sie dann die Taste EXEC Der Benutzername wird gespeichert und das Menü SYSTEM SETUP wird wieder angezeigt 5 Wählen Sie mit der Taste F oder f die Option SAVE USER aus 6 Wählen Sie die gewünschte Benutzerdefinitionsnummer mit der Taste G oder g aus 7 Drücken Sie die Taste EXE...

Страница 402: ...ker arbeitet dann auf der Basis der abgerufenen Benutzerdefinition Wenn Sie Einstellungen ändern arbeitet der Drucker mit den geänderten Daten bis Sie eine andere Benutzerdefinition abrufen Hinweis Wenn die Benutzerdefinition gewechselt wird werden alle Bilder im Speicher gelöscht So behalten Sie die ursprünglich eingestellten Werte bei Beispiel Sie ändern die Einstellungen unter Benutzerdefinitio...

Страница 403: ...OAD USER aus 2 Drücken Sie die Taste EXEC um die ausgewählte Benutzerdefinition zu aktivieren Hinweis Wenn die Benutzerdefinition gewechselt wird werden alle Bilder im Speicher gelöscht 3 Wählen Sie mit SAVE USER im Menü SYSTEM SETUP die Nummer der Zielbenutzerdefinition aus 4 Drücken Sie die Taste EXEC Die eingestellten Werte der in Schritt 1 ausgewählten Benutzerdefinition werden kopiert und unt...

Страница 404: ...enstände in das Gehäuse gelangen Wenn Sie das Gerät benutzen nachdem Fremdkörper hineingelangt sind besteht die Gefahr einer Fehlfunktion eines elektrischen Schlages oder eines Brandes Die Lüftungsöffnungen dienen dazu eine Überhitzung des Geräts zu verhindern Blockieren Sie diese Öffnungen nicht indem Sie andere Geräte direkt neben dem Drucker aufstellen oder den Drucker mit einem Tuch o ä abdeck...

Страница 405: ...ung und kleben Sie diese zu Lagern Sie die Packung möglichst an einem kühlen dunklen Ort Wenn Sie den Drucksatz dann wieder benötigen legen Sie ihn in der geschlossenen Packung mehrere Stunden lang in einen warmen Raum Auf diese Weise kommt es nicht zur Bildung von Kondenswasser wenn Sie den Drucksatz aus der Packung nehmen Aufstellort Um einen internen Wärmestau zu vermeiden lassen Sie genug Plat...

Страница 406: ...nt 2 Drücken Sie die Taste EXEC Der Drucker beginnt mit der Reinigung des Thermokopfes Während des Reinigungsvorgangs blinkt Q1 links unten auf dem Monitor Nachdem der Reinigungsvorgang beendet ist leuchtet Q1 wieder stetig Wenn die Markierung END erscheint Die Markierung END befindet sich am Ende des Bandes Wenn diese Markierung erscheint spulen Sie das Band an den Anfang zurück Danach können Sie...

Страница 407: ...Sie dann den Filter von der Lüftungsabdeckung 2 Reinigen Sie den Filter mit einem Staubsauger oder ähnlichem Hinweise Achten Sie darauf daß der Filter nicht in den Staubsauger eingezogen wird Reiben Sie nicht zu fest über das Netz des Filters 3 Setzen Sie die Lüftungsabdeckung und den Filter wieder zusammen und bringen Sie die beiden Teile wieder wie zuvor an der Seite des Druckers an ...

Страница 408: ...piert sind Andernfalls druckt der Drucker möglicherweise nicht ordnungsgemäß oder es kommt zu Fehlfunktionen Verwenden Sie das Farbband zusammen mit dem in derselben Packung gelieferten Papier Andernfalls es zu einer Verringerung der Bildqualität bei den Ausdrucken oder sonstigen Problemen kommen Erkennt der Drucker eine inkompatible Kombination von Farbbandkassette und Papier erscheint eine Fehle...

Страница 409: ...ndards Eingänge RGB SYNC analoges RGB Signal BNC Anschluß 4 RGB 0 7 Vp p 75 Ohm Abschlußwiderstand Schalter auf ON SYNC 0 3 bis 4 Vp p SYNC ON G automatische Erkennung 75 Ohm 75 Ohm Abschlußwiderstand Schalter auf ON sync negativ S VIDEO getrennte Luminanz Y und Chrominanzsignale C 4polig Mini DIN 1 Y 1 Vp p C Bei NTSC EIA Standards 0 29 Vp p Farb Burst Signal Bei PAL B G I Standards 0 3 Vp p Farb...

Страница 410: ...für medizinischen Bereich für UP 51MD 51MDU 51MDP Schutz vor elektrischem Schlag Klasse I Schutz vor dem Eindringen von Wasser Normal Grad der Gerätesicherheit bei Vorhandensein von brennbarem anästhetischem Gemisch oder Sauerstoff Nicht geeignet zum Einsatz bei Vorhandensein von brennbarem anästhetischem Gemisch oder Sauerstoff Betriebsmodus Kontinuierlich Die automatischen Druckfunktionen REMOTE...

Страница 411: ...eines Fernsteuerungs impulses Amplitude eines Fernsteuerungs impulses MIN 3 100 TYP MAX 12 5 Maßeinheit ms ms V Anmerkungen Dieser Wert basiert auf TTL Standards Wenn IMMED CAP auf ON gesetzt ist Notation tRPE tRPW VRP Parameter Zeit innerhalb derer ein Fernsteuerungs impuls auf Null reduziert sein sollte Länge eines Fernsteuerungs impulses Amplitude eines Fernsteuerungs impulses MIN 3 100 TYP MAX...

Страница 412: ...Drucker das Bild nicht aufzeichnen kann a wenn der Drucker nicht drucken kann oder wenn der Drucker weder das Bild aufzeichnen noch drucken kann a Wenn der Drucker das Bild nicht aufzeichnen kann Wenn das Eingangssignal im Drucker vorhanden ist und der Benutzer das Bild in einen bestimmten Speicher stellen will dies aber nicht möglich ist weil das Bild im Speicher gerade gedruckt wird Hinweis Wenn...

Страница 413: ...n Die Farbbandkassette ist nicht eingelegt t Legen Sie die Farbbandkassette ein Seite 293 Das Papier ist ausgegangen t Legen Sie Papier ein Seite 296 Das Papierfach ist nicht installiert t Bringen Sie das Papierfach an Seite 296 Wenn RIBBON REMAIN 0 angezeigt wird tauschen Sie das Farbband aus Seite 293 Farbbandkassette und Papier sind nicht eingelegt t Legen Sie Farbbandkassette und Papier ein Se...

Страница 414: ...r um den Fehlerstatus zu beheben Im Drucker hat sich Papier gestaut t Sehen Sie nach wo sich der Papierstau befindet und entfernen Sie das gestaute Papier aus dem Drucker Seite 415 Warnmeldungen Bei einer Warnung erscheint nur die Warnmeldung Die Anzeige ALARM leuchtet nicht auf Warnung Auf dem Videomonitor HIT ANY KEY INPUT MISMATCH Im Drucker Display HIT ANY KEY INPUT MISMATCH Mögliche Ursachen ...

Страница 415: ...icher und starten Sie dann den Druckvorgang Seite 303 Das in der ausgewählten Speicherseite aufgezeichnete Bild wird gedruckt oder befindet sich in der Warteschlange t Warten Sie bis der Drucker den Druckvorgang beendet hat und versuchen Sie es dann erneut Der Thermokopf ist überhitzt t Warten Sie ab bis sich der Thermokopf abgekühlt hat und diese Meldung ausgeblendet wird Der Drucker beginnt auto...

Страница 416: ...Papierfach aus dem Drucker heraus Hinweis Versuchen Sie nicht ein gestautes Blatt nach unten oben hinten oder vorne herauszuziehen Andernfalls kann sich das Blatt noch mehr verfangen oder reißen 4 Nehmen Sie das Papierfach heraus 5 Legen Sie das Papier korrekt ins Papierfach ein Verwenden Sie das in Schritt 3 entfernte Papier nicht nochmals sondern werfen Sie es weg Verwenden Sie nur das in dieser...

Страница 417: ...en und ein Speicherbild angezeigt wird ist die Option SOURCE im Menü OUTPUT SETUP auf THRU gesetzt t Setzen Sie die Einstellung für SOURCE auf EE Seite 368 Wenn das Menü mit der Taste MENU aufgerufen wird wird die Option DISPLAY am Videomonitor auf OFF gesetzt t Setzen Sie die Option DISPLAY auf ON indem Sie die Taste DISPLAY drücken Seite 352 Der Kontrast im Drucker Display ist nicht richtig eing...

Страница 418: ...deomonitor ist dunkel Mögliche Ursachen und Abhilfemaßnahmen Eine für diesen Drucker ungeeignete Farbbandkassette wird verwendet t Legen Sie eine geeignete Farbbandkassette ein Seite 293 Der 75 Ohm Abschlußwiderstand Schalter steht in der falschen Position t Stellen Sie den 75 Ohm Abschlußwiderstand Schalter in die richtige Position Seite 358 Störungsbehebung Fortsetzung ...

Страница 419: ...Y PAGE 310 323 351 Wählen Sie mit dieser Taste die Speicherseite 5 Taste SOURCE MEMORY 328 351 362 382 Mit dieser Taste wählen Sie das Signal das an den Bildschirm ausgegeben wird Das Speicherbild und das Quellenbild werden gewechselt wenn Sie diese Taste drücken 6 Taste CAPTURE 302 310 328 335 336 384 Stellen Sie mit dieser Taste ein Bild in eine Speicherseite 7 Taste PRINT 303 310 335 337 347 Zu...

Страница 420: ...te drücken wird die momentan ausgewählte Benutzerdefinition etwa drei Sekunden lang angezeigt Wenn Sie eine andere Benutzerdefinition abrufen wollen lassen Sie die Taste los während die Nummer der gewünschten Benutzerdefinition angezeigt wird Mit jedem Tastendruck auf diese Taste wechseln die Benutzerdefinitionen in der Reihenfolge 1 2 3 3 Taste MULTI PICTURE 320 336 Wählen Sie mit dieser Taste de...

Страница 421: ... Ausdruck 8 Taste MOTION CHECK 330 331 Mit dieser Taste wählen Sie auf der normalen Anzeige den Modus aus mit dem Sie überprüfen können ob die Speicherbilder verschwommen sind wenn Sie zwei oder vier verkleinerte Bilder aufzeichnen Mit jedem Tastendruck auf diese Taste wechselt der Modus in der Reihenfolge ON OFF ON Die Einstellung von MOTION CHK im Menü PRINTER SETUP wechselt wenn Sie diese Taste...

Страница 422: ... wird die momentan ausgewählte LOAD COLOR Nummer etwa drei Sekunden lang angezeigt Drei verschiedene LOAD COLOR Nummern stehen für die momentan ausgewählte Benutzerdefinition zur Verfügung Zum Auswählen der gewünschten LOAD COLOR Nummer lassen Sie die Taste los während die gewünschte LOAD COLOR Nummer angezeigt wird Die im Menü COLOR ADJUST ausgewählte LOAD COLOR Nummer wechselt wenn Sie diese Tas...

Страница 423: ...E 3 D SUB 9polig 360 Zum Anschließen des Fußschalters FS 30 Sie können hier auch Fernsteuerungs Impulssignale für automatische Druckfunktionen einspeisen 9 RS 232C Anschluß 360 Zum Anschließen eines Computers mit dem Sie den Drucker steuern können Nähere Informationen dazu erhalten Sie bei Ihrem Sony Händler 0 Netzeingang AC IN Zum Anschließen des Druckers an eine Netzsteckdose über das mitgeliefe...

Страница 424: ...gewählt sind Wenn die Option SEPARATE Bild mit weißen Rändern im Menü LAYOUT SETUP auf ON gesetzt ist wird F angefügt DUP1 Gibt an daß ein Bild in voller Größe und der Modus DUPLICATE ausgewählt sind DUP4 Gibt an daß vier verkleinerte Bilder und der Modus DUPLICATE ausgewählt sind a Gibt den Ausdrucktyp an b Gibt die Position an an der sich der Cursor gerade befindet und an der ein Bild aufgezeich...

Страница 425: ...REMAIN OFF ON Q1 A 1 S 0 0 0 COLOR ADJUST COLOR 200 COL LAY PRN IN OUT LOAD COLOR 1 2 3 TEMP 1 2 3 EXEC MAG GRN 0 YEL BLU 0 DARK LIGHT SHARPNESS INTERPOL SAVE COLOR CYN RED 0 Q1 A 1 S 0 0 8 OFF ON WINDOW SETUP COLOR 200 LAY SETUP H START 0 DOT S V START 0 DOT S H WIDTH 896 DOTS SAVE PRESS EXEC CANCEL PRESS EXEC PRESS Q1 A 1 S V WIDTH 464 DOTS SYSTEM SETUP LCD CNTR 7 BAUDRATE 24 48 9600 BEEP OFF ON...

Страница 426: ...cken Auswählen der Speicherseite 323 Auswählen des Ausdrucktyps 319 Drucker druckt nicht 303 eines Bildes in voller Größe 301 eines Bildes mit eingefügtem Bild 336 eines Spiegelbildes 337 Eliminieren von Unschärfen 302 Fernsteuern des Druckers 357 Gespeichertes Bild ist verschwommen 302 mit hoher Geschwindigkeit 303 Papier geht beim Drucken aus 309 Schlechte Bildqualität der Ausdrucke 304 Schwarze...

Страница 427: ...OLOR BALANCE Menü 382 FUNCTION SETUP Menü 326 348 388 389 INPUT SETUP Menü 300 362 LAYOUT SETUP Menü 318 321 333 337 398 OUTPUT SETUP Menü 352 353 360 367 368 PRINTER SETUP Menü 307 314 325 332 333 SYSTEM SETUP Menü 315 365 394 395 396 400 USER NAME Eingabemenü 400 WINDOW SETUP Menü 380 Mitgeliefertes Zubehör Auflistung 355 Montage 356 Monitoranzeige 424 Montage 356 P Papier einlegen 296 Entfernen...

Страница 428: ...Sony Corporation Printed in Japan ...

Отзывы: