- 22 -
1.
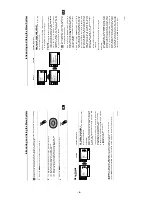
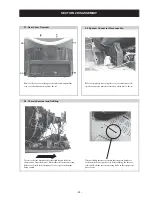
Input a video signal that contains a small 100% white area on a
black background.
2.
Connect an digital voltmeter to Pin 10 of J7375 [C Board].
3.
Set the TV set or operation in Service Mode.
[ See Page 21 ].
4.
Select ‘Service’ from the on screen menu display and press
‘Right Arrow’.
5.
The ‘Service’ menu will appear on the screen.
6.
Adjust the Sub-Contrast to obtain a voltage of 105 +/- 5V.
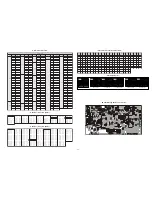
Sub Colour Adjustment
1.
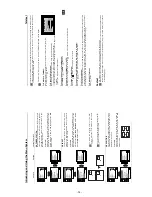
Receive a PAL colour bar signal.
2.
Connect an oscilloscope to Pin 6 of CN7001 [A Board].
3.
Set the TV set or operation in Service Mode.
[ See Page 21 ].
4.
Select ‘Service’ from the on screen menu display and press
‘Right Arrow’.
5.
The ‘Service’ menu will appear on the screen.
6.
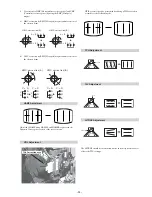
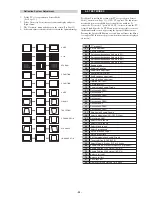
Adjust the ‘Sub Colour’ sothat the Cyan, Magenta and Blue
colour bars are of equal levels as indicated below.
Same Level
B-Out Waveform
1.
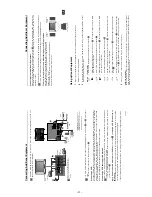
Input a Monoscope pattern.
2.
Set the TV set or operation in Service Mode.
[ See Page 21 ].
3.
Select ‘Service’ from the on screen menu display and press
‘Right Arrow’.
4.
The ‘Service’ menu will appear on the screen.
5.
Adjust the ‘Sub-Brightness’ data so that there is barely a
difference between the 0 IRE and 10 IRE signal levels.
Sub Contrast Adjustment
Sub Brightness Adjustment
U
N
E
M
R
O
R
R
E
2
0
E
3
0
E
4
0
E
5
0
E
6
0
E
7
0
E
8
0
E
9
0
E
0
1
E
1
1
E
2
1
E
3
1
E
4
1
E
5
1
E
6
1
E
E
M
I
T
G
N
I
K
R
O
W
S
R
U
O
H
S
E
T
U
N
I
M
P
C
O
P
V
O
C
N
Y
S
V
R
K
I
C
I
I
M
V
N
T
O
R
P
H
R
E
N
U
T
P
D
N
U
O
S
-
E
T
A
R
N
A
C
S
C
A
D
D
N
E
K
C
A
B
N
O
C
N
Y
D
P
I
P
)
5
5
2
,
0
(
)
5
5
2
,
0
(
)
5
5
2
,
0
(
)
5
5
2
,
0
(
)
5
5
2
,
0
(
)
5
5
2
,
0
(
)
5
5
2
,
0
(
)
5
5
2
,
0
(
)
5
5
2
,
0
(
)
5
5
2
,
0
(
)
5
5
2
,
0
(
)
5
5
2
,
0
(
)
5
5
2
,
0
(
)
5
5
2
,
0
(
)
5
5
2
,
0
(
0
0
0
0
0
0
0
0
0
0
0
0
0
0
0
4
1
7
C
A
D
G
I
F
N
O
C
T
N
O
C
N
I
P
M
N
I
L
H
P
A
R
T
H
L
I
O
C
.
T
O
R
H
P
S
U
C
O
H
P
)
5
5
2
,
0
(
)
5
5
2
,
0
(
)
5
5
2
,
0
(
)
5
5
2
,
0
(
)
5
5
2
,
0
(
0
0
0
0
0
0
0
0
6
9
3
8
7
2
1
0
3
1
0
9
E
C
I
V
R
E
S
L
O
C
B
U
S
E
U
H
B
U
S
P
R
A
H
S
B
U
S
T
H
G
I
R
B
B
U
S
T
N
O
C
B
U
S
E
V
I
R
D
-
R
E
V
I
R
D
-
G
E
V
I
R
D
-
B
F
F
O
T
U
C
R
F
F
O
T
U
C
G
F
F
O
T
U
C
B
T
X
T
r
B
D
S
O
r
B
)
3
6
,
0
(
)
3
6
,
0
(
)
3
6
,
0
(
)
3
6
,
0
(
)
5
1
,
0
(
)
3
6
,
0
(
)
3
6
,
0
(
)
3
6
,
0
(
)
3
6
,
0
(
)
3
6
,
0
(
)
3
6
,
0
(
)
5
1
,
0
(
)
5
1
,
0
(
j
d
A
1
3
0
3
3
1
2
1
0
5
j
d
A
j
d
A
8
2
4
2
6
4
7
0
1
T
S
U
J
D
A
F
I
e
t
u
m
o
t
u
A
n
i
a
G
o
i
d
u
A
g
n
i
t
a
G
L
P
O
T
C
G
A
)
5
1
+
,
6
1
-
(
1
0
0
6
-
D
N
U
O
S
N
-
M
D
-
M
S
-
M
M
-
S
M
-
D
M
-
N
E
B
B
1
B
2
B
3
B
4
B
5
B
L
W
S
F
W
S
D
A
C
M
A
C
I
N
r
o
r
r
E
M
A
C
I
N
o
e
r
e
t
S
)
1
1
5
,
0
(
)
1
-
,
8
2
1
-
(
)
7
2
1
+
,
0
+
(
)
7
2
1
+
,
0
+
(
)
1
-
,
8
2
1
-
(
)
3
2
0
1
,
0
(
)
8
6
+
,
0
+
(
)
6
9
+
,
6
9
-
(
)
6
9
+
,
6
9
-
(
)
6
9
+
,
6
9
-
(
)
6
9
+
,
6
9
-
(
)
6
9
+
,
6
9
-
(
)
0
+
,
8
2
1
-
(
)
0
4
+
,
5
+
(
)
7
4
0
2
,
0
(
)
7
2
1
+
,
8
2
1
-
(
0
0
0
0
0
0
0
2
0
2
-
0
2
+
0
1
+
0
1
-
6
9
4
8
2
+
0
+
0
+
0
+
0
+
0
+
0
+
0
3
+
0
0
+
s
u
t
a
t
S
0
1
1
0
0
0
0
0
0
0
Содержание Trinitron KV-29XL70K
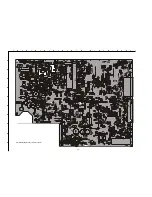
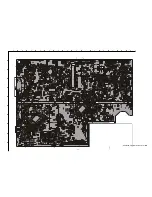
Страница 34: ...A B C D E F G H I J K L M N 1 2 3 4 5 6 7 8 9 10 11 34 A Printed Wiring Board Conductor side A ...
Страница 35: ...A B C D E F G H I J K L M N 1 2 3 4 5 6 7 8 9 10 11 35 A Printed Wiring Board Conductor side B ...
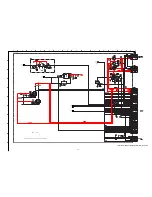
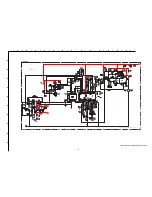
Страница 39: ...A B C D E F G H I J K L M N 1 2 3 4 5 6 7 8 9 10 11 39 G Board Schematic Diagram Power Supply ...
Страница 40: ...A B C D E F G H I J K L M N 1 2 3 4 5 6 7 8 9 10 11 40 D Board Schematic Diagram Deflection ...
Страница 44: ...A B C D E F G H I J K L M N 1 2 3 4 5 6 7 8 9 10 11 44 M Board Schematic Diagram Micro Processor ...

