


VAIO User Guide SVS13A1/SVS1311/SVS1511 Series
Back
|
Back to Top
Troubleshooting
How to Use
Parts Description
Setup
Network / Internet
Connections
Settings
Playback
Backup / Recovery
Security
Other Operations
Notifications
Inserting/Removing “Memory Stick”
You can use “Memory Stick” to save data or transfer images between a digital camera and
your VAIO computer. To insert/remove “Memory Stick”, follow these steps.
To Insert “Memory Stick”
1.
Locate the “Memory Stick” slot.
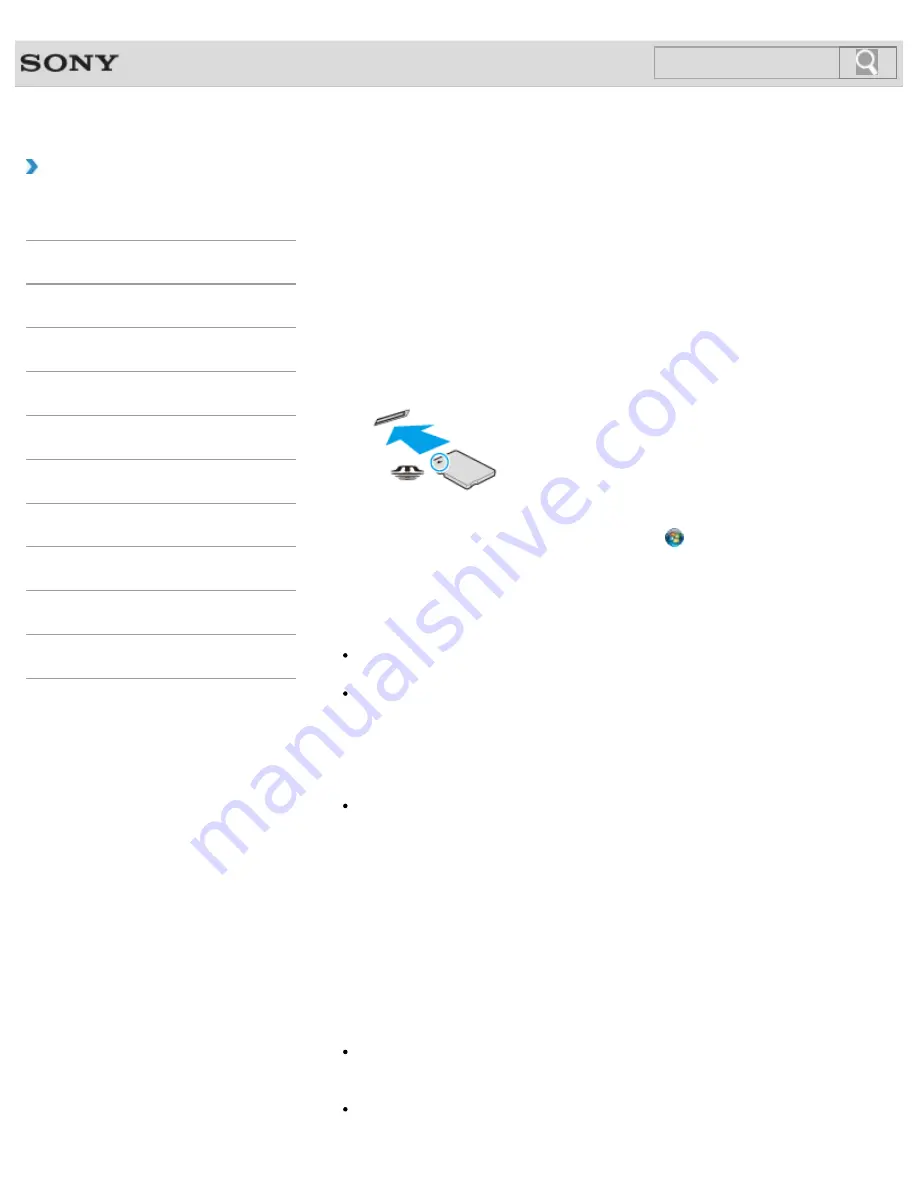
2.
Hold “Memory Stick”
[Details]
with the arrow pointing toward the slot, and carefully
slide it into the slot until it clicks into place.
“Memory Stick” is automatically detected by your system and the contents of “Memory Stick”
are displayed*. If nothing appears on the desktop, click
(
Start
) and
Computer
, and
double-click the “Memory Stick” icon*.
* The drive letter for the “Memory Stick” slot, such as “E:”, may vary depending on the
system configuration of your VAIO computer.
Note
The “Memory Stick” icon will appear in the
Computer
window after you insert “Memory
Stick” into the slot.
If “Memory Stick” cannot be inserted easily, remove it gently, and verify you are inserting
it in the proper direction. Be sure to hold “Memory Stick” with the arrow pointing in the
correct direction as you insert it into the slot. To avoid damaging your VAIO computer or
the media, do not force “Memory Stick” into the slot if you cannot insert it smoothly.
Hint
When you insert “Memory Stick” into the slot for the first time, you may be prompted to
install driver software. If prompted, follow the on-screen instructions to install the
software.
To remove “Memory Stick”
1.
Locate the “Memory Stick” slot.
2.
Check that the Media Access indicator light is off.
3.
Push in “Memory Stick” toward your VAIO computer and release.
4.
Pull “Memory Stick” out of the slot.
Note
Do not remove “Memory Stick” while the Media Access indicator light is on. If you do,
you may lose data. Large volumes of data may take time to load, so make sure the
indicator light is off before removing “Memory Stick”.
Be sure to remove “Memory Stick” gently, or it may pop out unexpectedly.
250
Содержание SVS13112FXB
Страница 139: ... 2012 Sony Corporation 139 ...
Страница 155: ...155 ...
Страница 166: ...Changing the Rapid Wake Sleep Mode Settings 2012 Sony Corporation 166 ...
Страница 173: ... 2012 Sony Corporation 173 ...
Страница 183: ...Changing the Sound Output Device Adjusting the Volume in Windows 2012 Sony Corporation 183 ...
Страница 191: ...191 ...
Страница 217: ... 2012 Sony Corporation 217 ...
Страница 234: ... 2012 Sony Corporation 234 ...
Страница 236: ...Related Topic Notes on the Built in Camera Built in camera equipped models 2012 Sony Corporation 236 ...
Страница 241: ... 2012 Sony Corporation 241 ...
Страница 249: ...Notes on Using SD Memory Cards 2012 Sony Corporation 249 ...
Страница 253: ...Related Topic Inserting Removing SD Memory Cards 2012 Sony Corporation 253 ...
Страница 272: ... 2012 Sony Corporation 272 ...
Страница 283: ...Not all the software listed above may be delivered with your model 2012 Sony Corporation 283 ...


