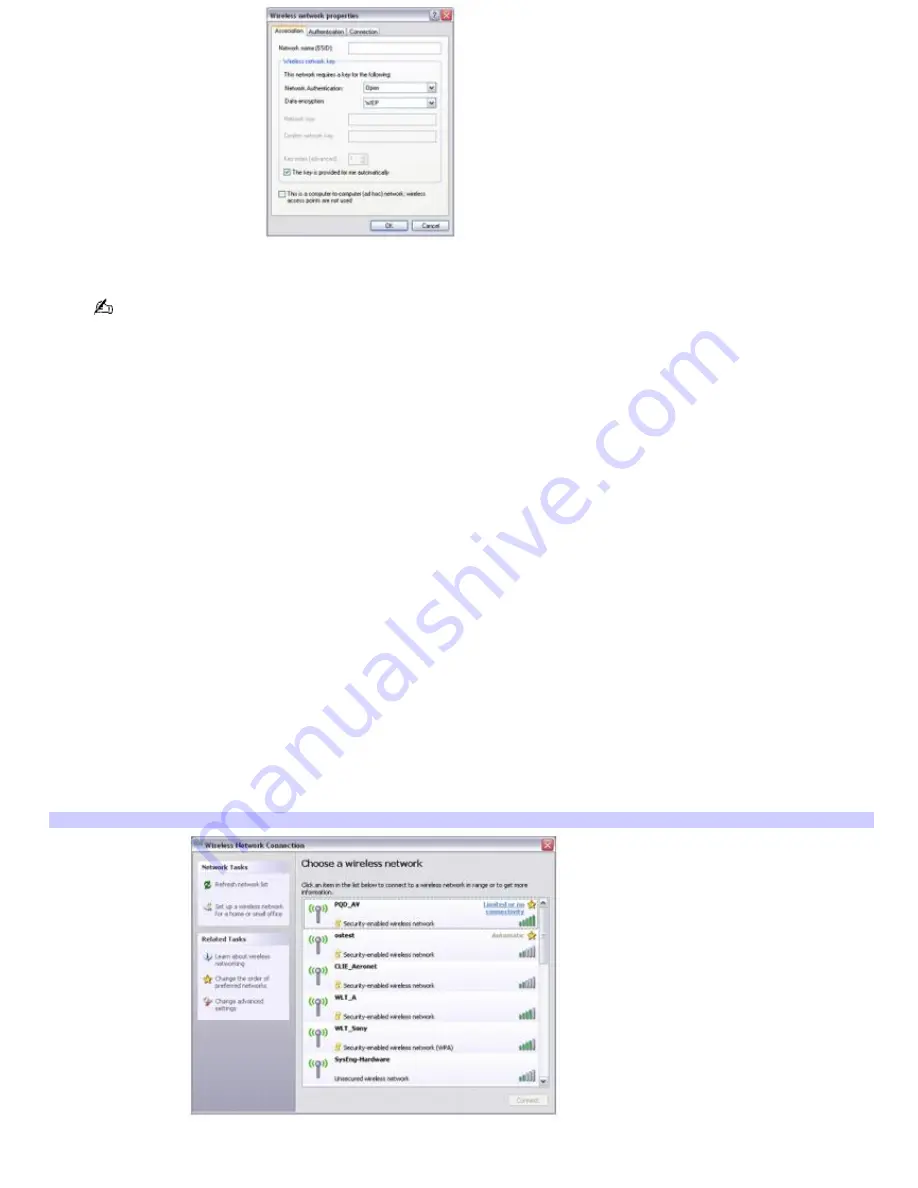
4.
Type the name of the network (access point) you want to connect to in the
Network name (SSID)
box.
The following steps are for networks that require a network key. If you do not know the network key or are not
sure a network key is required, see the network administrator or the guide that accompanied your access point for
more information.
5.
If available, make sure the
Data encryption (WEP enabled)
check box is selected.
If the Data encryption (WEP enabled) check box is not available:
1.
Select an authentication method from the Network Authentication menu.
2.
Select a data encryption method from the Data Encryption menu.
6.
Click to cancel the
The key is provided for me automatically
check box.
7.
Type the WEP network key in the
Network key
box if it is required by the selected authentication method.
8.
Retype the network key in the
Confirm network key
box.
9.
Click
OK
. The network name appears in the
Preferred networks
list box.
To set up a computer-to-computer (ad-hoc) network
The computer-to-computer (ad-hoc) network is only supported by the IEEE 802.11b wireless standard.
1.
Move the Wireless LAN switch to
ON
. For location information see "Locating Controls and Ports."
2.
Click
Start
,
Control Panel
,
Network and Internet Connections
, and then click
Network Connections
. The
Network Connections
window appears.
3.
In the right panel under
LAN or High-Speed Internet
, click
Wireless Network Connection
. The Wireless
Network Connection window appears.
Wireless Network Connection
4.
In the
Related Tasks
menu, click
Change the order of the preferred networks
. The
Wireless Network
Connection Properties
dialog box appears.
Page 68
Содержание PCG-K45 - VAIO - Mobile Pentium 4 3.2 GHz
Страница 8: ...Computer Features Locating Controls and Ports Using the Touch Pad Using Memory Stick Media Page 8 ...
Страница 27: ...Mice and Keyboards Using the Keyboard Connecting External Mice and Keyboards Page 27 ...
Страница 30: ...equivalent of clicking the right mouse button Page 30 ...
Страница 75: ...Page 75 ...
Страница 84: ...4 Lift the disc from the drive 5 Push the drive tray gently to close it Page 84 ...
Страница 87: ...Page 87 ...
Страница 99: ...Printer Connections Printing With Your Computer Page 99 ...
Страница 105: ...Floppy Disk and PC Card Connections Using a Floppy Disk Drive Using PC Cards Page 105 ...


