background image

50

GB

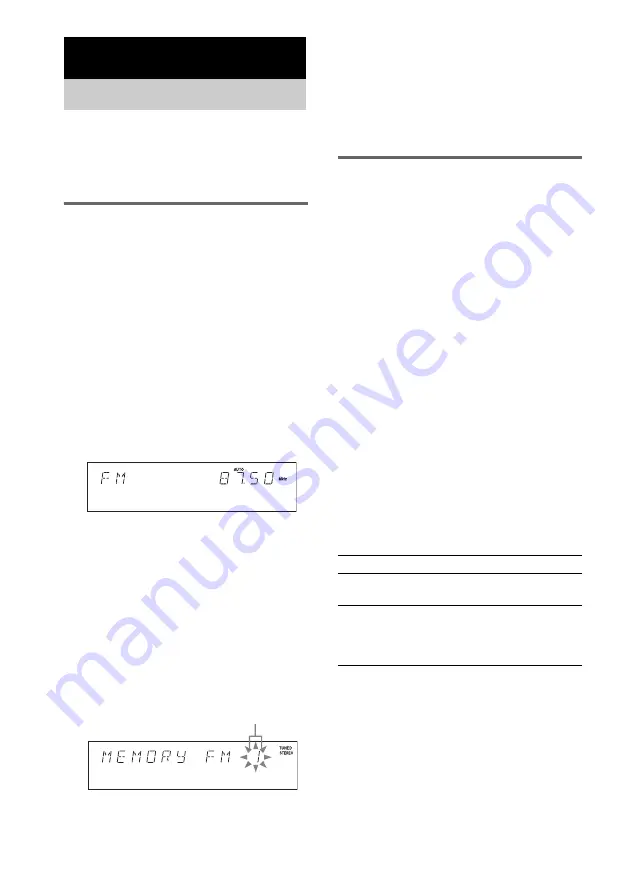
You can preset up to 20 FM stations and 10 AM 
stations. You can then tune in any of those 
stations simply by selecting the corresponding 
preset number.

Automatic tuning preset

You can automatically tune in all of the stations 
that can be received in your area and then store 
the radio frequency of the desired stations.

1

Press FU or – (or TUNER/
BAND on the unit) repeatedly to select 
“TUNER FM” or “TUNER AM”.

2

Press and hold  or – until 
“AUTO” appears.

The frequency changes as the system scans 
for a station. Scanning stops automatically 
when a station is tuned in. At that time, 
“TUNED” and “STEREO” (for an FM 
stereo program) appear.

If “TUNED” does not appear and the 
scanning does not stop

Set the frequency of the desired radio 
station as described in “Manual tuning 
preset”
.

3

Press MENU.

“MEMORY” appears.

4

Press ENTER.

A preset number flashes. Perform steps 5 
and 6 while the preset number flashes. 

5

Press 

M

 or 

m

 repeatedly to select the 

desired preset number.

6

Press ENTER.

“COMPLETE” appears.

7

Repeat steps 1 through 6 to store other 
stations.

Manual tuning preset

You can manually tune in and store the radio 
frequency of the desired stations.

1

Press FU or – (or TUNER/
BAND on the unit) repeatedly to select 
“TUNER FM” or “TUNER AM”.

2

Press or – repeatedly to tune 
in the desired station.

3

Press MENU.

“MEMORY” appears.

4

Press ENTER.

A preset number flashes. Perform steps 5 
and 6 while the preset number flashes.

5

Press 

M

 or 

m

 repeatedly to select the 

desired preset number.

6

Press ENTER.

“COMPLETE” appears.

7

Repeat steps 1 through 6 to store other 
stations.

Other operations

Tuner

Presetting radio stations

Preset number

To

Do this

Tune in a station 
with a weak signal

Follow the procedure described 
in “Manual tuning preset”.

Set another station 
to the existing 
preset number

Start over from step 1. After 
step 4, press 

M

 or 

m

 repeatedly 

to select the preset number you 
want to store the other station.

Содержание MHC-GNZ5D

Страница 1: ... 2005 Sony Corporation 2 583 714 11 2 Mini Hi Fi Component System Operating Instructions MHC GNZ9D MHC GNZ8D MHC GNZ7D MHC GNZ5D ...

Страница 2: ...license TM and marks are omitted in this manual This system incorporates Dolby1 Digital Dolby Pro Logic II adaptive matrix surround decoder and DTS2 Digital Surround System 1 Manufactured under license from Dolby Laboratories Dolby Pro Logic and the double D symbol are trademarks of Dolby Laboratories 2 Manufactured under license from Digital Theater Systems Inc DTS and DTS Digital Surround are re...

Страница 3: ... GNZ9D Latin American model GNZ8D Latin American model GNZ7D and GNZ5D Using the on screen display to search 32 Searching by scene 34 Picture Navigation DVD VIDEO CD CD MP3 JPEG DivX Various functions Changing the sound 35 Adjusting the delay between the picture and sound 37 A V SYNC Using the Setup Display 37 Setting the display or sound track language 38 LANGUAGE SETUP Settings for the display 3...

Страница 4: ... Optional Components Controlling the TV with the remote 68 Using the THEATRE SYNC function 68 Hooking up optional components 69 Listening to audio from a connected component 70 Except for MHC GNZ5D Enjoying the 5 1 channel sound with the optional amplifier 71 MHC GNZ7D GNZ5D only Recording audio from a connected component 71 Except for MHC GNZ5D Recording on a connected component 71 Except for MHC...

Страница 5: ...discs on this system Other discs cannot be played back List of playable discs The DVD VIDEO logo and DVD RW logo are trademarks How to use this manual Symbol Meaning Functions available for DVD VIDEOs DVD Rs DVD RWs in video mode and DVD Rs DVD RWs Functions available for DVD RWs in VR Video Recording mode Functions available for VIDEO CDs including Super VCDs or CD Rs CD RWs in video CD format or...

Страница 6: ...ed on this unit Attempting to do so may damage the unit Do not use such discs A disc with paper or stickers on it A disc that has the adhesive cellophane tape or a sticker still left on it 1 A logical format of files and folders on a CD ROMs defined by ISO International Organization for standardization 2 Except for MHC GNZ9D Latin American model GNZ8D Latin American model GNZ7D and GNZ5D Notes abo...

Страница 7: ... in later sessions can also be played back This system can play Multi Session CDs when a JPEG image file is contained in the first session Any subsequent JPEG image files recorded in later sessions can also be played back If audio tracks and images in music CD format or video CD format are recorded in the first session only the first session will be played back CD R and CD RW discs recorded in mul...

Страница 8: ... varies according to the model you purchased see Specifications on page 81 MHC GNZ9D is used for illustration purposes Getting Started Hooking up the system AM loop antenna Center speaker1 Front speaker Left FM antenna Front speaker Right Surround speaker Right 1 1 MHC GNZ9D GNZ8D only 2 MHC GNZ9D only Surround speaker Left 1 Subwoofer2 ...

Страница 9: ... 3 Connect the center speaker MHC GNZ9D GNZ8D only Connect the speaker cords to the CENTER SPEAKER jacks as shown below Main unit Speakers 4 Connect the subwoofer MHC GNZ9D only Connect the speaker cords to the SUBWOOFER jacks and SUBWOOFER CONTROL jack as shown below Black Stripe Gray Solid 3 Insert only the stripped portion R L Gray Solid 3 Black Stripe Insert only the stripped portion Gray Soli...

Страница 10: ...OUT jacks of this system If your TV is compatible with progressive format file signals use this connection and set PROGRESSIVE AUTO or PROGRESSIVE VIDEO depending on your TV For details see To change the type of signal output from the system page 40 You can use an optional S video cord to connect the S VIDEO input jack on your TV to the S VIDEO OUT jack 7 For models with a voltage selector set VOL...

Страница 11: ...set the color system in Power Saving Mode page 63 When you play back a VIDEO CD recorded in a different color system from the one you set to the unit the picture image may be distorted MHC GNZ9D GNZ8D only To connect optional components See page 69 Inserting two R6 size AA batteries into the remote Note If you do not use the remote for a long period of time remove the batteries to avoid possible d...

Страница 12: ... gray ranges Positioning both surround speakers the same distance from the listening position is effective When carrying this system Perform the following procedure to protect the DVD mechanism Use buttons on the unit for the operation 1 Press 1 to turn on the system then press DVD 2 Make sure that no disc is loaded in the system and check that NO DISC appears 3 Hold down x then press DISC SKIP un...

Страница 13: ... Fasten the screws to the wall The screws should protrude 5 to 7 mm 3 Hang the speakers on the screws Notes Use screws that are suitable for the wall material and strength As a plaster board wall is especially fragile attach the screws securely to a beam and fasten them to the wall Install the satellite speakers on a vertical and flat wall where reinforcement is applied Contact a screw shop or ins...

Страница 14: ...n page 43 The Asian model is used for illustration purposes only For MHC GNZ9D GNZ8D 1 Turn on the TV and select the video input 2 Press 1 to turn on the system 3 Press FUNCTION or repeatedly or DVD on the unit to switch the function to DVD The guide message appears on the TV screen Notes When a disc is in the system or the disc tray opens the guide message does not appear on the TV screen Remove ...

Страница 15: ...M or m repeatedly to select the center speaker distance from the listening position then press ENTER You can set from 0 0 to 7 0 m Note The setting range changes depending on the front speaker setting 11Press M or m repeatedly to select the surround speaker distance from the listening position You can set from 0 0 to 7 0 m Note The setting range changes depending on the front speaker setting 12Pre...

Страница 16: ... Press M or m repeatedly to select the setting that matches your TV type x When you connect a 4 3 standard TV 4 3 LETTER BOX or 4 3 PAN SCAN page 39 x When you connect a wide screen TV or a 4 3 standard TV with a wide screen mode 16 9 page 39 8 Press ENTER The Quick Setup is complete If you make a mistake Press then select the item again To quit the Quick Setup Press DISPLAY in any step To recall ...

Страница 17: ...xcept for MHC GNZ9D Latin American model GNZ8D Latin American model GNZ7D and GNZ5D Before playing a DVD VIDEO CD JPEG or DivX turn on your TV and select the video input Depending on the DVD or VIDEO CD some operations may be different or restricted Refer to the operating instructions supplied with the disc Example When a DVD disc is loaded Example When a CD disc is loaded 1 Press FUNCTION or repe...

Страница 18: ...l L on the unit during play or pause Or press the number buttons in stop mode then press ENTER 2 Select an album of DATA CDs DATA DVDs3 Press ALBUM or repeatedly during play or pause Locate a point quickly in fast forward or fast reverse Scan Except for JPEG Press m or M during play Each time you press the button searching speed changes cyclically as follows Playback direction4 t 2B5 t 1M t 2M t 3...

Страница 19: ... different point Resume play is canceled when you press x in stop mode you disconnect the power cord you eject the disc except for DVD VIDEO VIDEO CD when MULTI DISC RESUME in CUSTOM SETUP is set to ON you change the play mode you change the settings on the Setup Display you turn off the system MP3 JPEG DivX video only you change the functions CD MP3 JPEG DivX video only To enjoy a disc that is pl...

Страница 20: ...med track 1 After step 3 press M or m repeatedly to select the programmed track you want to change in the program list then press 2 Press M or m repeatedly to select the track you want to program then press ENTER The previously selected track is replaced by the newly selected track To clear a programmed track 1 After step 3 press M or m repeatedly to select the programmed track you want to clear i...

Страница 21: ... using the on screen display 1 Press DISPLAY in stop mode The Control Menu appears 2 Press M or m repeatedly to select SHUFFLE then press ENTER The options for SHUFFLE appear 3 Press M or m to select the item to be shuffled x When the disc is in Normal Play mode TRACK plays tracks on the current disc in random order x When the disc is in Program Play mode ON plays programmed tracks on the current ...

Страница 22: ...4 You cannot select REP1 during Program Play and Shuffle Play When you select REP1 that title chapter track DivX video files is repeated endlessly until REP1 is canceled Except for MHC GNZ9D Latin American model GNZ8D Latin American model GNZ7D and GNZ5D Using the on screen display 1 Press DISPLAY during play The Control Menu appears 2 Press M or m repeatedly to select REPEAT then press ENTER The ...

Страница 23: ...age 29 you cannot select TRACK Tips You can set Repeat Play in stop mode After selecting the REPEAT option press H or nN on the unit to start Repeat Play You can quickly display the REPEAT status by pressing REPEAT Each time you press REPEAT the REPEAT option changes Some DVDs have menus to help you enjoy the DVDs You can play DVDs using these menus on the TV screen Using the DVD top menu A DVD is...

Страница 24: ...ss the number buttons to select the item number you want 3 Press ENTER 4 Continue playback according to the instructions on the menus to enjoy interactive playback Refer to the operating instructions supplied with the disc as the operating procedure may differ according to the VIDEO CD To go back to a previous menu Press O RETURN Notes Depending on the VIDEO CD the menu does not appear in step 1 D...

Страница 25: ...on will be played back Note The system may not be able to play some DATA CDs created in the Packet Write format In this case you cannot view the JPEG images recorded MP3 audio track or JPEG image file that the system can play The system can play the MP3 audio tracks or JPEG image files which have the extension MP3 MP3 audio track or JPG JPEG JPEG image file which conform to the DCF image file form...

Страница 26: ... you add numbers 01 02 03 etc to the front of the track file names when you store the tracks or files in a disc the tracks and files will be played in that order Since a disc with many trees takes longer to start playback it is recommended that you create albums with no more than two trees MP3 audio tracks and JPEG image files recorded on DATA CDs CD ROMs CD Rs CD RWs can be played on this system ...

Страница 27: ...select an album then press ENTER The track list appears 3 Press M or m repeatedly to select a track then press ENTER The system starts playing the selected track To stop play Press x To play the next or previous MP3 audio track Press or You can select the first track of the next album by pressing during playback of the last track of the current album Note that you cannot return to the previous alb...

Страница 28: ...when the Control Menu is not displayed You can select the first file of the next album by pressing during playback of the last file of the current album Note that you cannot return to the previous album by pressing To return to the previous album select the album from the album list To rotate a JPEG image When a JPEG image file is displayed on the TV screen you can rotate the image by 90 degrees P...

Страница 29: ...n the audio track continues with no slide show If there are no MP3 audio tracks and JPEG image files in the DATA CD the No audio data and No image data messages appear on the TV screen PICTURE NAVI does not work when MODE MP3 JPEG is set to AUDIO MP3 If you play large MP3 audio track data and JPEG image data at the same time the sound may skip It is recommended that you set the MP3 bit rate to 128...

Страница 30: ...ger that the option you selected Especially progressive JPEG image files or JPEG image files of 3 000 000 pixels or more Selecting an effect for image files in the slide show JPEG only When you play a JPEG image file you can select the effect to be used when viewing the slide show 1 Press DISPLAY repeatedly until the Control Menu disappears then press DISPLAY once The Control Menu for JPEG appears...

Страница 31: ...ure may pause or be unclear In which case it is recommended that you create the file at a lower bit rate If the sound is still noisy MP3 is the recommended audio format Note however this system does not conform to WMA Windows Media Audio format Because of the compression technology used for DivX video files it may take some time after you press H or nN on the unit for the picture to appear Dependi...

Страница 32: ...ber The following occurrences are counted when the system is turned off when the disc tray is opened when another file is played Except for MHC GNZ9D Latin American model GNZ8D Latin American model GNZ7D and GNZ5D You can search for a DVD by title or chapter and you can search for a VIDEO CD CD DATA CD DATA DVD by track file album index or scene As titles and tracks are assigned unique numbers on ...

Страница 33: ...he Control Menu disappears To search for a particular point using the time code DVD VIDEO DVD RW only Time Search 1 In step 2 select TIME TEXT T playing time of the current title is selected 2 Press ENTER T changes to T 3 Input the time code using the number buttons then press ENTER For example to find the scene at 2 hours 10 minutes and 20 seconds after the beginning just enter 2 10 20 Notes You ...

Страница 34: ...ppears as follows When there are more than 9 titles chapters or tracks V appears at the bottom right of the TV screen To display the hidden titles chapters or tracks select the bottom scene then press m To return to the previous scene select the top scene then press M 4 Press M m to select a chapter title or track then press ENTER Playback starts from the selected scene To return to Normal Play Pr...

Страница 35: ... The types of sound tracks recorded on a disc are displayed The default setting is underlined Example 1 MAIN main sound 1 SUB sub sound 1 MAIN SUB main and sub sound 2 MAIN 2 SUB 2 MAIN SUB This is not displayed for a disc recorded with only one audio stream x When playing a VIDEO CD CD MP3 audio track The default setting is underlined STEREO the standard stereo sound 1 L the sound of the left cha...

Страница 36: ...del GNZ8D Latin American model GNZ7D and GNZ5D Example MP3 audio About audio signals Audio signals recorded in a disc contain the sound elements channels shown below Each channel is output from a separate speaker Front L Front R Center Surround L Surround R Surround Monaural This signal can be either the Dolby Surround Sound processed signals or the Dolby Digital sound s monaural Surround audio si...

Страница 37: ...ound You can also set a language for the subtitles and the Setup Display among other things For details on each Setup Display item see pages from 38 to 45 For an overall list of Setup Display items see page 85 Asian model is used for illustration purposes only Note Playback settings stored in the disc take priority over the Setup Display settings and not all the functions described may work 1 Pres...

Страница 38: ...hes the language of the sound track When you select ORIGINAL the language given priority in the disc is selected x SUBTITLE DVD VIDEO only Switches the language of the subtitle recorded on the DVD VIDEO When you select AUDIO FOLLOW the language for the subtitles changes according to the language you selected for the sound track Note When you select a language in MENU AUDIO or SUBTITLE that is not ...

Страница 39: ...3 audio track for more than 15 minutes The screen saver will help prevent your display device from becoming damaged ghosting Press H or nN on the unit to turn off the screen saver The default setting is underlined Settings for the display SCREEN SETUP 16 9 Select this when you connect a wide screen TV or a TV with a wide mode function 4 3 LETTER BOX Select this when you connect a 4 3 screen TV Thi...

Страница 40: ...except for MHC GNZ5D Progressive is the method for displaying TV images which reduces flickering and sharpens the image To display using this method you need to connect to a TV that accepts progressive signals Press DVD and DISPLAY on the unit at the same time Each time you press the buttons the display changes as follows PROGRESSIVE AUTO t PROGRESSIVE VIDEO t NORMAL INTERLACE P AUTO or P VIDEO ap...

Страница 41: ...he above conditions is not met x NORMAL INTERLACE Select this setting when your TV does not accept progressive signals or your TV is connected to the VIDEO OUT jacks About DVD software types and the conversion method DVD software can be divided into 2 types film based software and video based software Video based software is derived from TV such as dramas and sit coms and displays images at 30 fra...

Страница 42: ...to 40 different DVD VIDEO VIDEO CD discs page 19 The default setting is underlined x AUDIO DRC Dynamic Range Compression DVD VIDEO DVD RW only Narrows the dynamic range of the sound track Useful for watching movies at low volume late at night The default setting is underlined Note AUDIO DRC only applies to Dolby Digital sources x DivX except for MHC GNZ9D Latin American model GNZ8D Latin American ...

Страница 43: ...them The default setting is underlined MHC GNZ9D GNZ8D only Notes When you select an item the sound may cut off for a moment Depending on the settings of other speakers the subwoofer may output excessive sound When connecting a subwoofer make sure to set the SUBWOOFER setting to YES If set to NONE no sound is output from the subwoofer When you play a DVD that does not have subwoofer output recorde...

Страница 44: ...e sound output can be smaller than that of other speakers during using the test tone x LEVEL SURROUND MHC GNZ9D GNZ8D only You can vary the level of surround speakers as follows Be sure to set TEST TONE to ON for easy adjustment Any items that are set to NONE in the SIZE setting will not appear The default settings are underlined To adjust the volume of all the speakers at one time Press VOLUME or...

Страница 45: ...hed adjusting 9 Press and press M or m repeatedly to select TEST TONE then press ENTER 10Press M or m repeatedly to select OFF then press ENTER Note When adjusting the speaker settings the sound may cut off for a moment Preventing playback of specific discs CUSTOM PARENTAL CONTROL You can set the playback restrictions so that the system will not play inappropriate discs You can set the same Custom...

Страница 46: ...ns then press ENTER 4 To confirm your password re enter it using the number buttons then press ENTER To play a disc for which Custom Parental Control is set 1 Load the disc for which Custom Parental Control is set The CUSTOM PARENTAL CONTROL display appears 2 Enter your 4 digit password using the number buttons then press ENTER The system is ready for playback Tip If you forgot your password enter...

Страница 47: ...eatedly to select STANDARD then press ENTER The options for STANDARD appear 6 Press M or m repeatedly to select a geographic area as the playback limitation level then press ENTER The area is selected When you select OTHERSt select and enter the standard code in the table on page 48 using the number buttons 7 Press M or m repeatedly to select LEVEL then press ENTER The options for LEVEL appear 8 P...

Страница 48: ...Play mode is canceled the level returns to the original level Tip If you forgot your password remove the disc and repeat steps 1 to 3 of Limiting playback by children DVD VIDEO only page 46 When you are asked to enter your password enter 199703 using the number buttons then press ENTER The display will ask you to enter a new 4 digit password After you enter a new 4 digit password replace the disc ...

Страница 49: ...el GNZ7D and GNZ5D With discs on which multilingual subtitles are recorded you can change the subtitle language while playing a disc or turn the subtitles on or off whenever you want For example you can select the language you want to master and turn the subtitles on for better understanding Press SUBTITLE during play Each time you press SUBTITLE the subtitle language changes Notes Depending on th...

Страница 50: ...m steps 5 and 6 while the preset number flashes 5 Press M or m repeatedly to select the desired preset number 6 Press ENTER COMPLETE appears 7 Repeat steps 1 through 6 to store other stations Manual tuning preset You can manually tune in and store the radio frequency of the desired stations 1 Press FUNCTION or or TUNER BAND on the unit repeatedly to select TUNER FM or TUNER AM 2 Press TUNING or re...

Страница 51: ... s memory first see Presetting radio stations on page 50 1 Press FUNCTION or or TUNER BAND on the unit repeatedly to select TUNER FM or TUNER AM 2 Press PRESET or repeatedly to select the desired preset station Tip You can also select the desired preset station by pressing the number buttons and ENTER in step 2 Listening to non preset radio station Manual Tuning 1 Press FUNCTION or or TUNER BAND o...

Страница 52: ...e 3 The tape starts playing 1 TAPE B only The tape deck stops automatically after repeating the sequence five times The TAPE A plays front side only 2 Relay Play always follows this cyclic sequence up to five times then stops TAPE A front side t TAPE B front side t TAPE B reverse side 3 TAPE B only Other operations Tip If you select either TAPE A or B and press nN or H on the remote X m or M when ...

Страница 53: ...START Recording starts To stop recording Press x Notes CD Synchro Recording is not available with DVDs DATA CDs and DATA DVDs You cannot listen to other sources while recording When you press CD SYNC in step 5 the surround effect may automatically change see Selecting the surround effect on page 55 If the play mode is set to Shuffle Play Program Play or Repeat Play it automatically switches to Nor...

Страница 54: ...mponent connected to VIDEO INPUT AUDIO L R jacks TV SAT To record from the optional component connected to TV SAT IN L R jacks Except for MHC GNZ5D 5 Press REC PAUSE START Deck B stands by for recording REC flashes 6 Press REC PAUSE START then start playing the desired source to record Recording starts To stop recording Press x Notes You cannot listen to other sources while recording When you pres...

Страница 55: ... t 2CH STEREO When the headphones are connected HP 2CH y HP VIRTUAL x For MHC GNZ7D GNZ5D When the headphones are not connected 2CH STEREO t 2CH SURROUND t VIRTUAL A t VIRTUAL B When the headphones are connected HP 2CH t HP SURROUND t HP VIRTUAL These sound fields can be selected during DVD function except when the system is in stand by for recording or is recording karaoke mode is selected A F D ...

Страница 56: ...This mode is effective when the distance between the front L and R speakers is short V M DIM Creates an array of virtual surround speaker positions higher than the listener from a single set of actual surround speakers This mode creates 5 pairs of virtual speakers surrounding the listener at approximately a 30 angle of elevation The effect differs according to the BEHIND or SIDE setting of the sur...

Страница 57: ...3 Connect a microphone to MIC jack Karaoke mode is automatically activated and m appears at the upper right of TV screen You can also activate the Karaoke mode by pressing KARAOKE MODE without connecting the microphone s For DVDs or Super VCDs press AUDIO repeatedly to select the audio setting page 35 For CDs or VIDEO CDs the audio setting automatically switches to 1 L and the singer s voice turns...

Страница 58: ...tal Karaoke format discs guide melody and guide vocal tracks are recorded in addition to the accompaniment You can select them when the player is in karaoke mode Speaker output in normal Dolby Digital format 5 channel surround Speaker output in Dolby Digital Karaoke format To check the audio information press AUDIO When playing a Dolby Digital Karaoke disc 9 appears at the current audio format Exa...

Страница 59: ...merican model GNZ8D Latin American model GNZ7D and GNZ5D Tip You can turn Karaoke Pon mode on and off by using KARAOKE PON in the Control Menu display Turning the vocals on and off Vocal DVD VIDEO VIDEO CD CD only When playing a DVD with the Dolby Digital Karaoke format in karaoke mode you can turn on or off the guide vocal recorded in the karaoke track When playing a VIDEO CD CD in karaoke mode y...

Страница 60: ...function works only with the Dolby Digital Karaoke format Depending on the discs you may not be able to change the guide vocal channel Tips The channel returns to the default setting when you turn off the system you change the function you open the disc tray or change the disc you cancel karaoke mode When playing a DVD VIDEO recorded only with one kind of guide vocal select 1 Turning the guide mel...

Страница 61: ...ENTER ON appears and the hour indication flashes 5 Set the time to start playing Press M or m repeatedly to set the hour then press The minute indication flashes Press M or m repeatedly to set the minute then press ENTER 6 Set the time to stop playing following the same procedure as step 5 7 Press M or m repeatedly until the desired sound source appears Each time you press the button the display c...

Страница 62: ...ation on page 51 2 Press TIMER MENU 3 Press M or m repeatedly to select REC SET then press ENTER ON appears and the hour indication flashes 4 Set the time to start recording Press M or m repeatedly to set the hour then press The minute indication flashes Press M or m repeatedly to set the minute then press ENTER 5 Set the time to stop recording following the same procedure as step 4 The type of ti...

Страница 63: ...ancel Power Saving Mode Press DISPLAY while the system is off Each time you press the button the display switches cyclically as follows Demonstration display t Clock display t No display Power Saving Mode The clock is displayed only if you set the clock Tips The timer continues to operate in Power Saving Mode 1 indicator lights up even in Power Saving Mode Press ILLUMINATION on the unit Each time ...

Страница 64: ...Z9D Latin American model GNZ8D Latin American model GNZ7D and GNZ5D Elapsed playing time of the current file t File name1 t Album and file number for two seconds 1 Only alphabet letters and numbers can be displayed Other characters appear as In addition NO TEXT is displayed for discs without DVD CD text and file name 2 These are not displayed during Shuffle Play or Program Play 3 VIDEO CD without ...

Страница 65: ...ton the display changes cyclically as follows Disc information t Clock display for a few seconds t Effect status for a few seconds Note You can check the effect status in any function You can check the playing time and remaining time of the current title chapter or track You can also check the DVD CD text and file album name recorded on the disc 1 Press TIME TEXT during play 2 Press TIME TEXT to c...

Страница 66: ...played correctly To check DVD CD text Press TIME TEXT repeatedly in step 2 to display text recorded on the DVD CD The DVD CD text appears only when text is recorded in the disc You cannot change the text If the disc does not contain text NO TEXT appears To check DATA CD MP3 audio track DivX video file1 DATA DVD1 DivX video file text Press TIME TEXT while playing MP3 audio tracks on a DATA CD or Di...

Страница 67: ...able Image File Format is a digital camera image format defined by the Japan Electronics and Information Technology Industries Association JEITA Notes If there is no date information or data is damaged on the disc the system cannot display the date information Date information differs depending on the area Checking the date information 1 8 1 2 0 01 01 2003 DATA CD JPEG Date information ...

Страница 68: ...ork change the transmit time The transmit time varies depending on the TV If distance between the TV and this system is too far this function may not work Install the system near the TV Keep the remote pointed in the direction of the TV and this system Optional Components Controlling the TV with the remote To Press Turn the TV on or off TV 1 while holding down the TV button Switch the TV s input s...

Страница 69: ...omponent connected to VIDEO INPUT VIDEO jack may appear on the TV screen even if the system is turned off C TV SAT IN L R jacks except for MHC GNZ5D Use audio cords not supplied to connect an optional analog component TV or satellite tuner etc to these jacks You can then record or listen to from the component through this system Hooking up optional components M y M y nN X x From the audio and vide...

Страница 70: ...r equipped with Dolby Digital or DTS decoder you can enjoy the 5 1 channel sound If the jack is covered with a cap remove it before use Note If you press AUDIO SOUND FIELD or the buttons related to karaoke mode or if you connect or disconnect microphones or headphones the sound cuts off for a moment G COMPONENT VIDEO OUT jacks except for MHC GNZ5D Use an optional video cord to connect a TV If your...

Страница 71: ...e 35 Tip You cannot use the surround effect of this system 1 Connect audio cords See Hooking up optional components on page 69 2 Start recording manually See Recording on a tape manually on page 54 Making an analog recording 1 Connect audio cords See Hooking up optional components on page 69 2 Start recording Refer to the operating instructions provided with the connected component Making an analo...

Страница 72: ...ay mode There is severe hum or noise Move the system away from the source of noise Connect the system to a different wall outlet Install a noise filter commercially available to the power cord The timer cannot be set Set the clock again page 14 The timer does not function Check the timer setting and set the correct time pages 61 and 62 Cancel the Sleep Timer Function page 61 The remote does not fu...

Страница 73: ...er s and jacks are connected correctly DVD VIDEO CD CD MP3 JPEG DivX player The disc tray does not open and LOCKED appears Contact your Sony dealer or local authorized Sony service facility The disc tray does not close Place the disc correctly Always close the tray by pressing Z OPEN CLOSE on the unit Trying to press the tray closed with your fingers may cause problems with the player Play does no...

Страница 74: ...s all tracks on the discs playback may take more time than usual if the number of albums or tracks on the disc is very large the album and track organization structure is very complex The JPEG image file cannot be played The DATA CD is not recorded in JPEG format that conforms to ISO9660 Level 1 Level 2 or Joliet The JPEG image file does not have the extension JPG or JPEG The data is not formatted...

Страница 75: ...heck that the system is connected securely The video cable is damaged Replace it with a new one Make sure you connect the system to the video input jack of your TV page 10 Make sure you turn on the TV and operate the TV correctly Make sure you select the video input on the TV so that you can view the pictures from the system When you play a VIDEO CD make sure you set the color system correctly acc...

Страница 76: ...as as far away from the speaker cords as possible Consult your nearest Sony dealer if the supplied AM antenna has come off the plastic stand Try turning off surrounding electrical equipment A stereo FM program cannot be received in stereo Press FM MODE repeatedly until MONO disappears Tape deck The tape does not record or play or there is a decrease in sound level The heads are dirty Clean them pa...

Страница 77: ... reset as follows 1 Press DISPLAY in stop mode 2 Press M or m repeatedly to select SET UP then press ENTER 3 Press M or m repeatedly to select RESET then press ENTER 4 Press M or m repeatedly to select YES then press ENTER It takes a few seconds to complete Do not press 1 when resetting the system Note Turn off the subwoofer before you reset the system when you connect the subwoofer MHC GNZ8D GNZ7...

Страница 78: ...vX format but does not conform to a DivX Certified profiles Except for MHC GNZ9D Latin American model GNZ8D Latin American model GNZ7D and GNZ5D NO DISC There is no disc in the unit NOT IN USE You pressed DISC SKIP while the disc tray is open or you pressed an invalid button PASSWORD Custom Parental Control or Parental Control is set PUSH STOP You press CD SYNC on the unit during play READING The ...

Страница 79: ...If you continuously use this system at a high volume the cabinet temperature of the top side and bottom rises considerably To avoid burning yourself do not touch the cabinet To prevent a malfunction do not cover the ventilation hole for the cooling fan In case color irregularity is observed on nearby a TV screen With the magnetically shielded type of speaker system the speakers can be installed ne...

Страница 80: ...net panel and controls with a soft cloth slightly moistened with mild detergent solution Do not use any type of abrasive pad scouring powder or solvent such as thinner benzine or alcohol To save a tape permanently To prevent a tape from being accidentally recorded over break off the cassette tab from side A or B as illustrated If you later want to reuse the tape for recording cover the broken tab ...

Страница 81: ...ance 47 kilohms VIDEO INPUT VIDEO phono jack 1 1 Vp p 75 ohms VIDEO INPUT AUDIO phono jacks 1 voltage 250 mV impedance 47 kilohms MIC 1 MIC 2 MIC2 phone jacks sensitivity 1 mV impedance 10 kilohms Outputs TV SAT OUT audio phono jacks 1 voltage 250 mV impedance 1 kilohm VIDEO OUT phono jack max output level 1 Vp p unbalanced Sync negative load impedance 75 ohms S VIDEO OUT 4 pin mini DIN jack 1 Y 1...

Страница 82: ...10 kHz 531 1 602 kHz with the interval set at 9 kHz Antenna AM loop antenna Antenna terminals External antenna terminal Intermediate frequency 450 kHz Speaker Front speaker SS GNZ9D for MHC GNZ9D GNZ8D GNZ7D Speaker system 2 way 2 unit bass reflex type magnetically shielded type Speaker units Woofer 18 cm cone type Tweeter 5 cm cone type Nominal impedance 6 ohms Dimensions w h d Approx 240 346 5 2...

Страница 83: ...djustable with voltage selector Indian model 220 240 V AC 50 60 Hz Mexican model 127 V AC 60 Hz Thai model 220 V AC 50 60 Hz Other models 120 V 220 V or 230 240 V AC 50 60 Hz Adjustable with voltage selector Power consumption MHC GNZ9D 400 watts MHC GNZ8D 280 watts MHC GNZ7D 210 watts MHC GNZ5D 180 watts Dimensions w h d excl speakers MHC GNZ9D Approx 280 326 400 mm MHC GNZ8D GNZ7D Approx 280 326 ...

Страница 84: ...russian 1059 Bulgarian 1060 Bihari 1061 Bislama 1066 Bengali Bangla 1067 Tibetan 1070 Breton 1079 Catalan 1093 Corsican 1097 Czech 1103 Welsh 1105 Danish 1109 German 1130 Bhutani 1142 Greek 1144 English 1145 Esperanto 1149 Spanish 1150 Estonian 1151 Basque 1157 Persian 1165 Finnish 1166 Fiji 1171 Faroese 1174 French 1181 Frisian 1183 Irish 1186 Scots Gaelic 1194 Galician 1196 Guarani 1203 Gujarati...

Страница 85: ...e track to play in the order you want SHUFFLE VIDEOCDor CD only Plays the track in random order REPEAT Plays the entire disc all titles all tracks all albums repeatedly or one title chapter track album repeatedly or contents of program repeatedly A V SYNC Adjusts the delay between the picture and sound PARENTAL CONTROL DVD VIDEO VIDEO CD or CD only Sets the disc to prohibit playback SETUP QUICK Se...

Страница 86: ... be used for changing slides during a slide show MODE MP3 JPEG MP3 or JPEG only Selects the data type MP3 audio track AUDIO JPEG image file IMAGE or both AUTO to be played when playing a DATA CD KEY CONTROL Changes the key to suit your vocal range KARAOKE PON Enjoys karaoke with a stereo recorded disc even if it is a non karaoke disc by reducing the sound of the vocals VOCAL DVD VIDEO VIDEO CD or ...

Страница 87: ...e displayed language list SUBTITLE Select the language you want to use from the displayed language list TV TYPE1 16 9 4 3 LETTER BOX 4 3 PANSCAN COLOR SYSTEM2 AUTO PAL NTSC SCREEN SAVER ON OFF BACKGROUND JACKET PICTURE GRAPHICS BLUE BLACK BLACK LEVEL3 ON OFF BLACK LEVEL COMPONENT OUT 3 OFF ON 4 3 OUTPUT except for MHC GNZ5D FULL NORMAL PAUSE MODE AUTO FRAME TRACK SELECTION OFF AUTO MULTI DISC RESU...

Страница 88: ... five full bandwidth output channels from two channel sources This is done using an advanced high purity matrix surround decoder that extracts the spatial properties of the original recording without adding any new sounds or tonal colorations Movie mode The Movie mode is for use with stereo television shows and all programs encoded in Dolby Surround The result is enhanced soundfield directionality...

Страница 89: ...o sections to easily locate the point you want on a VIDEO CD or a CD Depending on the disc no indexes may be recorded Interlace format Interlaced scanning The Interlace format is the NTSC standard method for displaying TV images at 30 frames per second Each frame is scanned twice alternately between the even numbered scanning lines and then odd numbered scanning lines at 60 times per second Menu P...

Страница 90: ...ated Scene On a VIDEO CD with PBC functions page 24 the menu screens moving pictures and still pictures are divided into sections called scenes Each scene is assigned a scene number enabling you to locate the scene you want Title The longest sections of a picture or a music piece on a DVD a movie etc for a picture piece on video software or an album etc for a music piece on audio software Each tit...

Страница 91: ...50 51 TV SAT e 2 54 70 VIDEO wl2 54 70 VIDEO INPUT AUDIO L R jacks ws 54 69 VIDEO INPUT VIDEO jack wd 69 VOLUME control qk 44 58 1 power 1 10 51 61 68 77 nN play 8 17 39 52 53 X pause 8 11 18 52 x stop 8 12 18 45 52 53 77 Z OPEN CLOSE q 17 Z PUSH deck B eject qf 52 M fast forward qh 18 52 y slow forward qh 18 m rewind wg 18 52 slow rewind wg 18 Z PUSH deck A eject wj 52 1 MHC GNZ5D has only one MI...

Страница 92: ... TUNING 9 50 51 TUNING qa 50 51 TV wk 68 TV CH wh 68 TV CH e 68 TV VIDEO qk 68 TV VOL 7 68 VOLUME 7 44 61 1 power 1 10 61 68 77 TV 1 1 68 REPLAY ADVANCE c STEP STEP C 8 18 SLOW y 9 18 M fast forward 9 18 52 X pause q 18 52 SLOW qa 18 m rewind qa 18 52 M m qs 14 20 37 59 61 77 DISPLAY wg 21 45 65 67 go forward wh 18 x stop wj 52 go back e 18 H play wl 17 39 O RETURN ea 24 es KEY CONTROL 2 ed 59 The...

Отзывы: