- 14 -
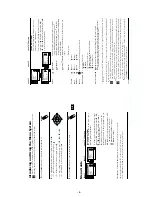
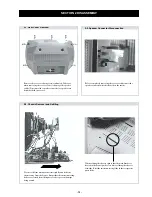
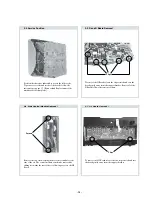
2-4. Service Position
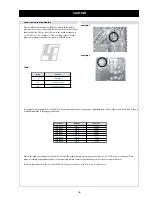
2-5. D and G Board Removal
To remove the G Board release the clips circled and ease the
board gently away from the support bracket. Removal of the
D Board follows the same procedure.
Position the chassis as indicated to access the solder side.
To gain access to the underside of the boards follow the
instructions on page 17. [Removal and Replacement of the
main bracket bottom plates ].
Clips
2-6. Side Control Module Removal
2-7. H2 Board Removal
Remove the two screws fixing the user control module to the
side of the set. The control module can then be removed by
sliding it towards the rear of the set allowing access to the H2
Board.
Screws
To remove the H2 Board release the two clips circled and ease
the board gently away from the support bracket.
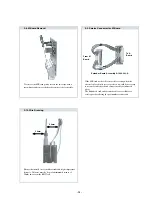
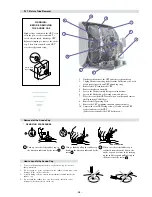
2
Clips
Содержание KV-28LS60B
Страница 29: ... 29 29 A Schematic Video Audio Processors Audio Output Vertical Deflection page 1 2 ...
Страница 31: ...A B C D E F G H I J K L M N 1 2 3 4 5 6 7 8 9 10 11 31 A Printed Wiring Board Conductor side A ...
Страница 32: ...A B C D E F G H I J K L M N 1 2 3 4 5 6 7 8 9 10 11 32 A Printed Wiring Board Conductor side B ...
Страница 37: ...A B C D E F G H I J K L M N 1 2 3 4 5 6 7 8 9 10 11 37 G Board Schematic Diagram Power Supply ...
Страница 38: ...A B C D E F G H I J K L M N 1 2 3 4 5 6 7 8 9 10 11 38 C Board Schematic Diagram R G B Out ...
Страница 40: ...A B C D E F G H I J K L M N 1 2 3 4 5 6 7 8 9 10 11 40 M Board Schematic Diagram Micro Processor ...
Страница 42: ...A B C D E F G H I J K L M N 1 2 3 4 5 6 7 8 9 10 11 42 D Board Schematic Diagram Deflection ...


