5-3
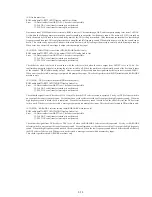
When an wrong item number is entered by mistake, it can be cleared by pressing the [CLEAR] key. When [CLEAR] is pressed, the selected
number is cleared. Enter a correct number. When [ENTER] is pressed, diagnosis of the selected number only is executed and its result
appears.
When any key is pressed while the diagnosis result is flashing, the system returns to the initial display of the self diagnosis. When the
diagnosis which needs visual check such as STILL picture check, or when errors occur, press the [PREV] key to repeat checking. Press
[NEXT] to advance to the next step.
If self diagnosis of the selected number does not exist, the system returns to the initial display when [ENTER] is pressed.
5-2-1-2. Testing All Items
When any key other than the numeric keys is pressed while Model No. is being displayed, testing of all items is selected.
“Testing All Items” is the simple check omitting the RAM check. In practice, the selected blocks only are tested at interval such as 0-ff, 500-
5ff, a00-aff, f00-fff, 1400-14ff, ...(address). Test is executed sequentially from the top of the check item list of the diagnosis. If errors which
require visual inspection, do not occur, the system advances to the next test step. W hen errors occur, press the [PREV] key to repeat
checking. When errors occur or confirmation is necessary, press the [PREV] key to repeat checking of the specified item. Press [NEXT] to
advance to the next step.
5-2-2. Error Display
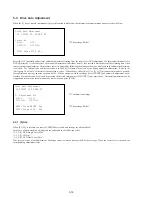
When errors occur, error code and information are displayed as follows.
Syscon Diagnosis
IF con Ver. 1. 220 (9315)
SYScon Ver. 1. 000 (0000)
Select Sub No. ; 02-02
** Press Remocon Key **
SIRCS:FF KEY:FF
←
Enter item number [0202]
Syscon Diagnosis
IF con Ver. 1. 220 (9315)
SYScon Ver. 1. 000 (62ED)
RAM Check
Error code: 05
Address : 01001D87
Write Data: 20
Read Data: FF
SIRCS:FF KEY:FF
When error code is other than “05” (Write data and read data do not agree.), the address column and the data column are set to 0.
When all steps of test have completed or the test is suspended, the message “Diag OK” or “Diag Error End” flashes. Press any to return to
the initial menu of the test mode.
←
Name of check item
←
Error code
←
Error occurring address
←
Write data (2 to 8 digits)
←
Read data (2 to 8 digits)
Содержание DVP-M35
Страница 9: ...1 1 DVP M35 SECTION 1 GENERAL This section is extracted from instruction manual ...
Страница 10: ...1 2 ...
Страница 11: ...1 3 ...
Страница 12: ...1 4 ...
Страница 13: ...1 5 ...
Страница 14: ...1 6 ...
Страница 15: ...1 7 ...
Страница 16: ...1 8 ...
Страница 17: ...1 9 ...
Страница 18: ...1 10 ...
Страница 19: ...1 11E ...
Страница 32: ......
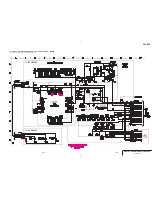
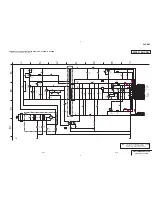
Страница 33: ...DVP M35 TK 47 RF SERVO SCHEMATIC DIAGRAM Ref No TK 47 Board 3 000 Series 4 7 4 8 4 9 RF SERVO TK 47 DVP M35 ...
Страница 34: ......
Страница 43: ......
Страница 45: ......
Страница 46: ......
Страница 48: ......
Страница 50: ......


