11
GB
Prep
arat
ion
s
3
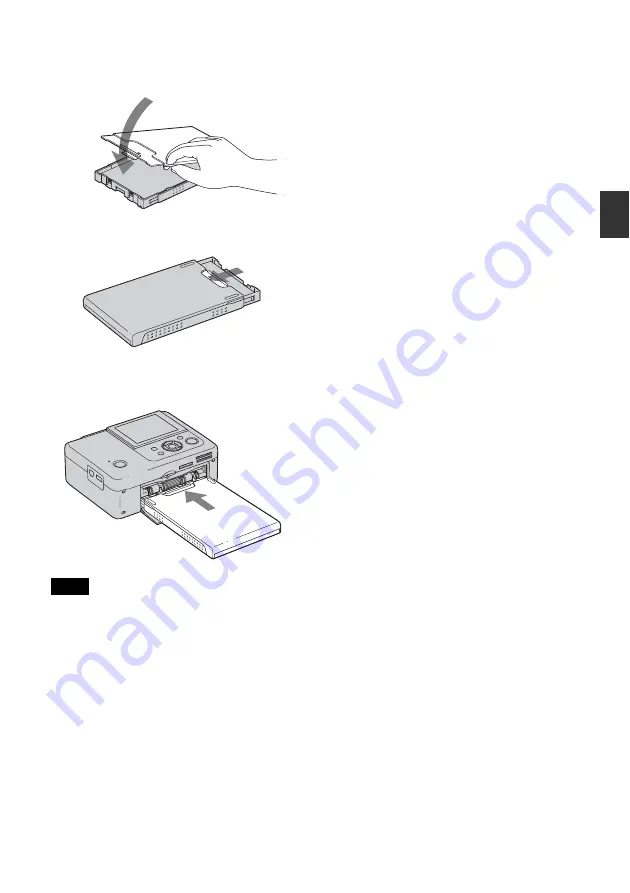
Close the paper tray cover.
4
Open the slide cover.
5
Insert the paper tray into the printer.
Notes
• You can set up to 20 sheets of print paper. Riffle
the print paper thoroughly. Insert the print paper
with the protective sheet facing up. Remove the
protective sheet from the tray.
• If there is no protective sheet, insert the print paper
into the paper tray with its printing surface (the
side with no imprint) facing up.
• Do not touch the printing surface. Fingerprints or
contamination on the printing surface may result in
imperfect printing.
• Do not bend the print paper, or cut the print paper
from the perforations before printing.
• To avoid paper jam or malfunctions of the printer,
make sure of the following before printing:
– Do not write or type on the print paper.
– Do not attach a sticker or stamps on the print
paper.
– When adding print paper to the paper tray, be
sure that the total number of print paper sheets
does not exceed 20 sheets.
– Do not insert different types of print paper
together into the paper tray.
– Do not print on used print paper. Printing an
image twice on the same paper will not make
the printed image thicker.
– Use the print paper for this printer only.
– Do not use print paper ejected without printing.
Notes on storing the print paper
• To store print paper in the tray, remove the paper
tray from the printer and close the slide door of the
paper tray.
• Avoid storing the paper with the printed faces
touching each other or in contact with rubber or
plastic products, including vinyl chloride or
plasticizer for an extended period of time; color
changes or deterioration of the printed image may
occur.
• Avoid placing the print paper in a location subject
to high temperatures, high humidity, excessive
dust or direct sunlight.
• When you are going to store partially-used print
paper, store it in its original bag or a similar
container.


