background image

3-197-729-

11

 (1)

 2007 Sony Corporation

Operating Instructions

Before operating this printer, please read
this manual thoroughly and retain it for
future reference.

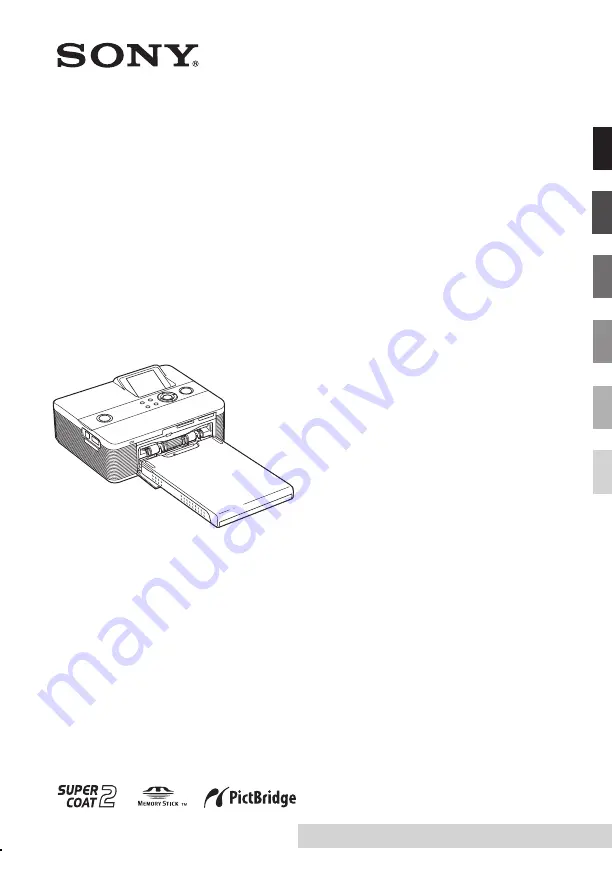
Digital Photo
Printer

DPP-FP60/FP60BT

Please read the supplied "Read This First"

.

Before you begin

Making various printing

Printing from a PictBridge

camera or external device

Printing from a PC

Troubleshooting

Additional information

Содержание DPP-FP60

Страница 1: ...se read this manual thoroughly and retain it for future reference Digital Photo Printer DPP FP60 FP60BT Please read the supplied Read This First Before you begin Making various printing Printing from a PictBridge camera or external device Printing from a PC Troubleshooting Additional information ...

Страница 2: ...ectricity or electromagnetism causes data transfer to discontinue midway fail restart the application or disconnect and connect the communication cable USB etc again Disposal of Old Electrical Electronic Equipment Applicable in the European Union and other European countries with separate collection systems This symbol on the product or on its packaging indicates that this product shall not be tre...

Страница 3: ...s of their respective companies Furthermore and are not mentioned in each case in this manual The raster process of true type fonts is based on the FreeType Team software This software is based in part on the work of the independent JPEG Group Libtiff Copyright 1988 1997 Sam Leffler Copyright 1991 1997 Silicon Graphics Inc Permission to use copy modify distribute and sell this software and its doc...

Страница 4: ...R ANY INCIDENTAL CONSEQUENTIAL OR SPECIAL DAMAGES WHETHER BASED ON TORT CONTACT OR OTHERWISE ARISING OUT OF OR IN CONNECTION WITH THIS MANUAL THE SOFTWARE OR OTHER INFORMATION CONTAINED HEREIN OR THE USE THEREOF By breaking the seal of the envelope of the CD ROM package you accept all the terms and conditions of this agreement If you do not accept these terms and conditions please return this disk...

Страница 5: ...ver 33 Installing the Picture Motion Browser 35 Printing photos from the Picture Motion Browser 37 Printing from a commercially available application software 42 Troubleshooting If trouble occurs 43 If an error message appears 58 If paper jams 61 Cleaning the inside of the printer 61 Additional information Precautions 63 On safety 63 On installation 63 On cleaning 63 On restrictions on duplication...

Страница 6: ...cator Read This First 0 Paper tray compartment door Read This First qa Paper tray compartment Read This First qs SD CARD slot Read This First page 67 qd MEMORY STICK PRO STD DUO slot Read This First page 65 Printer right side panel qf Ink ribbon eject lever Read This First qg Ink ribbon Read This First qh Ink ribbon compartment door Read This First Printer rear panel 1 Ventilation holes 2 DC IN 24...

Страница 7: ...patible files only In case of other file formats only part of file name will be displayed 5 Operation tips 6 Saved date year month day 7 Print quantity While the image is being selected press ENTER to display the print quantity You can set the print quantity up to 20 To increase the print quantity one by one press f repeatedly To reduce the print quantity one by one press F briefly repeatedly To r...

Страница 8: ...an image preview press zoom out When an image is enlarged press repeatedly An image is reduced up to the original scale and then the image list is displayed To display an image preview In the image list press g G f F to move the cursor to the desired image and press zoom in The display changes from the image list to an image preview To display another image preview press g G f F To enlarge an imag...

Страница 9: ...ges stored on a memory card or an external device at one time The printer provides the following three easy printing methods Index printing You can print a list index of all the images contained in a memory card or an external device which allows you to check the contents of the selected media easily The number of split panes on a sheet will be calculated automatically Images are printed with thei...

Страница 10: ...DPOF preset images when you selected DPOF Print an error message will be displayed 4 Press g G to select Yes to start printing or No to cancel printing and then press ENTER When you select Yes printing starts During printing the PRINT indicator flashes and the printing process is displayed To stop printing Press CANCEL When you are printing multiple copies the next printing after the one currently...

Страница 11: ...ting an image Enlarging and reducing an image size 1 Display the Edit menu 2 Press zoom in to enlarge an image or zoom out to reduce the size of it Each time you press the button the image becomes larger or smaller up to 200 up to 60 Note The picture quality of an enlarged image may be deteriorated depending on its size Moving an image 1 Display the Edit menu 2 Press g G to select Move and then pr...

Страница 12: ...play the Edit menu page 11 2 Press g G to select Adjust and then press ENTER The Adjust menu is displayed Adjust icon Adjust menu 3 Press f F to select the desired adjustment tool and press ENTER The adjustment slider appears When Brightness is selected Adjustment slider 4 Move the slider to the desired position to adjust the level Brightness Press G to brighten the picture or g to darken it Tint ...

Страница 13: ...RINT page 14 Correcting the red eye phenomenon You can correct the red eye phenomenon of a subject shot using a flash Note If you perform additional editing such as enlarging reducing the image size rotating or moving an image after the red eye correction adjustment the red eye correction may not take effect Perform the red eye correction after these editorial operations 1 Display the Edit menu pa...

Страница 14: ...nt Press CANCEL in step 5 instead of ENTER The red eye correction adjustment is canceled and the window of step 2 is displayed Tip To print the image previewed press PRINT page 14 Printing an edited image 1 Press PRINT The dialog box to specify the print quantity is displayed 2 Press f F to increase or decrease the print quantity To increase the print quantity one by one press f repeatedly To redu...

Страница 15: ... saving the image do not turn off the printer or remove a memory card from the printer The memory card may be damaged Making a Creative Print With images saved in a memory card or an external device you can make the following prints Menu You can make Layout Print A print with 2 4 9 13 16 split images Calendar Calendars with your favorite images Displaying the Creative Print menu Buttons to be used...

Страница 16: ...ress g G to select Creative Print and then press ENTER The Creative Print menu is displayed To undo the operation midway Press CANCEL The window of the previous step is displayed Depending on the step you cannot undo the operation Tip You can press MENU while making a Creative Print and set part of the Print setup menu items To exit the Creative Print menu Press MENU in the middle of the operation...

Страница 17: ... printer Move the image with g G f F and then press ENTER Each time you press ENTER the image rotates 90 clockwise 7 Press g G to select and press ENTER The selected image is added to the image area When you select a template with multiple images repeat the steps 4 through 7 to select an image for each area Tip To save or print the layout images previewed see page 14 Making a calendar You can make...

Страница 18: ...t the calendar 1 Press g G f F to select the calendar area and press ENTER to display the calendar setting window 2 Press f F to select the following items and then press g G to select an option Item Procedures Start Y M Set the first month and the year starting the calendar Press g G to select the month or year and press f F to set the number Press ENTER Start Day Set the day of the week placed f...

Страница 19: ...ow to specify the way how images are switched is displayed 4 Press f F to select Automatic to switch images automatically or Manual to switch them manually Then press ENTER 5 Press f F to select Execute and press ENTER When Automatic is selected The images in the memory card or an external device are displayed automatically one after another When Manual is selected The image with the cursor in the...

Страница 20: ...fy the starting and ending dates of the files that you want to search for Starting date Ending date Tip To search for images of a specific day enter the same date in both the boxes Searching for an image The Search menu allows you to search a memory card or an external device for an image by image number or date Note You can search for the images saved as DCF files only Buttons to be used in this ...

Страница 21: ...e their print quantity You can easily check the images you selected on the image list If you selected By Folder No the first or last image in the selected folder is displayed Tip To print a searched image press g G f F to select the desired image and then press ENTER to display it in the image preview Press f F to set the print quantity and then press PRINT to start printing Filing images Buttons ...

Страница 22: ...ciated motion or e mail file will be also deleted You cannot delete a protected image with the protect indication or a DPOF preset indication displayed To delete them use your digital camera For the details see the operating instruction of the digital camera Formatting a Memory Stick You can format a Memory Stick 1 Press MENU The menu bar is displayed 2 Press g G to select File operation and then ...

Страница 23: ... menu mode Press MENU again The previous window is displayed 2 Press g G to select Print setup and then press ENTER The Print setup menu is displayed Print setup menu Note Setting items which cannot be selected and changed are displayed in gray 3 Press f F to select the desired setting item and press ENTER The setting window for the selected item is displayed next page 4 Press f F to select the de...

Страница 24: ...he image data is not corrected When printing in PC mode the Auto Fine Print 3 setting with the printer driver has priority over the setting here In the PictBridge mode this setting holds effective Off Prints an image without any corrections Exif Print On Adjusts an image shot by an Exif Print Exif 2 21 compliant digital camera to its optimum picture quality Note The image data is not corrected Off...

Страница 25: ... from 4 to 4 and for S in the range from 7 to 0 R Adjusts the red and blue elements The higher you set the level the more reddish the picture becomes as if it receives red light The lower you set the level the darker the picture becomes as if light blue is added G Adjusts the green and purple elements The higher you set the level the more greenish the picture becomes as if it receives green light ...

Страница 26: ...previous window is displayed 2 Press g G to select Display Printer setup and then press ENTER The Display Printer setup menu is displayed Display Printer setup menu 3 Press f F to select the desired setting item and press ENTER The setting window for the selected item is displayed next page To display the hidden setting items scroll the window with f F Note Setting items which cannot be selected a...

Страница 27: ... file type shooting conditions etc will be displayed Off In an image preview window no image information will be displayed Date Display Order Set the displayed order of the date Year Month and Day from the following Y M D M D Y D M Y LCD Backlight Set the brightness level of the LCD backlight from the following Bright Dark Demonstration Mode On A flash file demonstration to explain the functions o...

Страница 28: ...nnector of the printer When you connect a PictBridge compliant digital camera to the printer Connecting is displayed on the LCD screen of the printer 5 Operate the digital camera to print an image The printer supports the following prints Single image print All images print Index print DPOF print Border Borderless print Date print For notes during printing please read Read This First Camera or oth...

Страница 29: ...oses and product profiles to be used To make the Bluetooth communication possible the devices to be communicated should support the same profile Compatible image file formats to be printed JPEG DCF 2 0 compatible Exif 2 21 compatible JFIF 4 4 4 4 2 2 4 2 0 formats Baseline JPEG TIFF Exif 2 21 compatible BMP 1 4 8 16 24 32 bit Windows format Some image file formats are not compatible Maximum number...

Страница 30: ...u connect the product to the mobile phone Turn off the wireless LAN device in case you should use the product within 10 m from the wireless LAN device It is not guaranteed that this product works with all devices enabled with Bluetooth wireless technology Do not use the DPPA BT1 outsides the area you purchased it Depending on the areas the use of this product may infringe the wave regulations and ...

Страница 31: ...First 3 Press 1 on standby switch to turn on the printer The 1 on standby indicator of the printer lights in yellow green 4 Connect a camera or an external device to the PictBridge connector of the printer Use the USB cable supplied with the digital camera or other external device if necessary Printing in the direct mode is possible Notes If you use a commercially available USB cable please use th...

Страница 32: ...software System requirements To use the supplied printer driver and Picture Motion Browser your PC must meet the following system requirements OS Microsoft Windows Vista 1 Windows XP Professional 2 Windows XP Home Edition Windows 2000 Professional Service Pack 3 or later pre installed 1 Excluding Starter In addition the Picture Motion Browser does not support the 64 bit version 2 The 64 bit versio...

Страница 33: ...er When using the Picture Motion Browser you can view the folders easier than you can when using the Cyber shot Viewer as the registered folders are displayed by group when viewing folders With its improved red eye reduction adjustment and newly added tone curve adjustment the Picture Motion Browser also offers more powerful editorial features You can also use the software to write data into an ex...

Страница 34: ...or future use To continue to install the Picture Motion Browser software follow the procedures from step 2 on page 35 Notes If the installation fails remove the printer from your PC restart your PC and then do the installation procedures from the step 2 After installation the Sony DPP FP60 is not set as the default printer Set the printer you use for each application The supplied CD ROM will be re...

Страница 35: ...rams 12Select Windows Driver Package Sony DPP FP60 70 90 and click Change Remove The confirmation dialog box is displayed 13Click Yes Installing the Picture Motion Browser Follow the procedures below to install the Picture Motion Browser Notes When using the Windows Vista XP 2000 log on to Windows as a Computer administrator user account Be sure to close all running programs before installing the ...

Страница 36: ...restart your PC follow the displayed instructions to restart it 9 When the installation is complete remove the CD ROM from your PC and keep it for future use Notes If the installation fails perform the installation procedures from step 2 again The supplied CD ROM will be required when you uninstall or re install the Picture Motion Browser Keep it in a safe place for possible future use Uninstallin...

Страница 37: ...rowser You can use the Picture Motion Browser to print an image from your PC using P size print paper 1 Start the Picture Motion Browser window using either of the following methods Double click Picture Motion Browser on the Windows desktop Click Start All Programs or Programs with Windows 2000 Sony Picture Utility Picture Motion Browser The Information Tool window is displayed When the Picture Mo...

Страница 38: ...er options 3 Click the folder containing the photos you want to print As an example the sample folder is selected in the following explanation 4 Select the photos that you want to print and click print The Print dialog box is displayed 5 In the Printer drop down list box select Sony DPP FP60 To set the paper orientation or other print options go to step 6 To print skip to step 11 Items Functions P...

Страница 39: ... the ICM Intent settings Leave the option as it is Document Options Advanced Printing Features Select Enabled to turn on advanced printing options such as Page Order If a compatibility problem occurs disable this feature Color Printing Mode To print in colors select True Color 24bpp To print in monochrome select Monochrome For details see the Windows help Items Functions Orientation Select the ori...

Страница 40: ...int in monochrome select Black White Advanced The DPP FP60 Advanced Options dialog box is displayed page 39 For details see step 8 10Click OK The Print dialog box is displayed again 11Click Print Printing starts For the details of the properties of the Picture Motion Browser see the Picture Motion Browser help Note You cannot print a motion picture file or RAW data files Tips To select serial stil...

Страница 41: ...ll be displayed Depending on the number of images it may take some tens of minutes to register images To display the Windows help Click on the upper right on the dialog box and then click the desired item on the screen To stop printing 1 Double click on the printer icon on the taskbar and open the Print dialog box 2 Click the document name that you want to cancel printing of and then click Cancel ...

Страница 42: ...on Some applications however may arrange and print the image with borders within the specified range If this occurs do the following to print an image without borders When you can set print range with an application set an image to be printed fully in the print range For example select Full page photo print or a similar option Orientation setting Depending on the application software you use orien...

Страница 43: ...e format compatible with the DCF Cause Solutions c Connect the AC power cord to an AC outlet securely Read This First Cause Solutions c When a PictBridge camera or a PC is connected to the printer and the printer operates on the PictBridge PC mode no images will be displayed on the window Operate with the PictBridge camera or PC To display the images of a memory card or external device remove the ...

Страница 44: ...ark is displayed again the image is of incompatible file format and you cannot print it with the printer cIf the mark shown on the left is displayed the image is of compatible file format but its thumbnail data or the data itself cannot be opened Select the mark and press ENTER to display its image preview If an image is displayed you can print the image If the same mark is displayed again you can...

Страница 45: ...isplayed on the printer read error cOnce you have selected images in the Printing multiple images procedures you cannot print an image with which the cursor is just placed Press ENTER to select it and specify the print quantity for the image Read This First cThe printer cannot display the images saved in a folder of the 8th or higher hierarchy cWhen you name or rename an image file on your compute...

Страница 46: ... the tray If the sheets exceeds 20 remove the extra sheets Riffle the print paper thoroughly and insert them into the tray Do not bend or fold the print paper before printing which may cause malfunction with the printer cIf an error message is displayed on the screen check the error message cUse print paper designed for the printer If you use incompatible print paper the printer may develop troubl...

Страница 47: ... preview images will not be as good as the primary images Note that if you delete the preview images the data for the primary images may be damaged cWhen the image is displayed as shown on the left it is a small image The printing quality is rough due to this small image size cChange the image size setting of the digital camera you are using cAn enlarged image depending on its image size will be p...

Страница 48: ...e uncompressed unprocessed still image data captured from a digital camera For whether or not a digital camera can capture an image in the RAW file format see the operating instructions of the digital camera cAn AdobeRGB image file that supports the DCF 2 0 will undergo color corrections but an AdobeRGB image file that does not support the DCF 2 0 will be printed in vague colors without color corr...

Страница 49: ...Cause Solutions cBecause of differences in the phosphor method or profiles of a LCD screen please regard the image being displayed on the display as just a reference To adjust picture quality do either of the following Menu Print setup Color Setting page 25 Menu Edit Adjust page 12 The setting takes effect only on the image being displayed cBecause of the differences in the printer s internal proc...

Страница 50: ... eliminate the borders on both sides of a print To print without borders edit and save an image with Borders No setting page 24 cYou can print the whole area of an image by selecting Borders No in the Print setup menu page 24 cDepending on the type of digital camera used the image may be stretched vertically if it has been rotated or processed using your digital camera This is not because of troub...

Страница 51: ...menon by selecting Menu Edit Red eye correction page 13 cSet the size of the adjustment frame to be two to seven times as large as the eye page 13 cRed eye correction may not work properly if other editorial operations such as enlarging reducing the size of rotating or moving an image Perform these editorial operations first and then perform red eye correction Settings Symptom The Borderless Yes N...

Страница 52: ...al device to release the protection and then try saving again cSlide the write protect switch to the write enable position page 66 cDelete unnecessary images page 21 or replace it with a new memory card with sufficient free memory space Save the image again cUse your digital camera or external device to release the protection and try printing again c Release the DPOF preset with your digital camer...

Страница 53: ...nd then turn it on After the motor sound stops try to remove the ink ribbon If this does not solve the problem contact Sony service facilities or your Sony dealer cPaper is jammed See If paper jams page 61 and remove jammed paper from the printer If jammed paper cannot be removed contact the Sony service facilities cThe data size of an image is large and it takes longer to process it for printing ...

Страница 54: ...layed while the printer is in the Edit Creative Print or other menu modes Exit the menu and then connect the cable again cDisconnect the digital camera and the printer and then connect them again Or turn off and then on the printer and the digital camera c Set the USB setting of your camera to the PictBridge mode cConnect the cable again after printing is complete cThe printer has developed an ove...

Страница 55: ...rt home page page 69 Or contact your Sony dealer cFollow the procedures in the operating instructions to install the driver page 33 If an error occurs restart your computer and do the installation procedures again cExit all applications and then install the driver again cDouble click My Computer and then the CD ROM icon in the open window Follow the procedures in the operating instructions to inst...

Страница 56: ...iver cTo install the driver in Windows Vista XP 2000 Professional log onto Windows using an Administrator user account c If there is no trouble displayed on the Windows desktop check the printer s LCD screen If the printer shows trouble do the following 1 Turn off the 1 on standby switch then turn it on again 2 Disconnect the power cable wait for 5 to 10 seconds and then connect the cable again 3 ...

Страница 57: ... printed image from a PC are different from those printed from a memory card Check Cause Solutions c Depending on the application you use the print quantity setting of the application you use may have priority over the setting specified in the printer driver dialog box c Since the process in printing an image from a memory card differs that in printing from a PC the colors may not be exactly ident...

Страница 58: ...your Sony dealer or Sony service facilities Memory cards and external device Meaning Solutions cA memory card or an external device is not inserted into their slot Or the external device is not connected Insert the memory card or an external device Read This First cA memory card or an external device that the printer does not support is inserted Use a compatible memory card or device pages 31 65 t...

Страница 59: ...use a device that does not contain a USB hub function cAn external device might be write protected Release the write protection setting of the device you use A built in memory of a digital camera may be write protected Meaning Solutions cThe Memory Stick is write protected Release the write protection page 66 cThere is no free memory space in the selected memory card or external device Delete unne...

Страница 60: ...not set in the printer The print paper is not set in the paper tray The print paper has run out In either case set the print paper in the tray and set the paper tray into the printer Read This First cThere is no cleaning sheet in the paper tray Insert the cleaning sheet into the paper tray and set the paper tray into the printer cThe print paper and ink ribbon do not match Check the ink ribbon siz...

Страница 61: ...ere is print paper in the tray remove it If paper jams If the print paper jams an error message is displayed and you cannot make printing Please do not remove the paper tray and ink ribbon from the printer and remove the jammed paper In case you removed the paper tray do not re insert the paper tray until the jammed paper is ejected 1 Turn off the power of the printer and then turn it on Please wa...

Страница 62: ...tridge and cleaning sheet together for future cleaning When cleaning ends Set the ink ribbon and print paper into the printer Notes Carry out cleaning when there are white lines or dots on the print When you can obtain proper printing performances cleaning will not improve the printed picture quality Do not place the cleaning sheet on the print paper and carry out cleaning which may cause paper ja...

Страница 63: ...ptor Be sure to use the AC adaptor supplied with the printer Do not use other AC adaptors as this may cause a malfunction Do not use the supplied AC adaptor to other devices Do not use an electrical transformer travel converter as this may cause overheat or a malfunction In case the cord of the AC adaptor is damaged never use it any longer as this may cause danger On moisture condensation If the p...

Страница 64: ...remove the slack Never disassemble the ink ribbon Do not pull out the ribbon from the ink ribbon Do not remove the ink ribbon while printing On print paper The side without the imprinting is the printing surface Inferior print quality may result if the printing surface is contaminated with dust or fingerprints Be careful to avoid touching the printing surface Do not bend the paper or tear it off a...

Страница 65: ... use it early Depending on the storage status color elements of the ink ribbon may deteriorate Sony shall assume no responsibilities for any damage loss or failed printed results that may be caused by use of such ink ribbon Avoid leaving the printing surface of the print paper in contact with a plastic eraser or plastic desk mats that includes vinyl chloride or plasticizer for an extended period o...

Страница 66: ...the Sony web site Do not insert multiple Memory Stick at the same time which may cause trouble with the printer When using a Memory Stick make sure to check correct insertion direction Wrong usage may cause trouble with the printer When using the Memory Stick Micro with the printer always insert it into an M2 adaptor If you insert the Memory Stick Micro into the printer without an M2 adaptor you m...

Страница 67: ...emory card 4 We do not guarantee proper operations for all types of SD memory cards and MMC standard memory cards 1 The printer has been demonstrated as operable with an SD card with a capacity of 2 GB or smaller 2 When you use a miniSD card use a miniSD card adaptor If you insert a miniSD card without the adaptor into a slot of the printer you may not be able to remove it 3 The printer has been d...

Страница 68: ... This First x AC power adaptor AC S2425 Power requirements AC 100V to 240 V 50 60 Hz 1 5A to 0 75 A Rated output voltage DC 24 V 2 2 A Peak 3 7 A 6 5 s Operating temperature 5 C to 35 C 41 F to 95 F Specifications x Printer Printing method Dye sublimation printing Yellow Magenta Cyan 3 pass Resolution 300 H x 300 V dpi Image processing per dot 256 levels processing 8 bits for each Yellow Magenta C...

Страница 69: ...age a used memory card settings of an application and operating conditions 4 When printing from a Memory Stick PRO Duo inserted in the printer s slot 5 When printing via DSC N2 connected by USB cable Time from when the PRINT button on the LCD display of the camera is pressed to when the printing is finished 6 The time for data processing and transferring is excluded 7 Baseline JPEG with 4 4 4 4 2 ...

Страница 70: ...of shooting as each shot is taken The printer utilises the Exif Print data stored in each image file to ensure the printed result matches the original shot as closely as possible 1 1 When the Auto Fine Print 3 is enabled and an image JPEG file is shot by an Exif Print Exif 2 21 compliant digital camera the image is automatically adjusted to its optimum picture quality and printed Mass Storage Syst...

Страница 71: ...nector 28 29 31 Picture Motion Browser 37 Precautions 63 Preview 7 Print paper Notes on use 64 Print quantity 7 14 Print setup 23 Printing Creative Print image 14 Edited image 14 From a Bluetooth device 29 From a PC 32 From a PictBridge camera 28 From an external device 31 Using the Picture Motion Browser 37 Printing range 69 Protect indication 7 R Red eye correction 13 Rotating an image 12 Index ...

Страница 72: ... 7 SD Card Notes on use 67 Types 67 Searching for an image 20 Sepia 13 Setting the print quantity 7 Slideshow 19 Special filter 13 Specifications 68 Switching the screen display 8 System requirement 32 T Troubleshooting 43 U Uninstalling Picture Motion Browser 36 Printer driver 35 USB connector 34 W Write protect switch 66 Z Zoom in 8 Zoom out 8 ...

Отзывы: