background image

67

St

ill

 i

m

a

g

e

 e

d

itin

g

g

Press MENU.

h

Select [OK] with 

B

, then press 

z

.

The 

-

 indicator turns white. The 

selected images are protected.

To exit the Protect function

Select [Cancel] in step 

4

 or select [Exit] in 

step 

8

, then press 

z

.

To cancel individual protection

Select the image to be unprotected with 

v

/

V

/

b

/

B

, then press 

z

 in step 

5

. The 

-


indicator turns gray. Repeat this operation 
for all images that are to be unprotected. 
Press MENU, select [OK], and then press 

z

.

To protect all images in the 
folder

Select [All In This Folder] in step 

4

, and 

press 

z

. Select [On], then press 

z

.

To cancel all protection of all 
images in the folder

Select [All In This Folder] in step 

4

, and 

press 

z

. Select [Off], then press 

z

.

Changing image size

— Resize

Mode switch: 

You can change the image size of a 
recorded image, and save it as a new file.
You can resize to the following sizes:
5M, 3M, 1M, VGA
The original image is retained even after 
resizing.

a

Set the mode switch to 

.

b

Display the image you want to 
resize with 

b

/

B

.

c

Press MENU.

The menu appears.

d

Select  

(Resize) 

with 

b

/

B

then press 

z

.

e

Select the desired size with 

v

/

V

, then press 

z

.

The resized image is recorded in the 
recording folder as the newest file.

To cancel resizing

Select [Cancel] in step 

5

.

You cannot change the size of movies or Multi 
Burst images.

When you change from a small size to a large 
size, the image quality deteriorates.

You cannot resize to an image size of 3:2.

When you resize a 3:2 image, the upper and 
lower black portions will be displayed on the 
image.

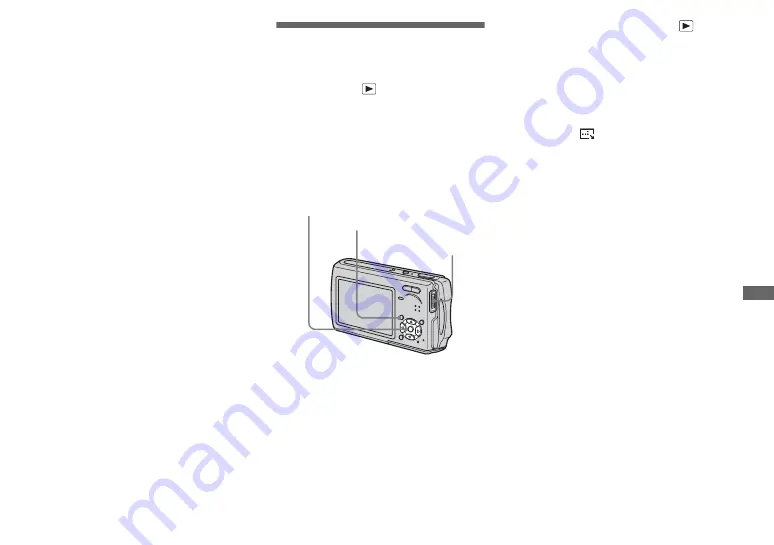
Mode switch

Control button

MENU

Содержание Cyber-Shot DSC-T11

Страница 1: ...ny Corporation Getting started________________________ Shooting still images__________________ Viewing still images___________________ Deleting still images __________________ Before advanced operations_____________ Advanced still image shooting ___________ Advanced still image viewing ____________ Still image editing ______________________ Still image printing _____________________ PictBridge pri...

Страница 2: ...city or electromagnetism causes data transfer to discontinue midway fail restart the application or disconnect and connect the USB cable again Certain countries and regions may regulate disposal of the battery used to power this product Please consult with your local authority WARNING Memory Stick N50 ...

Страница 3: ...ed blue or green in color that constantly appear on the LCD screen and the LCD finder These points are normal in the manufacturing process and do not affect the recording in any way Be careful when placing the camera near a window or outdoors Exposing the LCD screen the finder or the lens to direct sunlight for long periods may cause malfunctions Do not press the LCD screen hardly The screen may b...

Страница 4: ...on Memory Stick and MagicGate Memory Stick are trademarks of Sony Corporation Memory Stick PRO and are trademarks of Sony Corporation MagicGate and are trademarks of Sony Corporation InfoLITHIUM is a trademark of Sony Corporation Microsoft and Windows are registered trademarks of the U S Microsoft Corporation in the United States and other countries Macintosh Mac OS and QuickTime are trademarks or...

Страница 5: ...5 ...

Страница 6: ...g images 39 Formatting a Memory Stick Duo 41 How to setup and operate your camera 43 Changing the menu settings 43 Changing the items on the Setup screen 44 Deciding the still image quality 44 Creating or selecting a folder 45 Creating a new folder 45 Changing the recording folder 46 Choosing an auto focus method 47 Choosing a focus range finder frame AF range finder 47 Choosing a focus operation ...

Страница 7: ... Printing images 71 Printing index images 73 Shooting movies 77 Viewing movies on the LCD screen 78 Deleting movies 79 Editing movies 80 Cutting movies 81 Deleting unnecessary portions of movies 81 Copying images to your computer For Windows users 82 Copying images to your computer For Macintosh users 93 Troubleshooting 95 Warnings and messages 105 Self diagnosis display 107 Number of images that ...

Страница 8: ...Camera 1 2 3 4 5 7 9 8 6 q qa A POWER button 16 B POWER lamp 16 C Shutter button 22 D Multi connector 13 15 E Battery Memory Stick Duo cover F Memory Stick Duo insertion slot 19 G Battery insertion slot 11 H Microphone I Flash 29 J Lens K Self timer lamp 28 AF illuminator 30 114 ...

Страница 9: ...HG lamp orange 12 29 C LCD screen D MENU button 43 110 E Display LCD backlight on off button 25 F Control button Menu on v V b B z 16 Menu off 7 29 28 24 27 G RESET button 95 H Speaker I Mode switch 17 110 To shoot movies To shoot still images To view or edit images J Hook for wrist strap K Image Size Delete button 20 39 L Access lamp 19 ...

Страница 10: ...ted Make sure the camera is securely connected to the USB cradle How to disconnect Grasp the camera and the USB cradle supplied as illustrated and disconnect the camera Be sure to turn off the camera before you connect the camera to the USB cradle or disconnect the camera from the USB cradle Do not disconnect the camera from the USB cradle during the USB connection as the data may be corrupted To ...

Страница 11: ...o cover Make sure the battery pack is firmly inserted all the way then close the cover Battery insertion slot Insert the battery pack so that the v marks on the side of the battery pack face the same direction as the v mark on the battery insertion slot Be careful not to drop the battery pack when installing it Connect the AC Adaptor supplied to the DC IN jack of the USB cradle supplied Connect th...

Страница 12: ...ly connected to the USB cradle The CHG lamp lights up when charging begins and goes off when charging is completed When charging is completed remove the camera from the USB cradle Disconnecting the AC Adaptor from the USB cradle Hold the DC plug itself and the USB cradle as illustrated and disconnect the cable 4 Power cord mains lead 2 To a wall outlet wall socket 1 5 CHG CHG lamp DC plug ...

Страница 13: ...d the camera so that it faces downward and remove the battery pack Be careful not to drop the battery pack when removing it Battery remaining indicator The battery remaining indicator on the upper left side of the LCD screen shows the remaining shooting viewing time and the battery remaining charge The displayed time remaining may not be correct under certain circumstances or conditions Charging t...

Страница 14: ...een Viewing still images2 2 Viewing single images in order at about three second intervals Shooting movies3 3 Shooting movies continuously with the image size 160 The number of images and the battery life that can be recorded viewed are decreased under the following conditions The surrounding temperature is low The flash is used The camera has been turned on and off many times The zoom is used fre...

Страница 15: ...ing the AC Adaptor disconnect it both from the multi connector of the camera and from a wall outlet wall socket The set is not disconnected from the AC power source mains as long as it is connected to the wall outlet wall socket even if the set itself has been turned off 1 AC Adaptor DC plug Multi connector 2 2 To wall outlet wall socket Power cord mains lead 1 Using your camera abroad Power sourc...

Страница 16: ...aring down the battery The auto power off function only operates when the camera is operating using a battery pack The auto power off function also will not operate in the following circumstances When viewing movies When playing back a slide show When a connector is plugged into the USB jack or the A V OUT MONO jack with the camera connected to the USB cradle How to use the control button To chang...

Страница 17: ...Set screen appears on the LCD screen Select the desired date display format with v V on the control button then press z Select from Y M D year month day M D Y month day year or D M Y day month year If the rechargeable button battery page 117 which provides the power for saving the time data ever becomes low the Clock Set screen will appear again When this happens reset the date and time by startin...

Страница 18: ...are set If you selected D M Y in step 3 set the time on a 24 hour cycle Midnight is indicated as 12 00 AM and noon as 12 00 PM Select OK with B on the control button then press z The date and time are entered and the clock starts to keep time To cancel the date and time setting select Cancel with v V b B on the control button then press z 4 2004 1 1 12 00 AM OK Cancel Clock Set D M Y M D Y Y M D 5...

Страница 19: ...ting a Memory Stick Duo make sure of the direction and insert it all the way to the connector If the Memory Stick Duo is not inserted correctly you may not be able to record or display images with the Memory Stick Duo And also it may result in malfunction of both the camera and Memory Stick Duo Close the battery Memory Stick Duo cover To remove a Memory Stick Duo Open the battery Memory Stick Duo ...

Страница 20: ...ee page 21 Select the desired image size with v V on the control button The image size is set When the setting is complete press Image Size so that the Image Size setup disappears from the LCD screen The image size selected here is maintained even when the power is turned off 1 Mode switch 2 VGA 1M 3M 3 2 5M 5M Image Size 3 VGA 1M 3M 3 2 5M 1M Image Size ...

Страница 21: ...see page 67 1 The factory setting is 5M It is the highest image quality on this camera 2 Images are recorded in the same 3 2 aspect ratio as photograph printing paper or postcards etc The number of images that can be saved in a Memory Stick Duo 3 The number of images that can be saved in Fine Standard 4 mode are shown below Units number of images 3 When Mode REC Mode is set to Normal For the numbe...

Страница 22: ...cal distance to a subject is approx 50 cm 19 3 4 inches To shoot subjects at distances closer than this use close ups Macro mode page 27 Press and hold the shutter button halfway down The beep sounds but the image is not yet recorded When the AE AF lock indicator changes from flashing to steadily lit the camera is ready for shooting The LCD screen may be frozen for a split second depending on the ...

Страница 23: ...d to allow easy shooting In addition the image quality is set to Fine page 44 the AF range finder frame is set to Multi AF and the metering mode is set to Multi pages 47 and 52 Only Camera Mode REC Mode and Setup appear in the menu Still image program shooting Program The necessary adjustments are made automatically like still image auto shooting but you can also change the focus and other adjustm...

Страница 24: ... A flashing subject A backlit subject There are two Auto Focus functions AF range finder frame which sets the focus position according to the subject position and size and AF mode which sets the focus start finish timing according to the AF response and the battery consumption See page 47 for details Checking the last image you shot Quick Review Press b 7 on the control button To return to the nor...

Страница 25: ...dicators on t Indicators off t LCD backlight off This setting is maintained even when the power is turned off Indicators on r Histogram on Image information can also be displayed during playback r Indicators off r LCD backlight off VGA 101 96 S AF 60min VGA 101 96 S AF 60min S AF Using the zoom feature Press the zoom button to choose the desired image size for shooting The minimum focal distance t...

Страница 26: ...he or indicators flashes and AF operates with priority on subjects located near the center Smart zoom The image is enlarged with almost no distortion This lets you use smart zoom with the same feeling as optical zoom To set smart zoom set Digital Zoom to Smart on the Setup screen page 114 When you purchase your camera it is set to smart zoom The maximum zoom scale depends on the selected image siz...

Страница 27: ...es from the lens surface When the zoom is set all the way to the T side Approx 25 cm 9 7 8 inches from the lens surface Using Spot AF is recommended page 47 To shoot at even closer distances than close ups Macro recording use Magnifying glass mode page 32 Set the mode switch to and press B on the control button The macro indicator appears on the LCD screen If the menu is currently displayed press ...

Страница 28: ... in a stable location If you place the camera in an unstable location for recording the camera may fall and become damaged or malfunction If the menu is currently displayed press MENU first so that the menu disappears You can also carry out this operation when the mode switch is set to Center the subject in the frame Press and hold the shutter button halfway down then press the shutter button full...

Страница 29: ...prox 0 3 m to 1 5 m 11 7 8 inches to 59 1 8 inches W 0 5 m to 1 5 m 19 3 4 inches to 59 1 8 inches T You can change the brightness of the flash with Flash Level in the menu page 55 You cannot change the brightness of the flash while Camera is set to Auto in the menu When using the Slow synchro or No flash mode the shutter speed becomes slower in dark places Be careful not to allow your hand to sha...

Страница 30: ...es with priority on subjects located near the center The AF illuminator operates only when Camera is set to Auto Program Magnifying glass mode Twilight portrait mode Snow mode or Beach mode in the menu The AF illuminator emits very bright light Although there are no problems with safety directly looking into the AF illuminator emitter at close range is not recommended as you may see residual spots...

Страница 31: ...mage Off Does not superimpose the date and time onto the image After the setting has been completed press MENU first so that the menu disappears and shoot the image If you select Date the date is superimposed onto the image in the order selected in Setting the date and time page 17 This setting is maintained even when the power is turned off 2 Setup t Mode 3 Day Time Date Off 2 1 Camera AF Mode Di...

Страница 32: ...d cannot be used When you press the zoom button the image is enlarged using the digital zoom Twilight mode Allows you to shoot night scenes at far distance without losing the dark atmosphere of the surroundings The shutter speed becomes slower so be careful not to allow your hand to shake while holding the camera The close ups Macro function does not work You cannot shoot in Exposure Bracket Burst...

Страница 33: ... High speed shutter mode Use this mode to shoot moving subjects outdoors or in other bright places The shutter speed becomes faster so images shot in dark places become darker The flash is set to Forced flash or No flash Fireworks mode Fireworks are recorded in all their splendor by setting the focus distance to infinity The shutter speed becomes slower so be careful not to allow your hand to shak...

Страница 34: ...ear images When the shutter speed is 1 6 second or slower in Twilight mode Twilight portrait mode and Fireworks mode the camera automatically enters the NR slow shutter function and NR is indicated next to the shutter speed indicator Press the shutter button fully down r Then the screen turns black r Finally when Processing disappears the image has been recorded When the NR slow shutter function i...

Страница 35: ...panels on the LCD screen For details on viewing movies see page 78 For a detailed description of the indicators see page 124 VGA 60min 10 30PM 2004 1 1 101 0008 8 9 101 BACK NEXT VOLUME SINGLE DISPLAY SINGLE DISPLAY Single single image screen Index nine image screen Index sixteen image screen Viewing single images Set the mode switch to and turn on the power The last image in the selected recordin...

Страница 36: ...to the index nine image screen To display the next previous index screen Press v V b B on the control button to move the yellow frame up down left right Press Index once more The display switches to the index sixteen image screen To display the next previous index screen Press v V b B on the control button to move the yellow frame up down left right To return to the single image screen Press Index...

Страница 37: ...ed to the USB cradle remove the USB cable from the USB cradle Turn off both the camera and the TV before connecting the camera and the TV with the A V connecting cable Connect the camera to the USB cradle Connect the camera as illustrated Make sure the camera is securely connected to the USB cradle Turn on the TV and set the TV Video switch to Video The name and location of this switch may differ ...

Страница 38: ...till camera Check the following lists NTSC system Bahama Islands Bolivia Canada Central America Chile Colombia Ecuador Jamaica Japan Korea Mexico Peru Surinam Taiwan the Philippines the U S A Venezuela etc PAL system Australia Austria Belgium China Czech Republic Denmark Finland Germany Holland Hong Kong Hungary Italy Kuwait Malaysia New Zealand Norway Poland Portugal Singapore Slovak Republic Spa...

Страница 39: ...e page 66 Select Delete with v on the control button then press z The message Access appears and the image has been deleted To continue and delete other images Display the image to be deleted with b B on the control button Then select Delete with v and press z To cancel deleting Select Exit with V on the control button then press z 1 10 30PM 2004 1 1 101 0002 2 9 VGA 60min 101 BACK NEXT VOLUME 2 V...

Страница 40: ... press z Select an image you want to delete with v V b B on the control button then press z The Delete indicator appears on the selected image At this point the image has not yet been deleted Repeat this step for all of the images you want to delete To cancel a selection select the image then press z again so that the indicator disappears 1 Delete Select Exit All In This Folder 2 Delete Select Exi...

Страница 41: ...g a Memory Stick Duo Insert the Memory Stick Duo you want to format into the camera The term formatting means preparing a Memory Stick Duo to record images this process is also called initialization The Memory Stick Duo provided with this camera and those available commercially are already formatted and can be used immediately When you format a Memory Stick Duo be aware that all data including pro...

Страница 42: ...utton then press z Using the AC Adaptor is recommended to prevent the power from turning off partway through formatting Select OK with v on the control button then press z The message Formatting appears When this message disappears the format is complete 2 1 Memory Stick Tool Format Create REC folder Change REC folder OK Cancel 3 Format All data will be erased 60min Ready OK Cancel 4 ...

Страница 43: ...he control button to select the desired setting The selected setting is enlarged and the setting is entered When a v or V mark is displayed next to a setting item This means that there are also other setting items To display these other items scroll the screen with v V To turn off the menu display Press MENU again You cannot select items displayed in gray For a detailed description of the menu ite...

Страница 44: ...cancel the Setup screen Press MENU again To return to the menu from the Setup screen Press b on the control button to return to the position enclosed by the frame in step 3 then press b again For a detailed description of the Setup items see page 114 Deciding the still image quality Mode switch You can select the still image quality from Fine or Standard Before operation Set Camera in the menu to ...

Страница 45: ... capacity is exceeded a new folder is automatically created Creating a new folder a Select Memory Stick Tool with v V b Select Create REC Folder with B v V and OK with B v then press z The creating folder screen appears c Select OK with v then press z A new folder is created with a number one higher than the largest number in the Memory Stick Duo and the folder becomes the recording folder To canc...

Страница 46: ...sired folder with b B and OK with v then press z To cancel changing the recording folder Select Cancel in step 2 or 3 You cannot select the 100MSDCF folder as a recording folder The image is stored in the newly selected folder You cannot move images to a different folder with this camera BACK NEXT Select REC Folder Cancel OK Folder Name 102 2 2 Created No Of Files 2004 102MSDCF 0 1 1 1 05 34AM ...

Страница 47: ...ts you shoot in the desired image composition Spot AF This is useful when focusing on an extremely small subject or a narrow area Use together with the AF lock function lets you shoot in the desired image composition Take care to hold the camera steady so that the subject does not deviate from the range finder frame a Set the mode switch to or b Press MENU The menu appears c Select 9 Focus with b ...

Страница 48: ...st the focus even after AF lock is completed This allows shooting of moving subjects with continued focus The focus is not adjusted after the lock is completed in the following cases and the indicator flashes The camera operates in Monitoring AF mode When shooting in the dark place When shooting with a slow shutter speed The AF range finder frame is set to Center AF Focus adjustment may not be abl...

Страница 49: ... down When you are using AF lock you can capture an image with the correct focus even if the subject is at the edge of the frame You can carry out the AF lock adjustment process before you press the shutter button fully down F2 8 30 VGA 60min FINE 98 101 S AF VGA 60min FINE 97 101 S AF AF range finder frame m AE AF lock indicator Setting the distance to the subject Focus preset Mode switch When sh...

Страница 50: ... when the contrast difference between bright and dark between the subject and the background is extremely large You can select values ranging from 2 0EV to 2 0EV in steps of 1 3EV Before operation When shooting still images set Camera in the menu to other than Auto pages 43 and 110 a Set the mode switch to or b Press MENU The menu appears c Select EV with b B The value of the exposure adjustment i...

Страница 51: ... recording in the digital zoom range When the image size is 3 2 When rotating a still image When viewing Multi Burst images The histogram before recording represents the histogram of the image displayed on the LCD screen at that time A difference occurs in the histogram before and after you press the shutter button When this happens check the histogram while playing back a single image or during Q...

Страница 52: ...nt of the subject you want to shoot To focus on the metering position setting 9 Focus to Center AF is recommended page 47 Before operation When shooting still images set Camera in the menu to other than Auto pages 43 and 110 a Set the mode switch to or b Press MENU The menu appears c Select Metering Mode with b B then select the desired metering mode with v V Shooting three images with the exposur...

Страница 53: ... 3 You cannot use the flash in this mode During shooting in this mode the images are not displayed on the LCD screen Compose the image before pressing the shutter button The focus and white balance are adjusted for the first image and these settings are also used for the other images When the exposure is manually adjusted page 50 the exposure is shifted based on the adjusted brightness The recordi...

Страница 54: ...s 43 and 110 a Set the mode switch to or b Press MENU The menu appears c Select WB White Bal with b B then select the desired setting with v V To reactivate auto adjustment Select Auto in step 3 Under fluorescent lights that flicker the white balance adjustment function may not work correctly even though you select When the flash strobes the manual setting is canceled and the image is recorded in ...

Страница 55: ...ooting conditions Shooting images continuously Burst Mode switch This mode is used for continuous shooting Each time you press and hold the shutter button in this mode the camera records maximum four images in succession Speed priority burst The images are shot with a short interval approx 0 33 second During shooting in this mode the images are not displayed on the LCD screen Compose the image bef...

Страница 56: ... To return to normal mode Select Normal in step 3 You cannot use the flash in this mode When recording with the self timer a series of four images are recorded each time you press the shutter button Shooting in Multi Burst mode Multi Burst Mode switch This mode records 16 frames in succession each time you press the shutter button This is convenient for checking your form in sports for example Bef...

Страница 57: ...t can be recorded in Multi Burst mode see page 108 Shooting still images for e mail E Mail Mode switch In E mail mode a small size image 320 240 that is suitable for e mail transmission is also recorded at the same time as recording a normal still image See page 20 for the normal still image sizes a Set the mode switch to b Press MENU The menu appears c Select Mode REC Mode with b B then select E ...

Страница 58: ...conds To return to normal mode Select Normal in step 3 To view images recorded in Voice mode carry out the same procedure described in Viewing movies on the LCD screen page 78 Do not touch the microphone during shooting images in this mode For the number of images you can record in Voice mode see page 108 Adding special effects Picture Effect Mode switch You can digitally process images to obtain ...

Страница 59: ...t Camera in the menu to other than Auto pages 43 and 110 a Set the mode switch to or b Press MENU The menu appears c Select PFX P Effect with b B then select the desired mode with v V d Shoot the image To cancel Picture Effects Select Off in step 3 Mode switch Control button MENU ...

Страница 60: ...older is displayed the following indicators appear on the LCD screen Moves to the previous folder Moves to the next folder Moves to both the previous and next folders Single screen Index nine image screen Index sixteen image screen When no images are stored in the folder No file in this folder appears You can play back images from a last shot one without selecting the folder Mode switch Control bu...

Страница 61: ... b B e Adjust the image size with playback zoom To cancel playback zoom Press z You cannot use playback zoom for movies and Multi Burst images If you press playback zoom while a non enlarged image is displayed the LCD screen switches to the index screen page 36 You can enlarge the images displayed with the Quick Review function page 24 by performing steps 3 to 5 Mode switch Control button MENU Pre...

Страница 62: ...ges displayed with Quick Review Playing back successive images Slide Show Mode switch You can play back recorded images in order This function is useful for checking your images or for presentations etc a Set the mode switch to b Press MENU The menu appears c Select Slide with b B then press z Set the following items with v V b B Interval 3 sec 5 sec 10 sec 30 sec 1 min Image Folder Plays back all...

Страница 63: ...val setting time is approximate and may vary according to the playback image size Rotating still images Rotate Mode switch You can rotate an image recorded in portrait orientation and display it in landscape orientation a Set the mode switch to and display the image to rotate b Press MENU The menu appears c Select Rotate with b B then press z d Select with v then rotate the image with b B e Select...

Страница 64: ...e by frame This function is used for checking the image When Multi Burst images are played back on a computer or on a camera without the Multi Burst function the 16 frames you shot will be displayed at the same time as part of one image You cannot cut the Multi Burst image Playing back continuously a Set the mode switch to b Select the Multi Burst image with b B The selected Multi Burst image is p...

Страница 65: ...rame is displayed When you keep and press b the frame advances in the reverse direction To return to the normal playback Press z in step 4 The playback starts from the frame displayed on the LCD screen To delete shot images When using this mode you cannot delete only certain frames When you delete images all 16 of the frames are deleted at the same time 1 Display the desired Multi Burst image to d...

Страница 66: ...s select the desired image with b B then press z To cancel the protection Press z again in step 4 or 5 The indicator disappears In index nine image sixteen image mode a Set the mode switch to then press Index to display the index nine image screen Press Index twice to display a sixteen image index screen b Press MENU The menu appears c Select Protect with b B then press z d Select Select with b B ...

Страница 67: ... z Select Off then press z Changing image size Resize Mode switch You can change the image size of a recorded image and save it as a new file You can resize to the following sizes 5M 3M 1M VGA The original image is retained even after resizing a Set the mode switch to b Display the image you want to resize with b B c Press MENU The menu appears d Select Resize with b B then press z e Select the de...

Страница 68: ...mage that is recorded at the same time When you mark images shot in Multi Burst mode all the images are printed on one image divided into 16 frames You cannot set the number of prints In single image mode a Set the mode switch to b Display the image you want to mark with b B c Press MENU The menu appears d Select DPOF with b B then press z The mark is marked on the displayed image e To continue an...

Страница 69: ... In This Folder e Select the image you want to mark with v V b B then press z The green mark appears on the selected image f Repeat step 5 to mark other images g Press MENU h Select OK with B then press z The mark turns white The mark setting is completed To unmark marks Select the images to be unmarked with v V b B in step 5 then press z To unmark all the marks in the folder Select All In This Fo...

Страница 70: ...inter Before operation Set the menu to the Setup screen page 44 a Select Setup 2 with V then select USB Connect with B v V b Select PictBridge with B v then press z The USB mode is set Connecting the camera to the printer Connect the camera to the USB cradle Then connect the USB jack on the USB cradle and the USB jack on the printer with the USB cable supplied Turn on the camera and the printer Th...

Страница 71: ...the JPEG image that was recorded at the same time is printed When an error notification is received from the connected printer the indicator flashes for approximately 5 seconds Check the connected printer In single image mode a Display the image you want to print with b B b Press MENU The menu appears c Select Print with b B then press z d Select This image with v V then press z The print setting ...

Страница 72: ...and time on images Select Date in step 5 then select the date format with b B You can select from Day Time or Date When you chose Date the date will be inserted in the order set in Setting the date and time page 17 This function may not be provided depending on a printer In index nine image sixteen image mode a Press Index to display the index nine image screen Press Index twice to display a sixte...

Страница 73: ...All In This Folder in step 4 then press z To insert the date and time on images Select Date in step 8 then select the date format with b B You can select from Day Time or Date When you chose Date the date will be inserted in the order set in Setting the date and time page 17 This function may not be provided depending on a printer Printing index images Mode switch You can print some images side by...

Страница 74: ...with b B f Select Quantity with v V select the number of sheets laid side by side with b B You can select the number up to 20 You can arrange the specified quantity of an image side by side g Select OK with V B then press z The image is printed Do not disconnect the USB cable while the USB cable disconnected prohibited indicator appears on the LCD screen To cancel printing Select Cancel in step 4 ...

Страница 75: ...enu appears c Select Print with B then press z d Select Select with b B then press z e Select the desired image with v V b B then press z The mark appears on the selected image f Repeat step 5 to print other images g Press MENU h Select Index with v then select On with b B i Select Quantity with v V select the number of sets you want to print with b B You can select the number up to 20 j Select OK...

Страница 76: ... To insert the date and time on images Select Date in step 9 then select the date format with b B You can select from Day Time or Date When you chose Date the date will be inserted in the order set in Setting the date and time page 17 This function may not be provided depending on a printer ...

Страница 77: ...e LCD screen changes as follows Indicators off t LCD backlight off t Indicators on A histogram is not displayed For a detailed description of the indicators see page 123 Shooting close ups Macro Set the mode switch to and follow the procedure on page 27 Using the self timer Set the mode switch to and follow the procedure on page 28 Do not touch the microphone during shooting movies You cannot use ...

Страница 78: ...e or rewind the movie Press b B during playback To return to the normal playback press z Indicators during viewing movies Each time you press the status of the screen changes as follows Indicators off t LCD backlight off t Indicators on A histogram is not displayed For a detailed description of the indicators see page 125 The procedure for viewing movies on a TV is the same as that for viewing sti...

Страница 79: ...vies display the movie you want to delete with b B and repeat step 4 To cancel deletion Select Exit in step 4 or 5 In index nine image sixteen image mode a Set the mode switch to then press Index to display an index nine image screen Press Index twice to display a sixteen image index screen b Press Delete The movie has not yet been deleted at this point c Select Select with b B then press z d Sele...

Страница 80: ...ry Stick Duo capacity is insufficient or when you attach movies to your e mail messages The file numbers assigned when movies are cut The cut movies are assigned new numbers and recorded as the newest files in the selected recording folder The original movie is deleted and that number is skipped Example Cutting a movie numbered 101_0002 Mode switch Control button MENU 1 2 3 A B 101_0002 101_0004 1...

Страница 81: ...z The movie is cut To cancel cutting Select Exit in step 5 or 7 The movie appears on the LCD screen again You cannot cut the following images Still images Movie files not long enough to cut Protected movie files You cannot restore files once you cut them The original movie is deleted when you cut it The cut movies are recorded as the newest files in the selected recording folder Deleting unnecessa...

Страница 82: ...ith Windows XP When connected to a computer only the data in the folder selected by the camera is copied to the computer To select a folder perform the procedure on page 60 Communication with your computer When your computer resumes from the suspend or sleep mode communication between your camera and your computer may not recover at the same time When a USB connector is not provided on your comput...

Страница 83: ...ter t ImageMixer in that order b Click Cyber shot on the model selection screen The installing menu screen appears c Click USB Driver on the installing menu screen The InstallShield Wizard screen appears d Click Next When the Information screen appears click Next The USB driver installation starts When the installation is completed the screen informs you of completion e Click Yes I want to restart...

Страница 84: ...Welcome to the InstallShield Wizard for Image Transfer screen appears This section describes the English screen c Click Next When Licence Agreement screen appears click Yes Read the agreement carefully If you accept the terms of the agreement proceed with the installation The Information screen appears d Click Next e Select the folder to be installed then click Next Select the program folder then ...

Страница 85: ...er You can use the ImageMixer Ver 1 5 for Sony software to copy view and edit images and create video CDs For details see the software s help files a Click ImageMixer on the installing menu screen Select the desired language then click OK The Welcome to the InstallShield Wizard screen appears This section describes the English screen b Follow instructions on each succeeding screen Install ImageMix...

Страница 86: ... USB cable to the USB connector on the rear panel When using Windows XP the AutoPlay wizard automatically appears on the desktop Proceed to page 89 f Connect the camera to the USB cradle and turn on the camera Make sure the camera is securely connected to the USB cradle USB Mode Normal appears on the LCD screen of the camera When a USB connection is established for the first time your computer aut...

Страница 87: ...atically launches and images appear Normally Image Transfer and Date folders are created inside the My Documents folder and all of the image files recorded with the camera are copied into these folders You can change the Image Transfer settings page 88 Windows XP Connect the camera and your computer with the USB cable and the USB cradle Image Transfer starts up automatically and the images are aut...

Страница 88: ...cuments folder When the Removable Disk icon is not shown see page 89 When using Windows XP see page 89 b Double click DCIM then double click the folder which contains the desired images The folder opens c Right click the image then click Copy d Double click the My Documents folder Right click the inside of the folder then click Paste The image files are copied to the My Documents folder When an im...

Страница 89: ... Copy pictures to a folder on my computer using Microsoft Scanner and Camera Wizard then click OK The Scanner and Camera Wizard screen appears b Click Next The images stored on the Memory Stick Duo are displayed c Click the checkbox of images that you do not want to copy to your computer and remove the checkmark then click Next The Picture Name and Destination screen appears d Select a name and de...

Страница 90: ...yed Image file storage destinations and file names Image files recorded with your camera are grouped as folders in the Memory Stick Duo Example For Windows XP users Data in the 100MSDCF or MSSONY folders is for playback only and your camera cannot record images in these folders For more information about the folder see page 45 Folder containing image data recorded using a camera without the folder...

Страница 91: ...ode and its corresponding index image file Folder File name File meaning 101MSDCF up to 999MSDCF DSC0ssss JPG Still image files shot in Normal mode Exposure Bracket mode page 52 Burst mode page 55 Multi Burst mode page 56 Still image files recorded simultaneously in E Mail mode page 57 Voice mode page 58 DSC0ssss JPE Small size image files shot in E Mail mode page 57 DSC0ssss MPG Audio files shot ...

Страница 92: ...uaranteed a Right click the image file then click Rename Change the file name to DSC0ssss Enter a number from 0001 to 9999 for ssss An extension may be displayed depending on the computer settings The extension for still images is JPG and the extension for moving images is MPG Do not change the extension b Copy the file to the Memory Stick Duo folder 1 Right click the image file then click Copy 2 ...

Страница 93: ...hen your computer resumes from the suspend or sleep mode communication between your camera and your computer may not recover at the same time When a USB connector is not provided on your computer When neither a USB connector nor a Memory Stick slot is provided you can copy images using an additional device See the Sony Website for details http www sony net a Connecting your camera to your computer...

Страница 94: ...les for the operation method When images cannot be displayed increase the virtual memory capacity of the computer ImageMixer is not compatible with Mac OS X Image Transfer cannot be used with Macintosh For Mac OS X users If the There is no application available to open the document DSC0ssss JPE screen appears when you click an E mail mode image file make the following setting The screen display ma...

Страница 95: ...a off page 16 p Install the battery pack correctly page 11 The CHG lamp flashes when charging a battery pack The battery pack is not installed correctly The battery pack is discharged The battery pack has malfunctioned p Install the battery pack correctly page 11 p Re insert the AC Adaptor and then charge the battery pack page 11 p Consult your Sony dealer or local authorized Sony service facility...

Страница 96: ...nnected The AC Adaptor has malfunctioned The battery pack is discharged The battery pack is dead page 120 The camera is not properly installed to the USB cradle p Install the battery pack correctly page 11 p Properly connect the AC Adaptor page 15 p Consult your Sony dealer or local authorized Sony service facility p Install a charged battery pack page 11 p Replace the battery pack with a new one ...

Страница 97: ...still images Camera in the menu is set to Magnifying glass mode p Set it to other settings page 32 Digital zoom does not function Digital Zoom is set to Off on the Setup screen The image size is set to 5M or 3 2 only when using the smart zoom You are shooting in Multi Burst mode only when using the smart zoom p Set Digital Zoom to Smart or Precision pages 44 and 114 p Set image size to other setti...

Страница 98: ... Memory Stick Duo p Set it to the recording position page 118 p Set it to page 22 p Set it to page 77 p Insert a Memory Stick PRO Duo pages 77 and 117 p Set the image size to other than 640 Fine The flash does not work The mode switch is not set to The flash is set to No flash When shooting still images Camera in the menu is set to Twilight mode or Fireworks mode Camera in the menu is set to Magni...

Страница 99: ...ra cannot play back image files copied from the hard disk of your computer if the image has been modified The camera is set to USB mode p Set it to page 35 p See page 92 p Finish the USB connection pages 87 and 93 The image appears rough right after playback starts The image may appear rough right after playback starts due to the image processing p This is not a malfunction The image does not appe...

Страница 100: ...n can be prevented by setting the write protect switch of a Memory Stick Duo that has a write protect switch to the LOCK position page 118 The resizing function does not work You cannot resize movies and Multi Burst images You cannot display a print DPOF mark You cannot display print DPOF marks on movies You cannot cut images The movie is not long enough to cut Protected movie cannot be cut Still ...

Страница 101: ... 44 and 115 p Disconnect all equipment other than the keyboard the mouse and the USB cradle from the USB connectors p Connect the camera directly to your computer without passing through a USB hub or other device p Install the USB driver page 83 p Delete the incorrectly recognized device from your computer page 89 then install the USB driver page 83 You cannot copy images The camera is not correct...

Страница 102: ...erting it incorrectly p Insert it from the right side page 19 You cannot record on a Memory Stick Duo You are using a Memory Stick Duo with a write protect switch and the write protect switch on the Memory Stick Duo is set to the LOCK position The Memory Stick Duo is full The image size is set to 640 Fine when recording movies p Set it to the recording position page 118 p Delete unnecessary images...

Страница 103: ... using a model other than this camera or images that have been processed by a computer p Check that the camera and the printer are connected correctly using a USB cable p Turn on the printer See the operating instructions of the printer for details p Disconnect and connect the USB cable again If you cannot print still disconnect the USB cable turn off and on the printer then connect the USB cable ...

Страница 104: ...ra does not work The built in microcomputer is not working properly p Disconnect and then after one minute reconnect all power sources and turn on the camera If this does not work press the RESET button on the lower side of the control button using a fine tipped object then turn on the power again All the settings including date and time are cleared You cannot identify an indicator on the LCD scre...

Страница 105: ...Duo is set to the LOCK position Set it to the recording position page 118 No memory space The capacity of the Memory Stick Duo is insufficient You cannot record images Delete unnecessary images or data pages 39 and 79 Read only memory Your camera cannot record or delete images to this Memory Stick Duo No file in this folder No images have been recorded in this folder Folder error A folder with the...

Страница 106: ... camera is set to PictBridge but it is connected to a device that does not support PictBridge Check the connected device Depending on the circumstances the connection may not be established Disconnect and connect the USB cable again If an error message is indicated on the printer refer to the operating instructions supplied with the printer Printer busy The connected printer is currently printing ...

Страница 107: ...e corrective actions a few times contact your Sony dealer or local authorized Sony service facility Code Cause Corrective action C 32 ss There is trouble with your camera s hardware Turn the power off and on again page 16 C 13 ss The camera cannot read or write data on the Memory Stick Duo Re insert the Memory Stick Duo several times An unformatted Memory Stick Duo is inserted Format the Memory St...

Страница 108: ...9 the 9999 indicator appears on the LCD screen E Mail Units images Voice Units images When the recording time is five seconds Multi Burst Units images 16MB 32MB 64MB 128MB MSX M256 MSX M512 5M 6 11 12 23 25 46 50 94 91 170 186 345 3 2 6 11 12 23 25 46 50 94 91 170 186 345 3M 9 17 20 35 40 71 80 143 145 255 296 518 1M 23 42 47 85 96 171 192 343 340 595 691 1210 VGA 81 162 163 327 328 657 658 1317 1...

Страница 109: ...ated as hours minutes seconds in order from the left Example 1 10 28 t 1 hour 10 minutes 28 seconds 16MB 32MB 64MB 128MB MSX M256 MSX M512 640 Fine 0 02 57 0 06 02 640 Standard 0 00 42 0 01 27 0 02 56 0 05 54 0 10 42 0 21 47 160 0 11 12 0 22 42 0 45 39 1 31 33 2 51 21 5 47 05 ...

Страница 110: ...AF Chooses the auto focus method page 47 or sets the focus preset distance page 49 Metering Mode 1 Spot xMulti Adjusts the exposure to the subject you are shooting page 52 Sets the metering region WB White Bal 1 5 xAuto Sets the white balance page 54 ISO1 400 200 100 xAuto Selects the ISO sensitivity Select a large number when shooting in dark locations or shooting a subject moving at high speed o...

Страница 111: ... Records a Multi Burst series of images while displaying the images on the LCD screen page 55 Records a Multi Burst series of images with a short shooting interval page 55 Records an image using the normal recording mode BRK Bracket Step 3 1 0EV x 0 7EV 0 3EV Sets the exposure compensation value when recording three images with each exposure adjustment value page 52 This setting cannot be made whe...

Страница 112: ...ocus 7 0m 3 0m 1 0m 0 5m Spot AF Center AF xMulti AF Chooses the auto focus method page 47 or sets the focus preset distance page 49 Metering Mode Spot xMulti Adjusts the exposure to the subject you are shooting page 52 Sets the metering region WB White Bal xAuto Sets the white balance page 54 PFX P Effect Solarize Sepia Neg Art xOff Sets the image special effects page 58 ...

Страница 113: ...dge compliant printer page 70 Slide Interval Image Repeat Start Cancel Sets the slide show interval page 62 Only in single image mode x3 sec 5 sec 10 sec 30 sec 1 min Sets the range of the playback images xFolder All Plays back images repeatedly xOn Off Starts the slide show Cancels the slide show Resize 5M 3M 1M VGA Cancel Changes the recorded still image size page 67 Only in single image mode Ro...

Страница 114: ... Reduces the red eye phenomenon when using a flash page 29 AF Illuminator xAuto Off Selects whether to emit an AF assist light in the dark Helps when it is hard to focus on the subject under dark lighting page 30 Auto Review On xOff Selects whether to automatically display the recorded image on the LCD screen immediately after shooting a still image When set to On the recorded image is displayed f...

Страница 115: ...he control button shutter button Turns off the beep shutter sound Language Displays the menu items warnings and messages in selected language 1 A 2 Item Setting Description File Number xSeries Reset Assigns numbers to files in sequence even if the Memory Stick Duo is changed or the recording folder is changed Resets the file numbering and starts from 0001 each time the folder is changed When the r...

Страница 116: ...istened with water then wipe the surface with a dry cloth Do not use the following as this may damage the finish or the casing Thinner Benzine Alcohol Disposable cloth Volatile insecticide Contact with rubber or vinyl for a long time On operating temperature The camera is designed for use between the temperatures of 0 C and 40 C 32 F and 104 F Shooting in extremely cold or hot places that exceed t...

Страница 117: ...use the camera as long as you do not record the date and time Charging method Connect the camera to a wall outlet wall socket using the AC Adaptor or install a charged battery pack and leave the camera for 24 hours or more with the power off The internal rechargeable button battery is located inside the cover in the left side of battery insertion slot of the camera Never remove the rechargeable bu...

Страница 118: ...ed in the following cases When the Memory Stick Duo is removed or the camera is turned off during read or write operation When the Memory Stick Duo is used in locations subject to static electricity or electrical noise We recommend backing up important data Do not press down hard when you write down on the memo area Do not attach a label on the Memory Stick Duo itself nor on a Memory Stick Duo Ada...

Страница 119: ...of your camera The InfoLITHIUM battery pack calculates the power consumption according to the operating conditions of your camera and displays the remaining battery time in minutes Charging the battery pack We recommend charging the battery pack in an ambient temperature of between 10 C to 30 C 50 F to 86 F You may not be able to efficiently charge the battery pack outside of this temperature rang...

Страница 120: ...fective pixels number of camera Approx 5 090 000 pixels Lens Carl Zeiss Vario Tessar 3 zoom lens f 6 7 20 1 mm 38 114 mm when converted to a 35 mm still camera F3 5 4 4 Exposure control Automatic exposure Scene selection 8 modes White balance Automatic Daylight Cloudy Fluorescent Incandescent Flash File format DCF compliant Still images Exif Ver 2 2 JPEG compliant DPOF compatible Audio with still ...

Страница 121: ...ure 20 C to 60 C 4 F to 140 F Dimensions AC LM5 Approx 47 30 80 mm 1 7 8 1 3 16 3 1 4 inches AC LM5A Approx 48 29 81 mm 1 15 16 1 3 16 3 1 4 inches W H D excluding projecting parts Mass AC LM5 Approx 170 g 6 0 oz AC LM5A Approx 160 g 5 6 oz excluding power cord mains lead x NP FT1 battery pack Used battery Lithium ion battery Maximum voltage DC 4 2 V Nominal voltage DC 3 6 V Capacity 2 4 Wh 680 mA...

Страница 122: ... 60min SOLARIZE 1 2 3 4 5 6 7 8 9 q qa qs qd qf qg qh qj ql qk w wa ws wd wf wh wg J Spot metering cross hair 52 K NR slow shutter indicator 34 Shutter speed indicator L Multi Burst interval indicator 56 Image size indicator 20 M Image quality indicator 44 N Recording folder indicator 45 O Remaining number of recordable images indicator 21 P Remaining Memory Stick capacity indicator Q Self diagnos...

Страница 123: ...e indicator 47 Focus preset value 49 I AF range finder frame 47 J Image size indicator 77 K Recording time maximum recordable time indicator 109 L Recording folder indicator 45 M Remaining Memory Stick capacity indicator N Self diagnosis display 107 O Self timer indicator 28 P Menu Guide menu 43 Q EV level indicator 50 101 00 28 25 00 00 00 STD 6 4 0 C 32 00 SOLARIZE STBY 60min 1 2 3 5 9 qa qs qd ...

Страница 124: ...necting indicator 70 J Playback folder indicator 60 K Image number L Number of images recorded in selected folder M Remaining Memory Stick capacity indicator N Self diagnosis display 107 O Metering mode indicator 52 Flash indicator White balance indicator 54 P Shutter speed indicator Aperture value indicator Q Histogram indicator 51 R Recording date of the playback image 30 Menu Guide menu 43 C 32...

Страница 125: ...ator 60 G Image number H Recording folder indicator 45 I Number of images recorded in selected folder J Remaining Memory Stick capacity indicator K Counter 78 L Playback image 78 M Playback bar 78 N Menu Guide menu 43 Pressing MENU switches the menu on off 00 00 12 8 8 101 160 101 VOL 60min DPOF qf 5 1 2 3 4 qa 0 6 7 8 9 qs qd Page numbers in parentheses indicate the location of additional importa...

Страница 126: ...ting movies 81 D DC plug 11 15 Deleting movies 79 Deleting still images 39 Digital zoom 26 Divide 81 DPOF 68 E E mail 57 Enlarging an image 61 EV adjustment 50 Exposure Bracket 52 F File names 90 File storage destinations 90 Flash 29 Flash Level 55 Focus preset 49 Folder 45 60 Format 41 Framing priority burst 55 H Histogram 51 I Image quality 44 Image size 20 21 108 Image Transfer 84 ImageMixer 85...

Страница 127: ... display 25 122 Self diagnosis display 107 Self timer 28 Setting date and time 17 115 Setup 44 114 Sharpness 111 Shooting movies 77 Shooting still images 22 Single AF 48 Single screen 35 Slide show 62 Smart Zoom 26 Speed priority burst 55 Spot AF 47 Spot metering 52 Superimposing date and time 30 114 T Trimming 62 TV color system 38 U USB connection 70 86 115 USB cradle 10 USB driver 83 93 USB jac...

Страница 128: ...ted in Japan Printed on 100 recycled paper using VOC Volatile Organic Compound free vegetable oil based ink Additional information on this product and answers to frequently asked questions can be found at our Customer Support Website ...

Отзывы: