– 10 –
WAX2
RM-ED005
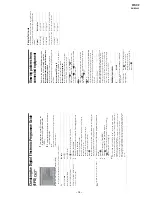
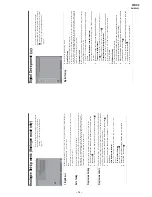
Checking the Digital Electronic Programme Guide
(EPG)
*
1
In digital mode, p
ress
to display the
Digital Electronic Programme Guide
(EPG)
.
2
Perform the desired operation, as shown in
the following table.
Note
Progr
amme
inf
or
mation w
ill only be displaye
d
if the T
V
st
ation is
transmitti
ng it.
*
Plea
se note
tha
t this function may not
be
available in some
countri
es.
Dig
ita
l
El
ect
ron
ic
Pr
og
ra
m
m
e
Gu
id
e
(EP
G)
T
o
Do this
T
u
rn
of
f t
he
EPG
P
ress
.
Mo
v
e through th
e
EPG
P
ress
F
/
f
/
G
/
g
.
W
atch
a c
u
rren
t
programme
P
ress
while
the c
u
rren
t
programme is selected.
Sort the
pr
ogramm
e inform
ation by
cate
gory –
Cate
gory list
1
Press the
b
lue
b
u
tton
.
2
Press
F
/
f
/
G
/
g
to select a categor
y. The categor
y
name
is
disp
la
y
ed on the side
.
Th
e
ca
tego
ries availab
le in
clu
de:
“Fav
ourite”:
Contains
all the channe
ls tha
t have been stored
in th
e
Fav
ourite list (page
17).
“All Categories”:
Contain
s all available
chan
nels
.
“News”: Co
ntains all news
cha
nnels
.
3
Press .
Th
e Digital Ele
ctroni
c Programme
Guide (EPG)
n
ow only disp
lay
s the
current p
ro
g
ramm
es
from the
cate
gory selected.
Set
a programme
to be re
corded –
T
imer
RE
C
1
Press
F
/
f
/
G
/
g
to select the
future
prog
ra
m
m
e y
o
u w
a
nt
to
record.
2
Press .
3
Press
F
/
f
to
select “Timer
RE
C”
.
4
Press
to
set the TV and
y
our
VCR
tim
e
rs
.
A
symbol
app
ears by that
programme’s
information. The
indicato
r on the
TV
(front) ligh
ts up.
Notes
•
Y
ou ca
n
se
t VCR timer
rec
or
ding on
the
TV
only for
Smar
tlink
compatible
V
C
R
s.
If your
VCR is
not Smartlink
compatible, a
message
will
be
displayed to
remin
d you
to
s
et yo
ur VCR
timer.
•
O
nce
a
reco
rd
in
g
has
be
gu
n,
y
o
u
c
an
switch
th
e T
V
to
sta
n
d
b
y
m
o
de
, b
u
t d
o
no
t
sw
itch of
f
the TV completely
or
the recording may
be canc
elled.
•
If an
ag
e
restri
ctio
n fo
r prog
ram
mes has
been select
ed, a message asking fo
r pin
co
de w
ill appe
ar
on the sc
reen. For
more
de
tails r
efer
to “
Par
ental L
o
ck” on
page
32.
Continued
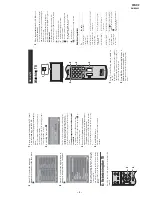
Viewing pictures from
connected equipment
Switch on the
con
nected
e
qui
pmen
t, then
per
form
o
n
e
o
f the follo
win
g op
era
tion.
For equ
ipme
nt connected
to the scart sockets using a
fully-wired
21-pin
scart lead
Start
playback on the
connected
equipment.
The
picture from
the connect
ed equipment appear
s on
the screen.
For a
n auto-tun
ed VCR
(page
6)
In analogue mode, pr
ess PROG +/-, or
the n
u
mber
butto
ns, to select the
v
ideo
channel.
For o
ther
conn
ected equ
ipme
nt
Press
/
repeated
ly until
the co
rrect input
symbol (see
below) app
ears on the
scr
een.
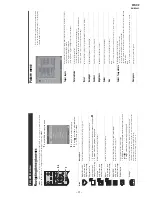
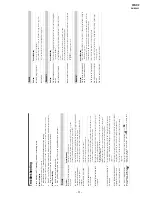
Additional operati
ons
Using the
Tools menu
Pres
s TOOLS to display
th
e following options
when
viewing pictures
from
co
nnected equipment other
than PC.
A
V
1/
A
V
1,
A
V
2/
A
V
2:
Aud
io/video
or RGB
in
put signal through
the
scart
so
ck
et
/
1
or 2.
app
ears
only if an RGB
so
urce h
as bee
n co
nnected.
AV
3
:
Compon
ent input
signal throug
h
the Y
, P
B
/C
B
, P
R
/C
R
so
ck
et
s
/
3
, and audi
o inp
ut sig
nal
t
hrough t
he
L, R sock
ets
/
3
.
AV
4
:
Digital au
dio
/video
sign
al
is inpu
t
throug
h the HDMI IN
4
sock
et. Audio
inpu
t sign
al is analogu
e
on
ly if the
equipment has been conn
ecte
d
using th
e
D
V
I and audio
out sock
et.
AV
5
/
AV
5
:
V
id
eo
inpu
t sign
al through th
e
video
sock
et
5
, and
audio inpu
t
sign
al
thro
ugh
th
e L (MONO),
R a
udio
so
ck
ets
5.
a
ppears o
n
ly
if the
equipment is
connected to
the S vid
eo
soc
k
et
5
instead of
the
vid
eo
soc
k
et
5, and S vi
deo inp
ut sig
nal
i
s
input
throu
gh
the S vi
deo so
ck
et
5.
T
o
Do
th
is
R
eturn t
o
the
norm
al
TV op
eration
Press D
IGIT
AL
or A
N
ALOG.
A
cce
ss
the
Inp
ut
si
gna
l in
de
x tab
le
Press
to ac
cess th
e Input signal
inde
x
t
abl
e. (Then
, onl
y in
ana
log
ue mode
,
press
g
.) T
o
select an input source, press
F
/
f
,
then press
.
Options
D
escription
P
o
wer Sa
ving
S
ee page
26.
P
icture Mode
S
ee page
20.
S
ound Mode
S
ee page
22.
Auto Clock Set
(in
an
alo
gue m
o
de
o
nly
)
Al
lo
ws
y
ou
to swi
tc
h to di
gi
tal
mo
de
a
n
d
ob
ta
in
t
h
e ti
me
.
S
leep
T
imer
S
ee
page
25.
i
V
o
lume
S
ee
page
23.
Содержание BRAVIA KDL-32V2000
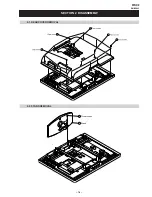
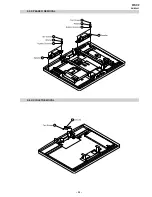
Страница 19: ... 18 WAX2 RM ED005 SECTION 2 DISASSEMBLY 2 2 STAND REMOVAL 2 1 REAR COVER REMOVAL ...
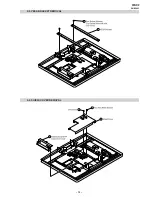
Страница 20: ... 19 WAX2 RM ED005 2 3 VESA BRACKET REMOVAL 2 4 SHIELD COVER REMOVAL ...
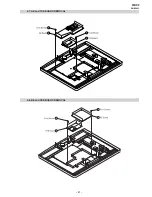
Страница 21: ... 20 WAX2 RM ED005 2 5 SPEAKER REMOVAL 2 6 AC INLET REMOVAL ...
Страница 22: ... 21 WAX2 RM ED005 2 7 AE and TUE BOARD REMOVAL 2 8 BE and FEE BOARD REMOVAL ...
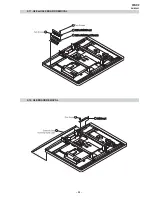
Страница 23: ... 22 WAX2 RM ED005 2 9 G1 or G2 BOARD REMOVAL 2 10 H1E BOARD REMOVAL ...
Страница 25: ... 24 WAX2 RM ED005 2 13 SHIELD BASE REMOVAL 2 14 LCD PANEL REMOVAL ...
Страница 40: ...A B C D E F G H I J K L M N 1 2 3 4 5 6 7 8 9 10 11 O 39 AE Printed Wiring Board Conductor Side B ...
Страница 100: ...9 927 532 01 Sony Corporation Sony UK Service Promotions Dept English 06DP7100 1 Printed in U K 2006 04 ...

