– 9 –
WAX2
RM-ED005
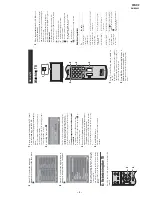
3
Press
F
/
f
to select the language
displayed on the menu
screens, then press
.
4
Press
F
/
f
to select the country/region in
which you will
operate the TV, then press
.
If
the
coun
try/r
egion in which
you
want to use the
TV does not app
ear in the list,
select “-”
instead of
a country/region.
The message confirming the TV start auto-tuning
appears on the scr
een, then go to “6:
Auto-tun
ing
the
T
V
”.
6: Auto-tuning the TV
The TV will
now search for and
st
ore
all available TV
channels.
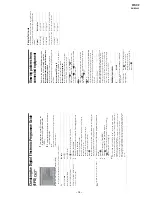
1
Before
you start auto-tuning
the TV,
insert
a pre-recorded tape into the VCR
connected to the TV
(page
4) and start play
back.
The video
channel
will be located and stored
on
th
e TV during au
to-tu
ning.
If n
o
VC
R is conn
ec
ted
to th
e TV, thi
s
proce
dure
is not req
uired. Go
to
step 2.
2
Select “OK”, then press
.
T
h
e TV st
art
s sea
rchi
ng f
o
r
all
a
v
ai
lab
le digi
ta
l
channels, followed
by
all
available analogue
channels. This may
take
some time,
please be
patient and
d
o
no
t press
any buttons
on th
e TV or
remote.
If
a
message appears
for you to confir
m the aerial
connections
No
digital or
analogue channels were
found.
Check
all
the aerial connections
and pr
ess
to
start auto-tuning again.
3
When the Programme Sorting menu
appears on the screen, follow the steps of
“Programme Sorting” (page
28).
If
you do no
t wish to change the order in
which
the
analogue
channels are
stored on
the TV,
go to step
4.
4
Press MEN
U to exit.
The TV has now
tu
ned in all the
available
channels.
4
2
Watching TV
1
Press
1
on the
TV (top side) to switch on
the TV.
When
the TV is in
standby mode (the
1
(standby)
indicator on
th
e
TV (
front)
is
red)
,
press
"/1
on
th
e rem
ote
t
o
swit
ch on the
T
V
.
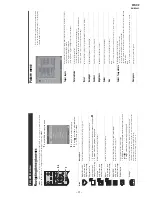
2
Press DIGITAL to switch to digital mode o
r
ANALOG to switch to analogue mode.
The ch
annels
avai
lable
vary depending on the
mode.
3
Press the number buttons or PRO
G +/- to
select a TV channel.
To select
channel
numbers 10
an
d above using
th
e
number
buttons,
enter
th
e
se
con
d and third
dig
its
wit
hin two se
con
ds.
To select
a
digital channel using
th
e
Digital
Electro
nic Programme Guide
(EPG)
, see
page
15.
In
di
gita
l m
ode
An information ban
ner app
ear
s briefly
. The
following
icons may
be indicated
on the
ban
ner.
Addi
tional operations
Watching TV
3
1
2
2
3
:R
ad
io
s
er
v
ic
e
:
S
cram
b
led
/Su
bscription se
rv
ice
:
M
u
ltiple audio la
nguages a
v
ailable
:
S
ubt
it
le
s a
v
ail
abl
e
:
S
ubt
it
le
s a
v
ail
abl
e fo
r t
h
e hearin
g
im
pai
re
d
:
R
ecommended
minimum age for
current
pr
ogram
m
e (fr
om
4 t
o
18 years)
:
P
arental Lo
ck
:
C
urrent
prog
ra
m
m
e is being recorded
T
o
Do this
T
u
rn of
f the
TV
temporarily
(Stand
by mod
e)
Press
"/
1
.
T
u
rn on th
e
TV
from Sta
ndby mode
with
out sound
Press
%
. Press
2
+/-
to
set t
h
e
v
o
lume l
ev
el.
T
u
rn of
f the
TV
com
pl
etely
Press
1
on
t
he
TV (t
op
sid
e).
Adjust the
v
o
lu
m
e
Press
2
+ (increase)/
-
(decrease).
Mute the
sound
Press
%
. Press
ag
ain to resto
re.
Access th
e
P
ro
g
ramm
e inde
x
ta
bl
e (i
n anal
ogue
mod
e on
ly)
P
ress
.
T
o select a
n an
alog
ue
ch
annel, press
F
/
f
, then
press
.
T
o
access th
e
Inpu
t sig
nal inde
x
table,
see
page
18.
Continued
Содержание BRAVIA KDL-32V2000
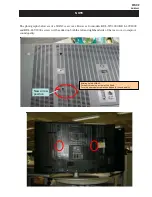
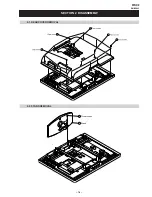
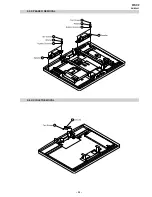
Страница 19: ... 18 WAX2 RM ED005 SECTION 2 DISASSEMBLY 2 2 STAND REMOVAL 2 1 REAR COVER REMOVAL ...
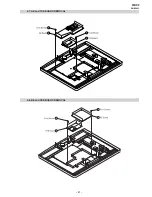
Страница 20: ... 19 WAX2 RM ED005 2 3 VESA BRACKET REMOVAL 2 4 SHIELD COVER REMOVAL ...
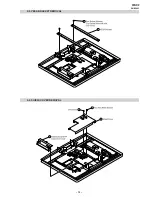
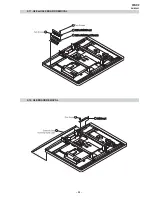
Страница 21: ... 20 WAX2 RM ED005 2 5 SPEAKER REMOVAL 2 6 AC INLET REMOVAL ...
Страница 22: ... 21 WAX2 RM ED005 2 7 AE and TUE BOARD REMOVAL 2 8 BE and FEE BOARD REMOVAL ...
Страница 23: ... 22 WAX2 RM ED005 2 9 G1 or G2 BOARD REMOVAL 2 10 H1E BOARD REMOVAL ...
Страница 25: ... 24 WAX2 RM ED005 2 13 SHIELD BASE REMOVAL 2 14 LCD PANEL REMOVAL ...
Страница 40: ...A B C D E F G H I J K L M N 1 2 3 4 5 6 7 8 9 10 11 O 39 AE Printed Wiring Board Conductor Side B ...
Страница 100: ...9 927 532 01 Sony Corporation Sony UK Service Promotions Dept English 06DP7100 1 Printed in U K 2006 04 ...

