SECTION 3 - INSTALLATION
Page S3-26
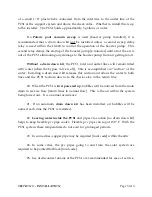
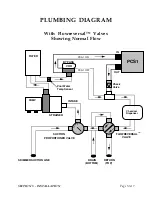
Q. Connect the flexible pvc pipe unions to the PCS1 manifolds.
1. Inlet pipe goes to the top of the coil.
2. Outlet pipe goes to the bottom of the coil.
CAUTION
:
Do not over tighten or ÒmuscleÓ pvc unions as they may crack.
Do not attempt to use the system with a cracked union [redo it].
N O T E :
All of the plumbing should now be completed!
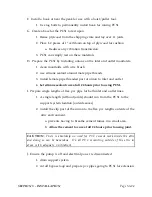
R. Finish reframing the access opening.
1. hinges may be used if desired and convenient to the access method
2. use rubber sealing tape around access edges to protect the vapor
barrier [generally a winter moisture issue in freezing climates].
3. hinge opening so that door lowers down from ceiling: not into attic
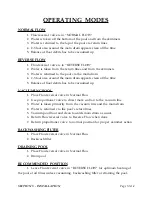
S. Test outlet in attic to ensure power is proper and ground is intact.
1. Keep filter pump unplugged or turned off for these initial attic tests.
2. place LX220 in
ON
[manual override] to test power.
a. observe operation of bypass valve
1. will water be routed correctly when pump is energized?
3. plug PCS1 into outlet and observe that fan turns on.
NOTE
: a properly wired solar controller will turn the PCS1 on when
ON
[manual override] is selected and off when the controller is turned
OFF
. In
AUTO
, the temperature sensor in the attic must be 8
°
F higher
than the pool temperature sensor and it will depend upon the position
of the temperature thermostat on the LX220.
T. Turn off the solar controller and observe that the bypass valve rotates off.
1. become familiar with the bypass valveÕs on & off positions.
a. on means water is routed to the PCS1 which is on.
b. off means water bypasses the PCS1 which is off.
NOTE:
ÒOffÓ on the valve handle indicates that the port pointed to is off.
Содержание PCS1
Страница 7: ...SECTION 1 SYSTEM ARRIVAL Page S1 1 SECTION ONE SYSTEM ARRIVAL...
Страница 22: ...SECTION 2 HEATING DATA Page S2 1 SECTION TWO HEATING DATA...
Страница 28: ...BTUS Vs GPM BTUS Vs T SECTION 2 HEATING DATA Page S2 7...
Страница 34: ...SECTION 3 INSTALLATION Page S3 1 SECTION THREE INSTALLATION...
Страница 65: ...Attic Installation Photos SECTION 3 INSTALLATION Page S3 31...
Страница 66: ...Attic Installation Photos SECTION 3 INSTALLATION Page S3 32...
Страница 79: ...SECTION 3 INSTALLATION Page S3 45 STEP THREE AUTOMATING The PCS1 With Compool s LX220 Solar Controller...
Страница 88: ...SECTION 4 SERVICE Page S4 1 SECTION FOUR SERVICE...
Страница 99: ...Common Questions Page 1 of 10 COMMON QUESTIONS...
Страница 109: ...Dictionary of Terms Page 1 of 4 DICTIONARY OF TERMS...
Страница 113: ...Site Survey Page 1 of 4 SITE SURVEY...
Страница 116: ...Site Survey Page 4 of 4 Sketch Form...


