SECTION 3 - INSTALLATION
Page S3-13
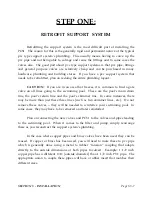
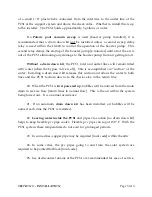
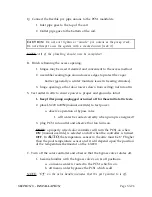
of a small 1/4Ó plastic tube connected from the inlet line to the outlet line of the
PCS1 at the support system and above the check valve. Whether to install this is up
to the installer. The PCS1 holds approximately 5 gallons of water.
If a
Polaris pool vacuum sweep
is used [booster pump installed], it is
recommended that a drain down kit not be installed unless a second sweep delay
relay is used within the LX220 to control the operation of the booster pump. This
second relay delays the startup of the booster pump [4 minutes] until all of the air is
out of the PCS1 eliminating any damage to the booster pump from air getting into it.
Without a drain down kit
, the PCS1, inlet and outlet lines will remain filled
with water [when the bypass valve is off]. This is accomplished via ÒsuctionÓ of the
water. Installing a drain down kit releases this suction and allows the water in both
lines and the PCS1 to drain down via the check valve in the return line.
20. When the PCS1 is
first powered up
, bubbles will be noticed from the main
drain in reverse flow [return lines in normal flow]. This is the air within the system
being forced out. It is a normal occurrence.
21. If an automatic
drain down kit
has been installed, air bubbles will be
noticed each time the PCS1 is restarted.
22.
Leaving water inside the PCS1
and pipes via suction [no drain down kit]
helps to keep flexible pvc pipe cooler. Flexible pvc pipe can sag at 150
°
F. With the
PCS1 system, these temperatures do not exist for prolonged periods.
23. In some cities, copper pipe may be required [local code] within the attic.
24. In some cities, the pvc pipes going to and from the solar system are
required to be painted flat black [local code].
25. Use of disconnect unions at the PCS1 are recommended for ease of service.
Содержание PCS1
Страница 7: ...SECTION 1 SYSTEM ARRIVAL Page S1 1 SECTION ONE SYSTEM ARRIVAL...
Страница 22: ...SECTION 2 HEATING DATA Page S2 1 SECTION TWO HEATING DATA...
Страница 28: ...BTUS Vs GPM BTUS Vs T SECTION 2 HEATING DATA Page S2 7...
Страница 34: ...SECTION 3 INSTALLATION Page S3 1 SECTION THREE INSTALLATION...
Страница 65: ...Attic Installation Photos SECTION 3 INSTALLATION Page S3 31...
Страница 66: ...Attic Installation Photos SECTION 3 INSTALLATION Page S3 32...
Страница 79: ...SECTION 3 INSTALLATION Page S3 45 STEP THREE AUTOMATING The PCS1 With Compool s LX220 Solar Controller...
Страница 88: ...SECTION 4 SERVICE Page S4 1 SECTION FOUR SERVICE...
Страница 99: ...Common Questions Page 1 of 10 COMMON QUESTIONS...
Страница 109: ...Dictionary of Terms Page 1 of 4 DICTIONARY OF TERMS...
Страница 113: ...Site Survey Page 1 of 4 SITE SURVEY...
Страница 116: ...Site Survey Page 4 of 4 Sketch Form...


