


Socionext Inc.
SynQuacer E-Series Assembly Instructions
http: //www.socionext.com/
16/32
Copyright 2018
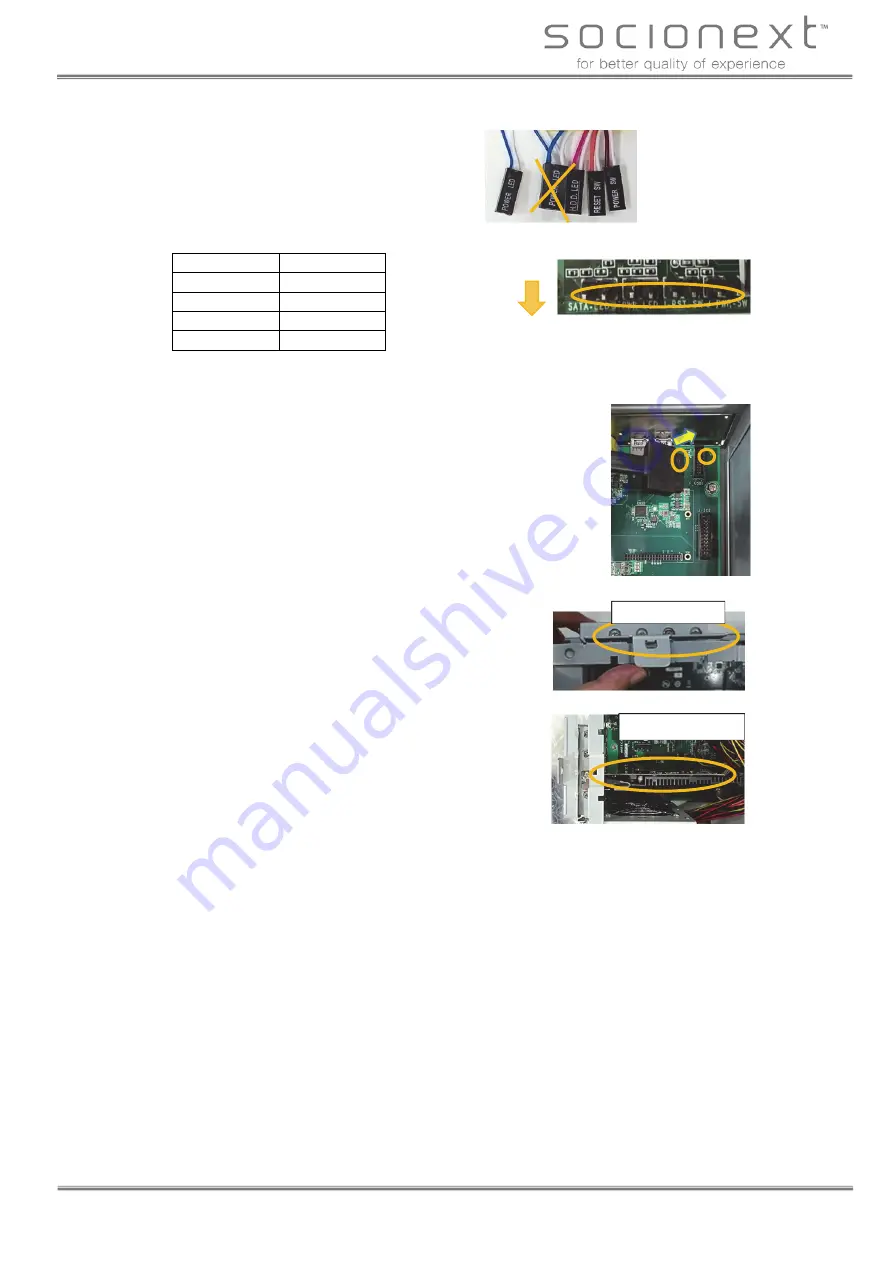
3. The front cable connectors have markings that
show their connection type.
Use the POWER LED (for 2-pin), HDD LED,
RESET SW and POWER SW connectors.
Insert each connector into the pins as follows.
Connector
Pin
HDD LED
SATA-LED
POWER LED
PWR-LED
RESET SW
J-RST-SW
POWER SW
J-PWR-SW
Insert with the markings facing down. Use caution, as these connectors can be inserted the
wrong way.
4. Connecting the front cable (USB)
There are two types of USB front cables, but
only the black cable (USB3) will be used.
The connector has tabs and is designed so that
it cannot be inserted in the wrong direction, so
line up the tabs.
This is plugged into the blue USB port on the
front cable side.
5. Installing the graphics card
Release the holding tab on the expansion slot
bracket with your finger.
Loosen the inch screw to remove the expansion
slot bracket, and insert the graphics card into the
expansion slot.
Make sure that the card is inserted all the way into
the expansion slot.
Last, replace and tighten the inch screw, and move
the holding tab on the expansion slot bracket back
to its original position.
(The expansion slot bracket should be kept for
future use.)
Bracket holding tab
Graphics card


