Scope / Multimeter
Operation and Controls
25
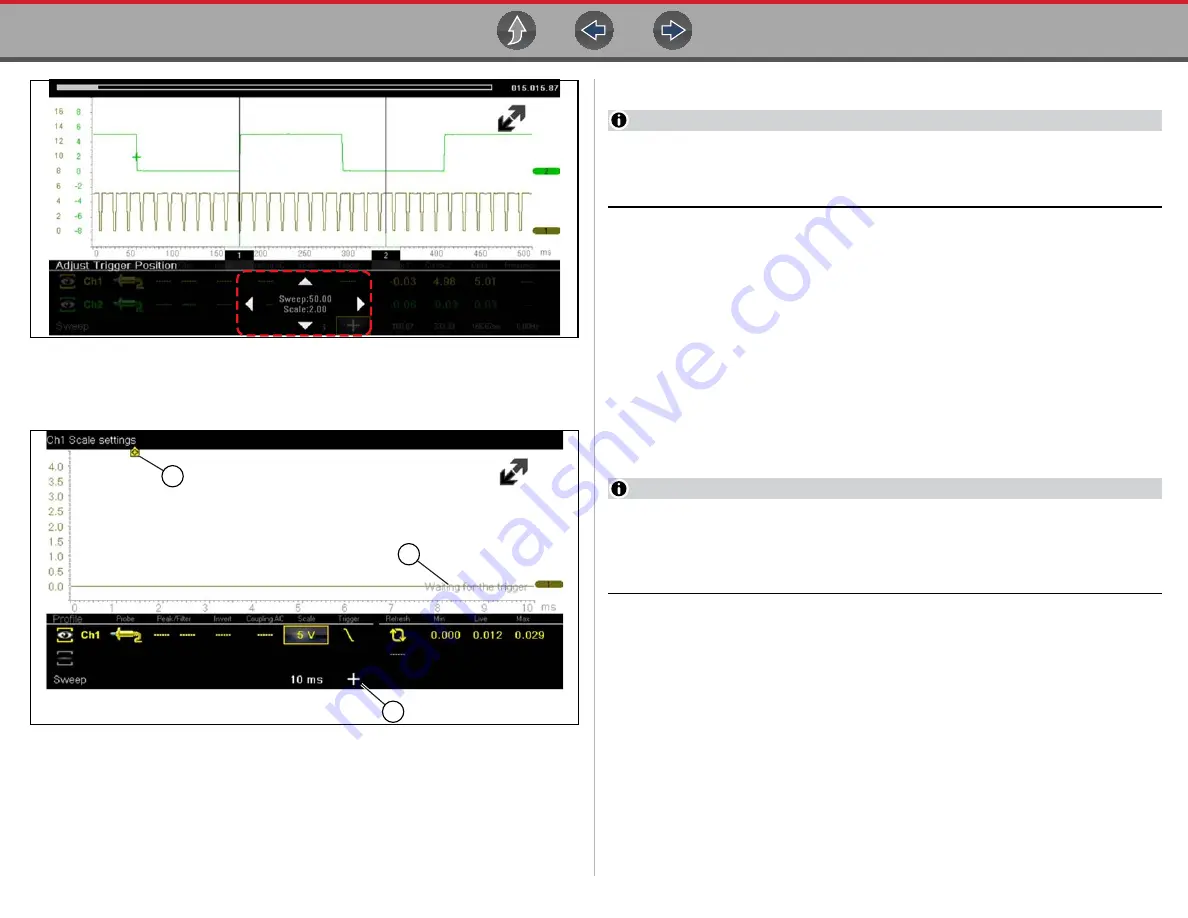
1— Trigger Marker
2— Trigger Position Control Panel
Figure 3-21
Trigger marker and position controls
1— Trigger Marker (out of range symbol)
2— Waiting for Trigger Message
3— Trigger Position Control Icon
Figure 3-22
Trigger Auto/Manual Mode (Optional Setting)
NOTE
The Auto and Manual Trigger modes allow you to set the criteria used to
display signals on the screen. To change the trigger mode, the trigger must be
set on one of the channels.
In both Auto and Manual Trigger mode the screen is updated when the signal
crosses the trigger point in the selected direction (rising or falling), however:
•
Auto Trigger
—(default mode)
–
when Auto Trigger is on, even if the signal does not cross the trigger point,
the screen automatically updates after a short period (allowing you to see the
waveform). When this occurs, the message "Waiting for the trigger"
is displayed on the screen. The trigger point can then be set to
optimize viewing.
•
Manual Trigger
–
when Manual Trigger is on, if the signal does not cross the trigger point the
screen will not update. This allows you to capture intermittent events, as the
screen only updates when the signal meets your trigger selection.
NOTE
When using Manual Trigger, it may be easier to initially set the trigger point
using Auto Trigger, as the screen will update regardless if the signal crosses
the trigger point. Once the trigger point is set, then switch to Manual Trigger
mode.
z
Selecting Trigger Auto/Manual Mode:
1.
From the Control Panel (on the test meter screen), turn the trigger on for the
desired channel.
2.
Select the
Settings
icon from the toolbar.
3.
Select
Settings > Configure Scope / Meter > Trigger Mode
from the menu
selections.
4.
Select either
Auto Trigger
or
Manual Trigger
.
5.
Select
Back
or press the
N/X
button to navigate back to the test meter screen.
1
3
2
Содержание Vantage Legend
Страница 1: ...User Manual ZEETM345A Rev A Start BC ...


