SMC Networks EZ Connect Vision SMCWIPCAM-PZ Скачать руководство пользователя страница 35

33 

„


Port Numbers 

-


HTTP Port:

 The default HTTP port is 

80

-


RTSP Port: 

Configure the transmission of streaming data within the 

network. The default RTSP (Real Time Streaming Protocol) port is 

554

NOTE: 

If the camera is behind an NAT router of firewall, the suggested to be used is from 1024 

to 65535.


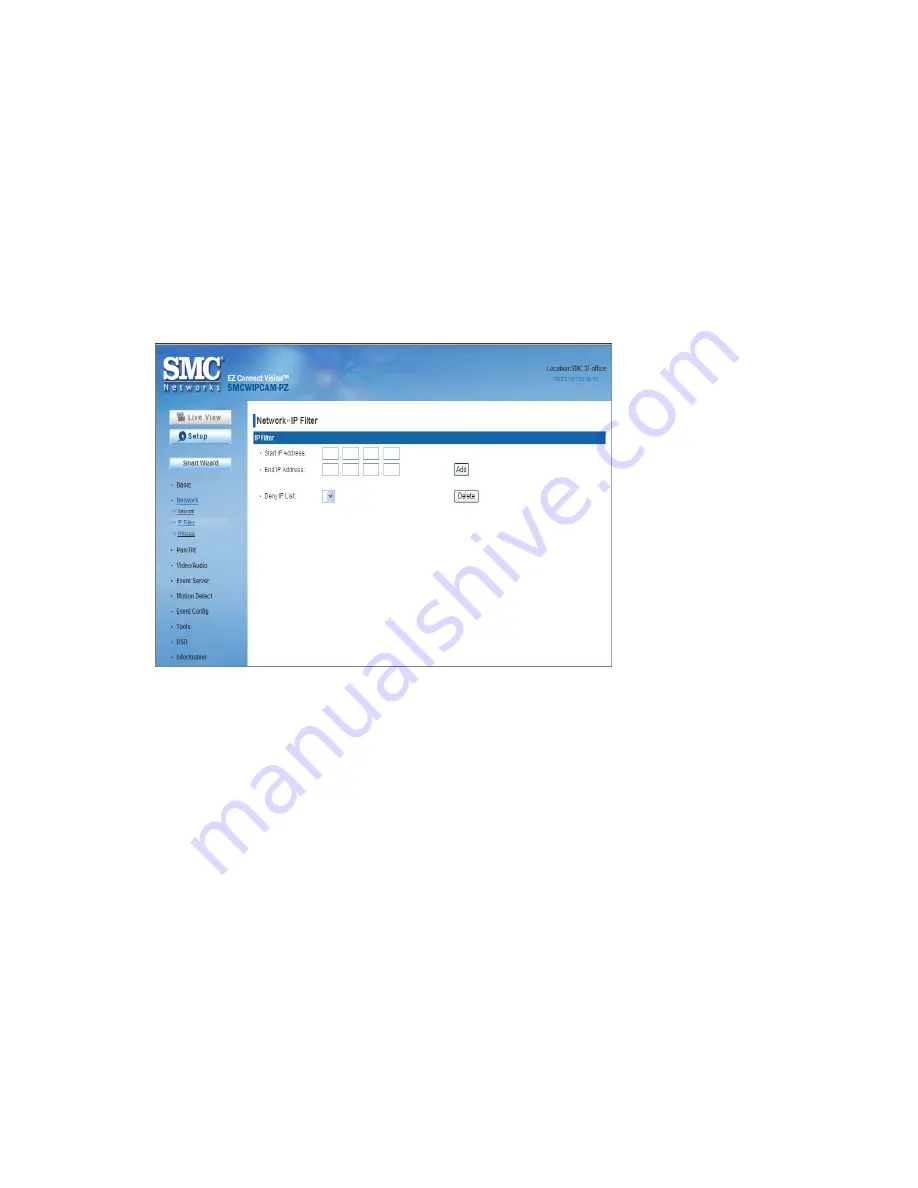
Network >> IP Filter 

The IP Filter setting allows the administrator of the camera to limit the users 
within a certain range of IP addresses to access the camera. 


„


Start/End IP Address 

Assign a range of IP addresses that are not allowed to access the camera by 
entering the Start IP address and End IP address. When you are finished, 
click 

Add

 to save the range setting. You can repeat the action to assign 

multiple ranges for the camera. 

For example, when you enter 192.168.0.50 in Start IP Address and 
192.168.0.80 in End IP Address, the user whose IP address located within 
192.168.0.50 ~ 192.168.0.80 will not be allowed to access the camera. 

„


Deny IP List 

The list displays the range setting(s) of IP addresses that are not allowed to 
access the camera. To clear the setting, select a range of IP addresses from 
the list and click 

Delete


Network >> Wireless Setting 

The camera supports WLAN while you use the wireless network. Select the 

Enable

 option to enable this feature. 

Содержание EZ Connect Vision SMCWIPCAM-PZ

Страница 1: ...EZ Connect N Draft 11n Wireless USB2 0 Adapter SMCWIPCAM PZ EZ Connect Vision Wireless Pan Tilt Zoom IP Camera...

Страница 2: ...license is granted by implication or otherwise under any patent or patent rights of SMC SMC reserves the right to change specifications at any time without notice Copyright 2009 by SMC Networks Inc 20...

Страница 3: ...nd Product Registration To register SMC products and to review the detailed warranty statement please refer to the Support Section of the SMC Website at http www smc com SMC Networks Inc 20 Mason Irvi...

Страница 4: ...tlet on a circuit different from that to which the receiver is connected Consult the dealer or an experienced radio TV technician for help This device complies with Part 15 of the FCC Rules Operation...

Страница 5: ...is 50 ohms To reduce potential radio interference to other users the antenna type and its gain should be so chosen that the EIRP is not more than required for successful communication EC Declaration...

Страница 6: ...r outdoor restrictions and license requirements for each European Community country as described in this document This device may be operated indoors or outdoors in all countries of European Community...

Страница 7: ...claration de conformit officielle peut tre trouv e sur notre site internet http www smc com dans la rubrique Produits Italian Con la presente SMC Networks dichiara che questo Radio LAN device conforme...

Страница 8: ...SMC Network izjavlja da je naprava Radio LAN skladna z bistvenimi zahtevami in drugimi ustreznimi predpisi direktive 1999 5 ES Za uradno izjavo o skladnosti ES glejte razdelek za ustrezni izdelek na s...

Страница 9: ...anemark finalnde France Allemagne Italie Luxembourg Pays Bas Norv ge Espagne Su de Suisse Royaume Uni Portugal Gr ce Irelande Icelande Des conditions sont appliqu es certains pays pour l utilisation e...

Страница 10: ...en na trh V souladu s l 6 odst 4 sm rnice 1999 5 ES o r diov ch za zen ch a telekomunika n ch koncov ch za zen ch byly uv dom ny tyto lensk zem ES nebo ESVO Belgie D nsko Finsko Francie Irsko Island I...

Страница 11: ...nali consentiti Contattare l Autorit normativa locale del proprio Paese o SMC Networks per informazioni dettagliate sulle limitazioni correnti per l utilizzo in esterni Latvian ier ce ir 2 4 GHz bezva...

Страница 12: ...gorsz gok kaptak rtes t st Ausztria Belgium D nia Finnorsz g Franciaorsz g N metorsz g Olaszorsz g Luxemburg Hollandia Norv gia Spanyolorsz g Sv dorsz g Sv jc Egyes lt Kir lys g Portug lia G r gorsz g...

Страница 13: ...tie v interi roch dom cnost a kancel ri vo v etk ch lensk ch t toch ES a EZVO ktor m bol ozn men z mer uvies zariadenie na trh V s lade s l 6 odst 4 smernice 1999 5 ES o r diovom zariaden a koncov ch...

Страница 14: ...d rs privat og kontorbruk i alle underrettede EF og EFTA medlemsstater I overensstemmelse med artikkel 6 4 i R TTE direktivet 1999 5 EF har f lgende EF EFTA medlemsstater blitt underrettet sterrike Be...

Страница 15: ...l 3 external power adapters approved suitable for used in North America equipment installation having an output voltage rating of 12V DC and output current ratings of 1 5A or equivalent The external A...

Страница 16: ...essing The Camera 22 3 1 Using IPFinder 22 3 2 Accessing to the Camera 22 3 3 Configuring the IP Address of the PC 25 Chapter 4 Configuring The Camera 26 4 1 Using the Web Configuration 26 4 2 Using S...

Страница 17: ...PC This guide provides you with the instructions and illustrations on how to use your camera which includes Chapter 1 Introduction describes the features of the camera You will also know the componen...

Страница 18: ...ng contact the authorized dealer of your locale 1 2 Getting to Know Your Camera Lens Assembly Power LED indicates the camera is powered on with the steady amber light Light Sensor is used to trigger o...

Страница 19: ...he on site voice In addition you can connect an external speaker to the camera to speak through the camera Day Night Surveillance Supported The seven Infrared LEDs around the standard lens assembly en...

Страница 20: ...nals to a variety of external alarm devices You can connect a special featured device and then configure the settings and control the device from the GPIO Trigger window of Web Configuration Remote Co...

Страница 21: ...icrosoft Windows 2000 XP Vista CPU Intel Pentium III 800MHz or above RAM 512MB Resolution 800x600 or above User Interface Microsoft Internet Explorer 6 0 or above Apple Safari 2 or above Mozilla Firef...

Страница 22: ...2 Connecting the Camera to LAN WLAN Use the provided Ethernet cable to connect the camera to your local area network LAN When you connect the AC power adapter the camera is powered on automatically Yo...

Страница 23: ...th WLAN settings 2 3 Applications of the Camera The camera can be used in multiple applications including Monitor local and remote places and objects via Internet or Intranet Capture still images and...

Страница 24: ...nect your camera to the network or the PC directly 2 Since the default configuration of the camera is DHCP mode enabled you are recommended to launch IPFinder to search the IP address that is assigned...

Страница 25: ...d functions including Camera Information Displays the camera s location and the current date time The information can be modified in the Web Configuration Live View Image Displays the real time image...

Страница 26: ...Right Up Down Home buttons allow you to move the camera lens position Clicking the Home button will move the camera lens to the assigned home position z Auto Patrol button controls the camera to autom...

Страница 27: ...omputer When you connect the camera to your computer directly to proceed with configuration of the camera you need to set up the IP addresses to be in the same segment for the two devices to communica...

Страница 28: ...Web Configuration The Web Configuration will start from the Basic page 4 2 Using Smart Wizard The camera s Smart Wizard lets you configure your camera easily and quickly The wizard will guide you thr...

Страница 29: ...Email Settings Enter the name for the camera and place Enter the administrator password Select the IP setting according to your network DHCP Static IP or PPPoE Enter the required information to be ab...

Страница 30: ...your camera When you confirm the settings click Apply to finish the wizard and reboot the camera Otherwise click Prev to go back to the previous step s and change the settings or click Cancel to end...

Страница 31: ...Camera Name Location Date Time and User management Basic System Basic Camera Name Enter a descriptive name for the camera Location Enter a descriptive name for the location used by the camera Indicati...

Страница 32: ...d access to the camera s Web Configuration you are strongly recommend to change the default administrator password Type the administrator password twice to set and confirm the password General User Us...

Страница 33: ...main page of the Web Configuration while accessing the camera Only the Administrator is allowed to configure the camera through the Web Configuration 4 4 Network Settings The Network menu contains th...

Страница 34: ...o you Therefore when you select PPPoE as your connecting type you have to set up the email or DDNS configuration in advance DDNS Setting With the Dynamic DNS feature you can assign a fixed host and do...

Страница 35: ...access the camera by entering the Start IP address and End IP address When you are finished click Add to save the range setting You can repeat the action to assign multiple ranges for the camera For e...

Страница 36: ...access point set a SSID for the camera to correspond with the access point s ESS ID To connect the camera to an Ad Hoc wireless workgroup set the same wireless channel and SSID to match with the compu...

Страница 37: ...a within the wireless network Format Once you enable the Encryption feature you need to determine the encryption format by selecting ASCII or HEX ASCII format causes each character you type to be inte...

Страница 38: ...ft Right button Tilt Steps Set the changing range 1 20 degrees when you click the Up Down button Auto Patrol Stay Time Set the stay time 1 999 seconds of each preset positions when the camera is patro...

Страница 39: ...Select the Horizontal option to mirror the image horizontally Select the Vertical option to mirror the image vertically Light Frequency Select the proper frequency according to the camera s location...

Страница 40: ...ge quality from five levels Lowest Low Medium High and Highest Frame Rate Select Auto or a proper setting depending on your network status NOTE The camera supports both MPEG4 and MJPEG compression MJP...

Страница 41: ...enable the camera s external speaker function so that the connected speaker can play the sound and voice through the camera Volume Set the speaker s volume 4 7 Event Server Configuration The Event Ser...

Страница 42: ...into the FTP server Directory Path Enter the destination folder for uploading the images For example Test Passive Mode Select the Enable option to enable passive mode FTP Upload with Select upload to...

Страница 43: ...er who will receive the email NOTE Due to the network environment the camera may not sens number of images that you set Event Server Setting Network Storage Samba Server Address Enter the IP address o...

Страница 44: ...area select Window 1 or 2 from the pull down list and then select Enable When the detecting area is enabled you can use the mouse to move the detecting area and change the area coverage Name Assign a...

Страница 45: ...ime Per Event Limit the retention time of the GPIO Trigger Out function Event Configuration Arrange Schedule Profile This sub menu displays the scheduled profile s To customize the profile click Add a...

Страница 46: ...ble option to enable the motion detect trigger function of the camera so that you can set Trigger Out function or send captured images within the detecting area to the FTP server email receiver Networ...

Страница 47: ...as 5 seconds recorded file becomes a non stop video clip because the camera will record a 10 second video clip every 5 seconds Event Configuration GPIO Trigger Select the Enable option to enable the G...

Страница 48: ...ation will be retained after rebooting Configuration You can save your camera configuration as a backup file on your computer Whenever you want to resume the original settings you can restore them by...

Страница 49: ...k Dismount from this item USB Information Display the Total space and Free space of the USB device USB Setting When Disk Full Select Stop Recording or Recycle Delete Oldest Folder of File when the sto...

Страница 50: ...ion menu displays the current configuration and events log of the camera Device Info Display the Basic Video Audio Network and Wireless settings of the camera System Log The Logs table displays the ev...

Страница 51: ...0 Ohm open circuit voltage 240V AC or 350V DC maximum LEDs Power LED amber Link LED green System Hardware Processor ARM9 base RAM 32MB SDRAM ROM 8MB NOR Flash Power DC 12V 1 5A output Communication LA...

Страница 52: ...ction event triggering alarm notification via e mail and a variety of external control functions The GPIO connectors are located on the rear panel of the camera which provide the interface of connecti...

Страница 53: ...the software or if you modify it For example if you distribute copies of such a program whether gratis or for a fee you must give the recipients all the rights that you have You must make sure that t...

Страница 54: ...in part contains or is derived from the Program or any part thereof to be licensed as a whole at no charge to all third parties under the terms of this License c If the modified program normally read...

Страница 55: ...nel and so on of the operating system on which the executable runs unless that component itself accompanies the executable If distribution of executable or object code is made by offering access to co...

Страница 56: ...nd a licensee cannot impose that choice This section is intended to make thoroughly clear what is believed to be a consequence of the rest of this License 8 If the distribution and or use of the Progr...

Страница 57: ...LOSSES SUSTAINED BY YOU OR THIRD PARTIES OR A FAILURE OF THE PROGRAM TO OPERATE WITH ANY OTHER PROGRAMS EVEN IF SUCH HOLDER OR OTHER PARTY HAS BEEN ADVISED OF THE POSSIBILITY OF SUCH DAMAGES END OF T...

Страница 58: ...ts of the General Public License Of course the commands you use maybe called something other than show w and show c they could even be mouse clicks or menu items whatever suits your program You should...

Страница 59: ...SMCWIPCAM PZ...

Отзывы: