CAT-601S Auto Transmission Cleaner and Fluid Exchanger User’s Manua
l
10
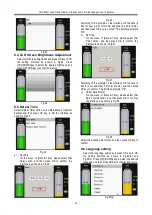
Fig.21
Fig.22
Fig.23
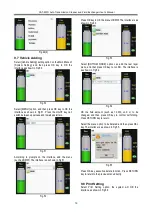
The system starts to drain the used fluid. You can wait for
finish, as well as you can press RETURN key to stop the
operation and return to the previous menu. As shown in
Fig.24
Fig.24
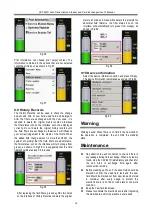
The interface prompts: Emptying OK! After the testing is
passed, please press OK key to perform ATF Change while
displaying progress bar and the waveforms for the change
of new/used fluid. As shown in Fig.25.
Fig.25
After ATF Change finished, the screen will display the
amount of the new fluid changed, the amount of the used
fluid changed, and the error between them, while printing
out the amount of the new fluid which has been changed.
Press RETURN key to return to the previous menu.
1) Check the fluid level inside transmission. If the level
is not enough, supplying fluid is required. Refer to
the section of Adjust fluid level for the detailed
operation.
2) Disconnect the unit and resume the hoses of the
transmission.
3) Start the engine and check if there is oil leakage in
the on-vehicle pipelines.
Note:
Switch each gear when exchanging. The time of
each shift should stay about half minute, which
depends on actual situation, the ATF inside fluid
control pipeline can be exchanged.
To ensure the exchange quality, the quantity of
new fluid inside the unit should be 2L~3L more
than that of the fluid required by automatic
transmission.
Do not add new fluid from the new tank during
the running period of exchange. Otherwise, the
operation will result in inequality amount. If
there must be added the new fluid, fill after this
exchange process is completed!
6. Adjusting fluid level
6.1 Increase fluid amount
When the fluid in transmission is not enough, supply it
with the desired amount of fluid. Select this operation.
1) OK the menu of Adjust fluid level, select “Filling”, it
indicates that the fluid is being filled into the
transmission. The maximum of the adjustment is the
fluid amount inside new tank. The interface is as
shown in Fig.26.


