32
Configuring the SMART Hub SE240
5.
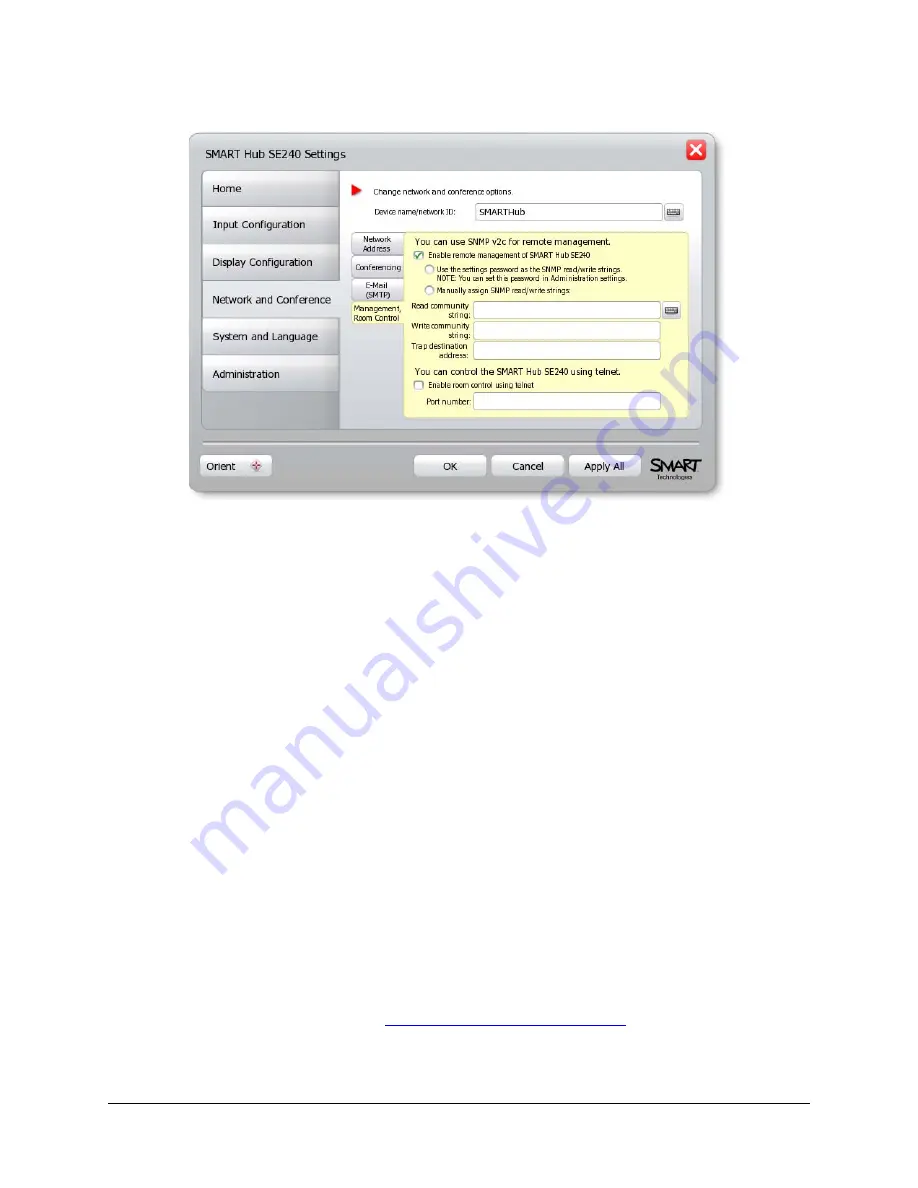
Press
Management, Room Control
.
6.
Select the
Enable remote management of SMART Hub SE240
check box to enable the
SNMP settings of the SMART Hub SE240.
7.
Select the
Use the settings password as the SNMP read/write strings
option to use the
general settings password for the SNMP read/write strings.
OR
Select the
Manually assign SNMP read/write strings
option, and then enter the appropriate
information (as supplied by your network administrator) in the following boxes to manually
assign the SNMP read/write strings:
–
Read community string
–
Write community string
NOTE:
In SNMP, community strings are text strings that act as passwords. Get requests are
only valid if their community strings match the value in the
Read community string
box, and
set requests are only valid if their community strings match the value in the
Write community string
box.
8.
In the
Trap destination address
box, type the IP address to which the SMART Hub SE240
should send traps (as supplied by your network administrator).
NOTE:
Traps are unsolicited, asynchronous events that devices such as the SMART Hub
SE240 generate to indicate status changes.
9.
Press
Apply All
.
You’ve configured the SNMP settings of the SMART Hub SE240.
NOTE:
To fully utilize the SNMP features, download the SMART Hub SE240’s Management
Information Base (MIB) files from
www.smarttech.com/SE240firmware
. SNMP management
software uses MIB files to interpret the devices that it monitors.
Содержание SE240
Страница 1: ...Installation and User s Guide SMART Hub SE240 ...
Страница 4: ...ii Important Information ...
Страница 10: ...4 About the SMART Hub SE240 ...
Страница 20: ...14 Installing the SMART Hub SE240 ...
Страница 50: ...44 Configuring the SMART Hub SE240 ...
Страница 90: ...84 Troubleshooting the SMART Hub SE240 ...
Страница 92: ...86 Regulatory Compliance ...
Страница 99: ......


