


-11-
Setting Lock Mode
Lock Mode allows the door to be locked with a magnetic
(hold) or pulse lock for added security. The controller re
-
leases the lock momentarily before the door commences
an open cycle (Factory Default = Pulse).
1.
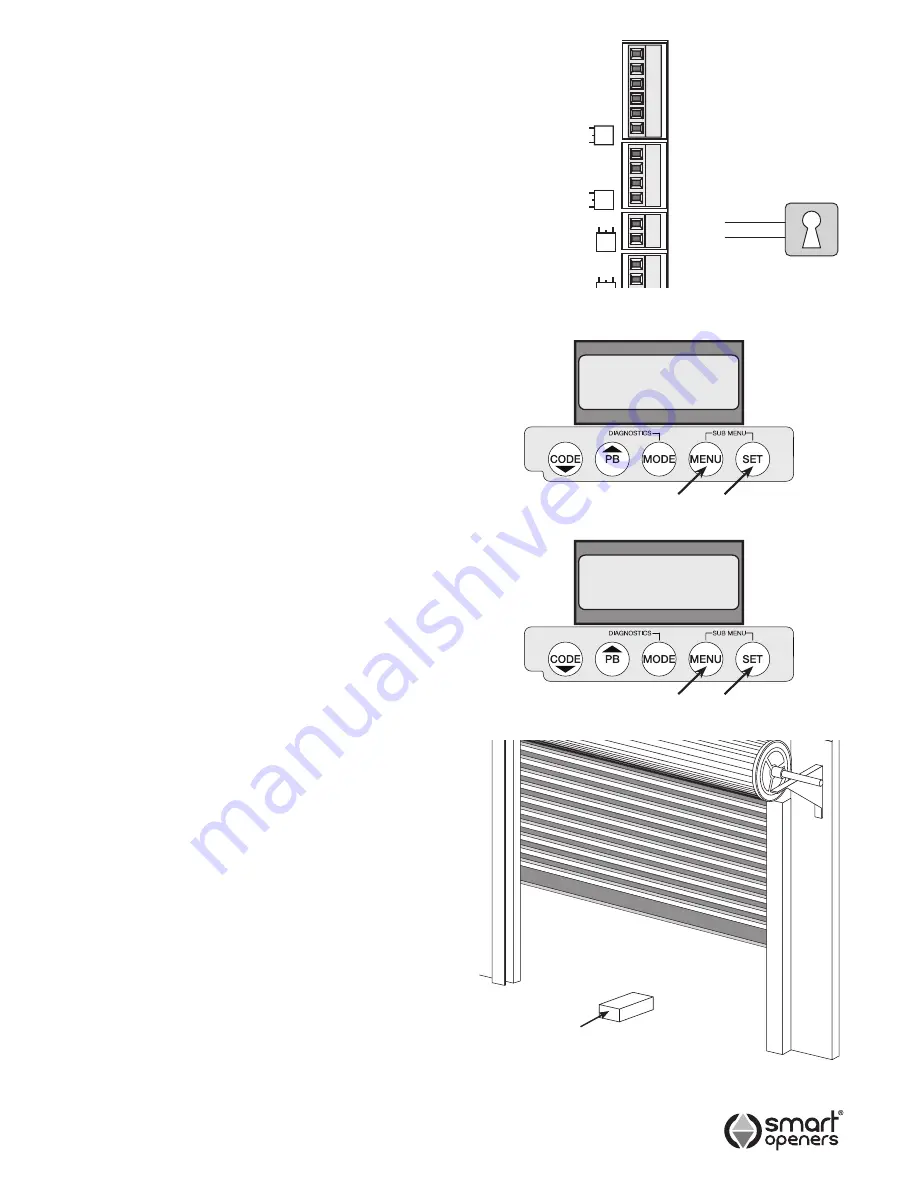
Connect lock to terminal block as per Fig. 17.
2.
Press
MENU
for 3 secs then press
SET
to cycle
through to
Lock
.
3.
Press
MENU
to choose either
Pulse
or
Hold
as
required.
4.
Press
SET
to confirm and move to next item or press
MODE
to exit to normal operation.
Note:
Pulse Mode output for 1 sec prior to motor start.
Hold Mode output 12V once motor has stopped.
Setting Obstruction Margin
The Obstruction Force Margin sensitivity is extremely
important for user safety. Make sure that where possible
the minimum (or default) force required to allow the
door to travel without phantom reversing is used. Smart
Openers strongly recommend that the door is properly
serviced rather than increasing the force margin to
compensate (Factory Default = 03).
1.
Press
MENU
for 3 secs then press
SET
to cycle
through to
Obstruction Margin
.
2.
Press
MENU
to cycle through from:
01
(very sensitive) –
09
(least sensitive).
3.
Press
SET
to confirm and move to next item or press
MODE
to exit to normal operation.
Testing Obstruction Margin
1.
Test the obstruction force margin sensitivity by placing
a piece of timber approximately 50mm thick on the
floor in the doorway.
2.
Close the door onto the timber. If the door does not
reverse easily and attempts to continue to close
adjust the force margin as per procedure above.
M2 Open Limit
Com
M2 Close Limit
M1 Open Limit
Com
M1 Close Limit
Com
Photo Beam 2
Photo Beam 1
+24V
Lock +
Lock -
Fig. 16
Lock
Pulse
Obstruction
Margin 03
Fig. 17
Fig. 18
Fig. 18
50mm Timber
© June 2009 Smart Openers Pty Ltd